The school spring picnic was in twelve hours and I had completely forgotten the sign-up sheet I’d shoved into my son’s backpack three weeks ago. It came back to me at 9 PM, buried under a permission slip and what looked like a fossilized apple core. Everyone else would be bringing those Pinterest-perfect tiered cakes and handmade fruit tarts. I had a package of Oreos, some instant pudding mix, and a bag of gummy worms left over from a movie night. Honestly, I almost just texted the room mom to say we’d bring napkins. But my kid had that hopeful look—you know the one—so I grabbed a whisk and started crumbling cookies like a woman possessed. The dirt cups were thrown together in about twenty minutes, looking more like a science experiment than a dessert. Let me tell you, I was mortified when I set them on the table next to a three-tiered strawberry shortcake. But by the end of the picnic, every single cup was gone, and three different parents asked for the recipe. That’s the thing about these Oreo dirt cups with gummy worms—they don’t try to be fancy. They just taste like pure, nostalgic spring fun. And honestly, that’s way better than a perfect tart any day.
Why You’ll Love This Recipe
I’ve tested this recipe at birthday parties, classroom celebrations, and even a very confused baby shower (the theme was “garden party,” and I leaned hard into the dirt angle). It works every single time, and here’s why you’ll keep coming back to it:
- No-Bake & Quick : This comes together in under 20 minutes of active prep. No oven, no mixer, no sweating over a double boiler. Just stir, layer, and chill.
- Simple Ingredients : You probably have most of these in your pantry right now. Instant pudding, milk, Oreos, cream cheese, and gummy worms. That’s it.
- Perfect for Spring Gatherings : Easter brunch, Earth Day parties, spring picnics, or just a rainy Tuesday when the kids need a project. These dirt cups fit right in with the seasonal mood.
- Crowd-Pleaser : Kids absolutely lose their minds over the gummy worms poking out of the “dirt.” Adults, meanwhile, sneak bites because the creamy filling is genuinely delicious.
- Unbelievably Fun : Let’s be real—eating something that looks like a tiny garden of worms is just fun. It sparks joy in a way that a regular pudding cup never could.
What makes this version different from the hundreds of dirt cup recipes out there? It’s the texture. I use a cream cheese base in the pudding layer, which gives it a rich, almost cheesecake-like consistency instead of that thin, watery pudding you sometimes get. Plus, I crush the Oreos in a specific way—not too fine, not too chunky—so it actually looks like real soil. Trust me, after a few batches, I’ve nailed the perfect crumb.
This recipe is the kind that makes you smile after the first spoonful. It’s comfort food reimagined for the spring season—lighter, brighter, and absolutely covered in gummy worms.
What Ingredients You Will Need
This recipe uses simple, pantry-friendly ingredients to create a dessert that looks impressive but requires almost no skill. The magic is in the layering and the chilling time, not in any complicated techniques.
- 1 package (14.3 oz) Oreo cookies — Regular Oreos work best. Don’t use the double-stuffed ones; the extra cream filling makes the “dirt” too sticky and clumpy. You want the classic ratio of cookie to filling.
- 1 package (3.4 oz) instant vanilla pudding mix — I prefer Jell-O brand for its consistent texture. Do not use cook-and-serve pudding; it won’t set properly in the fridge.
- 1 ½ cups cold whole milk — Whole milk gives the richest texture, but 2% works fine. Avoid skim milk—the pudding won’t be as creamy. For a dairy-free version, use oat milk or full-fat coconut milk.
- 8 oz cream cheese, softened — This is my secret ingredient. It transforms the pudding into a thick, luscious cream layer. Let it sit at room temperature for at least 30 minutes before mixing, or you’ll end up with lumps. Philadelphia brand is my go-to.
- ½ cup powdered sugar — This sweetens the cream cheese without making it grainy. Granulated sugar won’t dissolve properly in the cold mixture.
- 1 container (8 oz) Cool Whip, thawed — You can substitute homemade whipped cream (1 cup heavy cream + 2 tablespoons sugar, whipped to stiff peaks), but Cool Whip holds its shape better for layering and stays stable for days.
- 1 bag (4.5 oz) gummy worms — Get the colorful, sour-coated ones if you want extra flavor contrast. I’ve tried several brands, and Trolli sour worms are my favorite—they’re chewier and have a better texture than the cheaper store brands.
- Optional: ¼ cup chocolate pudding mix — If you want a deeper “dirt” flavor, swap half the vanilla pudding for chocolate. I do this when I’m serving adults who might find vanilla too sweet.
- Optional: Fresh mint sprigs or edible flowers — For a spring garden look, poke a few mint leaves into the “dirt” after chilling. It makes them look like little plants sprouting from the soil.
One quick note on the Oreos: I’ve tried using gluten-free chocolate sandwich cookies for friends with celiac disease, and they work fine. Just check the pudding mix label too—most instant pudding is gluten-free, but some brands add wheat starch.
Equipment Needed
You don’t need any fancy kitchen gadgets for these dirt cups. Here’s what you’ll need:
- Large mixing bowl — For the pudding and cream cheese mixture. A glass or stainless steel bowl works best; plastic can hold onto odors.
- Hand mixer or stand mixer — You can whisk by hand, but your arm will get tired. A hand mixer makes the cream cheese smooth in under a minute. I’ve used my trusty KitchenAid hand mixer for years, and it’s never let me down.
- Food processor or zip-top bag and rolling pin — For crushing the Oreos. A food processor gives the most consistent texture, but a zip-top bag and a rolling pin work great if you want to let the kids help. Just make sure the bag is sealed tight—I learned that lesson the hard way with crumbs all over the kitchen floor.
- Small bowls — For separating the crushed Oreos and any garnishes.
- Clear plastic cups (7 oz or 9 oz) — The clear cups are non-negotiable if you want the full visual effect. You need to see the layers of “dirt” and “grass.” I buy the 9-oz cups from the party supply store; they hold a generous serving without being overwhelming.
- Spatula or piping bag — A spatula works fine for layering, but a piping bag makes the cream layer look neat and professional. If you don’t have a piping bag, just use a zip-top bag with the corner snipped off.
- Measuring cups and spoons — For precise measurements, especially with the milk and powdered sugar.
If you don’t have a food processor, don’t stress. I’ve crushed Oreos with a meat mallet, a wine bottle, and even a heavy skillet. The crumbs will be less uniform, but that actually makes the “dirt” look more natural.
Preparation Method
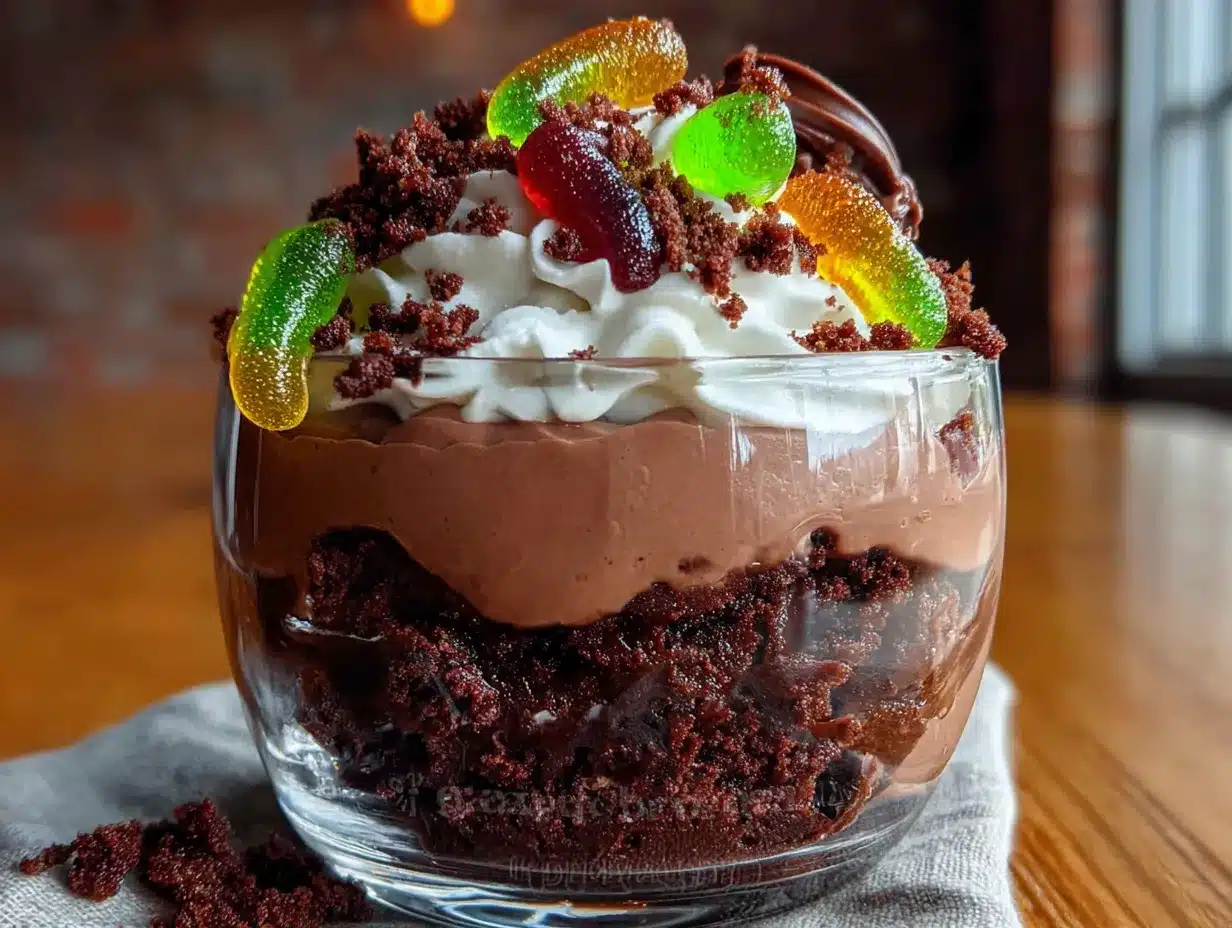
This recipe moves fast once you start, so I recommend having all your ingredients measured and your cups ready before you begin. Here’s the step-by-step:
- Crush the Oreos. Place the entire package of Oreos (filling included) into a food processor. Pulse 8-10 times until the cookies resemble coarse sand. You want some small chunks remaining—about the size of gravel—to mimic real soil. If you’re using a zip-top bag, place the cookies in the bag, seal it, and crush them with a rolling pin for about 2 minutes. Set the crushed Oreos aside in a bowl. You should have about 3 cups of crumbs.
- Make the cream cheese base. In a large mixing bowl, beat the softened cream cheese with the powdered sugar until smooth and fluffy, about 2 minutes on medium speed. Scrape down the sides of the bowl once during mixing. The mixture should be completely lump-free. If you see any white streaks, keep beating—those lumps will show up in the final cups.
- Prepare the pudding. In a separate bowl, whisk the instant pudding mix with the cold milk for 2 minutes until it starts to thicken. It will be quite thin at first—don’t worry, it sets in the fridge. Let it sit for 5 minutes to partially set.
- Combine the mixtures. Pour the pudding into the cream cheese mixture and beat on low speed until just combined. Be careful not to overmix, or the mixture can become too thin. Fold in the thawed Cool Whip gently with a spatula until no white streaks remain. The final mixture should be thick, creamy, and pale beige.
- Assemble the cups. Spoon about 2 tablespoons of the crushed Oreos into the bottom of each clear plastic cup. This is the first “dirt” layer. Press it down gently with the back of a spoon to create a firm base.
- Add the cream layer. Spoon or pipe the cream mixture over the Oreo layer, filling the cup about halfway. If you’re piping, fill a zip-top bag with the cream mixture, snip off a corner, and pipe it in a spiral. This gives a cleaner look than spooning. Tap the cup gently on the counter to settle the cream layer and remove air bubbles.
- Add the gummy worms. Press 2-3 gummy worms into the cream layer so they’re partially submerged. Let their heads poke out—this is the fun part where they look like they’re crawling out of the dirt. Arrange them at different angles for a more natural look.
- Top with more dirt. Sprinkle another 2-3 tablespoons of crushed Oreos over the cream layer, completely covering the surface. Don’t press down this time—you want the “dirt” to look loose and crumbly, like freshly turned soil.
- Garnish and chill. Add one more gummy worm on top, curling it over the edge of the cup for dramatic effect. Cover the cups with plastic wrap or their lids and refrigerate for at least 2 hours, or overnight. The chilling time is crucial—it allows the cream layer to set fully and the Oreo crumbs to soften slightly, creating that perfect “dirt” texture.
- Serve cold. Remove from the fridge just before serving. If you’re adding mint sprigs or edible flowers, poke them into the top layer now. Serve with a small spoon and watch the smiles appear.
A quick sensory note: when you’re crushing the Oreos, you should hear a satisfying crackle. The pudding mixture should feel thick and smooth when you fold it—if it’s runny, your cream cheese wasn’t soft enough, or you didn’t let the pudding set. The final cups should look like tiny terrariums with worms peeking out from the soil.
Cooking Tips & Techniques
I’ve made about fifty batches of these dirt cups over the years, and I’ve learned a few things the hard way. Here are my best tips:
Don’t over-crush the Oreos. I once made the mistake of pulsing the cookies into a fine powder, thinking it would look more like real dirt. It looked like black sand—not appetizing. You want visible cookie chunks and even some white filling streaks to mimic the organic texture of soil. Aim for crumbs that are about the size of small pebbles.
Let the cream cheese soften completely. This is the number one mistake I see people make. Cold cream cheese will leave lumps in your cream layer, and no amount of beating will fix it once the pudding is added. Set it out on the counter for at least 30 minutes, or microwave it in 10-second bursts until it’s soft to the touch. I’ve ruined two batches by rushing this step.
Chill the cups for the full time. I know it’s tempting to dig in after an hour, but the texture won’t be right. The cream layer needs time to firm up and the Oreo crumbs need to absorb some moisture from the cream. After 2 hours, the “dirt” will have a slightly softened, almost sandy texture that’s perfect. After 4 hours, it’s even better. Overnight is ideal.
Use a piping bag for the cream layer. I know it’s an extra step, but it makes a huge difference in presentation. When you spoon the cream in, it can mix with the bottom Oreo layer and create a muddy look. Piping keeps the layers clean and distinct. If you don’t have a piping bag, use a small cookie scoop to place dollops of cream on top of the Oreo layer, then spread them gently.
Add the gummy worms strategically. Place them at different depths—some fully submerged, some barely poking out, some draped over the edge. This creates visual interest and makes each cup unique. I like to arrange them so it looks like the worms are escaping from the dirt.
Variations & Adaptations
Once you’ve mastered the basic recipe, try these fun twists:
Chocolate Lover’s Version : Swap the vanilla pudding for chocolate pudding and use chocolate gummy worms (yes, they exist—look for them at candy stores). Add a layer of chocolate shavings on top for extra decadence. I made this for a friend’s birthday, and she said it tasted like a dirt cup from her childhood but way better.
Vegan-Friendly Dirt Cups : Use dairy-free cream cheese (Kite Hill makes a great one), coconut milk instead of whole milk, and a vegan whipped topping like CocoWhip. Check that your Oreos are vegan—they actually are! Use vegan gummy worms (most standard ones contain gelatin, but brands like Surf Sweets make plant-based versions). The texture is slightly less rich, but still delicious.
Spring Garden Theme : Instead of gummy worms, use gummy frogs, butterflies, or caterpillars. Top with edible flowers like pansies or violets for a garden-party look. I did this for an Earth Day event, and the kids loved finding the “bugs” in their dirt.
Individual Trifle Version : Layer the ingredients in a large glass trifle bowl instead of individual cups. Double the recipe, then alternate layers of Oreo crumbs, cream, and gummy worms. Top with extra worms and crushed cookies. This is perfect for a party where you want a showstopper centerpiece.
Low-Sugar Option : Use sugar-free instant pudding mix and sugar-free Cool Whip. Replace the powdered sugar with a monk fruit sweetener blend. Use reduced-sugar Oreos (they’re a bit harder to find, but they exist). The texture stays the same, but the sweetness is dialed back. I’ve served this to diabetic relatives, and they were thrilled.
Serving & Storage Suggestions
These dirt cups are best served cold, straight from the fridge. The contrast between the cool, creamy filling and the slightly crunchy Oreo “dirt” is what makes them so satisfying. I recommend serving them in their clear cups with a small spoon—no plates needed.
For a spring party, arrange the cups on a tray lined with fake grass or green tissue paper. You can also nestle them into a shallow planter filled with more crushed Oreos for a “dirt patch” effect. I once served them at a gardening club meeting, and everyone got a kick out of the presentation.
Storage Instructions : Cover the cups tightly with plastic wrap or their lids and refrigerate for up to 3 days. The texture is best within the first 24 hours, but they’ll still be delicious on day two. After day three, the Oreo crumbs can become soggy, and the gummy worms will start to soften and lose their chewiness.
Freezer Instructions : I don’t recommend freezing these. The cream cheese and pudding base can become grainy when thawed, and the gummy worms will turn into hard little rocks. If you need to make them ahead, prepare them up to 24 hours in advance and keep them refrigerated.
Reheating : There’s no reheating involved—these are served cold. If you’ve stored them and the cream layer seems too firm, let them sit at room temperature for 10 minutes before serving.
One note on flavor development: the gummy worms will start to release their flavor into the cream layer after about 6 hours. This isn’t a bad thing—it creates a subtle fruity undertone that complements the chocolate and cream. Some people actually prefer them the next day for this reason.
Nutritional Information & Benefits
Let’s be honest—these dirt cups are a treat, not a health food. But here’s the estimated nutritional breakdown per serving (based on 8 servings):
| Nutrient | Amount per Serving |
|---|---|
| Calories | 385 |
| Total Fat | 18g |
| Saturated Fat | 10g |
| Cholesterol | 35mg |
| Sodium | 410mg |
| Total Carbohydrates | 52g |
| Dietary Fiber | 1g |
| Sugars | 38g |
| Protein | 5g |
The cream cheese provides a small amount of calcium and protein, while the Oreos offer a quick energy boost (and a lot of nostalgia). The gummy worms are mostly sugar, but they’re the star of the show here—so I say embrace the fun.
For dietary considerations: this recipe contains gluten (Oreos), dairy (cream cheese, milk, Cool Whip), and soy (in the Oreos). It can be made gluten-free with GF sandwich cookies and vegan with the substitutions listed above. It’s not suitable for low-carb or keto diets due to the high sugar content.
My personal perspective? These dirt cups are about joy, not nutrition. They’re the dessert you make when you want to see people smile, when you want to create a moment of pure, silly fun. And honestly, that has its own kind of nutritional value.
Frequently Asked Questions
Can I make these dirt cups ahead of time?
Yes! You can assemble them up to 24 hours in advance. Keep them covered in the refrigerator, and add any fresh garnishes like mint sprigs just before serving. The flavor actually improves after a few hours as the layers meld together.
Can I use homemade whipped cream instead of Cool Whip?
Absolutely. Whip 1 cup of heavy cream with 2 tablespoons of powdered sugar until stiff peaks form, then fold it into the pudding mixture. The texture will be slightly lighter and less stable, so the cups won’t hold their shape as long. I recommend serving them within 6 hours if using homemade whipped cream.
What can I use instead of gummy worms?
You can use any gummy candy—frogs, bears, butterflies, or even gummy flowers for a spring theme. For a non-gummy option, try small chocolate eggs or candy-coated chocolates. I’ve also used crushed graham crackers mixed with the Oreos for a different “dirt” texture.
How many servings does this recipe make?
This recipe makes 8 generous servings in 9-ounce cups, or 12 smaller servings in 7-ounce cups. If you’re serving kids, I recommend the smaller cups—they’re plenty for little appetites and reduce waste.
Can I use a different type of cookie for the dirt?
Yes! Chocolate wafer cookies, chocolate graham crackers, or even chocolate Teddy Grahams work well. Vanilla wafers or shortbread cookies will give you a lighter “dirt” that looks more like sand. Just make sure the cookies are crisp, not soft, so they crumble properly.
Conclusion
These Oreo dirt cups with gummy worms are more than just a dessert—they’re a little moment of springtime joy in a cup. They’re the recipe you pull out when you need something quick, fun, and guaranteed to make everyone smile. Whether you’re making them for a classroom party, an Easter brunch, or just a rainy afternoon with the kids, they deliver every single time.
I love how forgiving this recipe is. You can mess up the measurements, forget to chill them long enough, or let the kids go wild with the gummy worm placement—and they still turn out adorable and delicious. That’s the kind of recipe I want in my back pocket.
So go ahead and give these a try. Customize them with your favorite gummy shapes, experiment with different pudding flavors, or just follow the recipe exactly as written. However you make them, they’ll be a hit. And when someone asks for the recipe—because they will—just smile and say it’s your little secret.
Now I’d love to hear from you! Have you made dirt cups before? What’s your favorite variation? Drop a comment below and share your creations. And if you loved this recipe, don’t forget to pin it for later or share it with a friend who needs a little spring fun in their life. Happy snacking!
Pin This Recipe!
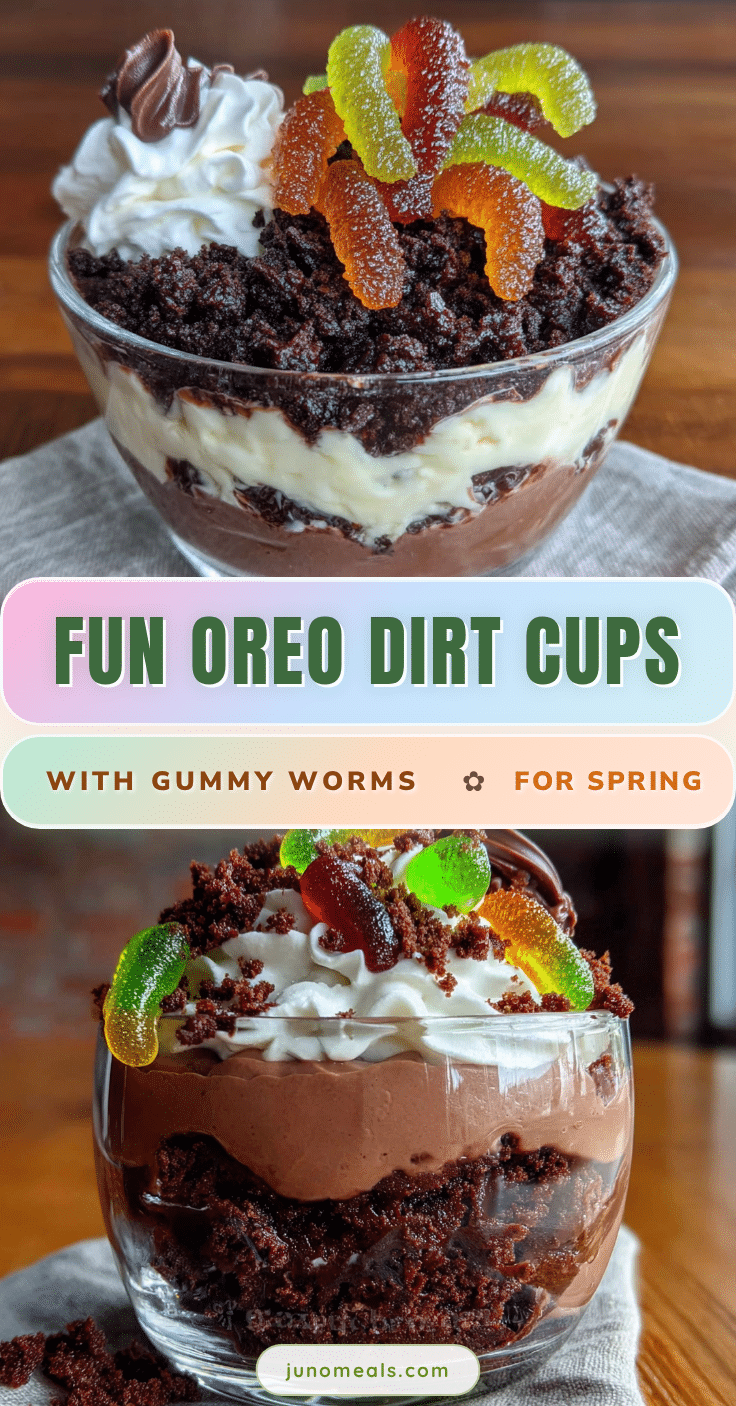
Best Easy Oreo Dirt Cups with Gummy Worms for Spring

These no-bake Oreo dirt cups with gummy worms are a quick, fun, and crowd-pleasing dessert perfect for spring gatherings. With a creamy cheesecake-like pudding layer and crumbly Oreo “dirt,” they’re pure nostalgic joy in a cup.
- Prep Time: 20 minutes
- Cook Time: 0 minutes
- Total Time: 2 hours 20 minutes (includes chilling)
- Yield: 8 servings 1x
- Category: Dessert
- Cuisine: American
Ingredients
- 1 package (14.3 oz) Oreo cookies
- 1 package (3.4 oz) instant vanilla pudding mix
- 1 ½ cups cold whole milk
- 8 oz cream cheese, softened
- ½ cup powdered sugar
- 1 container (8 oz) Cool Whip, thawed
- 1 bag (4.5 oz) gummy worms
- Optional: ¼ cup chocolate pudding mix
- Optional: Fresh mint sprigs or edible flowers
Instructions
- Crush the Oreos: Place the entire package of Oreos (filling included) into a food processor. Pulse 8-10 times until the cookies resemble coarse sand with some small chunks remaining. Set aside in a bowl.
- Make the cream cheese base: In a large mixing bowl, beat the softened cream cheese with the powdered sugar until smooth and fluffy, about 2 minutes on medium speed. Scrape down the sides once.
- Prepare the pudding: In a separate bowl, whisk the instant pudding mix with the cold milk for 2 minutes until it starts to thicken. Let it sit for 5 minutes to partially set.
- Combine the mixtures: Pour the pudding into the cream cheese mixture and beat on low speed until just combined. Fold in the thawed Cool Whip gently with a spatula until no white streaks remain.
- Assemble the cups: Spoon about 2 tablespoons of the crushed Oreos into the bottom of each clear plastic cup. Press down gently with the back of a spoon.
- Add the cream layer: Spoon or pipe the cream mixture over the Oreo layer, filling the cup about halfway. Tap the cup gently on the counter to settle.
- Add the gummy worms: Press 2-3 gummy worms into the cream layer so they are partially submerged, with their heads poking out.
- Top with more dirt: Sprinkle another 2-3 tablespoons of crushed Oreos over the cream layer, completely covering the surface. Do not press down.
- Garnish and chill: Add one more gummy worm on top, curling it over the edge of the cup. Cover and refrigerate for at least 2 hours, or overnight.
- Serve cold: Remove from the fridge just before serving. Add mint sprigs or edible flowers if desired.
Notes
For best texture, chill the cups for at least 2 hours. The cream cheese must be fully softened to avoid lumps. Use regular Oreos, not double-stuffed, for the best crumb texture. Gummy worms will soften slightly after a few hours, adding a fruity undertone to the cream layer.
Nutrition
- Serving Size: 1 cup (9 oz)
- Calories: 385
- Sugar: 38
- Sodium: 410
- Fat: 18
- Saturated Fat: 10
- Carbohydrates: 52
- Fiber: 1
- Protein: 5
Keywords: Oreo dirt cups, gummy worms, no-bake dessert, spring dessert, kids dessert, Easter dessert, classroom treat