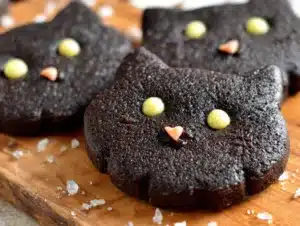
My niece asked why I couldn’t just use a cookie cutter from the dollar store instead of my fancy, expensive metal ones. I started to explain why that wouldn’t work—then stopped. She was seven, and she had a point. I mean, honestly, what was I so afraid of? A slightly imperfect cat shape? So I bought the cheap plastic cutter, and let me tell you, it worked perfectly. The cookies came out looking just as cute, maybe even cuter because they had this slightly homey, imperfect charm. That moment taught me something about baking for Halloween: it’s not about perfection, it’s about the joy of making something fun.
These quick adorable black cat sugar cookies are the result of that lesson. They’re not fussy. They don’t require royal icing skills or a pastry degree. You just need a good sugar cookie recipe, some black food coloring, and a willingness to have fun. The dough comes together in about ten minutes, and the decorating is where the personality shines through.
I remember making these on a Tuesday night last October. The power flickered once during a storm, and I just kept rolling out dough by the light of my phone. That’s the kind of recipe this is—flexible, forgiving, and worth the little bit of effort. You know that feeling when you need a quick win in the kitchen? These cookies are exactly that. They make people smile, and honestly, that’s why I keep making them year after year.
Why You’ll Love This Recipe
These black cat sugar cookies have become my go-to Halloween treat for one simple reason: they deliver big on fun without demanding a ton of time. I’ve tested this recipe at least a dozen times, tweaking the butter-to-flour ratio and the baking time until the texture was exactly right—crispy edges with a soft, tender center. Here’s what makes them stand out:
- Quick & Easy: From start to finish, you can have these cookies on the table in under an hour. The dough doesn’t need chilling, which is a game-changer for busy weeknights.
- Simple Ingredients: You probably already have everything in your pantry. No specialty flours or obscure extracts—just butter, sugar, flour, eggs, and vanilla.
- Perfect for Halloween: Whether it’s a school party, a neighborhood gathering, or just a fun night in, these cookies fit the occasion perfectly.
- Crowd-Pleaser: Kids and adults alike go crazy for them. I’ve watched grown men argue over the last cookie shaped like a slightly crooked cat.
- Unbelievably Delicious: The flavor is classic vanilla sugar cookie, but the texture is what gets you—soft in the middle, slightly crisp on the edges.
What makes this recipe different from the dozens of other sugar cookie recipes out there? It’s the technique. I use a combination of baking powder and baking soda to get that perfect lift, and I cream the butter and sugar for a full three minutes to incorporate air. The result is a cookie that holds its shape beautifully during baking but still melts in your mouth. This isn’t just another version of a black cat cookie—it’s the best version I’ve ever made.
There’s something deeply satisfying about pulling a tray of these out of the oven. The black color deepens as they cool, and the orange eyes you pipe on afterward make them look almost alive. It’s comfort food reimagined for Halloween—faster, easier, but with the same soul-soothing satisfaction. Perfect for impressing guests without stress, or turning a simple Tuesday into something memorable.
What Ingredients You Will Need
This recipe uses simple, wholesome ingredients to deliver bold flavor and satisfying texture without the fuss. Most of these are pantry staples, which means you can whip up a batch whenever the Halloween mood strikes.
For the Cookies
- Unsalted butter, softened (1 cup, or 2 sticks) — I prefer Land O’Lakes for consistent results. The butter needs to be at room temperature, not melted, for proper creaming.
- Granulated sugar (1 cup) — Regular white sugar works best here. Don’t substitute with brown sugar, as it will change the texture and color.
- Large egg (1, room temperature) — Cold eggs can cause the butter to seize, so let it sit out for 30 minutes first.
- Vanilla extract (2 teaspoons) — Pure vanilla extract gives the best flavor, but imitation works in a pinch.
- All-purpose flour (2 ½ cups) — Spoon and level your flour; don’t scoop directly from the bag, or you’ll end up with dry cookies.
- Baking powder (1 teaspoon) — This helps the cookies rise just a bit.
- Baking soda (½ teaspoon) — Works with the baking powder for that perfect texture.
- Salt (½ teaspoon) — Enhances all the flavors.
- Black gel food coloring (1-2 teaspoons) — Liquid food coloring won’t give you a deep black. I recommend Americolor Super Black or Wilton Color Right.
For the Decorating

- Powdered sugar (1 cup) — For the royal icing or simple glaze.
- Meringue powder (1 ½ tablespoons) — Only if you’re making royal icing. It gives the icing that hard, shiny finish.
- Water (2-3 tablespoons) — Adjust as needed for consistency.
- Orange gel food coloring — For the eyes. A tiny drop goes a long way.
- Black decorating icing (optional) — For adding whiskers or other details.
- Candy eyes (optional) — These are fun for kids who want a quicker decorating option.
For the cookie cutter, you’ll need a cat-shaped cutter. I’ve used everything from a cheap plastic one from the dollar store to a copper-plated one from a specialty baking shop. Honestly, they all work. Just make sure the cutter is at least 3 inches wide so the cookies have enough surface area for decorating.
Equipment Needed
You don’t need a fully stocked bakery to make these cookies. Here’s what you’ll actually use:
- Electric mixer (stand or hand-held) — Creaming butter and sugar by hand is possible but exhausting. A hand mixer works perfectly.
- Large mixing bowl — Glass or stainless steel, nothing fancy.
- Rolling pin — I use a wooden one, but a silicone rolling pin works too. If you don’t have one, a wine bottle works in a pinch.
- Cat-shaped cookie cutter — As mentioned, any size or material will do.
- Baking sheets — Two standard half-sheet pans. I like the ones with a light finish because they prevent over-browning.
- Parchment paper — Non-negotiable. It prevents sticking and makes cleanup effortless.
- Cooling rack — Wire racks allow air to circulate so the cookies cool evenly.
- Piping bags (or zip-top bags) — For the royal icing. A small round tip (size 2 or 3) works best for the eyes.
- Offset spatula — Optional but helpful for transferring cookies.
I bought my first set of piping bags from a craft store for under five dollars, and they’ve lasted through three Halloweens. You don’t need to invest in expensive equipment to get good results.
Preparation Method
Let me walk you through this step by step. Trust me, it’s simpler than it looks.
- Cream the butter and sugar (3 minutes). In your large mixing bowl, beat the softened butter and granulated sugar together on medium speed until light and fluffy. You’ll know it’s ready when the mixture turns pale yellow and looks a bit like wet sand. Scrape down the sides of the bowl once during this process.
- Add the egg and vanilla (1 minute). Crack the room-temperature egg into the butter mixture, add the vanilla extract, and beat on low until combined. Don’t overmix here—you just want everything incorporated.
- Add the black food coloring (30 seconds). Add 1 teaspoon of black gel food coloring and mix on low. The dough will look gray at first. Add more coloring, ½ teaspoon at a time, until you reach a deep, dark gray. It will darken further as the cookies bake.
- Combine the dry ingredients (2 minutes). In a separate bowl, whisk together the flour, baking powder, baking soda, and salt. This ensures the leavening agents are evenly distributed.
- Mix the dry into the wet (2 minutes). Gradually add the flour mixture to the butter mixture, mixing on low speed. Stop when the dough just comes together. It should be soft but not sticky. If it feels too sticky, add a tablespoon more flour.
- Preheat the oven to 350°F (175°C). While it heats, line your baking sheets with parchment paper.
- Roll out the dough (5 minutes). Lightly flour your work surface and rolling pin. Roll the dough to about ¼-inch thickness. If the dough cracks at the edges, let it sit for 2 minutes to warm up slightly. I’ve found that dough that’s too cold cracks more.
- Cut out the shapes (5 minutes). Press the cat cookie cutter firmly into the dough, then lift it straight up. Transfer the shapes to the prepared baking sheets, spacing them about 2 inches apart. Gather the scraps, re-roll, and cut more cookies.
- Bake (8-10 minutes). Bake one sheet at a time in the center of the oven. The cookies are done when the edges look set and the tops are just barely firm to the touch. They won’t brown much because of the black coloring, so watch the time carefully.
- Cool completely (15 minutes). Let the cookies sit on the baking sheet for 5 minutes, then transfer them to a wire cooling rack. They need to be completely cool before you decorate, or the icing will melt.
- Make the royal icing (5 minutes). In a small bowl, whisk together the powdered sugar, meringue powder, and 2 tablespoons of water. Add more water, one teaspoon at a time, until the icing reaches a thick but flowable consistency. It should hold a ribbon for a few seconds when you lift the whisk.
- Decorate the cookies (15-20 minutes). Divide the icing into two small bowls. Leave one white (or tint it very slightly yellow) and color the other orange. Transfer each color to a separate piping bag fitted with a small round tip. Pipe two small oval shapes for the eyes using the orange icing. Let the eyes set for 10 minutes. Then, using the white icing, pipe tiny dots in the center of each eye for highlights. Add whiskers with black decorating icing if desired.
One thing I learned the hard way: don’t rush the cooling process. I once tried to speed things up by putting warm cookies in the fridge, and the condensation made the icing slide right off. Patience pays off here.
Cooking Tips & Techniques
Over the years, I’ve made every mistake you can imagine with these cookies. Let me save you some trouble.
The dough temperature matters more than you think. If the dough gets too warm while you’re rolling it out, it becomes sticky and hard to handle. Pop it in the fridge for 10 minutes if that happens. Conversely, if the dough cracks when you try to roll it, it’s too cold. Let it sit at room temperature for a few minutes.
Don’t overbake. I cannot stress this enough. Because the cookies are black, you can’t rely on the usual visual cues like golden edges. Set a timer for 8 minutes and check them. They should look slightly underdone when you pull them out—they’ll continue cooking on the hot baking sheet. Overbaked black cat cookies become dry and hard, and nobody wants that.
Use a light touch with the food coloring. Gel food coloring is potent. Start with less than you think you need, mix thoroughly, and then add more. I once added too much at once and ended up with dough that tasted faintly bitter. The black color was gorgeous, but the flavor suffered.
Pipe the eyes before the icing sets. If you’re using royal icing for the eyes, pipe them while the icing is still wet. This helps the orange color blend smoothly and prevents those annoying little holes from forming. I learned this trick from a professional baker friend, and it made a huge difference.
Multitask wisely. While one batch of cookies bakes, roll out the next batch. But don’t try to decorate while you’re still baking—the flour dust from the rolling process will settle on your wet icing. I learned this the messy way.
Variations & Adaptations
One of the best things about this recipe is how easily it adapts. Here are a few ways I’ve changed it up over the years:
Gluten-Free Version: Substitute the all-purpose flour with a 1:1 gluten-free baking flour blend. I’ve used Bob’s Red Mill with good results. The cookies will be slightly more crumbly, so handle them gently. Add an extra tablespoon of butter to compensate for the drier flour.
Vegan Adaptation: Replace the butter with vegan butter (I like Earth Balance), and use a flax egg (1 tablespoon ground flaxseed mixed with 3 tablespoons water, let sit for 5 minutes). The texture won’t be quite as tender, but they’re still delicious. Use vegan powdered sugar for the icing.
Flavor Twists: Add ½ teaspoon of almond extract along with the vanilla for a subtle nutty flavor. Or swap the vanilla for orange extract and add a teaspoon of orange zest to the dough. I tried this last year and the citrus note paired beautifully with the black cocoa look.
Different Decorating Styles: Instead of royal icing, melt black candy melts and dip the cookies halfway. Let them set, then add orange candy eyes. This is faster and gives a shinier finish. Or skip the icing entirely and press orange sprinkles into the dough before baking for a simpler look.
Spooky Variations: Add 2 tablespoons of black cocoa powder to the dry ingredients for a darker color and a hint of Oreo-like flavor. You’ll need to reduce the flour by 2 tablespoons to keep the dough consistency right.
Serving & Storage Suggestions
These cookies are best served at room temperature. I like to arrange them on a black or orange platter for maximum Halloween impact. If you’re bringing them to a party, stack them in a single layer in a decorative tin lined with parchment paper.
Storage: Store undecorated cookies in an airtight container at room temperature for up to a week. Decorated cookies should be stored in a single layer, or layered with wax paper between each layer, to prevent the icing from smudging. They’ll keep for about 5 days.
Freezing: The dough freezes beautifully. Wrap it tightly in plastic wrap, then place it in a freezer bag. It will keep for up to 3 months. Thaw overnight in the fridge before rolling and cutting. You can also freeze baked, undecorated cookies for up to 2 months. Just thaw at room temperature before decorating.
Reheating: These cookies are meant to be eaten at room temperature, not warm. But if you want that just-baked softness, pop them in a 300°F oven for 3 minutes. Let them cool for 5 minutes before serving.
One thing I’ve noticed: the flavor actually improves after a day. The vanilla settles in, and the cookies become more tender. So don’t stress about making them the day before—they’ll be even better.
Nutritional Information & Benefits
Let’s be honest—these are cookies, not health food. But that doesn’t mean they can’t fit into a balanced lifestyle. Here’s the estimated nutritional breakdown per cookie (based on a 3-inch cat shape, made with the recipe as written):
| Nutrient | Amount per Cookie |
|---|---|
| Calories | 145 |
| Total Fat | 7g |
| Saturated Fat | 4g |
| Carbohydrates | 19g |
| Sugar | 10g |
| Protein | 2g |
| Sodium | 95mg |
The butter provides a small amount of vitamin A, and the egg adds protein. If you’re watching your sugar intake, you can reduce the sugar to ¾ cup without significantly affecting the texture. I’ve done it, and the cookies are still plenty sweet.
For those with dietary restrictions: these cookies contain dairy (butter), eggs, and gluten. The vegan and gluten-free variations I mentioned earlier work well if you need alternatives. Always check your food coloring labels—some brands contain allergens like soy.
My personal take? These are a treat, and treats are meant to be enjoyed. I make them once or twice during Halloween season, savor every bite, and don’t feel guilty about it. Life’s too short for boring cookies.
Conclusion
These quick adorable black cat sugar cookies have become a Halloween tradition in my kitchen, and I think they deserve a spot in yours too. They’re forgiving enough for beginners, fun enough for kids, and delicious enough that nobody will care if the whiskers are a little crooked. Honestly, the imperfections are what make them charming.
I hope you give this recipe a try. Play around with the decorating—make some cats with silly expressions, or add little bows in different colors. That’s the beauty of this recipe: it’s a canvas for your creativity. And if you come up with a variation I haven’t thought of, I’d love to hear about it.
Drop a comment below and let me know how your black cat cookies turned out. Share a photo if you’re feeling brave—I promise I won’t judge the piping skills. Happy Halloween, and happy baking!
Frequently Asked Questions
Can I make these cookies ahead of time?
Absolutely. You can make the dough up to 3 days in advance and keep it wrapped in the fridge. Or bake the cookies and store them undecorated for up to a week. Decorate them the day you plan to serve them for the best appearance.
Why did my cookies spread too much?
This usually happens when the butter is too soft or the dough is too warm. Make sure your butter is softened but not melted, and chill the cut-out cookies on the baking sheet for 10 minutes before baking if your kitchen is warm.
Can I use liquid food coloring instead of gel?
You can, but you’ll need a lot more to achieve a deep black color, and the extra liquid can affect the dough’s consistency. Gel food coloring is much more concentrated and gives better results. It’s worth picking up a bottle.
How do I get the black color really dark?
Use black gel food coloring and add it gradually. The dough will look dark gray before baking, but it darkens significantly as the cookies bake. If you want an even darker result, add 1 tablespoon of black cocoa powder to the dry ingredients.
My royal icing is too runny. How do I fix it?
Add more powdered sugar, one tablespoon at a time, and whisk until it thickens. If it’s too thick, add water a few drops at a time. The ideal consistency is thick enough to hold its shape but thin enough to pipe smoothly. Think of it like slightly melted ice cream.
Pin This Recipe!
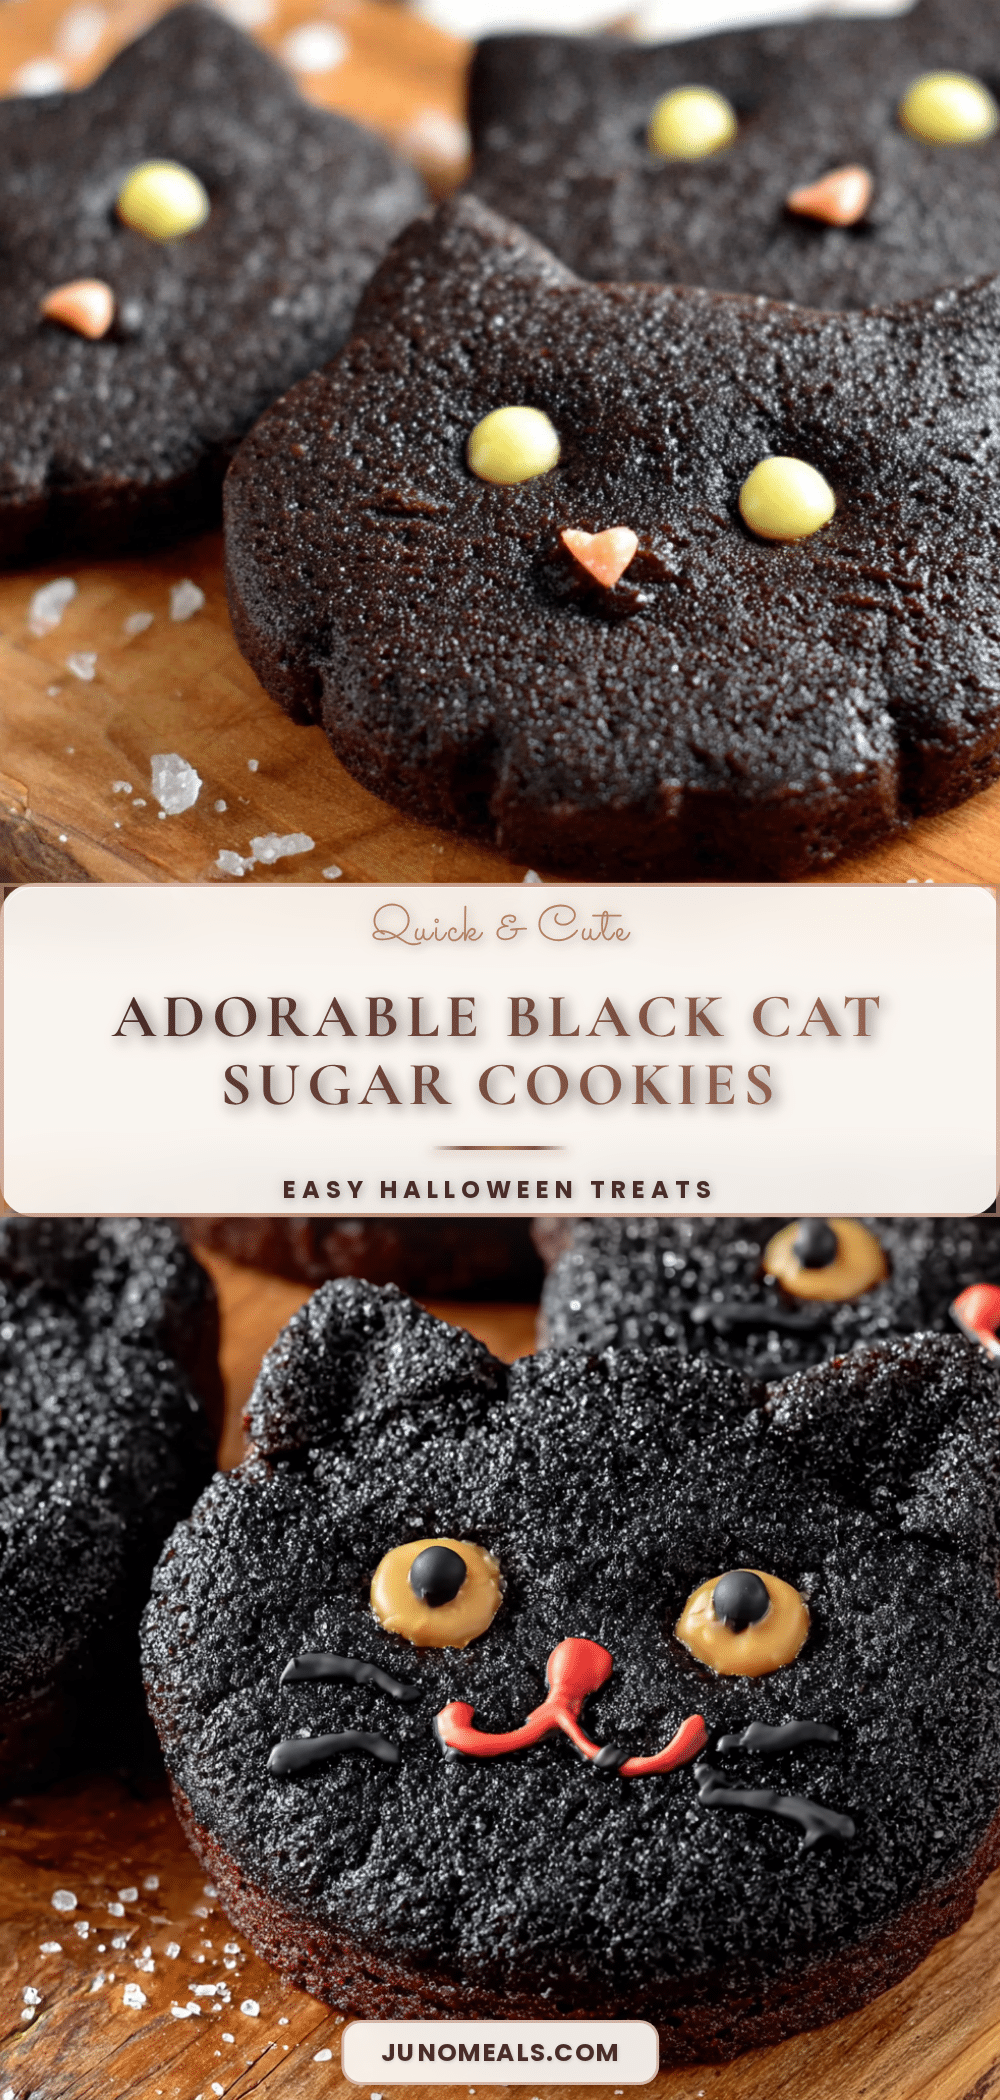
Adorable Black Cat Sugar Cookies: Easy Halloween Treat
These quick and easy black cat sugar cookies are perfect for Halloween. With a soft, tender center and crispy edges, they’re fun to decorate and sure to be a crowd-pleaser.
- Prep Time: 15 minutes
- Cook Time: 10 minutes
- Total Time: 25 minutes
- Yield: 24 servings 1x
- Category: Dessert
- Cuisine: American
Ingredients
- 1 cup (2 sticks) unsalted butter, softened
- 1 cup granulated sugar
- 1 large egg, room temperature
- 2 teaspoons vanilla extract
- 2 ½ cups all-purpose flour
- 1 teaspoon baking powder
- ½ teaspoon baking soda
- ½ teaspoon salt
- 1–2 teaspoons black gel food coloring
- 1 cup powdered sugar
- 1 ½ tablespoons meringue powder
- 2–3 tablespoons water
- Orange gel food coloring
- Black decorating icing (optional)
- Candy eyes (optional)
Instructions
- Cream the butter and sugar together on medium speed until light and fluffy, about 3 minutes. Scrape down the sides once.
- Add the egg and vanilla, beat on low until combined.
- Add black gel food coloring, 1 teaspoon at a time, mixing until the dough is a deep dark gray.
- In a separate bowl, whisk together flour, baking powder, baking soda, and salt.
- Gradually add the dry ingredients to the wet mixture, mixing on low until just combined. The dough should be soft but not sticky.
- Preheat oven to 350°F (175°C). Line baking sheets with parchment paper.
- Lightly flour a work surface and rolling pin. Roll dough to about ¼-inch thickness.
- Cut out cat shapes with a cookie cutter and place on prepared baking sheets, spacing 2 inches apart. Re-roll scraps and cut more cookies.
- Bake one sheet at a time for 8-10 minutes, until edges are set and tops are just firm. Cool on baking sheet for 5 minutes, then transfer to a wire rack to cool completely.
- For royal icing: whisk together powdered sugar, meringue powder, and 2 tablespoons water. Add more water, 1 teaspoon at a time, until thick but flowable.
- Divide icing into two bowls. Leave one white or tint slightly yellow, color the other orange. Transfer to piping bags with small round tips.
- Pipe orange oval eyes on cooled cookies. Let set 10 minutes, then pipe white dots for highlights. Add whiskers with black decorating icing if desired.
Notes
Don’t overbake; cookies will continue cooking on hot sheet. Use gel food coloring for best color. Chill dough if it becomes too sticky. For darker color, add 1 tablespoon black cocoa powder to dry ingredients.
Nutrition
- Serving Size: 1 cookie
- Calories: 145
- Sugar: 10
- Sodium: 95
- Fat: 7
- Saturated Fat: 4
- Carbohydrates: 19
- Protein: 2
Keywords: black cat cookies, Halloween cookies, sugar cookies, easy Halloween treat, cat-shaped cookies