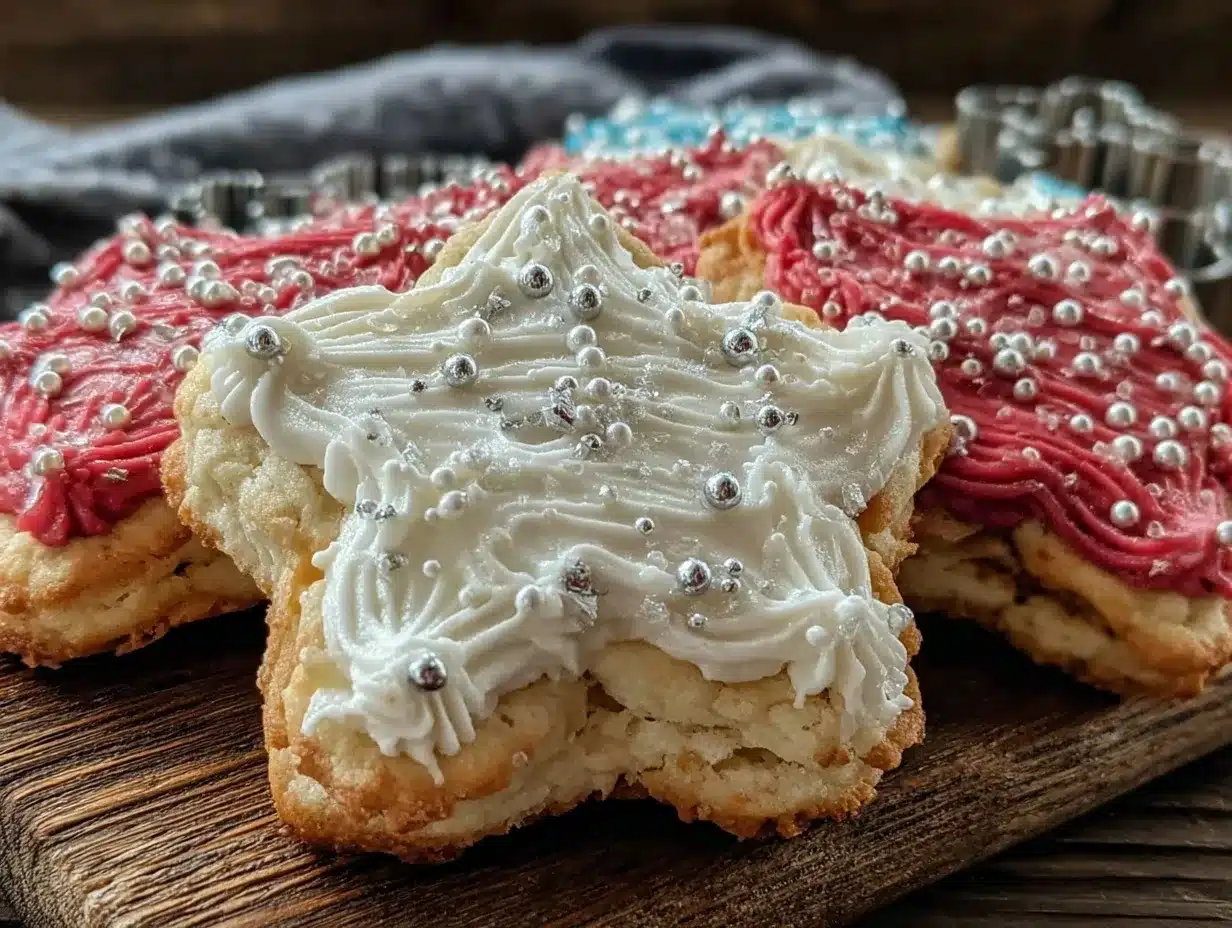
Crackly edges dusted with a whisper of granulated sugar, and that’s the whole point. The way these Perfect Star-Spangled Sugar Cookies with Royal Icing feel between your fingers before you even taste them is what drew me in from the start. They’re firm enough to hold their shape, but with just enough give to hint at a tender crumb inside. You can almost hear the faint snap as you bite through, followed by that smooth melt-in-your-mouth softness that only a well-made sugar cookie can deliver.
I remember the first time I made them, carefully piping the royal icing stars and stripes, watching as the glossy surface dried to a delicate sheen. It wasn’t about the flavor alone (though that buttery vanilla hit is no joke). No, it was about how these cookies looked and felt — a perfect balance of crisp and soft, bold and delicate, almost like a little edible celebration you could hold in your hand. They’re the kind of cookies you want to examine before you eat, running your fingertips over the ridges of icing, the smooth expanse of sugar dough, the tiny granules sparkling in the light.
Honestly, the texture obsession started me on this recipe and kept me coming back. The royal icing has to be just right — not too runny, not too stiff — to create those clean, bright designs without cracking or bleeding colors. And the cookie base? It needs to be a little chewy, a little crumbly, but never dry. After a few tries (and some lessons learned about chilling dough and piping techniques), these cookies became my go-to for every patriotic holiday, especially July 4th. They’re not just festive; they’re a tactile joy, a little moment of craftsmanship in a world of rushed baking.
What stuck with me beyond the texture was this quiet realization: it’s not just about making cookies that look good. It’s about making them feel right, too — like a small but meaningful way to celebrate with your hands and eyes before the taste buds even get involved. And that’s why this recipe remains a favorite, the one I trust to impress without fail.
Why You’ll Love This Recipe
After countless batches and countless celebrations, these Perfect Star-Spangled Sugar Cookies with Royal Icing have earned their place in my recipe box — and your kitchen will thank you, too. Here’s what makes this recipe stand apart:
- Quick & Easy: The dough comes together in under 20 minutes, and the icing sets fast — perfect for last-minute holiday baking chaos.
- Simple Ingredients: Nothing fancy or obscure here; you’ll likely have everything on hand already.
- Perfect for Patriotic Occasions: Whether it’s the Fourth of July, Memorial Day, or any summer barbecue, these cookies bring festive vibes with zero fuss.
- Crowd-Pleaser: Kids love the bright colors, adults love the buttery, balanced flavor — it’s a win-win.
- Unbelievably Delicious: The buttery cookie paired with smooth, sweet royal icing creates a classic combo that feels both nostalgic and fresh.
What really sets this recipe apart is the attention to texture — the cookie isn’t just soft or crunchy; it’s both. The royal icing recipe is tuned for that perfect smooth finish, not the stiff, chalky kind you sometimes get. Plus, the method I share here includes some neat tricks I picked up from professional bakers, like chilling the dough properly and using a piping bag for crisp, clean designs. It’s not just another sugar cookie recipe; it’s the one I return to when I want that satisfying snap and smooth sweetness in every bite.
This recipe isn’t just food; it’s a little tradition. The kind you make with friends or family and feel quietly proud about, knowing these star-spangled treats bring a little sparkle to the table. And hey, if you like fun desserts, you might enjoy trying my mini lemon blueberry cheesecakes recipe too — they’re just as festive in their own way!
What Ingredients You Will Need
This recipe uses simple, wholesome ingredients to deliver that bold flavor and satisfying texture without any complicated steps. Most are pantry staples, making this an easy go-to for spontaneous baking sessions.
- For the Cookie Dough:
- 2 ¾ cups (345 g) all-purpose flour, sifted (I prefer King Arthur for consistent texture)
- 1 teaspoon baking powder
- ½ teaspoon salt
- 1 cup (226 g) unsalted butter, softened (room temperature for easy creaming)
- 1 ½ cups (300 g) granulated sugar
- 1 large egg, room temperature
- 2 teaspoons pure vanilla extract (don’t skimp — it makes a difference!)
- 2 tablespoons whole milk (helps keep the dough tender)
- For the Royal Icing:
- 3 cups (360 g) powdered sugar, sifted
- 2 large egg whites or 4 tablespoons meringue powder mixed with water (safer option)
- ½ teaspoon cream of tartar (for stability)
- Food coloring gels (red and blue recommended for star-spangled design)
- 1 teaspoon vanilla or lemon extract (optional for subtle flavor)
If you want a gluten-free option, swapping the flour for a blend like almond or oat flour can work but expect a slightly different texture (more crumbly). For a dairy-free take, use coconut oil in place of butter and a non-dairy milk. I usually stick with traditional ingredients for that classic flavor and texture — feels right for these patriotic cookies.
Equipment Needed
To make these star-spangled sugar cookies with royal icing, having the right tools definitely helps, but there are budget-friendly options if you’re outfitting your kitchen.
- Stand mixer or hand mixer: For creaming the butter and sugar smoothly — a hand mixer works fine if that’s what you have.
- Mixing bowls: Multiple sizes are handy to separate dough and icing prep.
- Rolling pin: A smooth, sturdy rolling pin for even dough thickness (I like using a silicone one for easy cleanup).
- Cookie cutters: Star shapes in various sizes for that patriotic theme. If you don’t have stars, any simple shape will do.
- Baking sheets and parchment paper: Prevent sticking and make cleanup easier.
- Piping bags and tips: Essential for that crisp royal icing detail. You can use disposable bags or reusable silicone ones. A small round tip (#2 or #3) is perfect.
- Sifter: To sift flour and powdered sugar, preventing lumps.
If you don’t have a piping tip, you can carefully snip the corner of a plastic bag for freestyle icing. I’ve done it plenty of times when in a pinch. Also, keeping your cookie cutters lightly floured or chilled helps keep those edges sharp.
Preparation Method
- Prep the dough: In a medium bowl, whisk together 2 ¾ cups (345 g) of sifted all-purpose flour, 1 teaspoon baking powder, and ½ teaspoon salt. Set aside.
- Cream butter and sugar: Using a stand mixer or hand mixer, beat 1 cup (226 g) softened unsalted butter with 1 ½ cups (300 g) granulated sugar on medium speed for about 3-4 minutes until light and fluffy. This step is key for that tender crumb and slight snap.
- Add egg and vanilla: Beat in 1 large room-temperature egg and 2 teaspoons pure vanilla extract until combined. Scrape down the sides as needed.
- Incorporate dry ingredients and milk: Gradually add the dry flour mixture to the wet ingredients in batches, mixing on low speed. Pour in 2 tablespoons whole milk to keep the dough soft and manageable. The dough should come together but not be sticky.
- Chill the dough: Flatten the dough into a disk, wrap in plastic, and chill for at least 1 hour (or overnight). This step prevents spreading and helps maintain shape during baking.
- Roll and cut: Preheat oven to 350°F (175°C). On a lightly floured surface, roll out dough to about ¼ inch (6 mm) thickness. Use star-shaped cookie cutters to cut out shapes and place them 1 inch (2.5 cm) apart on parchment-lined baking sheets.
- Bake: Bake cookies for 8-10 minutes until edges just begin to brown. Watch carefully — you want a slight crunch at the edges but a tender center. Let cookies cool on the sheet for 5 minutes before transferring to a wire rack to cool completely.
- Make royal icing: In a clean bowl, beat 3 cups (360 g) sifted powdered sugar with 2 large egg whites (or meringue powder mix) and ½ teaspoon cream of tartar until stiff peaks form. Adjust consistency with tiny amounts of water for piping (stiffer for outlines, thinner for flooding). Divide and tint with red and blue gels.
- Decorate: Outline the cookies with stiff icing and flood inside with thinner icing. Use a toothpick or scribe tool to smooth edges and create star and stripe details. Let icing dry completely (4-6 hours or overnight) before stacking or serving.
Pro tip: If the dough softens too much while rolling, pop it back in the fridge for 10-15 minutes. Also, don’t skip chilling the dough — it’s what keeps those edges crisp and the shape perfect. I often bake a test cookie to check timing, since oven temps vary.
Cooking Tips & Techniques
One lesson I learned the hard way: rushing the royal icing drying process leads to smudges and cracks. Patience here truly pays off. Try to decorate on a cool, dry day to avoid humidity messing with the icing’s texture.
For consistent cookie thickness, I use rolling pin guides — little rings or bands that clip on the ends to keep the dough perfectly even. This little trick makes the cookies bake evenly without guesswork.
When piping the royal icing, start with the outlines first, and let them crust slightly before flooding inside. This prevents colors from bleeding together. And if you’re new to piping, practice on parchment paper first — trust me, it helps you get comfortable with pressure and flow.
Another tip: If your cookies puff up too much, your dough might be too warm or overmixed. Keep everything cool and mix gently.
Finally, multitasking is your friend. While the cookies bake and cool, whip up your royal icing so you can jump straight into decorating. This keeps the whole process smooth and satisfying.
Variations & Adaptations
You can easily switch things up with this sugar cookie base to suit your preferences or dietary needs.
- Flavor twists: Add lemon zest or almond extract to the dough for a citrusy or nutty note that pairs beautifully with the royal icing.
- Dietary swaps: Use gluten-free flour blends to make gluten-free sugar cookies. For egg-free, try a flaxseed egg substitute, though texture will change slightly.
- Color and design variations: Instead of classic red and blue, try pastel hues or metallic edible dusts for a different festive vibe. You could also pipe little floral or geometric patterns instead of stars and stripes for other occasions.
- Baking method: For a quicker version, bake smaller cookies (2-inch stars) which also means less icing time!
- Personal experiment: I once swapped half the butter for browned butter, making these sugar cookies with a subtle nuttiness and deeper flavor that still held the star-spangled look.
Serving & Storage Suggestions
These cookies are best served at room temperature, allowing the icing to fully set and the cookie texture to shine through. Arrange them on a festive platter, maybe alongside fresh berries or a cool lemonade for a perfect summer party vibe.
You can store the cookies in an airtight container at room temperature for up to 5 days. If you want to keep them longer, freeze baked and decorated cookies layered between parchment paper for up to 3 months. Just thaw at room temperature before serving.
Reheat them? Honestly, these cookies are best fresh or at room temp—warming might soften the icing too much. Over time, the flavors meld and the cookie softens slightly, which some folks love. If you want to keep the texture crisp, avoid humidity and store carefully.
Nutritional Information & Benefits
Each cookie (based on a 3-inch star) carries approximately 150-180 calories, with a balance of fats from butter and carbs from sugar and flour. While not a health food, these cookies are made from simple, recognizable ingredients you can feel good about sharing.
Butter provides some fat-soluble vitamins, and the egg whites in the royal icing add a bit of protein. Choosing natural vanilla extract over artificial flavors adds to the wholesome feel. If you want a lower sugar version, reduce the sugar slightly in the dough, though it may affect texture.
This recipe is gluten-containing by default but can be adapted for gluten intolerance by swapping flours. It contains eggs and dairy, so be mindful if you have allergies.
Conclusion
The Perfect Star-Spangled Sugar Cookies with Royal Icing recipe is one I keep coming back to because it’s more than just a cookie — it’s a little celebration you can hold, decorate, and share with pride. The texture obsession that started me on this journey still drives every batch, and the joy of getting that snap and smooth icing finish never fades.
Feel free to tweak the colors, flavors, or even the shapes to suit your occasion or taste — this recipe is a solid foundation for creativity. I hope you find as much satisfaction in making and sharing these cookies as I do.
And if you’re curious about other fun baking adventures, you might enjoy browsing through the recipe collection, where you’ll find plenty of seasonal treats and easy desserts to try next.
Happy baking — may your cookies be crisp, your icing smooth, and your celebrations sweet!
FAQs
- Can I make the cookie dough ahead of time? Yes! The dough can be refrigerated for up to 3 days or frozen for up to 3 months. Just thaw in the fridge before rolling.
- How do I fix royal icing that’s too runny? Add more powdered sugar a tablespoon at a time until you reach the desired consistency. For outlining, the icing should hold a peak.
- Why did my cookies spread too much? Dough that’s too warm or not chilled properly will spread. Make sure to chill the dough for at least an hour before baking.
- Can I use pasteurized egg whites for the royal icing? Absolutely, pasteurized egg whites or meringue powder are safer choices and work perfectly.
- How long does royal icing take to dry? Usually, it takes 4-6 hours to dry completely at room temperature, but overnight is best for stacking or storing.
Pin This Recipe!
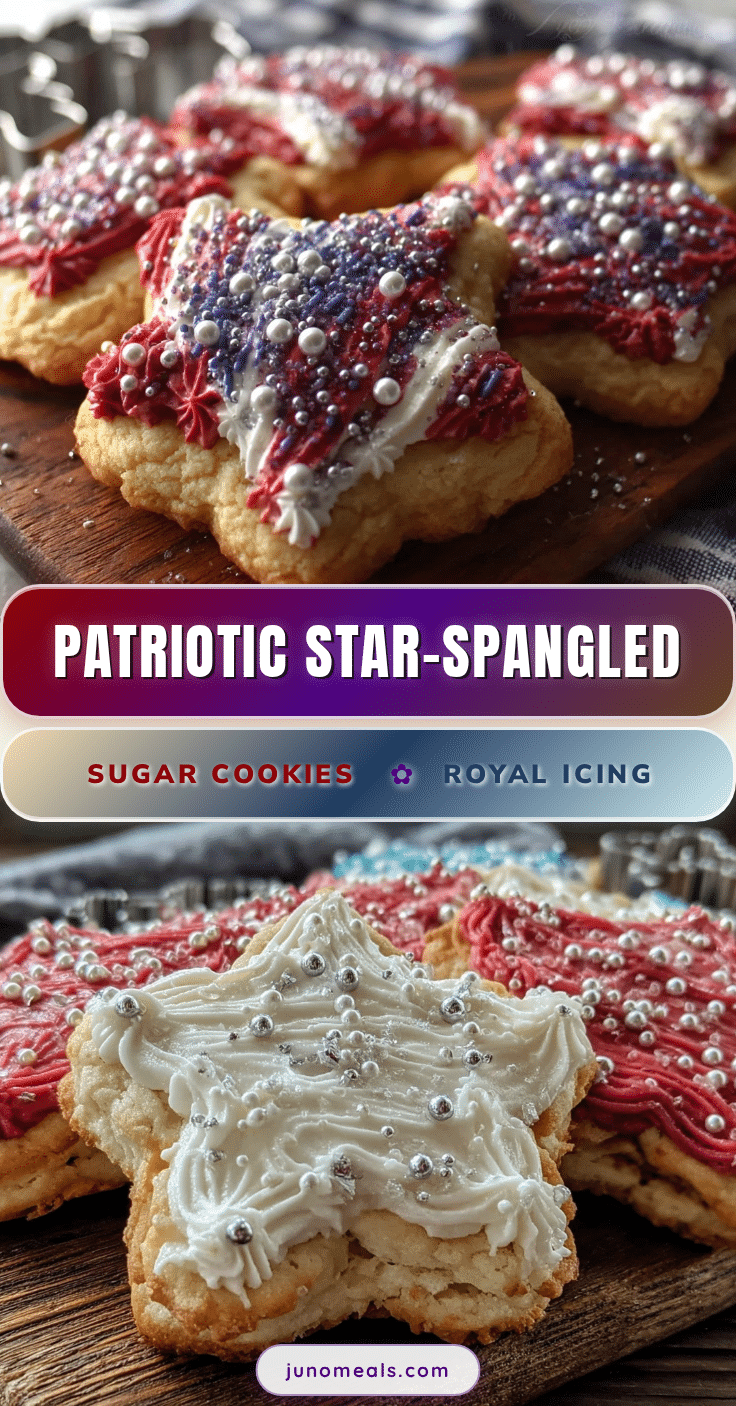
Perfect Star-Spangled Sugar Cookies with Royal Icing

These sugar cookies feature crackly edges dusted with granulated sugar and are decorated with smooth royal icing for a festive patriotic treat. They balance a tender crumb inside with a satisfying snap and buttery vanilla flavor.
- Prep Time: 20 minutes
- Cook Time: 10 minutes
- Total Time: 1 hour 30 minutes
- Yield: 24 cookies 1x
- Category: Dessert
- Cuisine: American
Ingredients
- 2 ¾ cups (345 g) all-purpose flour, sifted
- 1 teaspoon baking powder
- ½ teaspoon salt
- 1 cup (226 g) unsalted butter, softened (room temperature)
- 1 ½ cups (300 g) granulated sugar
- 1 large egg, room temperature
- 2 teaspoons pure vanilla extract
- 2 tablespoons whole milk
- 3 cups (360 g) powdered sugar, sifted
- 2 large egg whites or 4 tablespoons meringue powder mixed with water
- ½ teaspoon cream of tartar
- Food coloring gels (red and blue recommended)
- 1 teaspoon vanilla or lemon extract (optional)
Instructions
- In a medium bowl, whisk together 2 ¾ cups sifted all-purpose flour, 1 teaspoon baking powder, and ½ teaspoon salt. Set aside.
- Using a stand mixer or hand mixer, beat 1 cup softened unsalted butter with 1 ½ cups granulated sugar on medium speed for 3-4 minutes until light and fluffy.
- Beat in 1 large room-temperature egg and 2 teaspoons pure vanilla extract until combined. Scrape down the sides as needed.
- Gradually add the dry flour mixture to the wet ingredients in batches, mixing on low speed. Pour in 2 tablespoons whole milk and mix until dough comes together but is not sticky.
- Flatten the dough into a disk, wrap in plastic, and chill for at least 1 hour or overnight.
- Preheat oven to 350°F (175°C). Roll out dough on a lightly floured surface to about ¼ inch thickness. Use star-shaped cookie cutters to cut shapes and place 1 inch apart on parchment-lined baking sheets.
- Bake cookies for 8-10 minutes until edges just begin to brown. Let cool on the sheet for 5 minutes, then transfer to a wire rack to cool completely.
- In a clean bowl, beat 3 cups sifted powdered sugar with 2 large egg whites (or meringue powder mix) and ½ teaspoon cream of tartar until stiff peaks form. Adjust consistency with water for piping.
- Divide icing and tint with red and blue gels. Outline cookies with stiff icing and flood inside with thinner icing. Use a toothpick or scribe tool to smooth edges and create star and stripe details.
- Let icing dry completely for 4-6 hours or overnight before stacking or serving.
Notes
Chill dough for at least 1 hour to prevent spreading and maintain shape. Use pasteurized egg whites or meringue powder for safer royal icing. Let icing dry fully (4-6 hours or overnight) to avoid smudging. If dough softens while rolling, chill again for 10-15 minutes. Practice piping on parchment paper if new to decorating.
Nutrition
- Serving Size: 1 cookie (3-inch sta
- Calories: 165
- Sugar: 18
- Sodium: 90
- Fat: 7
- Saturated Fat: 4
- Carbohydrates: 25
- Fiber: 0.5
- Protein: 2
Keywords: sugar cookies, royal icing, patriotic cookies, 4th of July, star-shaped cookies, easy sugar cookies, holiday baking


