“Hey, can I make my own taco in the bag?” That question came from my seven-year-old just as I was about to start dinner, and honestly, I thought it was one of those fleeting ideas kids have that they forget in five minutes. But nope—she was serious, and that little request turned into one of the most fun, mess-friendly meals we’ve whipped up as a family. Easy cheesy walking tacos in a bag for kids became our go-to for busy nights when everyone wanted something quick, tasty, and hands-on.
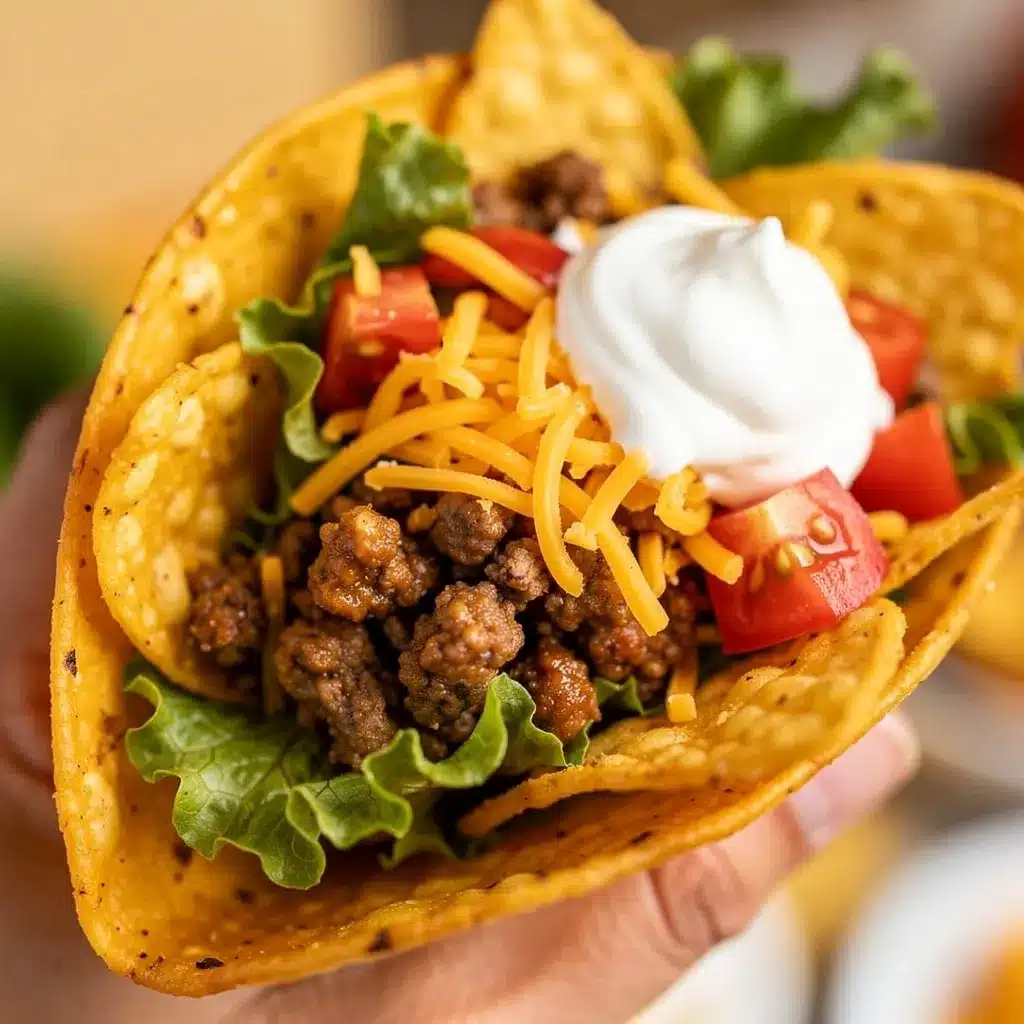
It’s funny how a simple craving for tacos morphed into a whole activity that kept my kids entertained while sneaking in some veggies and cheese. I remember the first time, I was skeptical that it could actually be easy or even neat. Walking tacos, after all, sounded like a fancy thing, but this version is just grabbing a crunchy chip bag, topping it with savory beef, melty cheese, and all the fixings—and eating it right out of the bag. No plates, no fuss.
Since then, it’s been repeated multiple times in a week (don’t judge). It’s kid-approved, parent-approved, and honestly, it’s the kind of meal that feels casual but hits that comfort-food spot perfectly. There’s a cozy little magic in watching the kids pile on their own toppings, smushing the chips under the warm beef and cheese, and giggling with mess on their cheeks. This recipe stuck because it’s quick, fun, and just the right amount of cheesy goodness everyone craves.
Why You’ll Love This Recipe
After testing and tweaking this easy cheesy walking tacos in a bag recipe for months, I can say it’s one of those rare dishes that checks all the boxes. Whether you’re racing the clock on a weeknight or looking for a playful food idea for the kids, this recipe delivers.
- Quick & Easy: Ready in about 20 minutes, so you can get dinner on the table fast without sacrificing flavor.
- Simple Ingredients: Uses pantry staples like ground beef, taco seasoning, shredded cheese, and of course, the crunchy chip bags you probably already have on hand.
- Perfect for Kids’ Meals: The hands-on aspect makes it super engaging for little ones who love customizing their food.
- Crowd-Pleaser: Adults love it too! The cheesy, savory flavors combined with the crunchy chips are a hit at gatherings or casual dinners.
- Unbelievably Delicious: The blend of seasoned beef, melty cheese, and fresh toppings makes this more than just a snack—it’s comfort food you can hold.
This isn’t your run-of-the-mill taco night. The trick is using the chip bag itself as a serving vessel, which locks in all those flavors and textures. Plus, I like to add a sprinkle of chopped fresh cilantro and a squeeze of lime at the end—it seriously brightens everything up. If you’ve ever enjoyed tacos but wished they were simpler to eat (and less messy), this recipe answers that craving.
It feels like a little party in a bag, one that your kids can assemble themselves with minimal supervision—and let’s be honest, that’s a win for any busy parent. This recipe has a way of making even hectic evenings feel a bit more playful and relaxed.
What Ingredients You Will Need
This recipe uses simple, wholesome ingredients to deliver bold flavor and satisfying texture without the fuss. Most are pantry staples or easily found in any grocery store, and you can tweak a few things if you want to suit your family’s preferences.
- For the Filling:
- 1 lb (450 g) ground beef (or ground turkey for a lighter option)
- 1 packet taco seasoning (about 1 oz or 28 g) – I like Old El Paso for authentic flavor
- ½ cup (120 ml) water
- For the Tacos in a Bag:
- 4 individual bags of crunchy tortilla chips (about 1.25 to 1.5 oz / 35-43 g each) – Doritos Nacho Cheese or plain tortilla chips work well
- 1 cup (100 g) shredded cheddar cheese (sharp or mild, your call)
- ½ cup (75 g) shredded lettuce
- ½ cup (75 g) diced tomatoes
- ¼ cup (60 g) sour cream or plain Greek yogurt
- Optional toppings: sliced black olives, chopped green onions, jalapeño slices, salsa
You can easily swap in shredded chicken or beans instead of beef, and if you want a gluten-free version, just check your chip packaging. For dairy-free, try a shredded vegan cheese and skip the sour cream or use a plant-based alternative. The key is having that crunchy chip base and a good melty cheese to wrap all the flavors together.
Equipment Needed
- Large skillet or frying pan – for browning the ground beef
- Wooden spoon or spatula – for stirring and breaking up meat
- Measuring cups and spoons – to keep seasoning and water precise
- Cheese grater, if shredding cheese yourself
- Cutting board and knife – for chopping fresh veggies
- Spoons or small ladle – for portioning filling into chip bags
If you don’t have a skillet, a medium saucepan can work, but a wide pan helps brown the beef evenly. I’ve tried this with a non-stick and cast iron pan; cast iron gives a nice sear but requires extra care cleaning. For cheese, pre-shredded works fine, but freshly shredded melts better and tastes fresher.
Preparation Method
- Brown the ground beef: Heat a large skillet over medium-high heat. Add the ground beef and cook for about 5-7 minutes (225-420 °F / 110-215 °C on the pan), stirring and breaking it apart with a wooden spoon until fully browned and no pink remains.
- Drain excess fat: Carefully drain any fat from the pan to avoid greasy tacos (especially if using higher-fat beef). Use a spoon or tilt the pan carefully.
- Add taco seasoning and water: Sprinkle the taco seasoning evenly over the beef, then pour in ½ cup (120 ml) of water. Stir well to combine.
- Simmer the mixture: Reduce heat to medium-low and let the beef simmer for about 5 minutes until the sauce thickens and coats the meat nicely. Stir occasionally to prevent sticking. It should smell fragrant and a little smoky.
- Prepare toppings: While the beef simmers, chop your lettuce, dice tomatoes, slice olives, or prep any extras you like. Get the sour cream and shredded cheese ready for assembly.
- Fill the chip bags: Carefully open each individual chip bag (don’t tear it open or chips will spill!) and spoon about ⅓ to ½ cup (75-120 g) of the warm beef mixture into each bag.
- Add cheese and toppings: Sprinkle about ¼ cup (25 g) of shredded cheddar over the beef, then add lettuce, tomatoes, a dollop of sour cream, and any other toppings your family loves.
- Mix inside the bag: Give the bag a gentle shake or press with your hands to mix the filling and chips just a bit—this helps coat the chips with the beef juices and cheese melts slightly.
- Serve immediately: Hand out the bags and let everyone enjoy their walking tacos straight from the bag. It’s messy but oh-so-fun!
For best results, don’t prepare the bags too far ahead—the chips can get soggy if the mixture sits too long. If you want to prep in advance, keep the beef warm separately and assemble right before eating.
Cooking Tips & Techniques
Here are a few things I learned the hard way while perfecting this recipe. First, don’t skip draining the beef fat unless you want greasy tacos. It’s tempting to leave it in for flavor, but it can weigh down the chips and make the whole thing soggy.
Also, warming the beef mixture just enough to melt the cheese is key. Too hot and the chips get limp fast; too cold and the cheese won’t melt properly. I usually turn down the heat and let the pan sit off the burner for a minute after cooking to reach that sweet spot.
When mixing in the bag, be gentle. Crushing all the chips will make it a mushy mess, but a light toss helps distribute flavors perfectly. I find using a spoon or the back of a fork inside the bag works better than shaking for little hands.
Feel free to multitask by prepping toppings while the beef cooks—this saves time and keeps the process smooth. And if you want to up the flavor, a quick squeeze of fresh lime or a sprinkle of cilantro right before serving makes a big difference.
Variations & Adaptations
- Vegetarian Version: Swap the ground beef for seasoned black beans or lentils. Cook with the same taco seasoning and water for a hearty, meat-free option.
- Spicy Kick: Add diced jalapeños or a dash of hot sauce to the beef mixture for those who like it hotter. You can also use spicy chip varieties for extra heat.
- Different Proteins: Use shredded rotisserie chicken or ground turkey instead of beef. Chicken cooks quickly and keeps the tacos light.
- Gluten-Free: Choose certified gluten-free tortilla chips and check your taco seasoning label, or make your own seasoning blend to avoid gluten.
- Cheese Alternatives: Try pepper jack for a mild spicy note or skip cheese entirely and offer avocado slices for creaminess.
Once, I made a batch with sweet corn and black beans added into the beef mix—my kids loved the extra texture and sweetness. Don’t be afraid to experiment with what you have on hand!
Serving & Storage Suggestions
Serve these walking tacos immediately for the best crunch and cheesy melt. They pair beautifully with a simple side of guacamole or fresh salsa and a cold drink like lemonade or iced tea.
If you have leftovers (which is rare), store the beef mixture separately in an airtight container in the fridge for up to 3 days. Chips should be kept in their original sealed bags to stay crunchy.
To reheat the beef, warm it gently in a skillet or microwave until steaming, then assemble fresh tacos. Avoid preassembling if you want to keep the chips crisp.
Flavors tend to develop nicely in the beef mixture overnight, so making the filling a day ahead can save time and deepen taste—just keep toppings fresh and assemble right before eating.
Nutritional Information & Benefits
Each serving of these easy cheesy walking tacos provides a balanced mix of protein from the ground beef, calcium from the cheese, and fiber from the fresh veggies and tortilla chips. A typical serving contains roughly 400-450 calories, depending on toppings.
Ground beef offers essential nutrients like iron and B vitamins, while the fresh tomatoes and lettuce add antioxidants and vitamins A and C. Using lean beef or turkey lowers fat content for a lighter meal.
For families mindful of allergens, this recipe can be adapted to be gluten-free and dairy-free. Just swap chips and cheese accordingly, and you’ve got a meal everyone can enjoy.
Conclusion
Easy cheesy walking tacos in a bag for kids is one of those recipes that feels like a little celebration every time it’s on the table. It’s fun, flexible, and hits that sweet spot between comfort and convenience. Whether you’re juggling a busy evening or just want a meal the kids can help make (and eat messily!), this recipe fits the bill perfectly.
Feel free to customize toppings and proteins to suit your family’s tastes, and don’t hesitate to make it your own. For a sweet finish to your meal or next gathering, you might also enjoy treats like the mini lemon blueberry cheesecakes—they’re a party hit with kids and adults alike.
I hope this recipe brings a little joy and cheesy goodness to your kitchen, just like it did to mine. Happy cooking and even happier eating!
FAQs
Can I make walking tacos ahead of time?
It’s best to prepare the beef filling ahead but assemble the tacos just before eating to keep the chips crunchy.
What if my kids don’t like spicy food?
Simply omit jalapeños or spicy seasonings and stick to mild toppings like shredded cheese and sour cream.
Can I use other types of chips?
Yes, plain or flavored tortilla chips work well. Just avoid very thick or heavily salted chips that might overpower the filling.
Is this recipe healthy for kids?
When balanced with fresh veggies and lean protein, it’s a kid-friendly meal that provides essential nutrients without too much added fat or sugar.
How do I store leftovers?
Keep the beef mixture in an airtight container in the fridge for up to 3 days. Store chips separately to prevent sogginess.
Pin This Recipe!

Easy Cheesy Walking Tacos In A Bag Recipe Kids Love to Make

A quick, fun, and mess-friendly walking tacos recipe perfect for busy nights. Kids love customizing their own tacos served right in crunchy chip bags.
- Prep Time: 10 minutes
- Cook Time: 10 minutes
- Total Time: 20 minutes
- Yield: 4 servings 1x
- Category: Main Course
- Cuisine: Mexican
Ingredients
- 1 lb ground beef (or ground turkey for a lighter option)
- 1 packet taco seasoning (about 1 oz or 28 g)
- ½ cup water (120 ml)
- 4 individual bags of crunchy tortilla chips (about 1.25 to 1.5 oz / 35–43 g each)
- 1 cup shredded cheddar cheese (100 g)
- ½ cup shredded lettuce (75 g)
- ½ cup diced tomatoes (75 g)
- ¼ cup sour cream or plain Greek yogurt (60 g)
- Optional toppings: sliced black olives, chopped green onions, jalapeño slices, salsa
Instructions
- Heat a large skillet over medium-high heat. Add the ground beef and cook for about 5-7 minutes, stirring and breaking it apart until fully browned and no pink remains.
- Carefully drain any excess fat from the pan to avoid greasy tacos.
- Sprinkle the taco seasoning evenly over the beef, then pour in ½ cup (120 ml) of water. Stir well to combine.
- Reduce heat to medium-low and let the beef simmer for about 5 minutes until the sauce thickens and coats the meat nicely. Stir occasionally.
- While the beef simmers, chop lettuce, dice tomatoes, slice olives, and prepare any other toppings. Get sour cream and shredded cheese ready.
- Carefully open each chip bag and spoon about ⅓ to ½ cup (75-120 g) of the warm beef mixture into each bag.
- Sprinkle about ¼ cup (25 g) of shredded cheddar cheese over the beef, then add lettuce, tomatoes, a dollop of sour cream, and any other desired toppings.
- Gently shake or press the bag with your hands to mix the filling and chips slightly, coating the chips with beef juices and melting the cheese.
- Serve immediately and enjoy the walking tacos straight from the bag.
Notes
Drain excess fat from the beef to avoid soggy tacos. Warm beef just enough to melt cheese without making chips limp. Mix gently inside the bag to avoid crushing chips. Prepare beef filling ahead but assemble tacos just before eating to keep chips crunchy. Add a squeeze of fresh lime and chopped cilantro for extra flavor.
Nutrition
- Serving Size: 1 walking taco in a
- Calories: 425
- Sugar: 3
- Sodium: 600
- Fat: 22
- Saturated Fat: 9
- Carbohydrates: 30
- Fiber: 3
- Protein: 22
Keywords: walking tacos, tacos in a bag, kid-friendly tacos, quick dinner, cheesy tacos, ground beef tacos, easy taco recipe