Introduction
“Hey, did you bring dessert?” That question has followed me to more summer cookouts than I can count. Honestly, the pressure to deliver something everyone loves is real. One afternoon, after a particularly hectic week and a last-minute invite to a neighbor’s barbecue, I found myself rummaging through my pantry, pondering what to whip up quickly. My usual go-to brownies felt a bit plain, and I wanted something that could please a crowd without me turning into a kitchen marathon runner.
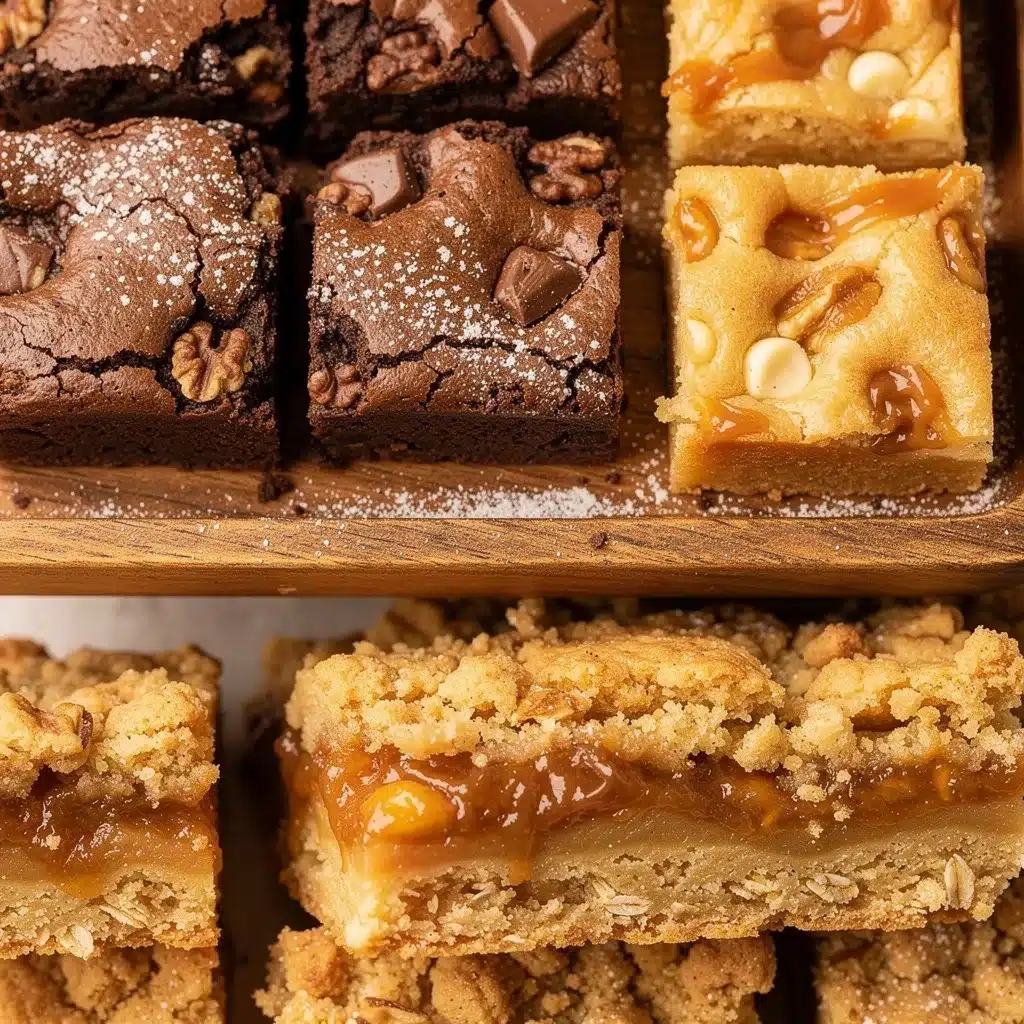
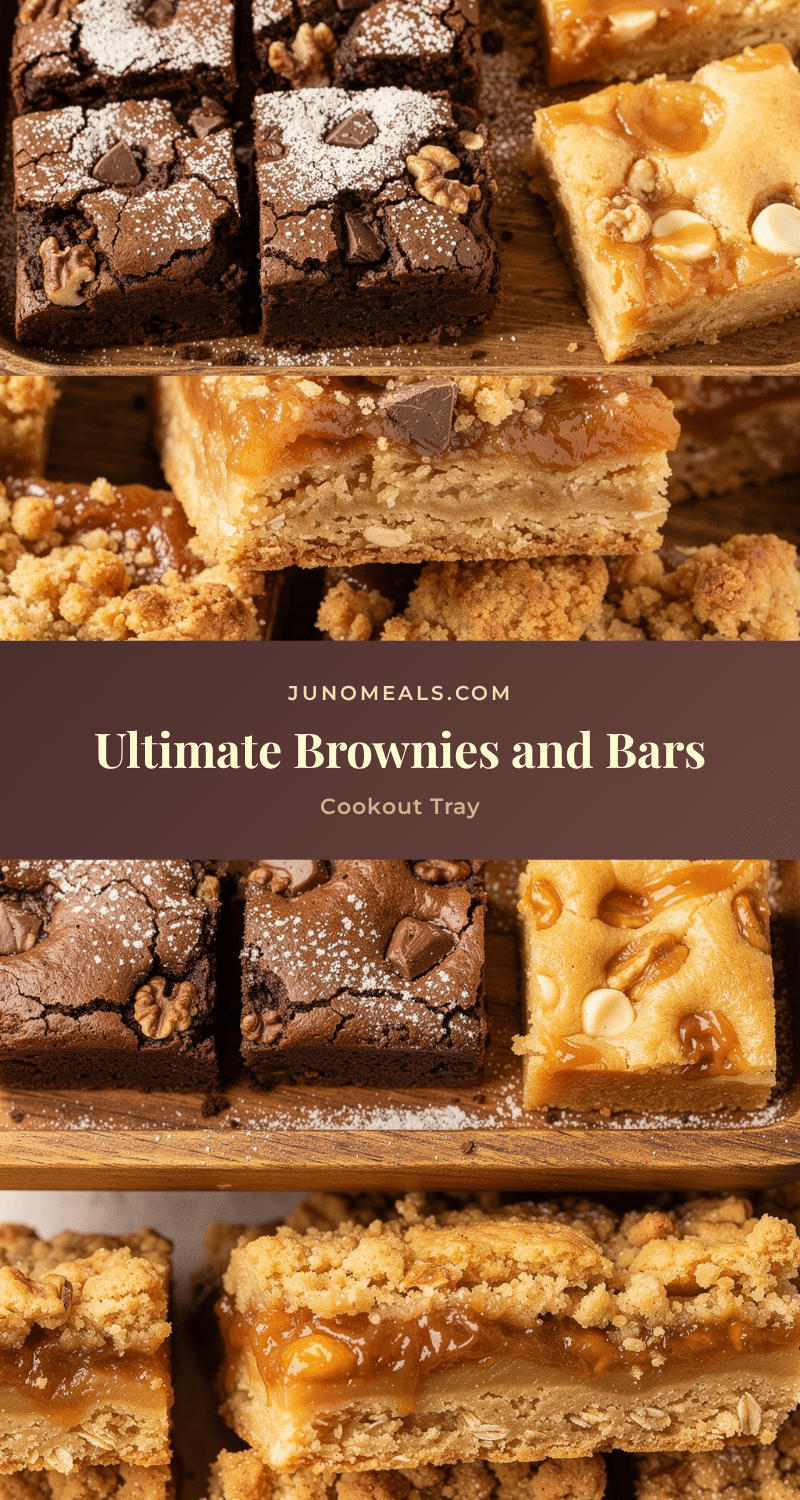
That’s when the idea of the Ultimate Brownies and Bars Cookout Tray came to life—an easy, no-fuss way to offer a variety of bars and brownies all in one pan. I started mixing a classic brownie base with swirls of cream cheese, chunks of chocolate, and even a sprinkle of nuts for texture. To my surprise, this tray quickly became the star of the party, sparking requests for the recipe and second helpings. It’s funny how something thrown together out of necessity can turn into your signature dish.
What stuck with me, beyond the rich chocolate aroma filling the backyard, was how this tray brought everyone together. Whether it was the kid who wanted the fudgey brownie corner or the aunt who loved the nutty crunch, there was a piece for every preference. This recipe isn’t just about brownies and bars—it’s about making moments sweeter, easier, and more memorable. So, if you’re looking for a dessert that’s as effortless as it is irresistible, this cookout tray might just be your next favorite.
Why You’ll Love This Recipe
From my many trials and tweaks, this Ultimate Brownies and Bars Cookout Tray has become a trusted favorite in my recipe collection. Here’s why it’s worth making again and again:
- Quick & Easy: Comes together in under 30 minutes, perfect for last-minute gatherings or weeknight treats.
- Simple Ingredients: No fancy or hard-to-find items—most are pantry staples or everyday baking essentials.
- Perfect for Cookouts & Parties: This tray serves a crowd effortlessly, making it ideal for outdoor get-togethers or potlucks.
- Crowd-Pleaser: Everyone finds something to love—whether it’s the classic fudgy brownie, cream cheese swirls, or nut-studded bars.
- Unbelievably Delicious: The balance of rich chocolate, creamy textures, and crunchy bits takes comfort food to a whole new level.
What sets this recipe apart is the multi-textured approach—combining brownie, cream cheese, and nutty bar elements in one tray. I’ve tested versions with different chocolate types and even swapped out nuts for dried fruit to keep things fresh. It’s the kind of dessert that makes you close your eyes after the first bite and smile—comfort food with a little flair. Plus, it’s a lifesaver when you want to impress guests without fuss. Honestly, after making this, I rarely bring anything else to a cookout.
What Ingredients You Will Need
This recipe uses simple, wholesome ingredients to deliver bold flavor and satisfying texture without the fuss. Most are pantry staples, so you can easily put this together anytime.
- For the Brownie Base:
- 1 cup (226g) unsalted butter, melted (adds richness)
- 2 cups (400g) granulated sugar
- 4 large eggs, room temperature
- 1 ½ cups (190g) all-purpose flour
- ¾ cup (75g) unsweetened cocoa powder (I prefer Ghirardelli for deep chocolate flavor)
- 1 teaspoon baking powder
- ½ teaspoon salt
- 2 teaspoons vanilla extract
- For the Cream Cheese Swirl:
- 8 oz (226g) cream cheese, softened
- ½ cup (60g) powdered sugar
- 1 large egg
- 1 teaspoon vanilla extract
- For the Topping & Mix-ins:
- 1 cup (170g) semisweet chocolate chips or chunks
- ½ cup (60g) chopped pecans or walnuts (optional, but adds great texture)
- Sprinkle of flaky sea salt (to balance sweetness)
If you want a gluten-free twist, swapping all-purpose flour for a gluten-free blend works well. Also, you can use dairy-free cream cheese and butter alternatives to make this tray vegan-friendly. For a seasonal touch, swapping nuts with dried cherries or cranberries adds a tart pop that’s delightful in summer or fall cookouts.
Equipment Needed
- 9×13-inch (23×33 cm) baking pan – this size is perfect for a generous tray that serves about 12-16 people.
- Mixing bowls – at least two, one for brownie batter and one for cream cheese swirl.
- Hand mixer or stand mixer – to get the cream cheese mixture silky smooth.
- Whisk and spatula – essential for folding ingredients without overmixing.
- Measuring cups and spoons – accuracy matters here for a balanced texture.
- Optional: Parchment paper – lining the pan makes for easier cleanup and perfect edges.
I’ve tried making this with both metal and glass pans; metal tends to give a crispier edge, while glass holds heat evenly for a softer center. If you don’t have a mixer, a sturdy whisk can do the job, it just takes a bit more elbow grease. For budget-friendly options, a basic hand mixer works well and won’t take up much space in your kitchen.
Preparation Method
- Preheat your oven to 350°F (175°C). Grease the 9×13-inch pan with butter or line it with parchment paper for easy removal.
- Make the brownie batter: In a large bowl, whisk together the melted butter and granulated sugar until combined and glossy. Beat in the eggs one at a time, then stir in the vanilla extract.
- Sift together the flour, cocoa powder, baking powder, and salt in a separate bowl. Gradually fold the dry ingredients into the wet mixture until just combined. Avoid overmixing to keep the brownies tender. The batter should be thick and fudgy.
- Prepare the cream cheese swirl: In another bowl, beat the softened cream cheese with powdered sugar, egg, and vanilla until smooth and creamy. No lumps here—it should resemble a thick frosting.
- Assemble the tray: Pour half the brownie batter evenly into the pan. Drop spoonfuls of the cream cheese mixture over the batter, then pour the remaining brownie batter on top. Use a knife or skewer to swirl the cream cheese gently into the batter, creating marbled patterns.
- Scatter the chocolate chips and nuts evenly over the top, pressing them lightly into the batter. Finish with a light sprinkle of flaky sea salt.
- Bake for 35-40 minutes, or until a toothpick inserted near the center comes out with a few moist crumbs but not wet batter. The edges should be set and slightly crisp.
- Cool completely in the pan on a wire rack before cutting into squares. This helps the bars hold their shape and develop the perfect chewy texture.
Tip: If your cream cheese mixture feels too runny, pop it in the fridge for 10 minutes before swirling; it holds better and creates more defined patterns. Also, don’t skip the sea salt—it really wakes up the chocolate and balances the sweetness. If you want to speed things up, you can prepare the cream cheese swirl while the brownie batter rests.
Cooking Tips & Techniques
Getting the perfect brownie-bar balance can be tricky, but a few tips from my kitchen experiments might save you some headaches:
- Measure flour properly: Spoon and level your flour instead of scooping directly from the bag to avoid dense brownies.
- Don’t overmix: Once you add the dry ingredients to the wet, fold gently. Overworking the batter can lead to cakey brownies rather than fudgy bars.
- Swirling technique: Use a gentle hand with the knife or skewer when mixing the cream cheese. You want defined swirls, not a muddy mess.
- Baking time: Check a few minutes before the minimum time. Ovens vary, and underbaking slightly helps keep the center gooey.
- Room temperature ingredients: Eggs and cream cheese mix better and prevent lumps when not cold.
One time, I tried speeding things up by baking immediately after mixing, and the cream cheese sank instead of swirling. Lesson learned: a little patience makes all the difference. Also, multitasking by prepping your toppings while the batter rests saves time. And if you want those edges crispier, try sliding the tray to the lower rack in the last 5 minutes of baking.
Variations & Adaptations
This recipe is super flexible—here are a few ways I’ve adapted it depending on mood or occasion:
- Peanut Butter Swirl: Swap the cream cheese swirl for softened peanut butter mixed with a touch of powdered sugar for a nutty twist.
- Seasonal Fruit Bars: Replace nuts with chopped dried apricots or cherries for a fruity pop that’s great for summer or holiday gatherings.
- Gluten-Free Version: Use a gluten-free flour blend instead of all-purpose flour, making sure it’s a 1:1 substitution for best texture.
- Vegan Adaptation: Use dairy-free cream cheese and butter substitutes, plus a flax egg (1 tablespoon flaxseed meal + 3 tablespoons water) instead of real eggs.
Personally, I once tried a mocha variation by adding 2 tablespoons of instant espresso powder to the brownie batter—it intensified the chocolate and gave it a grown-up vibe. If you want to change the cooking method, this recipe works well as mini bars baked in a muffin tin for easy grab-and-go treats at picnics.
Serving & Storage Suggestions
For an easy presentation, cut the tray into 2-inch squares and arrange them on a rustic wooden board or a colorful platter. These bars are best served at room temperature, which lets the flavors shine and textures stay just right. If you like, add a dusting of powdered sugar or a drizzle of caramel sauce for extra flair.
This tray pairs beautifully with fresh berries or a scoop of vanilla ice cream for a simple dessert upgrade. For cookouts, I love serving it alongside fresh lemonade or iced coffee to balance the richness.
Store leftovers in an airtight container at room temperature for up to 3 days. If you want to keep them longer, refrigerate for up to a week or freeze individual squares wrapped tightly in plastic wrap and foil for up to 3 months. To reheat, warm gently in the microwave for 15-20 seconds or let thaw at room temperature.
Flavors tend to deepen if you let the tray rest overnight, making it an excellent make-ahead dessert for busy days. Just be sure to cover it well to keep the bars moist and fresh.
Nutritional Information & Benefits
On average, one square (about 2×2 inches) of this Ultimate Brownies and Bars Cookout Tray contains approximately:
| Calories | 280 |
|---|---|
| Fat | 15g |
| Carbohydrates | 34g |
| Protein | 4g |
While undeniably indulgent, the recipe includes some nutritional perks. Cocoa powder is rich in antioxidants, and the nuts provide heart-healthy fats and protein. Using real butter and cream cheese adds satisfying richness, helping you feel full with less. For those mindful of allergens, this recipe contains dairy, eggs, and gluten, but swaps mentioned earlier can make it friendly for many diets.
From a wellness perspective, I appreciate that this dessert can be portioned easily and shared, so you get that treat satisfaction without going overboard. It’s all about balance and enjoying the moment.
Conclusion
The Ultimate Brownies and Bars Cookout Tray is one of those recipes that feels like a shortcut to happy moments. It’s straightforward enough for a busy day but impressive enough to bring smiles at any gathering. What I love most is how it invites creativity—whether you stick to the classic cream cheese swirl or add your own twist, it always turns out delicious.
Give it a try next time you’re headed to a cookout or craving a chocolate fix. You might find it becomes your signature dessert too. If you’re curious about other crowd-pleasing treats, you could pair this tray with mini lemon blueberry cheesecakes for a refreshing contrast. Also, feel free to browse the recipe collection for more easy-to-make sweets that fit perfectly into your busy life.
Let me know how your tray turns out or if you’ve tried any fun variations. Baking is always better when shared, after all!
FAQs
Can I make the Ultimate Brownies and Bars Cookout Tray ahead of time?
Absolutely! It’s great made a day in advance and stored covered at room temperature. Just cut and serve when ready.
What’s the best way to get clean cream cheese swirls?
Make sure the cream cheese is fully softened and mixed smooth before swirling. Use a gentle hand with a knife or skewer to create defined patterns.
Can I freeze leftover brownies and bars?
Yes, wrap individual squares tightly and freeze for up to 3 months. Thaw at room temperature or warm briefly in the microwave before serving.
What if I don’t have nuts or don’t want to use them?
You can skip the nuts or replace them with dried fruit or extra chocolate chips for different texture and flavor.
Is there a way to make this tray vegan?
Yes! Substitute dairy butter and cream cheese with plant-based alternatives and use flax eggs instead of regular eggs. The texture will be slightly different but still tasty.
Pin This Recipe!
Ultimate Brownies and Bars Cookout Tray
An easy, no-fuss dessert tray combining classic fudgy brownies, cream cheese swirls, chocolate chunks, and nuts, perfect for cookouts and parties.
- Prep Time: 15 minutes
- Cook Time: 35-40 minutes
- Total Time: 50-55 minutes
- Yield: 12-16 servings 1x
- Category: Dessert
- Cuisine: American
Ingredients
- 1 cup (226g) unsalted butter, melted
- 2 cups (400g) granulated sugar
- 4 large eggs, room temperature
- 1 ½ cups (190g) all-purpose flour
- ¾ cup (75g) unsweetened cocoa powder
- 1 teaspoon baking powder
- ½ teaspoon salt
- 2 teaspoons vanilla extract
- 8 oz (226g) cream cheese, softened
- ½ cup (60g) powdered sugar
- 1 large egg
- 1 teaspoon vanilla extract
- 1 cup (170g) semisweet chocolate chips or chunks
- ½ cup (60g) chopped pecans or walnuts (optional)
- Sprinkle of flaky sea salt
Instructions
- Preheat your oven to 350°F (175°C). Grease a 9×13-inch pan with butter or line it with parchment paper.
- In a large bowl, whisk together the melted butter and granulated sugar until combined and glossy. Beat in the eggs one at a time, then stir in the vanilla extract.
- Sift together the flour, cocoa powder, baking powder, and salt in a separate bowl. Gradually fold the dry ingredients into the wet mixture until just combined, avoiding overmixing.
- In another bowl, beat the softened cream cheese with powdered sugar, egg, and vanilla until smooth and creamy.
- Pour half the brownie batter evenly into the pan. Drop spoonfuls of the cream cheese mixture over the batter, then pour the remaining brownie batter on top. Use a knife or skewer to swirl the cream cheese gently into the batter.
- Scatter the chocolate chips and nuts evenly over the top, pressing them lightly into the batter. Finish with a light sprinkle of flaky sea salt.
- Bake for 35-40 minutes, or until a toothpick inserted near the center comes out with a few moist crumbs but not wet batter.
- Cool completely in the pan on a wire rack before cutting into squares.
Notes
If cream cheese mixture is too runny, chill for 10 minutes before swirling. Use parchment paper for easier cleanup and perfect edges. Avoid overmixing batter to keep brownies tender. Check baking time early to keep center gooey. Room temperature eggs and cream cheese mix better. For crispier edges, move tray to lower rack in last 5 minutes of baking.
Nutrition
- Serving Size: One 2x2 inch square
- Calories: 280
- Fat: 15
- Carbohydrates: 34
- Protein: 4
Keywords: brownies, bars, cookout dessert, cream cheese swirl, chocolate, nuts, easy dessert, party dessert