My sister-in-law Maria wasn’t trying to impress anyone. I’d stopped by to drop off a birthday present for my nephew and the smell of onions and cream hit me before I even got through the front door. She was standing there in sweatpants, hair in a messy bun, stirring a pot while her kids ran circles around the kitchen island. “Oh, that’s just the green bean thing,” she said when I asked what smelled so good. “The kids actually eat it, so I make it every year.”
Let me tell you, that “green bean thing” stopped me cold. I’d spent years trying to get my own kids to eat green beans at Thanksgiving. I’d tried bacon, cheese sauce, even hiding them in macaroni. Nothing worked. But Maria’s casserole had this golden, bubbling top and those crispy shallots scattered across it like little flavor bombs. She handed me a spoon and I scooped up a bite right there over the stove. Honestly, I think I made some kind of noise that embarrassed us both.
The best part? She wasn’t even trying to be impressive. She’d thrown it together the night before because she knew Thanksgiving morning would be chaos. That’s when it hit me—this was the answer to every parent’s prayer. A vegetable side dish that kids actually fight over, and you can make it ahead of time so you’re not losing your mind on the big day. I begged her for the recipe right there, standing in her messy kitchen with a toddler tugging at my pant leg.
I’ve been making this kid-approved make-ahead green bean casserole with crispy shallots ever since, and I’ve tweaked it just enough to call it my own. Maybe you’ve been there too—standing in the grocery store aisle, trying to figure out how to get everyone at the table to eat their vegetables without a battle. This one’s for you.
Why You’ll Love This Recipe
I’ve tested this recipe about a dozen times now, and I can tell you with confidence—it works. Here’s why this one is different from every other green bean casserole you’ve tried:
- Kid-Approved Magic: My own kids, who normally push green beans to the side of their plate, actually ask for seconds. The creamy sauce and crispy topping make vegetables feel like a treat, not a chore.
- Make-Ahead Friendly: You can assemble this casserole up to two days in advance and pop it in the oven when you’re ready. No last-minute scrambling, no stress. This is a game-changer for Thanksgiving or any busy weeknight.
- Simple Pantry Ingredients: Nothing fancy here. Fresh or frozen green beans, cream of mushroom soup, milk, and shallots. You probably already have most of this in your kitchen.
- Budget-Friendly: This whole dish costs under $10 to make, and it feeds a crowd. Perfect for families watching their grocery budget.
- Better Than the Original: The crispy shallots are a total upgrade from those canned fried onions. They add real flavor and crunch without all the weird additives.
- Leftovers That Reheat Beautifully: This is one of those rare casseroles that tastes just as good the next day. The sauce stays creamy, and the topping stays crisp if you reheat it in the oven.
This recipe isn’t just good—it’s the kind that makes you close your eyes after the first bite. It’s comfort food reimagined: easier, faster, and way more kid-friendly than the version your grandma used to make. Perfect for impressing your in-laws without stressing yourself out.
What Ingredients You Will Need
This recipe uses simple, honest ingredients to create something genuinely delicious. No weird shortcuts or hard-to-find items. Here’s what you’ll need:
For the Casserole Base
- 2 pounds fresh green beans, trimmed and cut into 2-inch pieces (or 2 pounds frozen green beans, thawed) — fresh beans give the best texture, but frozen work great in a pinch
- 2 tablespoons unsalted butter — I use Kerrygold for the richest flavor, but any good butter works
- 1 medium yellow onion, finely diced — this adds sweetness and depth to the sauce
- 3 cloves garlic, minced — fresh garlic is non-negotiable here; don’t use the jarred stuff
- 1 can (10.5 ounces) condensed cream of mushroom soup — I prefer Campbell’s for consistency, but feel free to use a reduced-sodium version
- 1/2 cup whole milk — whole milk makes the sauce creamier, but 2% works fine too
- 1/4 cup sour cream — this is my secret ingredient; it adds tang and richness that makes kids go back for more
- 1 teaspoon Worcestershire sauce — just a tiny bit for umami depth (kids won’t notice it)
- 1/2 teaspoon black pepper — freshly ground tastes best
- 1/4 teaspoon salt — plus more for the blanching water
- 1/4 teaspoon garlic powder — optional, but I like the extra layer of flavor
For the Crispy Shallot Topping
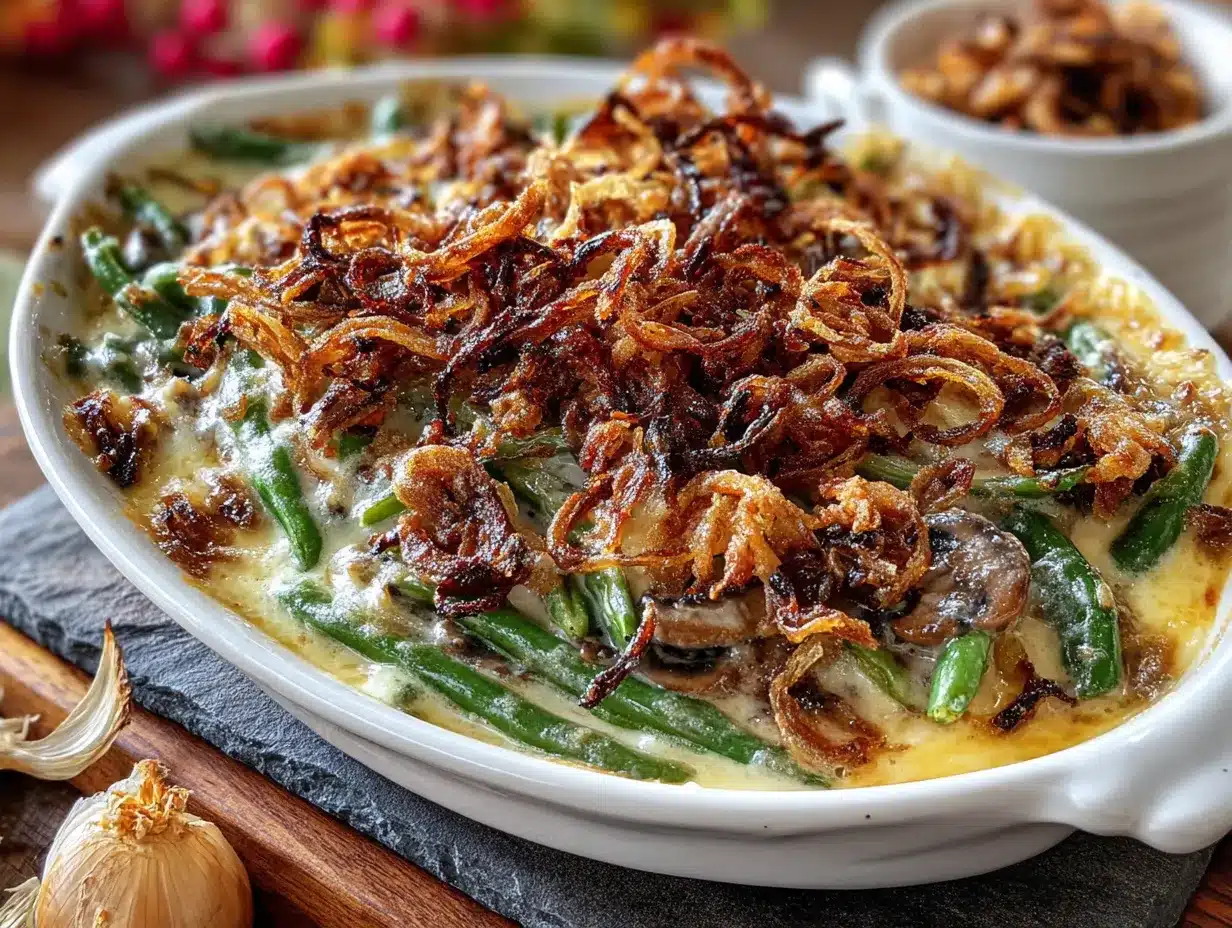
- 4 large shallots, thinly sliced into rings — look for firm, dry shallots with papery skins
- 1/2 cup all-purpose flour — for dredging the shallots
- 1/2 teaspoon salt
- 1/4 teaspoon black pepper
- 1/2 cup vegetable oil — for frying; use a neutral oil with a high smoke point like canola or grapeseed
Ingredient Tips from My Kitchen
I’ve learned a few things from making this over and over. First, don’t skip blanching the green beans—it keeps them bright green and crisp-tender instead of mushy. If you’re using frozen beans, thaw them completely and pat them dry so they don’t water down the sauce. And here’s a tip I wish someone had told me years ago: buy extra shallots because you’ll want to snack on them while you cook. Trust me on this.
For the cream of mushroom soup, I’ve tested this with homemade versions too, and honestly? The canned stuff works perfectly here. It’s one of those shortcuts that actually makes the dish better, not worse. If you’re feeding someone with a dairy allergy, you can swap the milk and sour cream for unsweetened almond milk and dairy-free sour cream. The texture will be slightly thinner, but it still tastes great.
Equipment Needed
Nothing too fancy here—this is a family-friendly recipe that doesn’t require special gadgets. Here’s what you’ll need:
- Large pot for blanching the green beans (at least 5 quarts)
- Large bowl filled with ice water for shocking the beans
- Colander for draining
- Large skillet for sautéing the onions and making the sauce
- Small skillet for frying the shallots (a cast-iron skillet works beautifully here)
- 9×13-inch baking dish — glass or ceramic works best; metal can sometimes react with the sauce
- Sharp knife and cutting board for prepping vegetables
- Measuring cups and spoons
- Wooden spoon or silicone spatula for stirring
- Paper towels for draining the crispy shallots
- Aluminum foil for covering the casserole if you’re making it ahead
If you don’t have a 9×13-inch dish, you can use a 10-inch cast-iron skillet or a 3-quart casserole dish instead. Just keep an eye on the cooking time—it might be slightly different. And if you don’t have a second skillet for the shallots, you can fry them first and wipe out the pan before making the sauce. I’ve done this plenty of times and it works just fine.
Preparation Method
Alright, let’s get cooking. I’ll walk you through this step by step so you don’t miss anything. Trust me, the first time I made this, I forgot to blanch the beans and ended up with a watery mess. Learn from my mistakes!
Step 1: Prepare the Green Beans
Fill a large pot with water and bring it to a rolling boil over high heat. Add a generous tablespoon of salt—this helps season the beans from the inside out. While the water heats up, fill a large bowl with ice water and set it nearby. Drop the trimmed green beans into the boiling water and cook for exactly 3 minutes. They should turn bright green and become slightly tender but still have a nice snap. Use a slotted spoon or tongs to transfer them immediately to the ice water bath. This stops the cooking process and locks in that beautiful color. Let them sit in the ice water for 2-3 minutes, then drain well in a colander. Pat them dry with a clean kitchen towel or paper towels—excess moisture will make your sauce watery later.
Step 2: Make the Crispy Shallots
While the beans are cooling, get your shallots ready. Peel them and slice them into thin rings—about 1/8-inch thick. Try to keep them uniform so they cook evenly. In a shallow bowl, whisk together the flour, salt, and pepper. Toss the shallot rings in the flour mixture until they’re all lightly coated. Shake off any excess flour. Heat the vegetable oil in a small skillet over medium-high heat until it shimmers (about 350°F if you’re using a thermometer). Working in batches, fry the shallots for 2-3 minutes, stirring occasionally, until they’re golden brown and crispy. Don’t walk away from the stove—they can burn in seconds. Use a slotted spoon to transfer them to a paper towel-lined plate. Sprinkle with a tiny pinch of salt while they’re still warm. Set aside.
Step 3: Build the Creamy Sauce
In a large skillet, melt the butter over medium heat. Add the diced onion and cook for 4-5 minutes until it’s soft and translucent, stirring occasionally. Add the minced garlic and cook for another 30 seconds until fragrant—don’t let it burn or it’ll turn bitter. Reduce the heat to low and stir in the condensed cream of mushroom soup, milk, sour cream, Worcestershire sauce, pepper, salt, and garlic powder. Whisk everything together until smooth and well combined. Let it simmer gently for 2-3 minutes, stirring frequently, until the sauce thickens slightly. Taste it and adjust the seasoning if needed. The sauce should be creamy, savory, and just a little tangy from the sour cream.
Step 4: Assemble the Casserole
Preheat your oven to 350°F. Add the blanched green beans to the skillet with the sauce and stir gently until every bean is coated. Pour the mixture into your greased 9×13-inch baking dish and spread it into an even layer. At this point, you can cover the dish with foil and refrigerate it for up to 2 days if you’re making it ahead. If you’re baking it right away, sprinkle the crispy shallots evenly over the top and bake for 20-25 minutes until the casserole is bubbly and heated through. If you’re baking it from the fridge, add 10-15 minutes to the baking time and uncover for the last 10 minutes so the top gets golden.
Step 5: Rest and Serve
Let the casserole rest for 5 minutes after it comes out of the oven. This helps the sauce set up so it doesn’t run all over the plate. Sprinkle any remaining crispy shallots on top for extra crunch, then serve warm. The shallots will soften slightly in the oven, which is why I like to reserve a handful to add right before serving. That way you get the best of both worlds—creamy casserole with a crunchy topping.
Cooking Tips & Techniques
I’ve made this casserole at least 15 times now, and I’ve learned a few things the hard way. Let me save you some trouble.
Don’t skip the blanching step. I know it’s tempting to just toss the beans in raw, but blanching does two things: it sets the color so you don’t end up with sad, olive-green beans, and it starts the cooking process so the casserole doesn’t need to bake as long. The first time I made this, I skipped this step because I was in a hurry. The beans came out unevenly cooked and the sauce was watery. Never again.
Pat those beans dry. This is probably the most important tip I can give you. After blanching, water clings to the beans. If you don’t dry them thoroughly, that extra water will thin out your sauce and you’ll end up with a soupy casserole. I use a clean kitchen towel and roll the beans up in it to absorb the moisture. It takes 30 seconds and makes a huge difference.
Fry the shallots in batches. If you crowd the pan, the temperature drops and the shallots steam instead of fry. You’ll end up with soggy, greasy shallots instead of crispy ones. I do mine in 3-4 batches, giving the oil time to come back up to temperature between each batch. Yes, it takes a little longer, but the results are worth it.
Make extra shallots. Seriously, make double what you think you need. They’re amazing on salads, soups, and pretty much everything else. I keep a jar of them in my pantry for snacking and garnishing. They stay crispy for about a week if stored in an airtight container.
Watch the oven time. Every oven runs a little differently. Start checking your casserole at 18 minutes if you’re baking it right away, and at 30 minutes if it’s coming straight from the fridge. You want it bubbly around the edges and heated through in the center. If the top is browning too quickly, cover it loosely with foil for the last 10 minutes.
Variations & Adaptations
One of the things I love about this recipe is how flexible it is. Here are some ways to make it your own:
Dietary Variations
Gluten-Free Version: Use gluten-free all-purpose flour for dredging the shallots, and make sure your cream of mushroom soup is certified gluten-free (Pacific Foods makes a good one). The rest of the ingredients are naturally gluten-free. I’ve tested this version for a friend with celiac disease and it turned out perfectly.
Dairy-Free Version: Swap the butter for vegan butter or olive oil, use unsweetened oat milk or almond milk instead of whole milk, and replace the sour cream with a dairy-free version like Tofutti or Kite Hill. The texture will be slightly less creamy, but the flavor is still fantastic.
Vegan Version: Follow the dairy-free instructions and use a vegan cream of mushroom soup (or make your own with mushrooms, vegetable broth, and cashew cream). The crispy shallots are already vegan! My neighbor’s daughter is vegan and she always requests this for family dinners.
Flavor Twists
Cheesy Green Bean Casserole: Stir in 1 cup of shredded cheddar cheese into the sauce before assembling. The cheese adds richness and makes it even more kid-friendly. I do this sometimes when I want to turn it into a main dish.
Bacon Lover’s Version: Cook 4 slices of bacon until crispy, crumble them, and sprinkle over the top along with the shallots. My husband says this is the only way to make green bean casserole. I think he’s just biased toward bacon.
Mushroom-Packed Version: Sauté 8 ounces of sliced cremini mushrooms with the onions for extra earthy flavor. This is great if you’re serving mushroom lovers or want to make the dish feel more substantial.
Seasonal Adaptations
In summer, I use fresh green beans from the farmer’s market and add a handful of cherry tomatoes to the sauce. In fall, I swap the shallots for crispy sage leaves—just fry fresh sage leaves in the oil for about 30 seconds until they’re crispy. It gives the casserole a cozy, Thanksgiving vibe that’s totally different but equally delicious.
Serving & Storage Suggestions
This casserole is incredibly versatile when it comes to serving. Here’s how to get the most out of it:
Serving Temperature: Serve it hot out of the oven, but let it rest for 5 minutes first. This allows the sauce to thicken up so it doesn’t run all over the plate. I like to garnish with a few extra crispy shallots right before serving for that fresh crunch.
What to Serve With It: This casserole pairs beautifully with roasted turkey or chicken, but it’s also great alongside a simple roast chicken or even meatloaf. For a vegetarian meal, serve it with mashed potatoes and a side of cranberry sauce. It’s also fantastic as part of a holiday spread alongside stuffing and sweet potato casserole.
Storing Leftovers: Let the casserole cool completely, then cover it tightly with foil or transfer it to an airtight container. It will keep in the refrigerator for up to 4 days. The flavors actually meld together and get even better overnight, so don’t be afraid of leftovers.
Freezing Instructions: You can freeze this casserole for up to 3 months. Assemble it completely (without the crispy shallots on top), wrap it tightly in plastic wrap and then foil, and freeze. When you’re ready to eat, thaw it overnight in the refrigerator, then bake as directed, adding the crispy shallots during the last 10 minutes of baking. The texture is slightly softer after freezing, but it’s still delicious.
Reheating Tips: The best way to reheat leftovers is in the oven at 350°F for 15-20 minutes, covered with foil. This helps the sauce reheat evenly without drying out. If you’re in a hurry, you can microwave individual portions, but the shallots will lose their crunch. I usually reheat in the oven and add a few fresh crispy shallots on top to revive that texture.
Nutritional Information & Benefits
Here’s the nutritional breakdown for one serving (about 1 cup, based on 8 servings):
| Nutrient | Amount |
|---|---|
| Calories | 215 |
| Total Fat | 12g |
| Saturated Fat | 5g |
| Cholesterol | 18mg |
| Sodium | 520mg |
| Total Carbohydrates | 22g |
| Dietary Fiber | 4g |
| Sugars | 6g |
| Protein | 5g |
| Vitamin A | 15% DV |
| Vitamin C | 20% DV |
| Calcium | 6% DV |
| Iron | 8% DV |
This casserole is a solid source of fiber and vitamins from the green beans, which are packed with vitamin C, vitamin K, and antioxidants. The shallots add a dose of quercetin, a compound that supports immune health. While this isn’t a low-calorie dish, it’s a reasonable indulgence—especially when you consider that it’s a vegetable side dish that actually gets kids to eat their greens. I feel good about serving this to my family because I know they’re getting real nutrition along with the comfort-food satisfaction.
Dietary Considerations: This recipe contains dairy and gluten. For allergen-friendly versions, see the variations section above. It’s nut-free as written and can be made egg-free (the original recipe doesn’t call for eggs).
Conclusion
This kid-approved make-ahead green bean casserole with crispy shallots has become a staple in my kitchen, and I think it deserves a spot in yours too. It’s one of those rare recipes that checks every box: it’s easy enough for a weeknight, fancy enough for a holiday table, and affordable enough to make any night feel special. The fact that my kids actually ask for seconds? That’s the real magic.
I love how forgiving this recipe is. You can tweak it a hundred different ways and it still turns out delicious. Add cheese, skip the cheese, use bacon, go vegetarian—it all works. That’s the kind of recipe I want in my back pocket for busy days and big gatherings alike.
Give it a try and let me know how it goes! Drop a comment below and tell me what variations you tried, or tag me in your photos if you share them online. I love seeing how you make this recipe your own. And if you’ve got picky eaters at home, I’d especially love to hear if this one won them over. Happy cooking, friends!
Frequently Asked Questions
Can I use canned green beans instead of fresh?
You can, but I don’t recommend it. Canned green beans are already cooked and much softer, so they’ll turn mushy in the casserole. If you’re in a pinch, use frozen green beans instead—they hold up much better and have a fresher flavor. Just thaw them first and pat them dry so they don’t water down the sauce.
How far ahead can I make this casserole?
You can assemble the casserole (without the crispy shallots on top) up to 2 days in advance. Keep it covered in the refrigerator. When you’re ready to bake, add the shallots and bake for 30-35 minutes at 350°F, or until bubbly and heated through. If you want to prep even further ahead, you can blanch the green beans and fry the shallots up to 3 days in advance and store them separately.
Why did my sauce turn out watery?
This usually happens for one of two reasons: either the green beans weren’t dried properly after blanching, or the casserole wasn’t baked long enough. Make sure you pat the beans completely dry before adding them to the sauce. Also, let the casserole bake until it’s bubbly around the edges—this helps the sauce thicken up. If you’re making it ahead, you might need to add 5-10 minutes to the baking time since it’s starting from cold.
Can I make this in a slow cooker?
I don’t recommend it for this recipe. The slow cooker creates too much moisture, which makes the sauce thin and the green beans mushy. If you really want to use a slow cooker, sauté the onions and garlic first, then combine everything except the crispy shallots in the slow cooker. Cook on low for 2-3 hours, then add the shallots just before serving. The texture won’t be quite the same, but it’ll still taste good.
How do I keep the crispy shallots from getting soggy?
The key is to add them at the right time. If you’re baking the casserole right away, sprinkle the shallots on top for the last 10 minutes of baking rather than at the beginning. If you’re making it ahead, store the shallots separately in an airtight container at room temperature and add them just before serving. I always make extra shallots and keep a handful aside to sprinkle on top right before the casserole hits the table—that way everyone gets that perfect crunch.
Pin This Recipe!
Kid-Approved Make-Ahead Green Bean Casserole with Crispy Shallots

A creamy, kid-friendly green bean casserole with a crispy shallot topping that can be assembled up to two days in advance. Perfect for Thanksgiving or busy weeknights, this budget-friendly dish gets kids to ask for seconds.
- Prep Time: 20 minutes
- Cook Time: 25 minutes
- Total Time: 45 minutes
- Yield: 8 servings 1x
- Category: Side Dish
- Cuisine: American
Ingredients
- 2 pounds fresh green beans, trimmed and cut into 2-inch pieces (or 2 pounds frozen green beans, thawed)
- 2 tablespoons unsalted butter
- 1 medium yellow onion, finely diced
- 3 cloves garlic, minced
- 1 can (10.5 ounces) condensed cream of mushroom soup
- 1/2 cup whole milk
- 1/4 cup sour cream
- 1 teaspoon Worcestershire sauce
- 1/2 teaspoon black pepper
- 1/4 teaspoon salt
- 1/4 teaspoon garlic powder (optional)
- 4 large shallots, thinly sliced into rings
- 1/2 cup all-purpose flour
- 1/2 teaspoon salt (for shallots)
- 1/4 teaspoon black pepper (for shallots)
- 1/2 cup vegetable oil (for frying)
Instructions
- Fill a large pot with water and bring to a rolling boil. Add a generous tablespoon of salt. Fill a large bowl with ice water. Drop the trimmed green beans into the boiling water and cook for exactly 3 minutes. Transfer immediately to the ice water bath. Let sit for 2-3 minutes, then drain well and pat dry.
- While beans cool, peel and slice shallots into thin rings (about 1/8-inch thick). In a shallow bowl, whisk together flour, 1/2 teaspoon salt, and 1/4 teaspoon pepper. Toss shallot rings in flour mixture until lightly coated. Shake off excess.
- Heat vegetable oil in a small skillet over medium-high heat until shimmering (about 350°F). Working in batches, fry shallots for 2-3 minutes until golden brown and crispy. Transfer to a paper towel-lined plate and sprinkle with a tiny pinch of salt while warm. Set aside.
- In a large skillet, melt butter over medium heat. Add diced onion and cook for 4-5 minutes until soft and translucent. Add minced garlic and cook for 30 seconds until fragrant. Reduce heat to low and stir in cream of mushroom soup, milk, sour cream, Worcestershire sauce, pepper, 1/4 teaspoon salt, and garlic powder. Whisk until smooth. Simmer gently for 2-3 minutes, stirring frequently, until sauce thickens slightly. Adjust seasoning to taste.
- Preheat oven to 350°F. Add blanched green beans to the skillet with the sauce and stir gently until coated. Pour mixture into a greased 9×13-inch baking dish and spread evenly. If making ahead, cover with foil and refrigerate for up to 2 days. If baking immediately, sprinkle crispy shallots evenly over the top and bake for 20-25 minutes until bubbly and heated through. If baking from fridge, add 10-15 minutes to baking time and uncover for last 10 minutes.
- Let casserole rest for 5 minutes before serving. Sprinkle any remaining crispy shallots on top for extra crunch. Serve warm.
Notes
Don’t skip blanching the green beans—it keeps them bright green and crisp-tender. Pat beans thoroughly dry after blanching to avoid watery sauce. Fry shallots in batches to ensure crispiness. Make extra shallots as they are great on salads and soups. If baking from the fridge, add 10-15 minutes to baking time. Reserve some crispy shallots to add just before serving for maximum crunch.
Nutrition
- Serving Size: 1 cup
- Calories: 215
- Sugar: 6
- Sodium: 520
- Fat: 12
- Saturated Fat: 5
- Carbohydrates: 22
- Fiber: 4
- Protein: 5
Keywords: green bean casserole, make-ahead, kid-friendly, Thanksgiving side dish, crispy shallots, easy casserole


