I was standing in the baking aisle of our local grocery store last October, staring at a display of orange sprinkles and candy eyeballs, when a woman next to me let out this frustrated little sigh. She was holding a box of pre-made cupcakes and a tube of store-bought frosting, looking completely defeated. “My kid wants spider web cupcakes for the school party,” she said, mostly to herself, “but I don’t have time for all that piping nonsense.” And just like that, I was eight years old again, sitting at my Aunt Maggie’s worn kitchen table, watching her turn a box of chocolate cake mix into something that looked like it belonged in a bakery window. She wasn’t a fancy baker, not even close. But she had this way of making things feel special without making a big production out of it. I remember the way she’d laugh when the spider web lines came out crooked, saying, “Spiders don’t make perfect webs anyway, honey. That’s what makes them real.” I’d completely forgotten about those afternoons until that moment in the grocery store. And honestly, I think that’s why I keep coming back to this recipe for Quick Chocolate Spider Web Cupcakes. It’s not about perfection. It’s about getting something fun on the table (or in a lunchbox) without losing your mind. Maybe you’ve been there too, standing in a store aisle, trying to figure out how to pull off something cute when you’re already running on empty.
Why You’ll Love This Recipe
Let me tell you why these Quick Chocolate Spider Web Cupcakes have become my go-to for Halloween season, and why they’ll probably become yours too. I’ve tested this approach about a dozen times, tweaking the frosting consistency and the piping technique, and I can say with confidence that this is the easiest way to get that wow factor without the stress.
- Ready in 30 Minutes: From box to table in under half an hour. That’s faster than a trip to the bakery, and honestly, way more fun.
- Pantry-Friendly Ingredients: You probably already have everything you need. No special trips to a specialty baking store, no weird ingredients you’ll never use again.
- Perfect for School Parties & Potlucks: These things disappear fast. I brought a batch to my son’s classroom party last year, and the teacher asked for the recipe before the kids even finished singing.
- Kid-Approved, Adult-Loved: The chocolate cake is moist and rich, and the frosting situation is just sweet enough without being overwhelming. Even the adults sneak seconds.
- Foolproof Spider Web Design: Here’s the thing — the spider web pattern actually looks better when it’s a little messy. So if you’re not a steady-handed piper, you’re in luck. Imperfection is part of the charm.
What makes this recipe different from all the other spider web cupcake tutorials out there? It’s the timing. Most recipes have you make frosting from scratch, then chill it, then pipe it, then chill it again. Who has time for that on a Tuesday night? This version uses a simple buttercream that comes together in five minutes and pipes beautifully at room temperature. No waiting, no stressing, just frosting and go.
I mean, these are the kind of cupcakes that make people close their eyes after the first bite. That soft, chocolatey crumb with that creamy, sweet frosting on top — it’s simple comfort food, but it feels like a celebration. And on a busy weeknight in October, when you’re juggling homework and costumes and that one kid who’s already asking about next year’s Halloween plans, a little celebration goes a long way.
What Ingredients You Will Need
This recipe uses simple, straightforward ingredients that come together to create something genuinely impressive. No fancy stuff here, just good, honest baking ingredients that do exactly what they’re supposed to do.
- For the Cupcakes:
- 1 box chocolate cake mix (I prefer Duncan Hines or Betty Crocker for consistent results)
- 3 large eggs (room temperature if you remember, straight from the fridge works too)
- 1/2 cup vegetable oil (adds moisture without changing the flavor)
- 1 1/4 cups water (or substitute brewed coffee for a deeper chocolate taste)
- 1 teaspoon vanilla extract (a little extra flavor boost)
- For the Buttercream Frosting:
- 1 cup unsalted butter, softened (I use Land O’Lakes, but any brand works)
- 4 cups powdered sugar (sifted if you’re feeling fancy, but I rarely bother)
- 2-3 tablespoons heavy cream or whole milk (start with 2, add more if needed)
- 1 teaspoon vanilla extract
- 1/4 teaspoon salt (trust me on this — it balances the sweetness)
- For the Spider Web Design:
- 1/2 cup white chocolate chips or white candy melts
- 1 tablespoon coconut oil or vegetable shortening (helps the chocolate flow smoothly)
- Black gel food coloring (the tube kind, not liquid — liquid will seize the chocolate)
- Optional: candy spiders or plastic spider rings for decoration
A quick note on ingredient selection: when you’re picking your chocolate cake mix, look for one that says “extra moist” or “fudge” on the box. Those tend to produce a denser, richer crumb that holds up well to the frosting. And for the white chocolate, don’t use the cheap baking chips that have that waxy coating — they don’t melt smoothly. I’ve learned this the hard way, and let me tell you, nothing ruins a spider web faster than lumpy chocolate.
If you’re dairy-free, you can swap the butter for a good vegan butter stick (I like Miyoko’s) and use oat milk instead of heavy cream. The texture will be slightly different, but the spider web effect still works beautifully.
Equipment Needed
You don’t need a professional bakery setup for these Quick Chocolate Spider Web Cupcakes. Here’s what you’ll actually use:
- Standard 12-cup muffin tin (non-stick is nice, but any kind works with liners)
- Paper cupcake liners (I use the basic white ones, but Halloween-themed ones are fun)
- Large mixing bowl and whisk (or a hand mixer if you’re feeling energetic)
- Electric hand mixer or stand mixer (for the frosting — you can do it by hand, but your arm will hate you)
- Piping bag or a sturdy zip-top bag (the freezer-strength ones work best)
- Small piping tip (a round tip, size 3 or 4, or just snip the corner of the bag)
- Small microwave-safe bowl (for melting the white chocolate)
- Toothpick or small skewer (for dragging the spider web lines)
- Cooling rack (a wire rack is ideal, but a clean cutting board works in a pinch)
I’ve made these cupcakes with everything from a fancy Wilton piping set to a sandwich bag with the corner snipped off, and honestly, the results are almost identical. If you don’t have a piping tip, just cut a tiny hole in the corner of your zip-top bag. It’s not fancy, but it works. Just make sure the hole is small — you can always make it bigger, but you can’t make it smaller once you’ve cut too much.
Preparation Method
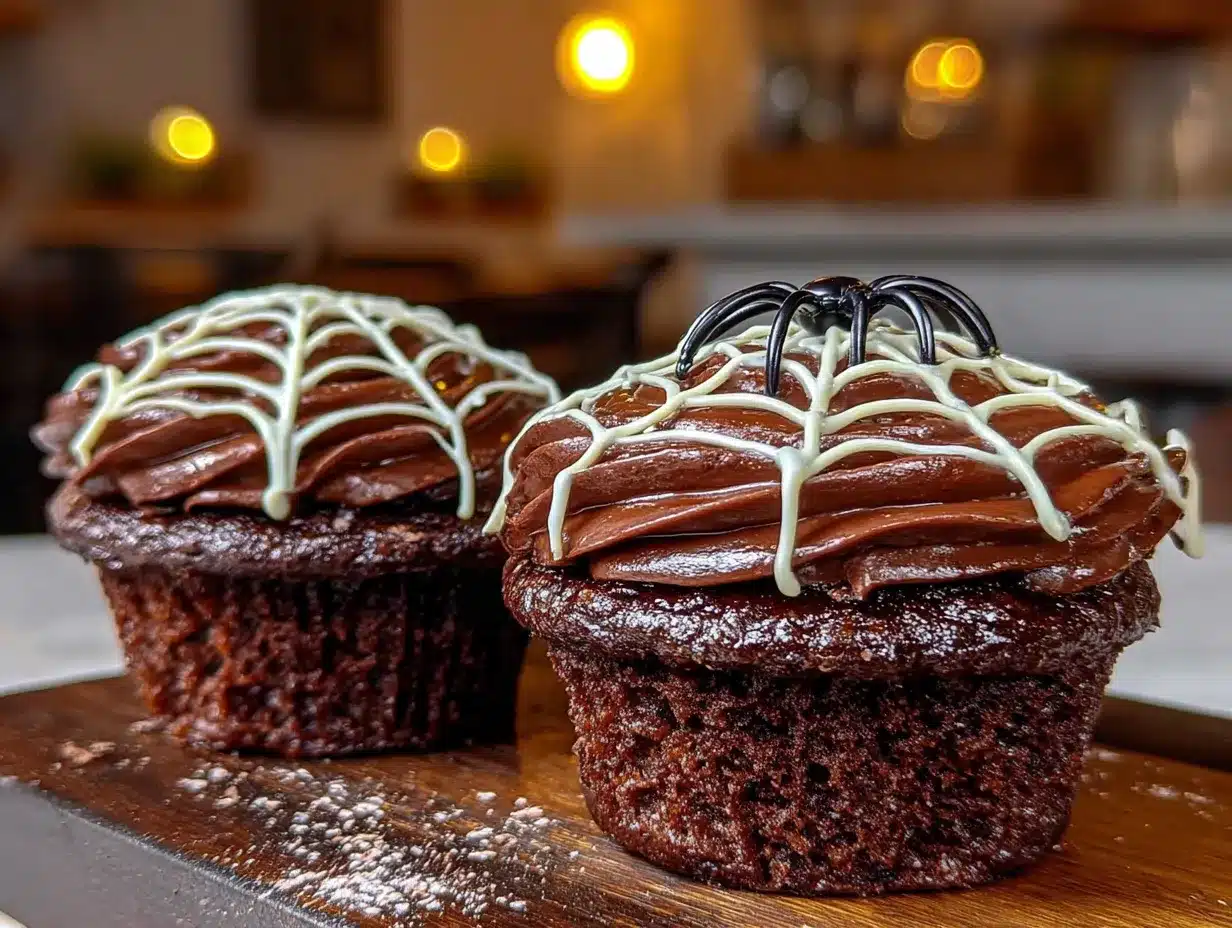
Alright, let’s get these Quick Chocolate Spider Web Cupcakes made. I’ve broken this down into steps that even a tired Tuesday-night baker can handle.
- Preheat your oven to 350°F (175°C). Line your muffin tin with paper liners. Here’s a tip I learned the hard way: if you’re using Halloween-themed liners, check that they’re not too thin. Some of the fun printed ones are flimsy and will peel away from the cake. Double them up if you’re worried.
- Make the cupcake batter. In a large bowl, combine the chocolate cake mix, eggs, oil, water, and vanilla extract. Mix until just combined — about 30 seconds on low speed with a hand mixer, or about 50 strokes with a whisk. Don’t overmix. A few small lumps are totally fine. Overmixing will give you tough, dense cupcakes, and nobody wants that.
- Fill the liners. Fill each liner about two-thirds full. I use a cookie scoop for this — it keeps things consistent and less messy. You should get exactly 12 cupcakes from one box mix, maybe 13 if you’re generous with the scooping.
- Bake for 18-22 minutes. Start checking at 18 minutes. The cupcakes are done when a toothpick inserted into the center comes out clean or with just a few moist crumbs. The tops should spring back when you gently press them. Let them cool in the pan for 5 minutes, then transfer to a wire rack to cool completely. And I mean completely — warm frosting on warm cupcakes is a recipe for a melty mess.
- Make the buttercream. While the cupcakes are cooling, beat the softened butter in a large bowl with an electric mixer until smooth and creamy, about 2 minutes. Gradually add the powdered sugar, one cup at a time, beating on low speed. Add the vanilla and salt, then add the heavy cream one tablespoon at a time until the frosting reaches a spreadable consistency. It should be thick enough to hold its shape but soft enough to spread easily.
- Frost the cupcakes. Once the cupcakes are completely cool, spread a generous layer of buttercream on each one. You want a smooth, even surface for the spider web design. I use an offset spatula for this, but the back of a spoon works fine too. Don’t worry about making it perfect — the spider web will cover most of it anyway.
- Melt the white chocolate. Place the white chocolate chips and coconut oil in a small microwave-safe bowl. Microwave in 20-second intervals, stirring between each, until completely smooth. Be careful not to overheat — white chocolate burns easily and gets grainy. If it seizes, you’ll have to start over, so take it slow.
- Color the chocolate. Add a small amount of black gel food coloring to the melted white chocolate. Stir until you get a deep, dark gray or black color. You might need to add more than you think — white chocolate takes a lot of coloring to turn truly dark.
- Create the spider web design. Transfer the black chocolate to a piping bag or zip-top bag with a tiny hole snipped in the corner. Starting from the center of each cupcake, pipe a spiral outward toward the edge. Don’t worry if it’s not perfect — imperfect spirals actually look more like real spider webs. Then, using a toothpick or small skewer, drag lines from the center outward through the spiral, creating the web effect. Space them evenly around the cupcake — I usually do 6 to 8 drag lines per cupcake.
- Add the spider. If you’re using candy spiders or plastic rings, place one on each cupcake while the chocolate is still wet so it sticks. If you don’t have spiders, you can pipe a small spider shape with the remaining black chocolate — just make a small circle for the body and a few tiny legs.
- Let the chocolate set. Allow the spider web design to set for about 10-15 minutes at room temperature. If you’re in a hurry, pop them in the fridge for 5 minutes. Just don’t leave them in there too long, or condensation will form and ruin the design.
One thing I’ve learned the hard way: don’t try to pipe the spider web design on warm cupcakes. The buttercream will be too soft, and the chocolate lines will sink in and disappear. Patience is not my strong suit either, but trust me on this one.
Cooking Tips & Techniques
After making these Quick Chocolate Spider Web Cupcakes more times than I care to count, I’ve picked up a few tricks that make the process smoother and the results better.
The frosting consistency is everything. If your buttercream is too stiff, it will pull up the cupcake crumbs when you spread it. If it’s too soft, the spider web lines will sink in. The sweet spot is a texture that’s thick but spreadable — think peanut butter at room temperature. If you accidentally make it too thin, just add more powdered sugar, one tablespoon at a time, until it firms up.
Here’s a mistake I made the first time: I tried to pipe the spider web design directly onto the cupcakes without letting the frosting set first. The black chocolate just pooled and sank into the buttercream, and I ended up with gray, muddy-looking blobs instead of webs. Give the frosted cupcakes about 10 minutes at room temperature before you pipe the design. It makes a huge difference.
Multitasking is your friend. While the cupcakes are baking, clean up your mixing bowls and get your frosting ingredients ready. While the cupcakes are cooling, make the buttercream. While the buttercream is sitting, melt the white chocolate. Stacking these tasks will save you a solid 15 minutes, which on a busy weeknight is basically a miracle.
For consistent spider web lines, practice on a piece of parchment paper first. Pipe a few spirals and drag some lines through them until you get a feel for the motion. It takes about 30 seconds, and it saves you from ruining a cupcake. Not that I’ve ever done that. More than once.
If your white chocolate seizes (gets thick and grainy), don’t panic. Add a teaspoon of coconut oil and stir vigorously. Sometimes that brings it back. If it doesn’t, just melt a fresh batch and be more careful with the microwave this time. We’ve all been there.
Variations & Adaptations
One of the best things about this recipe is how easy it is to adapt. Here are some variations I’ve tried and loved:
- Gluten-Free Version: Use a gluten-free chocolate cake mix. I’ve had good luck with King Arthur Flour’s gluten-free chocolate cake mix. Everything else stays the same. Just check that your white chocolate chips are certified gluten-free if that’s a concern.
- Dairy-Free Version: Swap the butter for vegan butter, use oat milk or almond milk in the frosting, and use dairy-free white chocolate chips. Enjoy Life makes a good one. The texture will be slightly different, but the spider web effect works just as well.
- Vanilla Cupcake Base: Not a chocolate fan? Use a vanilla or yellow cake mix instead. The white chocolate spider web will show up even more clearly on a lighter background. I’ve done this for a friend who doesn’t do chocolate, and they were a hit.
- Color Variations: Instead of black spider webs, try purple or orange for a different Halloween vibe. Just use white chocolate and add the corresponding gel food coloring. Neon green spider webs are also pretty cool, if a little unsettling.
- Different Frosting: If buttercream isn’t your thing, cream cheese frosting works beautifully here. The tanginess cuts through the sweetness of the chocolate and the white chocolate. Just make sure it’s thick enough to hold the spider web design.
- Mini Cupcakes: These work great as mini cupcakes for parties. Bake for about 12-14 minutes instead of 18-22, and use a smaller piping tip for the spider web design. They’re perfect for little hands.
My personal favorite variation? I add a teaspoon of cinnamon to the cake batter and a pinch of cayenne pepper to the buttercream. It gives the cupcakes a subtle warmth that pairs beautifully with the chocolate. I call them “Spicy Spider Webs,” and they always get people talking.
Serving & Storage Suggestions
These Quick Chocolate Spider Web Cupcakes are best served at room temperature. The buttercream is soft and creamy, the cake is moist, and the spider web design has a slight snap when you bite into it. If they’ve been in the fridge, let them sit out for about 20 minutes before serving.
For a Halloween party spread, arrange them on a black or orange platter. Add some fake spider webs (the stretchy kind from the dollar store) around the edges for extra effect. A few plastic spiders scattered on the platter complete the spooky look. I’ve also served them alongside a bowl of spooky Halloween punch for a complete themed dessert table.
Storage is straightforward. Keep them in an airtight container at room temperature for up to 3 days. The spider web design will start to soften after the first day, but they’ll still look good. If you need to store them longer, pop them in the fridge for up to 5 days. Just bring them back to room temperature before serving.
These cupcakes also freeze beautifully. Place them in a single layer in a freezer-safe container, with parchment paper between layers. Freeze for up to 3 months. Thaw in the refrigerator overnight, then bring to room temperature before serving. The spider web design might lose a bit of its crispness, but the flavor will still be spot-on.
One thing I’ve noticed: the flavors actually develop a bit overnight. The chocolate gets deeper, and the frosting melds with the cake in a really lovely way. So if you can make them a day ahead, go for it. Just add the spider decorations right before serving so they stay crisp.
Nutritional Information & Benefits
Let’s be real — these are cupcakes, not health food. But here’s the breakdown so you know what you’re working with. Per cupcake (based on 12 servings):
- Calories: approximately 380-420
- Total Fat: 22g
- Saturated Fat: 12g
- Carbohydrates: 48g
- Sugar: 35g
- Protein: 4g
- Sodium: 320mg
Now, the good news: chocolate cake mix is often fortified with iron and B vitamins, so there’s that. And if you use the coffee substitution in the batter, you’re getting a small dose of antioxidants. The butter in the frosting provides vitamin A and healthy fats. It’s not a salad, but it’s not the worst thing you could eat either.
If you’re watching your sugar intake, you can reduce the powdered sugar in the frosting to 3 cups instead of 4. The frosting will be less sweet and a little softer, but it still works. I’ve done this for a friend with gestational diabetes, and she said they were still delicious.
For those with allergies: these cupcakes contain wheat, dairy, and eggs. The white chocolate may contain soy lecithin. If you’re using the gluten-free or dairy-free variations mentioned above, those concerns are addressed. Always check labels if you’re serving someone with severe allergies.
Conclusion
These Quick Chocolate Spider Web Cupcakes are proof that you don’t need hours in the kitchen or a pastry chef’s skills to create something genuinely impressive. They come together in about 30 minutes, use ingredients you probably already have, and the spider web design is actually more forgiving than you’d think. That imperfect, slightly wonky web? That’s what makes it look real.
I love this recipe because it reminds me that Halloween doesn’t have to be about perfection. It’s about the fun of creating something together, the excitement on a kid’s face when they see a spider on their cupcake, and the simple joy of biting into a soft, chocolatey treat after a long day. Whether you’re making these for a school party, a potluck, or just because it’s Tuesday and you want something fun, they deliver every time.
So go ahead and give them a try. Customize them however you like — different colors, different cake flavors, different spiders. Make them your own. And when you do, come back and tell me how they turned out. I’d love to hear about your spider web adventures. Drop a comment below or tag me in your photos. Happy Halloween, and happy baking!
Frequently Asked Questions
Can I use homemade chocolate cake instead of a box mix?
Absolutely. If you have a favorite chocolate cake recipe, use it. Just make sure it’s a sturdy enough cake to hold the frosting and spider web design. Lighter, fluffier cakes might not hold up as well.
How far in advance can I make these cupcakes?
You can bake the cupcakes and make the frosting up to 2 days ahead. Store the unfrosted cupcakes in an airtight container and the frosting in the fridge. Bring the frosting to room temperature and give it a quick whip before using. Assemble the spider web design on the day you’re serving for the best results.
My white chocolate seized and got grainy. What did I do wrong?
You probably overheated it. White chocolate is sensitive — it burns easily and seizes when it gets too hot or comes into contact with water. Next time, microwave in 15-second intervals instead of 20, and stir thoroughly between each. If it does seize, try adding a teaspoon of coconut oil and stirring vigorously. Sometimes that saves it.
Can I use regular food coloring instead of gel?
I wouldn’t recommend it. Liquid food coloring will seize the white chocolate because of the water content. Gel food coloring is concentrated and has a much lower water content, so it mixes in smoothly. You can find it at any grocery store or craft store in the baking aisle.
How do I get the spider web design to look more defined?
Make sure your white chocolate mixture is on the thicker side — not runny, but still pourable. If it’s too thin, the lines will blur together. Also, let the frosted cupcakes sit for 10 minutes before piping the design so the buttercream has a chance to set slightly. And use a light hand when dragging the toothpick through the spiral — you want to move the chocolate, not dig into the frosting.
Pin This Recipe!
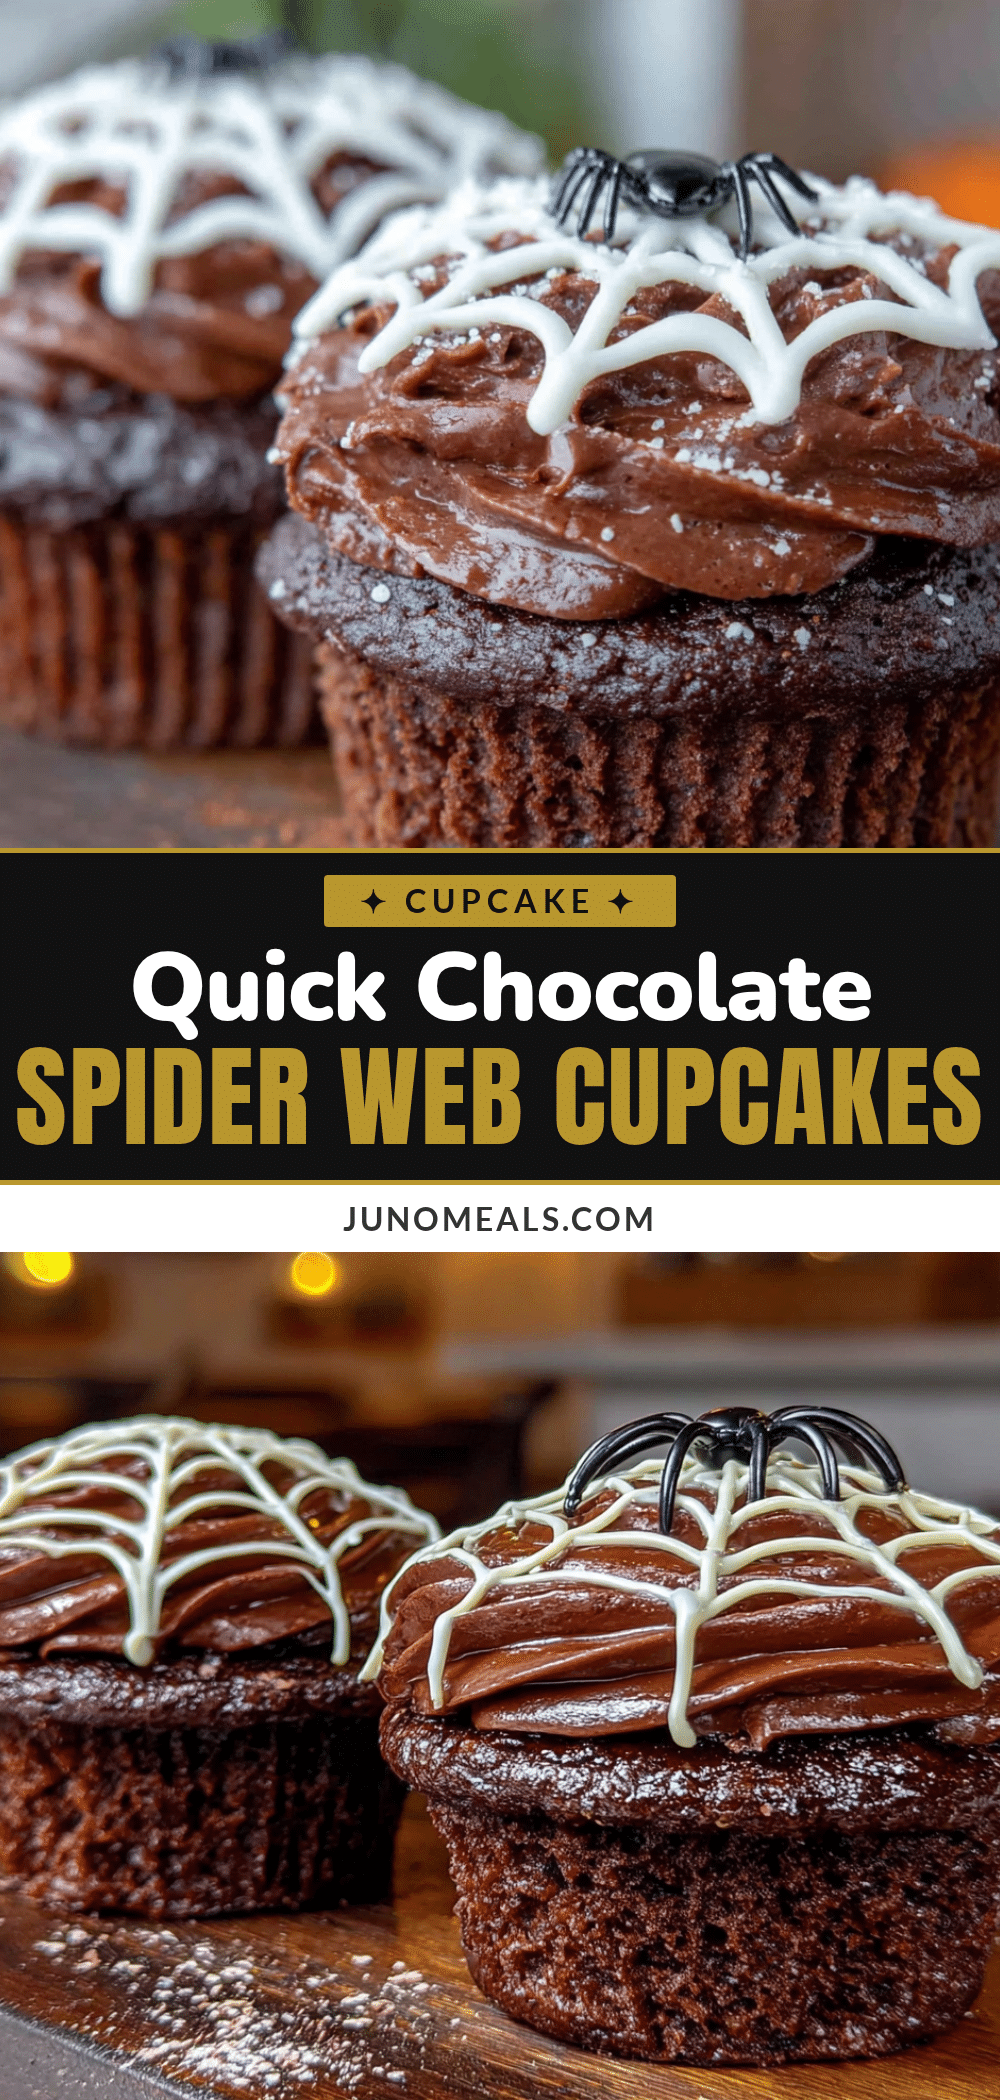
Quick Spider Web Cupcakes: Easy Halloween Dessert
These Quick Chocolate Spider Web Cupcakes come together in about 30 minutes using a box cake mix and simple buttercream. The foolproof spider web design actually looks better when it’s a little messy, making this the perfect last-minute Halloween treat for school parties, potlucks, or a fun weeknight baking project.
- Prep Time: 15 minutes
- Cook Time: 20 minutes
- Total Time: 35 minutes
- Yield: 12 servings 1x
- Category: Dessert
- Cuisine: American
Ingredients
- 1 box chocolate cake mix (preferably extra moist or fudge)
- 3 large eggs (room temperature or straight from the fridge)
- 1/2 cup vegetable oil
- 1 1/4 cups water (or brewed coffee for deeper chocolate flavor)
- 1 teaspoon vanilla extract
- 1 cup unsalted butter, softened
- 4 cups powdered sugar (sifted if desired)
- 2–3 tablespoons heavy cream or whole milk
- 1 teaspoon vanilla extract
- 1/4 teaspoon salt
- 1/2 cup white chocolate chips or white candy melts
- 1 tablespoon coconut oil or vegetable shortening
- Black gel food coloring
- Optional: candy spiders or plastic spider rings for decoration
Instructions
- Preheat your oven to 350°F (175°C). Line a 12-cup muffin tin with paper liners. If using Halloween-themed liners, double them up if they seem thin.
- In a large bowl, combine the chocolate cake mix, eggs, oil, water, and vanilla extract. Mix until just combined, about 30 seconds on low speed with a hand mixer or about 50 strokes with a whisk. Do not overmix; a few small lumps are fine.
- Fill each liner about two-thirds full using a cookie scoop for consistency. You should get 12-13 cupcakes.
- Bake for 18-22 minutes, starting to check at 18 minutes. Cupcakes are done when a toothpick inserted into the center comes out clean or with a few moist crumbs, and the tops spring back when gently pressed. Cool in the pan for 5 minutes, then transfer to a wire rack to cool completely.
- While cupcakes cool, make the buttercream: Beat softened butter in a large bowl with an electric mixer until smooth and creamy, about 2 minutes. Gradually add powdered sugar, one cup at a time, beating on low speed. Add vanilla and salt, then add heavy cream one tablespoon at a time until the frosting reaches a spreadable consistency (thick but spreadable, like peanut butter at room temperature).
- Once cupcakes are completely cool, spread a generous layer of buttercream on each one, creating a smooth, even surface. Let frosted cupcakes sit at room temperature for about 10 minutes to allow the frosting to set slightly.
- Melt white chocolate chips and coconut oil in a small microwave-safe bowl in 20-second intervals, stirring between each, until completely smooth. Be careful not to overheat.
- Add a small amount of black gel food coloring to the melted white chocolate and stir until you get a deep, dark gray or black color. You may need more coloring than expected.
- Transfer the black chocolate to a piping bag or zip-top bag with a tiny hole snipped in the corner. Starting from the center of each cupcake, pipe a spiral outward toward the edge. Then, using a toothpick or small skewer, drag lines from the center outward through the spiral, creating the web effect. Space 6-8 drag lines evenly around each cupcake.
- If using candy spiders or plastic rings, place one on each cupcake while the chocolate is still wet so it sticks. Alternatively, pipe a small spider shape with remaining black chocolate.
- Let the spider web design set for 10-15 minutes at room temperature, or 5 minutes in the refrigerator if in a hurry. Do not refrigerate longer to avoid condensation.
Notes
For best results, ensure cupcakes are completely cool before frosting to prevent melting. The spider web design actually looks better when slightly imperfect. If white chocolate seizes, add a teaspoon of coconut oil and stir vigorously. For dairy-free version, use vegan butter, oat milk, and dairy-free white chocolate. For gluten-free version, use a gluten-free chocolate cake mix. Cupcakes can be stored in an airtight container at room temperature for up to 3 days, or refrigerated for up to 5 days. They also freeze well for up to 3 months.
Nutrition
- Serving Size: 1 cupcake
- Calories: 400
- Sugar: 35
- Sodium: 320
- Fat: 22
- Saturated Fat: 12
- Carbohydrates: 48
- Fiber: 1
- Protein: 4
Keywords: Halloween cupcakes, spider web cupcakes, chocolate cupcakes, easy Halloween dessert, quick cupcakes, buttercream frosting, kid-friendly Halloween treat


