This was supposed to be a batch of apple cider donuts. I had the donut pan greased, the apple cider reduced on the stove, and I was feeling pretty good about myself. Then my phone rang—my sister, needing a last-minute favor—and by the time I got back to the kitchen, the cider had reduced to almost nothing. I mean, it was practically syrup. And the donut pan? I’d grabbed the mini muffin tin by mistake. Honestly, I stood there staring at the stove for a full minute, ready to just order pizza and call it a day. But I’d promised my neighbor I’d bring something to her book club that night, and I couldn’t show up empty-handed. So I poured that concentrated, sticky apple cider into a bowl of flour and butter and sugar, crossed my fingers, and scooped it onto a baking sheet. What came out of the oven was nothing like the donuts I’d planned—and so much better. The edges were perfectly crisp, the centers were impossibly chewy, and that concentrated cider flavor? It hit you right in the back of the throat like the last sip of autumn. I drizzled a quick cinnamon glaze over the top, and let me tell you, I nearly ate the whole batch before the book club even started. Maybe you’ve been there—staring at a kitchen fail, ready to throw in the towel. That’s exactly why I keep making these cookies. They remind me that sometimes the best recipes come from the moments when everything goes wrong.
Why You’ll Love These Chewy Apple Cider Cookies
I’ve tested this recipe more times than I care to admit, tweaking the flour ratio, the chilling time, the glaze consistency. After about the fifth batch, my husband started hiding the cookie jar from me. But you know what? It was worth every single test because these cookies are genuinely foolproof now. Here’s why they’ll become your go-to for every fall gathering:
- Intense Apple Flavor: By reducing the apple cider down to a syrup, you get that deep, tangy-sweet apple taste without watering down the dough. No bland cookies here.
- Perfectly Chewy Texture: The combination of melted butter and an extra egg yolk gives these cookies that bakery-style chew that lasts for days. They stay soft in the center with slightly crispy edges.
- Simple Pantry Ingredients: You probably have everything except the apple cider already in your kitchen. No weird extracts or hard-to-find specialty flours.
- Make-Ahead Friendly: The dough chills for at least two hours, which means you can prep it the night before your party and just bake them off when guests arrive. Fresh cookies with zero stress.
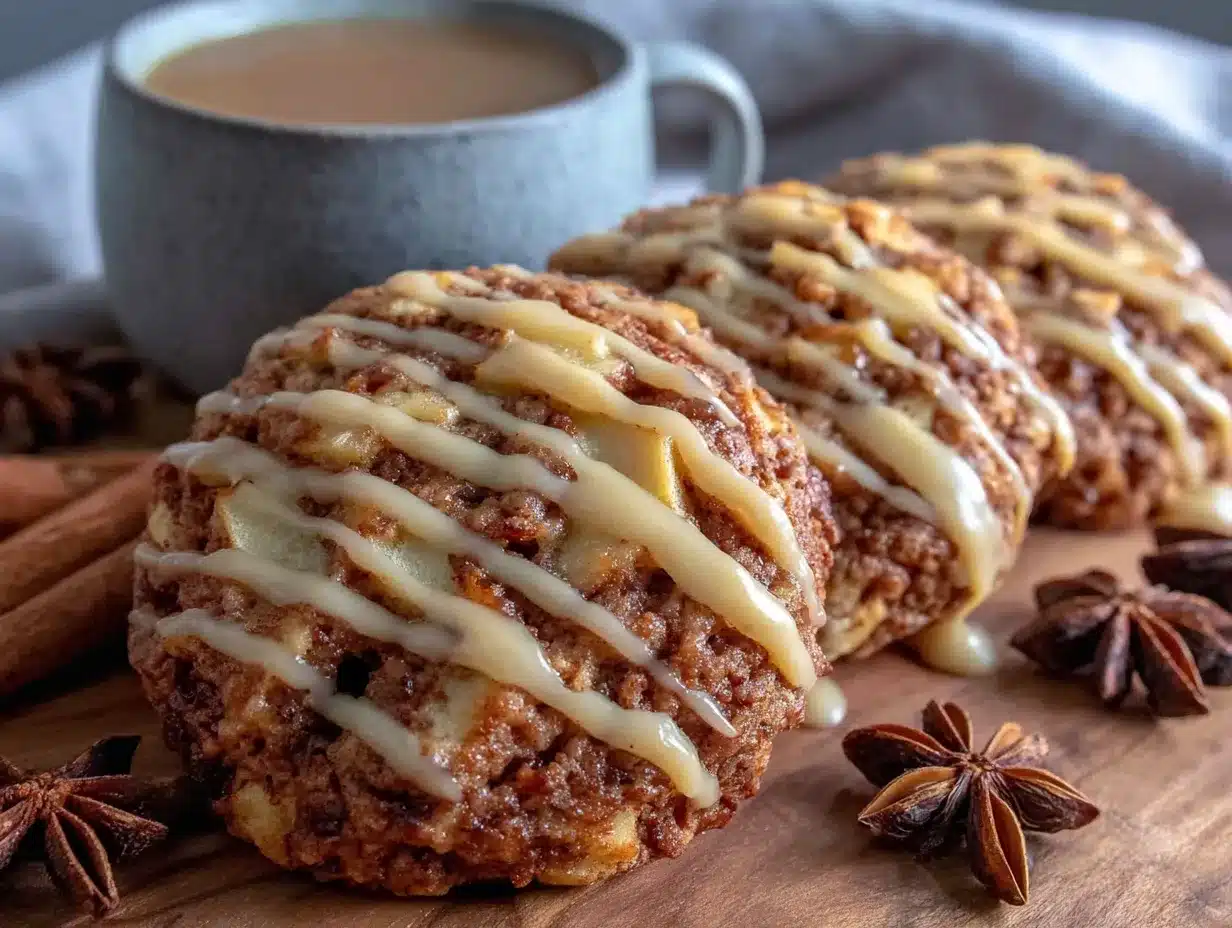
- Show-Stopping Presentation: That dreamy cinnamon glaze sets into a crackly, white ribbon on top of each cookie. They look like something from a fancy bakery, but you made them in your own kitchen.
These cookies are the kind that make people close their eyes after the first bite. I brought them to a Friendsgiving last year, and someone actually asked me if I’d bought them from a specialty shop. I just smiled and said “nope, happy accident.” Honestly, that’s the best compliment a home baker can get.
Ingredients You Will Need
This recipe uses simple, wholesome ingredients that work together to create that intense apple flavor and perfectly chewy texture. Most of these are pantry staples, so you might only need to pick up fresh apple cider.
For the Cookies
- 1 cup (240 ml) apple cider — Use fresh, unfiltered cider if you can find it. You’ll reduce this down to about ¼ cup of concentrated syrup, so don’t skip this step. (I like using local orchard cider for the best flavor.)
- 2 ½ cups (310 g) all-purpose flour — Spoon and level your flour for the most accurate measurement. Too much flour makes dense cookies.
- 1 teaspoon baking soda
- ½ teaspoon baking powder
- ½ teaspoon salt
- 2 teaspoons ground cinnamon — This warm spice pairs beautifully with the apple cider. I prefer Saigon cinnamon for its stronger, sweeter flavor.
- ½ teaspoon ground nutmeg — Freshly grated if you have it, but pre-ground works fine too.
- ¼ teaspoon ground cloves — Just a pinch for depth. Don’t overdo it or it’ll overpower the apple.
- ¾ cup (170 g) unsalted butter, melted and slightly cooled — Melting the butter instead of creaming it gives these cookies that signature chewiness.
- 1 cup (200 g) packed light brown sugar — Brown sugar adds moisture and a subtle molasses flavor that complements the apple cider.
- ¼ cup (50 g) granulated sugar
- 1 large egg, room temperature
- 1 large egg yolk, room temperature — The extra yolk adds richness and helps with that chewy texture.
- 2 teaspoons vanilla extract
For the Cinnamon Glaze
- 1 ½ cups (180 g) powdered sugar, sifted
- 2-3 tablespoons apple cider — Use the same cider you reduced for the cookies. (Start with 2 tablespoons and add more if needed.)
- 1 teaspoon ground cinnamon
- ¼ teaspoon vanilla extract
- Pinch of salt — This balances the sweetness and makes the flavors pop.
Equipment Needed
You don’t need anything fancy to make these cookies, which is part of why I love this recipe. Here’s what you’ll need:
- Small saucepan — For reducing the apple cider. A 1-quart saucepan works perfectly.
- Large mixing bowls — One for dry ingredients, one for wet ingredients.
- Whisk — For combining your dry ingredients and smoothing out the glaze.
- Rubber spatula — For folding the wet and dry ingredients together without overmixing.
- Baking sheets — I recommend using light-colored metal baking sheets for even browning. Dark sheets can cause the bottoms to burn.
- Parchment paper or silicone baking mats — These prevent sticking and make cleanup a breeze. I’ve ruined a batch by forgetting parchment—don’t be like me.
- Cookie scoop (about 1.5 tablespoons) — This ensures evenly sized cookies that bake at the same rate. A 1.5-tablespoon scoop is my go-to for this recipe.
- Wire cooling rack — Essential for letting the glaze set properly without pooling on the bottom.
- Small whisk or fork — For mixing the glaze. A fork works in a pinch if you don’t want to dirty another whisk.
If you don’t have a cookie scoop, just use two spoons to portion the dough. And if you’re using dark baking sheets, reduce your oven temperature by 25°F to prevent over-browning. Trust me on that one—I learned the hard way.
Preparation Method
- Reduce the apple cider: Pour 1 cup of apple cider into your small saucepan and bring it to a boil over medium-high heat. Once boiling, reduce the heat to medium-low and let it simmer gently for about 15-20 minutes, stirring occasionally. You’re looking for it to reduce down to about ¼ cup—it should be thick, syrupy, and deeply amber in color. Watch it closely toward the end because it can go from perfect to burnt in seconds. Remove from heat and let it cool completely. (I usually set it aside while I prep the other ingredients.)
- Whisk dry ingredients: In a large bowl, whisk together the all-purpose flour, baking soda, baking powder, salt, cinnamon, nutmeg, and cloves. Make sure everything is evenly distributed—nobody wants a pocket of baking soda in their cookie.
- Mix wet ingredients: In a separate large bowl, whisk together the melted butter, brown sugar, and granulated sugar until smooth and well combined. The mixture should look like wet sand. Add the whole egg, egg yolk, vanilla extract, and the cooled apple cider syrup. Whisk vigorously until the mixture is smooth and glossy, about 1 minute. The batter should be thick and smell incredibly fragrant at this point.
- Combine wet and dry: Pour the wet ingredients into the dry ingredients and fold together with a rubber spatula. Use a gentle hand here—mix just until you no longer see streaks of flour. Overmixing will develop the gluten and make your cookies tough instead of tender and chewy. The dough will be quite soft and slightly sticky, which is exactly what you want.
- Chill the dough: Cover the bowl with plastic wrap and refrigerate for at least 2 hours, or up to 3 days. This step is non-negotiable. Chilling solidifies the butter, prevents the cookies from spreading too much, and allows the flavors to meld together. I’ve tried baking these without chilling, and they turned into flat, sad puddles. Learn from my mistakes.
- Preheat and prepare: When you’re ready to bake, preheat your oven to 350°F (175°C). Line two baking sheets with parchment paper or silicone mats.
- Scoop and shape: Use your cookie scoop to portion the dough into 1.5-tablespoon balls. Place them about 2 inches apart on the prepared baking sheets—these cookies do spread a bit. I like to roll each ball gently between my palms to make them perfectly round, but that’s optional.
- Bake: Bake one sheet at a time in the center rack for 10-12 minutes. The edges should be set and lightly golden, but the centers will still look slightly soft and underdone. That’s okay—they’ll continue to set as they cool. For chewier cookies, bake on the shorter side; for slightly crispier edges, go for 12 minutes.
- Cool: Let the cookies cool on the baking sheet for 5 minutes. This allows them to firm up enough to transfer without breaking. Then move them to a wire cooling rack to cool completely before glazing. Warm cookies will make the glaze run right off, so be patient.
- Make the glaze: While the cookies cool, whisk together the sifted powdered sugar, 2 tablespoons of apple cider, cinnamon, vanilla extract, and a pinch of salt. Whisk until smooth and glossy. If the glaze is too thick to drizzle, add the remaining tablespoon of cider, one teaspoon at a time, until you reach a pourable consistency. It should be thick enough to hold its shape but thin enough to drizzle.
- Glaze the cookies: Once the cookies are completely cool, drizzle the glaze over the tops using a spoon or a small whisk. I like to go back and forth in a zigzag pattern for that rustic, bakery-style look. Let the glaze set for about 30 minutes before serving.
Cooking Tips & Techniques
After about a dozen test batches—some glorious, some disastrous—I’ve gathered a few tricks that make these cookies foolproof every single time.
Don’t rush the cider reduction. I know it’s tempting to crank up the heat and get it done faster, but medium-low heat is your friend here. High heat can scorch the sugars in the cider, leaving you with a bitter, burnt flavor instead of that sweet-tart apple concentrate. Keep an eye on it, stir occasionally, and pull it off the heat the moment it reaches that syrupy consistency.
Chill the dough overnight if you can. Two hours is the minimum, but I’ve found that 24 hours in the fridge produces the most flavorful, perfectly textured cookies. The flour has time to fully hydrate, the spices meld into every bite, and the dough becomes much easier to handle. I often make the dough the night before a party and bake fresh cookies the next day—it’s a game-changer for hosting.
Use a cookie scoop for uniform sizing. This isn’t just about aesthetics—evenly sized cookies bake at the same rate. If you have some small and some large, you’ll end up with burnt edges and underdone centers. A 1.5-tablespoon scoop costs about five bucks and is worth every penny.
Watch your oven temperature. Ovens run hot or cold more often than you’d think. I learned this when my first batch came out looking like hockey pucks. An inexpensive oven thermometer will save you from that heartbreak. If your cookies are browning too fast on the bottom, try stacking two baking sheets together for insulation.
Let the glaze set completely. I know it’s hard to wait, but if you stack or cover these cookies before the glaze is fully dry, you’ll end up with a sticky, smeared mess. Give it a full 30 minutes on the wire rack, or pop them in the fridge for 15 minutes if you’re in a hurry.
Variations & Adaptations
One of the best things about this recipe is how easily it adapts to different tastes and dietary needs. Here are some variations I’ve tried and loved:
Gluten-Free Version: Substitute the all-purpose flour with a 1:1 gluten-free baking flour blend that contains xanthan gum. I’ve had great results with Bob’s Red Mill Gluten-Free 1-to-1 Baking Flour. The texture will be slightly more tender, but the chewy factor is still there. Just make sure to chill the dough for at least 3 hours—gluten-free dough needs that extra time to firm up.
Dairy-Free Adaptation: Swap the unsalted butter with a high-quality vegan butter stick (not the spreadable kind in a tub). I like using Miyoko’s or Country Crock Plant Butter. The cookies will spread a tiny bit more, so chill them well. For the glaze, use dairy-free milk like oat or almond milk instead of the extra cider, or just increase the cider slightly.
Spiced Apple Chunk Variation: After you chill the dough, fold in ½ cup of finely diced fresh apple (about 1 small apple, peeled and chopped into tiny pieces). I like using Honeycrisp or Granny Smith for their firm texture and tartness. This adds little bursts of fresh apple throughout the cookie. Just be aware that the moisture from the apple might make the dough slightly stickier—chill for an extra 30 minutes before scooping.
Maple Cinnamon Twist: Replace ¼ cup of the brown sugar with ¼ cup of pure maple syrup. Reduce the apple cider by an extra tablespoon to compensate for the added liquid. The maple flavor pairs beautifully with the apple and cinnamon, giving these cookies a cozy, cabin-in-the-woods vibe. I made this version for a fall camping trip and they were gone in minutes.
Pumpkin Spice Variation: Replace the cinnamon, nutmeg, and cloves with 2 teaspoons of pumpkin pie spice blend. It’s a subtle shift, but it gives the cookies that familiar fall flavor profile that everyone loves. Perfect for Thanksgiving cookie platters.
Serving & Storage Suggestions
These cookies are best served at room temperature, about 30 minutes after the glaze has set. The glaze will be crackly on top, the edges will be slightly crisp, and the centers will be soft and chewy. They’re absolutely perfect with a hot cup of coffee, a mug of spiced tea, or—my personal favorite—a glass of cold milk.
If you’re hosting a gathering, arrange them on a large wooden board or a white platter for that beautiful contrast. The white glaze against the golden cookie is seriously photogenic. I like to sprinkle a tiny pinch of flaky sea salt over the glaze while it’s still wet—it sounds weird, but trust me, that salty-sweet combo is addictive.
Storage Instructions: Store these cookies in an airtight container at room temperature for up to 5 days. Place a sheet of parchment paper between layers to prevent the glaze from sticking. They actually get even better on day two—the flavors continue to meld and the texture softens slightly.
Freezer Instructions: You can freeze the baked, unglazed cookies for up to 3 months. Just place them in a single layer on a baking sheet, freeze until solid, then transfer to a freezer-safe bag. When you’re ready to serve, thaw them at room temperature, then whip up a fresh batch of glaze. Alternatively, you can freeze the cookie dough balls for up to 3 months. Scoop them onto a baking sheet, freeze until solid, then transfer to a freezer bag. Bake directly from frozen, adding 2-3 minutes to the baking time.
Reheating Tip: If you want that fresh-from-the-oven experience, pop a cookie in the microwave for about 10 seconds. It’ll soften the center and make the glaze slightly gooey. Dangerous but delicious.
Nutritional Information & Benefits
These cookies are definitely a treat, but they do offer a few surprising benefits. Here’s the estimated nutritional breakdown per cookie (based on 24 cookies):
- Calories: 165
- Total Fat: 7g
- Saturated Fat: 4g
- Carbohydrates: 25g
- Sugar: 16g
- Protein: 2g
- Fiber: 1g
- Sodium: 95mg
Apple cider is rich in antioxidants called polyphenols, which can help reduce inflammation and support heart health. The cinnamon in both the cookies and the glaze has been shown to help regulate blood sugar levels and has anti-inflammatory properties. And while these aren’t health food by any stretch, using real apple cider instead of artificial flavoring means you’re getting actual fruit nutrients in every bite.
For those with dietary concerns, these cookies contain gluten, dairy, and eggs. I’ve included gluten-free and dairy-free variations above if you need to adapt them. They’re also nut-free as written, making them a safe option for school events or gatherings where allergies might be a concern.
Conclusion
Look, I’m not going to tell you these cookies will change your life. But honestly? They kind of changed mine. That moment when I thought I’d ruined dinner and instead stumbled onto the best fall cookie I’ve ever made—it reminded me why I love being in the kitchen. It’s not about perfection. It’s about the happy accidents, the messy counters, and the way a simple cookie can make a whole room full of people stop talking and just enjoy the moment.
These chewy apple cider cookies with that dreamy cinnamon glaze are my favorite way to welcome autumn. They’re forgiving, they’re adaptable, and they taste like everything cozy about this season. I’d love to hear how they turn out for you—did you try any of the variations? Did your family fight over the last one? Drop a comment below and let me know. And if you’re feeling generous, share this recipe with a friend who needs a little kitchen magic in their life.
Happy baking, friend. May your cider reduce perfectly and your cookies always come out chewy.
Frequently Asked Questions
Can I use apple juice instead of apple cider?
Technically yes, but the flavor won’t be as rich or complex. Apple juice is more clarified and less tangy than cider. If you’re in a pinch, use apple juice and add an extra ½ teaspoon of cinnamon to compensate for the missing depth. Just know that the cookies won’t have that same authentic apple cider punch.
Why did my cookies spread too much?
This usually happens for one of three reasons: the dough wasn’t chilled long enough, the butter was too warm when you mixed it, or your baking soda is old. Make sure you chill the dough for at least 2 hours, let your melted butter cool to room temperature before mixing, and check that your baking soda is less than 6 months old. You can test it by dropping a pinch into vinegar—if it fizzes vigorously, it’s still active.
Can I make the glaze ahead of time?
Yes, but it’s best made fresh. The glaze will keep in an airtight container in the refrigerator for up to 3 days. When you’re ready to use it, let it come to room temperature and whisk it well. You might need to add a teaspoon of cider or milk to thin it back to drizzling consistency, as it tends to thicken as it sits.
How do I know when the apple cider is reduced enough?
You’re looking for the cider to reduce from 1 cup down to about ¼ cup. It should be thick enough to coat the back of a spoon, and it will look like a dark amber syrup. Watch for small bubbles that get slower and larger as it thickens. When you tilt the pan, the syrup should move slowly. If you’re unsure, pull it off the heat slightly early—you can always simmer it a bit more, but you can’t un-burn it.
Can I double this recipe?
Absolutely. This recipe doubles beautifully. Just make sure you have a large enough bowl for the dough, and don’t try to cram all the cookies onto one baking sheet. They need space to spread. You’ll also need to reduce the cider in two separate batches unless you have a very large saucepan—reducing too much at once takes significantly longer and can be uneven. Stick to 1 cup batches for the reduction step.
Pin This Recipe!

Best Easy Chewy Apple Cider Cookies with Cinnamon Glaze

These chewy apple cider cookies with a dreamy cinnamon glaze are a happy accident turned into the perfect fall treat. Intense apple flavor, perfectly chewy texture, and simple pantry ingredients make them a go-to for every autumn gathering.
- Prep Time: 20 minutes
- Cook Time: 12 minutes
- Total Time: 2 hours 32 minutes (includes chilling)
- Yield: 24 cookies 1x
- Category: Dessert
- Cuisine: American
Ingredients
- 1 cup (240 ml) apple cider
- 2 ½ cups (310 g) all-purpose flour
- 1 teaspoon baking soda
- ½ teaspoon baking powder
- ½ teaspoon salt
- 2 teaspoons ground cinnamon
- ½ teaspoon ground nutmeg
- ¼ teaspoon ground cloves
- ¾ cup (170 g) unsalted butter, melted and slightly cooled
- 1 cup (200 g) packed light brown sugar
- ¼ cup (50 g) granulated sugar
- 1 large egg, room temperature
- 1 large egg yolk, room temperature
- 2 teaspoons vanilla extract
- 1 ½ cups (180 g) powdered sugar, sifted
- 2–3 tablespoons apple cider
- 1 teaspoon ground cinnamon
- ¼ teaspoon vanilla extract
- Pinch of salt
Instructions
- Reduce the apple cider: Pour 1 cup of apple cider into a small saucepan and bring to a boil over medium-high heat. Reduce heat to medium-low and simmer gently for 15-20 minutes, stirring occasionally, until reduced to about ¼ cup and syrupy. Remove from heat and let cool completely.
- Whisk dry ingredients: In a large bowl, whisk together flour, baking soda, baking powder, salt, cinnamon, nutmeg, and cloves.
- Mix wet ingredients: In a separate large bowl, whisk together melted butter, brown sugar, and granulated sugar until smooth. Add whole egg, egg yolk, vanilla extract, and cooled apple cider syrup. Whisk until smooth and glossy, about 1 minute.
- Combine wet and dry: Pour wet ingredients into dry ingredients and fold together with a rubber spatula until just combined. Do not overmix. Dough will be soft and slightly sticky.
- Chill the dough: Cover bowl with plastic wrap and refrigerate for at least 2 hours, or up to 3 days.
- Preheat and prepare: When ready to bake, preheat oven to 350°F (175°C). Line two baking sheets with parchment paper or silicone mats.
- Scoop and shape: Use a cookie scoop (1.5 tablespoons) to portion dough into balls. Place 2 inches apart on prepared baking sheets. Optionally, roll each ball gently between palms.
- Bake: Bake one sheet at a time on center rack for 10-12 minutes. Edges should be set and lightly golden, centers still slightly soft. Cool on baking sheet for 5 minutes, then transfer to wire rack to cool completely.
- Make the glaze: Whisk together sifted powdered sugar, 2 tablespoons apple cider, cinnamon, vanilla extract, and pinch of salt until smooth. Add more cider if needed to reach drizzling consistency.
- Glaze the cookies: Once cookies are completely cool, drizzle glaze over tops using a spoon or small whisk. Let glaze set for about 30 minutes before serving.
Notes
Chill dough for at least 2 hours; overnight is best. Use fresh, unfiltered apple cider for best flavor. Watch cider reduction closely to avoid burning. For gluten-free, use a 1:1 gluten-free flour blend. For dairy-free, use vegan butter. Cookies can be stored in an airtight container at room temperature for up to 5 days. Freeze unglazed baked cookies or dough balls for up to 3 months.
Nutrition
- Serving Size: 1 cookie
- Calories: 165
- Sugar: 16
- Sodium: 95
- Fat: 7
- Saturated Fat: 4
- Carbohydrates: 25
- Fiber: 1
- Protein: 2
Keywords: apple cider cookies, chewy cookies, fall cookies, cinnamon glaze, easy cookie recipe


