This was supposed to be a batch of pumpkin bread. I had the loaf pan greased, the oven preheated, and my three-year-old “helping” by dumping half a bag of chocolate chips onto the floor. But somewhere between wrestling a toddler and answering a phone call from my mom, I grabbed the wrong measuring cup. Instead of the 1-cup measure I needed for the flour, I grabbed the quarter-cup. The batter was way too thin, and I was already running late for a playdate. Honestly, I almost just threw it all in the trash. I mean, what else could I do with a soupy mess of pumpkin and sugar?
Let me tell you, desperation makes you creative. I stared at that sad, liquid batter and thought, “Well, maybe I can just spoon it onto a sheet pan and see what happens.” So I did. I dropped spoonfuls onto a parchment-lined baking sheet, popped them in the oven, and crossed my fingers. Twenty minutes later, I pulled out the softest, most perfectly spiced little cookie pucks I had ever seen. They weren’t crispy. They weren’t cakey. They were this perfect, pillowy thing in between. My kid, who usually snubs anything orange, grabbed one before it was even cool and asked for another. That was the moment I knew I had accidentally stumbled onto something special.
Maybe you’ve been there—standing in a messy kitchen, convinced you’ve ruined dinner or dessert, only to have the universe hand you a happy little surprise. That’s exactly how these kid-approved pumpkin cookies with cream cheese icing were born. They’ve become our go-to fall treat, and I keep making them because they’re just that good. No stress, no fancy techniques, just a sweet accident that worked out better than the original plan ever could have.
Why You’ll Love This Recipe
I’ve tested this recipe more times than I can count, and every single batch has been a winner. Here is why these cookies will become a staple in your kitchen:
- Super Easy for Busy Days: You can mix the batter in one bowl, no electric mixer needed. From start to finish, you are looking at about 25 minutes. Perfect for those after-school snack attacks or a last-minute dessert for a potluck.
- Simple Pantry Ingredients: No weird stuff here. Canned pumpkin, basic flour, sugar, butter, and a tub of cream cheese. You probably have most of this in your kitchen right now.
- Kid-Approved (Seriously!): My own little guy is a tough critic. He pushes broccoli around his plate and sniffs at anything green. But these cookies? He asks for them by name. They are soft, sweet, and not too “pumpkin-y” for picky palates.
- Crowd-Pleaser for All Ages: I brought a plate to a neighborhood gathering last fall, and they vanished in minutes. Adults love them with coffee, kids love them as a treat. No one can resist that cream cheese icing.
- Perfect for Fall Baking: These cookies just taste like October. The warm spices, the creamy icing, the cozy feeling they bring—it is comfort food at its simplest and best.
What makes these cookies different from every other pumpkin cookie out there? It is the texture. Most pumpkin cookies turn out either too cakey or too dense. These are perfectly soft, almost like a little pumpkin cloud. The secret is not overmixing the batter and using just the right amount of pumpkin. And that cream cheese icing? It is tangy, sweet, and sets up just firm enough to hold its shape without getting hard. This isn’t just another version of a pumpkin cookie—it is my best version, perfected through trial and error in a real kitchen with a toddler underfoot.
What Ingredients You Will Need
This recipe uses simple, wholesome ingredients to deliver bold flavor and satisfying texture without the fuss. Most of these are pantry staples, so you won’t need a special trip to the store.
For the Pumpkin Cookies
- 1 cup (240g) canned pumpkin puree – Make sure it is pure pumpkin, not pumpkin pie filling. I personally prefer Libby’s brand for its consistent texture and flavor.
- 1/2 cup (115g) unsalted butter, softened – Let it sit out for about 30 minutes. If you are in a rush, you can microwave it for 10 seconds, but be careful not to melt it.
- 1 cup (200g) granulated sugar – Regular white sugar works best here. It gives the cookies a nice, tender crumb.
- 1 large egg, room temperature – Cold eggs can make the batter seize up. Just set it on the counter with the butter.
- 1 teaspoon vanilla extract – Pure vanilla adds a warm depth, but imitation works fine too.
- 1 1/2 cups (190g) all-purpose flour – Spoon and level your flour for the best results. Scooping straight from the bag can pack in too much.
- 1 teaspoon baking soda – This helps the cookies rise a bit and stay soft.
- 1/2 teaspoon baking powder – Adds a little extra lift.
- 1/2 teaspoon salt – Balances the sweetness and enhances the spices.
- 1 1/2 teaspoons pumpkin pie spice – If you don’t have this, mix 1/2 teaspoon cinnamon, 1/4 teaspoon nutmeg, 1/4 teaspoon ginger, and 1/8 teaspoon cloves.
- 1/2 teaspoon ground cinnamon – Because you can never have too much cinnamon.
For the Cream Cheese Icing
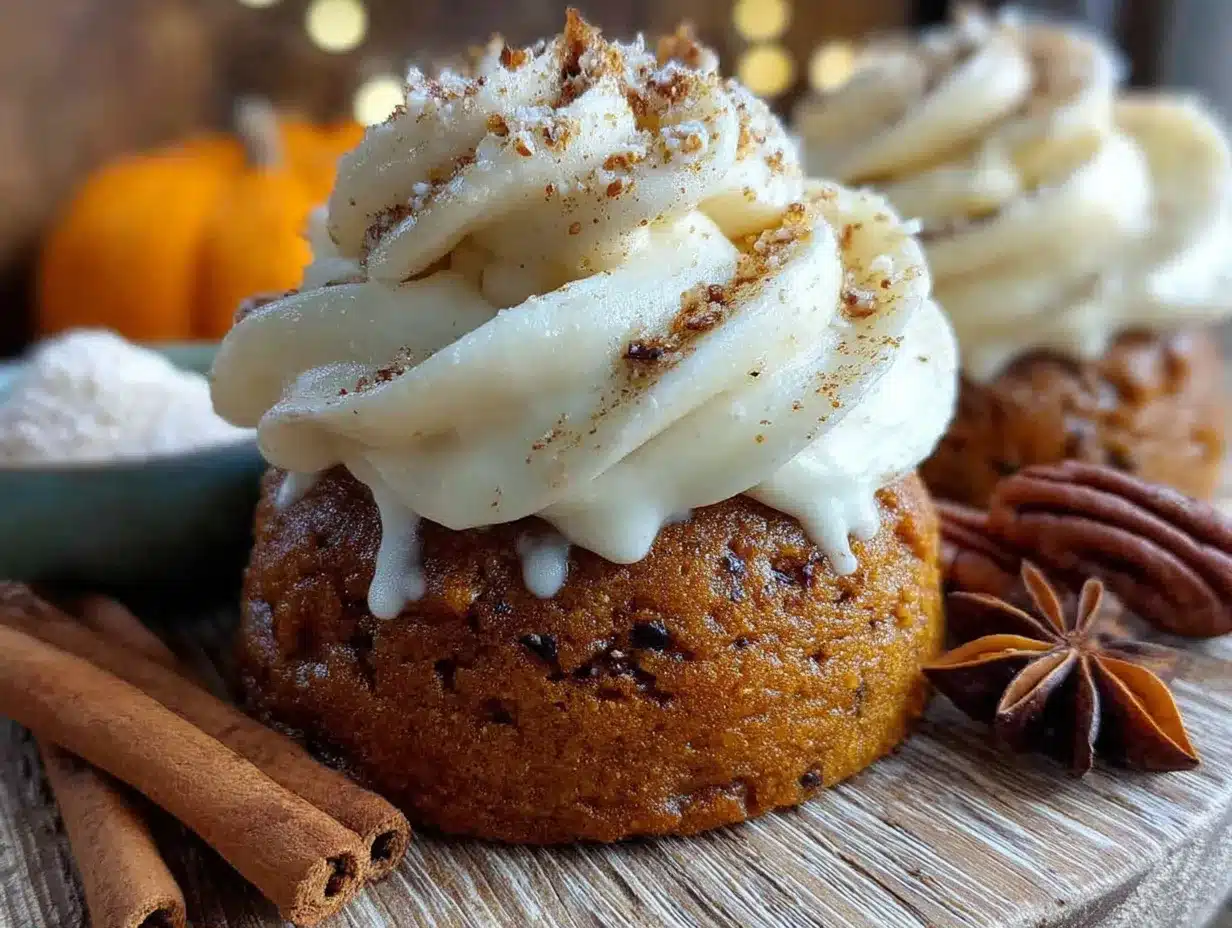
- 4 oz (115g) cream cheese, softened – Full-fat cream cheese gives the best texture and tang. Let it soften completely to avoid lumps.
- 2 tablespoons unsalted butter, softened – Adds richness and helps the icing come together smoothly.
- 1 cup (120g) powdered sugar – Sift it if you want an extra-smooth icing, but I usually skip that step and it turns out fine.
- 1/2 teaspoon vanilla extract – A must for that classic cream cheese frosting flavor.
- 1-2 tablespoons milk – Use as needed to thin the icing to your desired consistency. Whole milk works best, but any kind will do.
Ingredient Tips and Substitutions
If you want to make these cookies gluten-free, swap the all-purpose flour with a 1:1 gluten-free baking blend. I have used Bob’s Red Mill with great results. For a dairy-free version, use plant-based butter and a dairy-free cream cheese alternative. The texture will be slightly different, but still delicious. And if you are out of pumpkin pie spice, don’t worry—just use extra cinnamon and a pinch of nutmeg. The cookies will still taste amazing.
Equipment Needed
You don’t need a fancy kitchen to make these cookies. Here is what I use every time:
- Large mixing bowl – Any bowl will do, but a wide one makes mixing easier.
- Wooden spoon or silicone spatula – No electric mixer required. A good old-fashioned spoon works perfectly.
- Baking sheet – A standard 13×18 inch sheet pan. I like using light-colored metal pans for even baking.
- Parchment paper or silicone baking mat – This prevents sticking and makes cleanup a breeze. I always use parchment paper.
- Cookie scoop or tablespoon – A 1.5-tablespoon scoop gives you uniform cookies. If you don’t have one, just use a regular spoon.
- Cooling rack – Letting the cookies cool completely on a rack prevents soggy bottoms and helps the icing set.
- Small bowl for icing – For mixing the cream cheese icing.
- Spatula or butter knife – For spreading the icing. A small offset spatula is my favorite tool for this job.
If you don’t have a cooling rack, no problem. Just let the cookies cool on the baking sheet for a few minutes, then transfer them to a plate. They will cool fine, just a bit slower. And if you don’t have a cookie scoop, a regular tablespoon works—just try to make each dollop roughly the same size so they bake evenly.
Preparation Method
Let’s get baking! Follow these steps, and you will have a batch of perfect pumpkin cookies in no time.
- Preheat your oven to 350°F (175°C). Line two baking sheets with parchment paper or silicone mats. This is important—the cookies will stick without it.
- Cream the butter and sugar. In a large mixing bowl, beat the softened butter and granulated sugar together with a wooden spoon or spatula until light and fluffy. This takes about 2 minutes. Scrape down the sides of the bowl halfway through. The mixture should look pale and a bit grainy.
- Add the wet ingredients. Beat in the pumpkin puree, egg, and vanilla extract. Mix until everything is well combined. The batter will look a little loose and shiny—that is totally normal. Don’t panic if it seems thinner than a typical cookie dough.
- Combine the dry ingredients. In a separate small bowl, whisk together the flour, baking soda, baking powder, salt, pumpkin pie spice, and cinnamon. This ensures the leavening agents and spices are evenly distributed.
- Mix the dry into the wet. Gradually add the dry ingredients to the wet mixture, stirring gently with your spoon or spatula. Mix just until no streaks of flour remain. Overmixing will make the cookies tough. The final dough will be soft and slightly sticky, like a thick muffin batter.
- Scoop the cookies. Using a 1.5-tablespoon cookie scoop or a regular spoon, drop rounded spoonfuls of dough onto the prepared baking sheets. Space them about 2 inches apart—they will spread a little but not too much. I usually fit 12 cookies per sheet.
- Bake the cookies. Place one sheet in the preheated oven and bake for 10-12 minutes. The cookies are done when the edges are set and the tops look dry. The centers will still be soft. Do not overbake, or they will lose that pillowy texture. My oven runs hot, so I check at 10 minutes.
- Cool the cookies. Let the cookies rest on the baking sheet for 5 minutes. They will be very fragile right out of the oven. After 5 minutes, transfer them to a cooling rack to cool completely. This is essential—warm cookies will melt your icing into a puddle.
- Make the cream cheese icing. While the cookies cool, prepare the icing. In a small bowl, beat the softened cream cheese and butter together until smooth and creamy. Add the powdered sugar and vanilla extract, and mix until well combined. If the icing is too thick, add milk one tablespoon at a time until it reaches a spreadable consistency. If it is too thin, add a little more powdered sugar.
- Ice the cookies. Once the cookies are completely cool, spread a generous dollop of icing on each one. I like to leave the edges a little messy for that homemade look. You can also drizzle the icing with a spoon if you prefer a lighter touch.
- Let the icing set. Allow the iced cookies to sit at room temperature for about 10 minutes so the icing firms up slightly. Then dig in!
Cooking Tips & Techniques
After making these cookies more times than I can count, I have learned a few things the hard way. Here are my best tips to help you nail it every time.
Don’t overmix the batter. I know I said this already, but it is worth repeating. Mixing too much develops the gluten and makes the cookies tough and dense. You want them soft and tender, so stir just until the flour disappears. A few tiny lumps are totally fine.
Use room temperature ingredients. Cold butter and cold cream cheese don’t mix well. They create lumps in your batter and your icing. Set everything out on the counter about 30 minutes before you start. If you forget, you can soften cream cheese in the microwave for about 10 seconds on low power.
Check your pumpkin puree. Sometimes canned pumpkin can be watery, especially if it has been sitting on the shelf for a while. If your puree looks thin, blot it with a paper towel to remove excess moisture. This helps prevent flat, soggy cookies. I learned this lesson after one particularly sad batch that spread into giant pancakes.
Space your cookies properly. These cookies spread a little, but not a lot. Still, give them about 2 inches of breathing room. If you crowd the pan, they will bake into one giant cookie. Not the worst problem to have, but not what we are going for here.
Let the cookies cool completely before icing. This is non-negotiable. If you ice them while they are still warm, the icing will melt into a sweet, soupy mess. I have made this mistake more than once, and it is heartbreaking. Patience pays off here.
Bake one sheet at a time. If you put two sheets in the oven at once, the heat doesn’t circulate properly, and your cookies will bake unevenly. If you only have one oven, just bake the sheets one after the other. The second batch might take a minute less since the oven is already hot.
Variations & Adaptations
One of the best things about this recipe is how flexible it is. Here are some ways to make it your own.
Chocolate Chip Pumpkin Cookies: Fold in 1/2 cup of semi-sweet chocolate chips to the batter before scooping. The chocolate pairs beautifully with the pumpkin and spices. My kid loves this version best.
Gluten-Free Option: Substitute the all-purpose flour with a 1:1 gluten-free baking blend. I have tried this with Bob’s Red Mill, and the cookies turned out just as soft and delicious. No one at the table could tell the difference.
Vegan Version: Use plant-based butter and a flax egg (1 tablespoon ground flaxseed mixed with 3 tablespoons water, let sit for 5 minutes). For the icing, use dairy-free cream cheese. The texture will be slightly denser, but still very tasty.
Spice It Up: If you love a warm, spicy kick, add an extra 1/4 teaspoon of ginger and a pinch of cayenne pepper to the dry ingredients. It gives the cookies a subtle heat that is surprisingly good with the sweet cream cheese icing.
Mini Cookies for Lunchboxes: Use a teaspoon-sized scoop to make mini cookies. Bake for 7-8 minutes instead of 10-12. These are perfect for packing in school lunches or for a quick snack without the guilt.
Pumpkin Cream Cheese Swirl: Instead of icing the cookies, drop a small dollop of the cream cheese mixture onto each cookie before baking. Use a toothpick to swirl it into the batter. This creates a beautiful marbled effect and a built-in frosting center.
Serving & Storage Suggestions
These cookies are best served at room temperature, with the icing set but still soft. They are perfect with a cold glass of milk for the kids or a hot cup of coffee for the grown-ups. I like to arrange them on a pretty plate and dust them with a little extra cinnamon for a finishing touch.
Storage: Store the iced cookies in a single layer in an airtight container in the refrigerator. They will stay fresh for up to 5 days. The cold fridge helps the icing hold its shape. Let them sit at room temperature for about 10 minutes before serving to soften the icing slightly.
Freezer Instructions: You can freeze the un-iced cookies for up to 3 months. Place them in a single layer on a baking sheet and freeze until solid, then transfer to a freezer-safe bag or container. When you are ready to enjoy them, thaw the cookies at room temperature and then prepare the fresh cream cheese icing. I do not recommend freezing the iced cookies, as the icing can become grainy when thawed.
Reheating: If you like your cookies a little warm, pop an un-iced cookie in the microwave for 8-10 seconds. It softens the texture beautifully. Do not microwave iced cookies, or the icing will melt.
Flavor Development: Honestly, these cookies taste even better the next day. The spices mellow and meld together, and the texture stays perfectly soft. If you can resist eating them all in one sitting, you will be rewarded with an even better cookie on day two.
Nutritional Information & Benefits
Here is an approximate nutritional breakdown for one cookie (based on a batch of 24 cookies with icing):
| Nutrient | Amount Per Cookie |
|---|---|
| Calories | 145 |
| Total Fat | 7g |
| Saturated Fat | 4g |
| Cholesterol | 25mg |
| Sodium | 115mg |
| Total Carbohydrates | 20g |
| Dietary Fiber | 1g |
| Sugars | 13g |
| Protein | 2g |
Pumpkin is packed with vitamin A, which is great for eye health and immune function. It also provides a good dose of fiber, which helps keep you full and satisfied. The cream cheese icing adds calcium from the dairy. While these are definitely a treat, they offer a little more nutritional value than your average cookie. If you want to lighten them up, you can reduce the sugar to 3/4 cup or use a low-fat cream cheese for the icing. Just know the texture will be slightly different.
Conclusion
These kid-approved pumpkin cookies with cream cheese icing started as a happy accident, and I am so glad it happened. They are soft, spiced, and topped with that tangy, creamy icing that makes everything better. Whether you are baking for a school event, a cozy weekend at home, or just because you have a can of pumpkin sitting in the pantry, these cookies deliver every single time.
I love how forgiving this recipe is. You can mess up the measurements, forget an ingredient, and still end up with something delicious. That is real cooking, you know? It is not about perfection. It is about making something good with what you have. So go ahead and give these a try. Add a little extra cinnamon if that is your thing. Skip the icing if you want a simpler cookie. Make them your own.
I would love to hear how yours turn out! Drop a comment below and tell me about your own kitchen accidents that turned into triumphs. Share a photo of your cookies on social media and tag me. Happy baking, friends—you have got this!
Frequently Asked Questions
Can I use fresh pumpkin instead of canned?
Yes, you can! Just make sure to roast or steam the pumpkin and then puree it until smooth. You will need to drain it well in a cheesecloth or paper towel to remove excess moisture. Fresh pumpkin can be more watery than canned, so blotting is important to avoid soggy cookies.
Why did my cookies turn out flat?
Flat cookies usually mean your butter was too soft or your pumpkin puree was too watery. Make sure your butter is just softened, not melted. Also, blot your pumpkin puree with a paper towel if it looks thin. Overmixing the batter can also cause spreading, so mix gently.
Can I make the dough ahead of time?
Absolutely. You can prepare the cookie dough, cover it tightly, and refrigerate it for up to 24 hours. Let it sit at room temperature for about 10 minutes before scooping and baking. Chilled dough might need an extra minute or two in the oven.
How do I get smooth cream cheese icing?
The key is to use room temperature cream cheese and butter. If they are cold, you will end up with lumps. Beat them together until completely smooth before adding the powdered sugar. If you still see lumps, you can microwave the icing for 5 seconds and stir vigorously.
Can I freeze the cookies with the icing?
I do not recommend it. The cream cheese icing can become grainy and separate when thawed. It is much better to freeze the un-iced cookies and make fresh icing when you are ready to serve them. The cookies freeze beautifully on their own for up to 3 months.
Pin This Recipe!
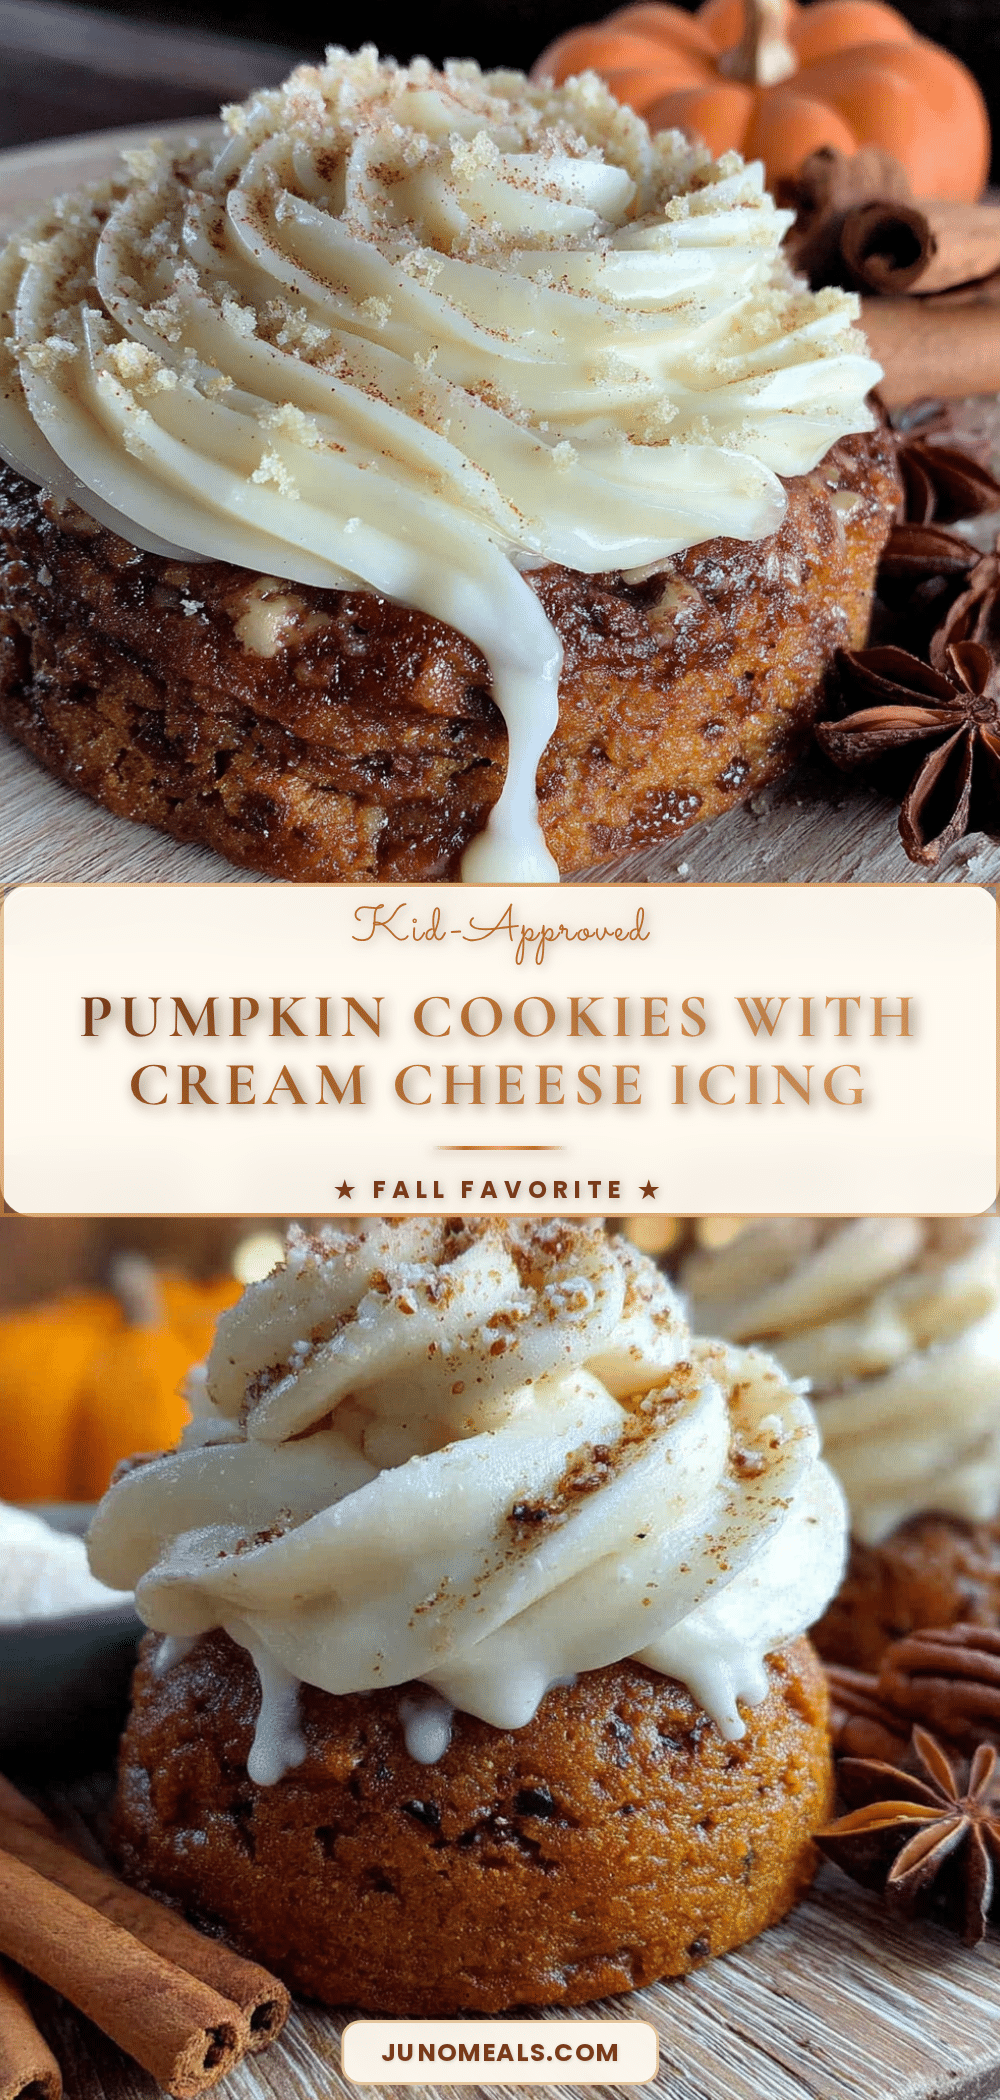
Easy Kid-Approved Pumpkin Cookies with Cream Cheese Icing
Soft, pillowy pumpkin cookies topped with tangy cream cheese icing. A happy accident turned into a beloved fall treat that kids and adults alike can’t resist.
- Prep Time: 15 minutes
- Cook Time: 12 minutes
- Total Time: 27 minutes
- Yield: 24 servings 1x
- Category: Dessert
- Cuisine: American
Ingredients
- 1 cup (240g) canned pumpkin puree
- 1/2 cup (115g) unsalted butter, softened
- 1 cup (200g) granulated sugar
- 1 large egg, room temperature
- 1 teaspoon vanilla extract
- 1 1/2 cups (190g) all-purpose flour
- 1 teaspoon baking soda
- 1/2 teaspoon baking powder
- 1/2 teaspoon salt
- 1 1/2 teaspoons pumpkin pie spice
- 1/2 teaspoon ground cinnamon
- 4 oz (115g) cream cheese, softened
- 2 tablespoons unsalted butter, softened
- 1 cup (120g) powdered sugar
- 1/2 teaspoon vanilla extract
- 1–2 tablespoons milk
Instructions
- Preheat your oven to 350°F (175°C). Line two baking sheets with parchment paper or silicone mats.
- In a large mixing bowl, beat the softened butter and granulated sugar together with a wooden spoon or spatula until light and fluffy, about 2 minutes.
- Beat in the pumpkin puree, egg, and vanilla extract until well combined.
- In a separate small bowl, whisk together the flour, baking soda, baking powder, salt, pumpkin pie spice, and cinnamon.
- Gradually add the dry ingredients to the wet mixture, stirring gently just until no streaks of flour remain. Do not overmix.
- Using a 1.5-tablespoon cookie scoop or a regular spoon, drop rounded spoonfuls of dough onto the prepared baking sheets, spacing them about 2 inches apart.
- Bake one sheet at a time for 10-12 minutes, until the edges are set and the tops look dry. The centers will still be soft.
- Let the cookies rest on the baking sheet for 5 minutes, then transfer them to a cooling rack to cool completely.
- While the cookies cool, make the icing: In a small bowl, beat the softened cream cheese and butter together until smooth and creamy. Add the powdered sugar and vanilla extract, and mix until well combined. Add milk one tablespoon at a time until it reaches a spreadable consistency.
- Once the cookies are completely cool, spread a generous dollop of icing on each one.
- Allow the iced cookies to sit at room temperature for about 10 minutes so the icing firms up slightly before serving.
Notes
Don’t overmix the batter to keep cookies soft. Use room temperature ingredients for best results. Blot pumpkin puree if watery to prevent flat cookies. Cool cookies completely before icing. Bake one sheet at a time for even baking.
Nutrition
- Serving Size: 1 cookie
- Calories: 145
- Sugar: 13
- Sodium: 115
- Fat: 7
- Saturated Fat: 4
- Carbohydrates: 20
- Fiber: 1
- Protein: 2
Keywords: pumpkin cookies, cream cheese icing, kid-friendly, fall baking, easy cookies, soft pumpkin cookies


