My neighbor Karen wasn’t trying to impress anyone. I’d stopped by to borrow a ladder on a crisp October afternoon, and the smell hit me before I even got through the screen door. It was sweet, buttery, and weirdly familiar—like the best parts of a bakery and a candy shop had a baby. She was pulling a sheet pan out of the oven, completely unfazed, while her kids were already sneaking finger-swipes through a bowl of bright orange frosting.
“Oh, those are just the cookie bars for the school party,” she said, wiping her hands on her jeans. “Nothing fancy.”
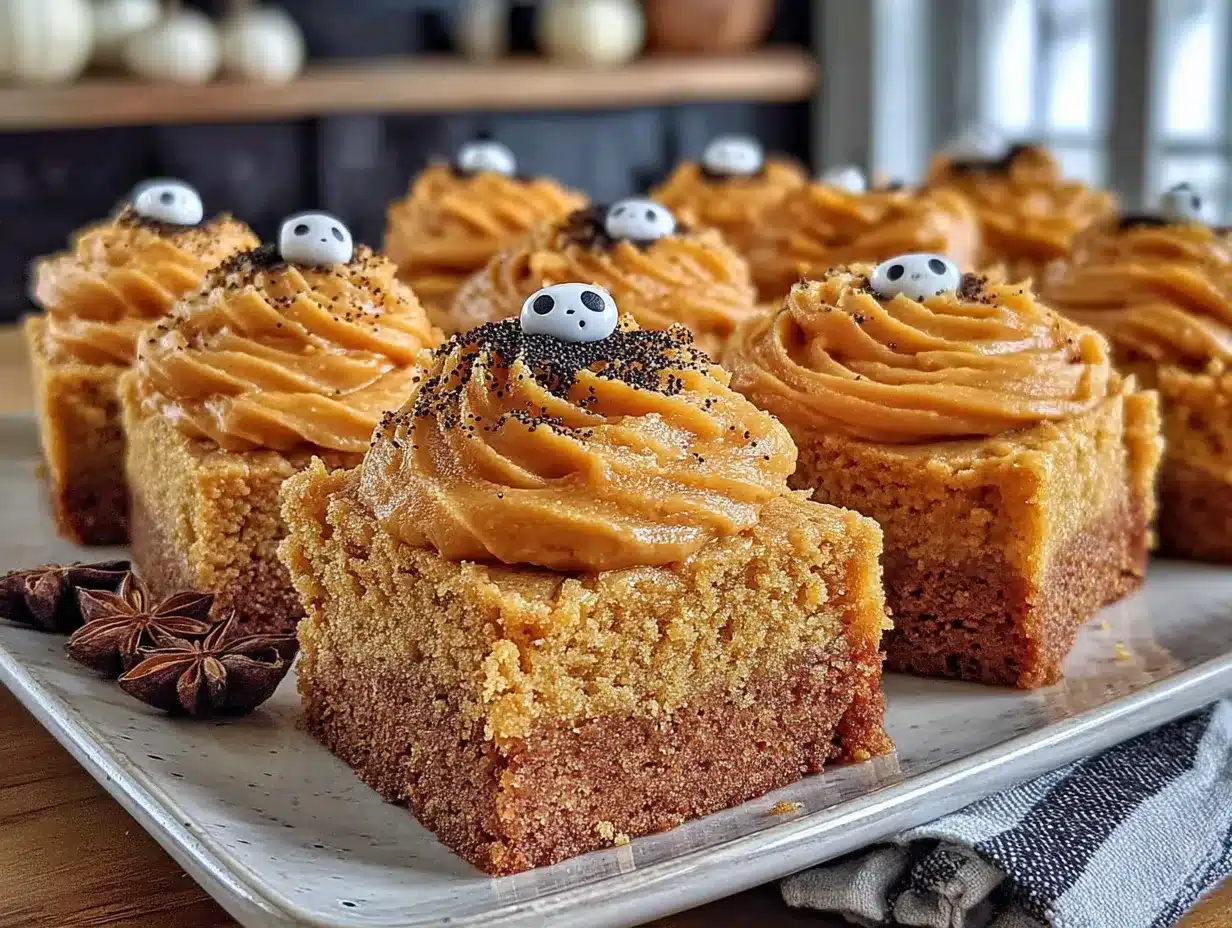
Nothing fancy. I mean, I stood there watching her cut them into perfect little squares while she told me about her dryer breaking, and I honestly forgot I was supposed to be holding a ladder. The way the frosting sat thick and glossy on top, with little sprinkles catching the afternoon light—it was the kind of thing you’d see on a magazine cover, and she was acting like it was no big deal.
I asked for the recipe before I left, and she scribbled it on the back of an old grocery list. That piece of paper has been stuck to my refrigerator with a magnet for three years now. Every Halloween, I make these bars, and every time someone takes a bite, they get that same look I probably had standing in Karen’s kitchen—surprised, delighted, and a little confused about why something so simple tastes this good.
Maybe you’ve been there, staring at a dessert table full of complicated cupcakes and fancy cookies, wondering if there’s an easier way to impress a crowd. Let me tell you, these Halloween sugar cookie bars with orange frosting are it. They’re the thing people hover around, the one that disappears first, the recipe you’ll text your friends about the next day.
Why You’ll Love This Recipe
I’ve tested a lot of Halloween desserts over the years, and most of them fall into one of two categories: they look amazing but taste like cardboard, or they taste incredible but look like a toddler decorated them. These cookie bars are the sweet spot where both things work together perfectly.
Here’s what makes them stand out from every other Halloween treat you’ve tried:
- No Rolling, No Cutting, No Stress : You press the dough into a sheet pan and bake. That’s it. No cookie cutters, no chilling, no wrestling with sticky dough at midnight.
- Simple Pantry Ingredients : Butter, sugar, flour, eggs, vanilla—you probably have most of this in your kitchen right now. No specialty Halloween sprinkles required (though they’re fun if you have them).
- Perfect for Parties and Potlucks : One batch makes 24 generous bars, which means you’re feeding a crowd without spending all day in the kitchen. These are my go-to for classroom parties, office potlucks, and neighborhood gatherings.
- Kid-Approved and Adult-Obsessed : The orange frosting is tangy and sweet, the cookie base is soft and buttery, and the combination is honestly addictive. I’ve watched grown adults argue over the last piece.
- Make-Ahead Friendly : You can bake the bars a day ahead and frost them the morning of your event. They actually get better after sitting overnight—the flavors meld together in a way that makes them taste even more homemade.
What really sets this recipe apart is the frosting. Most Halloween desserts use canned frosting that tastes like sugar and sadness, but this homemade orange frosting is different. It’s creamy, bright, and has just enough citrus to cut through the richness of the cookie. The first time I made these for a Halloween party, someone actually asked me if I’d bought them from a bakery. I just smiled and said, “Nope, just Karen’s recipe.”
These bars are comfort food with a costume on—familiar enough to feel like home, festive enough to feel special. And honestly? They’re the kind of dessert that makes you close your eyes after the first bite.
What Ingredients You Will Need
This recipe uses simple, everyday ingredients that come together to create something genuinely special. I’ve tested a few variations over the years, and this combination gives you the softest cookie base with the most flavorful frosting every single time.
For the Cookie Bars
- 1 cup unsalted butter, softened (I prefer Land O’Lakes for consistent results—the butter quality really matters here)
- 1 ½ cups granulated sugar
- 2 large eggs, room temperature (cold eggs will make the batter seize up)
- 2 teaspoons vanilla extract (use pure vanilla, not imitation—you’ll taste the difference)
- 3 cups all-purpose flour (spoon and level it—don’t scoop straight from the bag)
- 1 teaspoon baking powder
- ½ teaspoon baking soda
- ½ teaspoon salt (I use fine sea salt for baking)
For the Orange Frosting
- ½ cup unsalted butter, softened
- 4 cups powdered sugar, sifted (sifting prevents lumps—trust me on this)
- 3 tablespoons fresh orange juice (about one large orange—don’t use bottled juice)
- 1 tablespoon orange zest (zest before juicing—it’s easier that way)
- 1 teaspoon vanilla extract
- Pinch of salt
- Orange gel food coloring (optional, but it makes them look so festive)
For Decoration
- Halloween sprinkles (I like the mix of pumpkins, ghosts, and orange jimmies)
- Optional: Candy eyeballs, black licorice strings, or mini chocolate chips for making faces
A few ingredient notes from my years of making these: The butter temperature is crucial. If your butter is too cold, the dough won’t cream properly, and your bars will be dense. If it’s too soft, the dough will spread too much in the pan. You want it soft enough that your finger leaves an indent but not so soft that it looks greasy.
For the orange juice, please use fresh oranges. Bottled orange juice has a flat, almost metallic taste that really shows up in the frosting. I’ve made this mistake exactly once, and I still remember how disappointed I was. A good navel orange or a Cara Cara orange will give you the best flavor.
If you’re gluten-sensitive, you can substitute a 1:1 gluten-free flour blend. I’ve had good luck with King Arthur’s Measure for Measure flour in this recipe. The texture is slightly more tender, but nobody at your Halloween party will notice.
Equipment Needed
You don’t need a professional bakery setup for these bars, which is part of why I love them so much. Here’s what you’ll need:
- 9×13-inch baking pan (metal pans work best—glass pans can make the edges overbake)
- Electric hand mixer or stand mixer (you can do this by hand, but your arm will get tired creaming the butter and sugar)
- Mixing bowls (one large, one medium)
- Parchment paper (this is non-negotiable—it makes lifting the bars out so much easier)
- Rubber spatula for scraping the bowl clean
- Measuring cups and spoons
- Zester or microplane for the orange zest
- Cooling rack (a wire rack lets air circulate so the bars cool evenly)
- Offset spatula for spreading the frosting (a butter knife works in a pinch)
If you don’t have a zester, you can use the fine side of a box grater. It’s not quite as elegant, but it gets the job done. And if you’re new to baking, don’t stress about having the perfect tools—I made these for years with a wooden spoon and a lot of determination before I got my stand mixer.
Preparation Method
Let me walk you through this step by step. I’ve made these bars at least two dozen times, so I know exactly where things can go wrong and how to fix them.
- Preheat your oven to 375°F (190°C). Line your 9×13-inch pan with parchment paper, leaving a little overhang on the long sides. This creates handles that let you lift the entire block of cookie bars out later. Lightly grease the parchment with butter or non-stick spray.
- Cream the butter and sugar. In a large bowl, beat the softened butter and granulated sugar together until light and fluffy, about 3-4 minutes. Scrape down the sides of the bowl halfway through. You’re looking for a pale, creamy mixture that looks almost like frosting at this point. If it looks greasy or separated, your butter was too warm.
- Add the eggs and vanilla. Beat in the eggs one at a time, mixing well after each addition. Then add the vanilla extract. The mixture might look a little curdled at this point—that’s normal, especially if your eggs were cold. Don’t panic, it will come together when you add the flour.
- Mix the dry ingredients. In a separate medium bowl, whisk together the flour, baking powder, baking soda, and salt. Whisking aerates the flour and distributes the leavening agents evenly, which means your bars will rise consistently.
- Combine wet and dry ingredients. Gradually add the flour mixture to the butter mixture, mixing on low speed or folding with a spatula. Mix just until you can’t see any more white streaks of flour. Overmixing at this stage will develop gluten and make your cookie bars tough, so stop as soon as it comes together.
- Press the dough into the pan. The dough will be thick and slightly sticky. Transfer it to your prepared pan and press it into an even layer. I use a piece of parchment paper on top of the dough to press it flat without getting my fingers sticky. Make sure it reaches all the corners evenly—thicker spots will bake differently than thinner spots.
- Bake for 18-22 minutes. The edges should be lightly golden and the center should look set but still soft. A toothpick inserted in the center should come out with a few moist crumbs, not wet batter. If the toothpick is clean, you’ve overbaked them. I start checking at 18 minutes because every oven runs differently.
- Cool completely. Let the bars cool in the pan on a wire rack for about 10 minutes, then use the parchment handles to lift them out and transfer to the rack to cool completely. This is important—if you frost them while they’re still warm, the frosting will melt into a puddle. I usually wait about an hour.
- Make the frosting. While the bars cool, beat the softened butter for the frosting until smooth and creamy. Gradually add the sifted powdered sugar, alternating with the orange juice. Add the orange zest, vanilla, and a pinch of salt. Beat on medium-high speed for 2-3 minutes until light and fluffy. If you’re using food coloring, add it a drop at a time until you reach your desired shade of Halloween orange.
- Frost and decorate. Spread the frosting evenly over the cooled cookie bars. Add your Halloween sprinkles immediately before the frosting sets. Let the frosting firm up for about 15-20 minutes before cutting into squares.
- Cut and serve. Use a sharp knife to cut into 24 squares (6 rows by 4 rows). Wipe the knife clean between cuts for neat edges. For cleanest cuts, refrigerate the frosted bars for 20 minutes before slicing.
One thing I learned the hard way: don’t rush the cooling process. I once tried to speed things up by putting the bars in the refrigerator while they were still warm, and the condensation made the frosting slide right off. Patience is your friend here.
Cooking Tips & Techniques
After making these Halloween sugar cookie bars more times than I can count, I’ve picked up a few tricks that make a real difference. Here are the ones I wish someone had told me from the start.
Room temperature ingredients matter more than you think. Cold butter doesn’t cream properly, and cold eggs can cause the batter to separate. Pull your butter and eggs out of the refrigerator about 30 minutes before you start baking. If you forgot to plan ahead, you can soften butter in the microwave in 5-second bursts—just watch it carefully because melted butter won’t work here.
Don’t overbake. This is the most common mistake I see. Cookie bars continue to cook from residual heat after they come out of the oven, so you want to pull them when they look just barely done. The center should jiggle slightly when you shake the pan. If you wait until the center looks fully set, the edges will be dry and crumbly.
Use the parchment paper trick. I cannot emphasize this enough—parchment paper with overhang makes everything easier. You lift the entire block out, cut it on a cutting board, and your pan stays clean. It’s the kind of kitchen hack that feels obvious once you do it but somehow isn’t.
Sift your powdered sugar. I know, it’s an extra step and it makes a mess. But unsifted powdered sugar has little clumps that won’t beat out, and you’ll end up with lumpy frosting. If you don’t have a sifter, you can whisk the powdered sugar vigorously in a bowl to break up the clumps.
Zest before you juice. This is one of those small kitchen habits that saves so much frustration. Zesting a whole orange is easy; zesting a squishy, juiced orange is a nightmare. Grate off the zest first, then cut the orange in half and squeeze the juice.
Let the frosting set before serving. If you cut into these bars right after frosting, you’ll get a sticky, smeary mess. Give the frosting at least 15-20 minutes to set at room temperature, or pop the whole pan in the refrigerator for 10 minutes. The frosting firms up just enough to give you clean, beautiful slices.
And here’s a personal failure I’ll share so you don’t repeat it: I once tried to double the recipe and bake it in a half-sheet pan. The edges burned before the center was done, and I ended up with a weird, uneven mess. Stick with the 9×13 pan. If you need more bars, make two separate batches.
Variations & Adaptations
One of the best things about this recipe is how flexible it is. I’ve played around with different flavors and decorations over the years, and here are some variations that have worked well.
Chocolate Orange Cookie Bars : Add ½ cup of cocoa powder to the dry ingredients for a chocolate-orange combination that tastes like a fancy Halloween candy. Reduce the flour by ¼ cup to keep the texture right. The orange frosting on top of chocolate cookie bars is genuinely stunning—the colors pop against each other.
Spiced Pumpkin Version : Replace ½ cup of the butter with ½ cup of pumpkin puree and add 1 teaspoon of pumpkin pie spice to the dry ingredients. The bars will be slightly more cake-like, but the flavor is perfect for fall. Use cream cheese frosting instead of orange frosting for a pumpkin roll vibe.
Gluten-Free Adaptation : Substitute the all-purpose flour with a 1:1 gluten-free baking flour blend. I’ve had the best results with King Arthur’s Measure for Measure or Bob’s Red Mill 1-to-1. Add an extra tablespoon of milk or water to the dough if it seems too dry—gluten-free flours absorb more liquid.
Dairy-Free Option : Use vegan butter sticks (I like Earth Balance) and a dairy-free cream cheese for the frosting. The texture will be slightly less tender, but the flavor is still fantastic. Just make sure your vegan butter is stick form, not spreadable—the spreadable kind has too much water.
Different Frosting Flavors : While I love the orange frosting for Halloween, you can easily switch it up. Try cream cheese frosting for a tangy twist, chocolate frosting for a double-chocolate experience, or a simple vanilla buttercream with orange food coloring for a milder flavor.
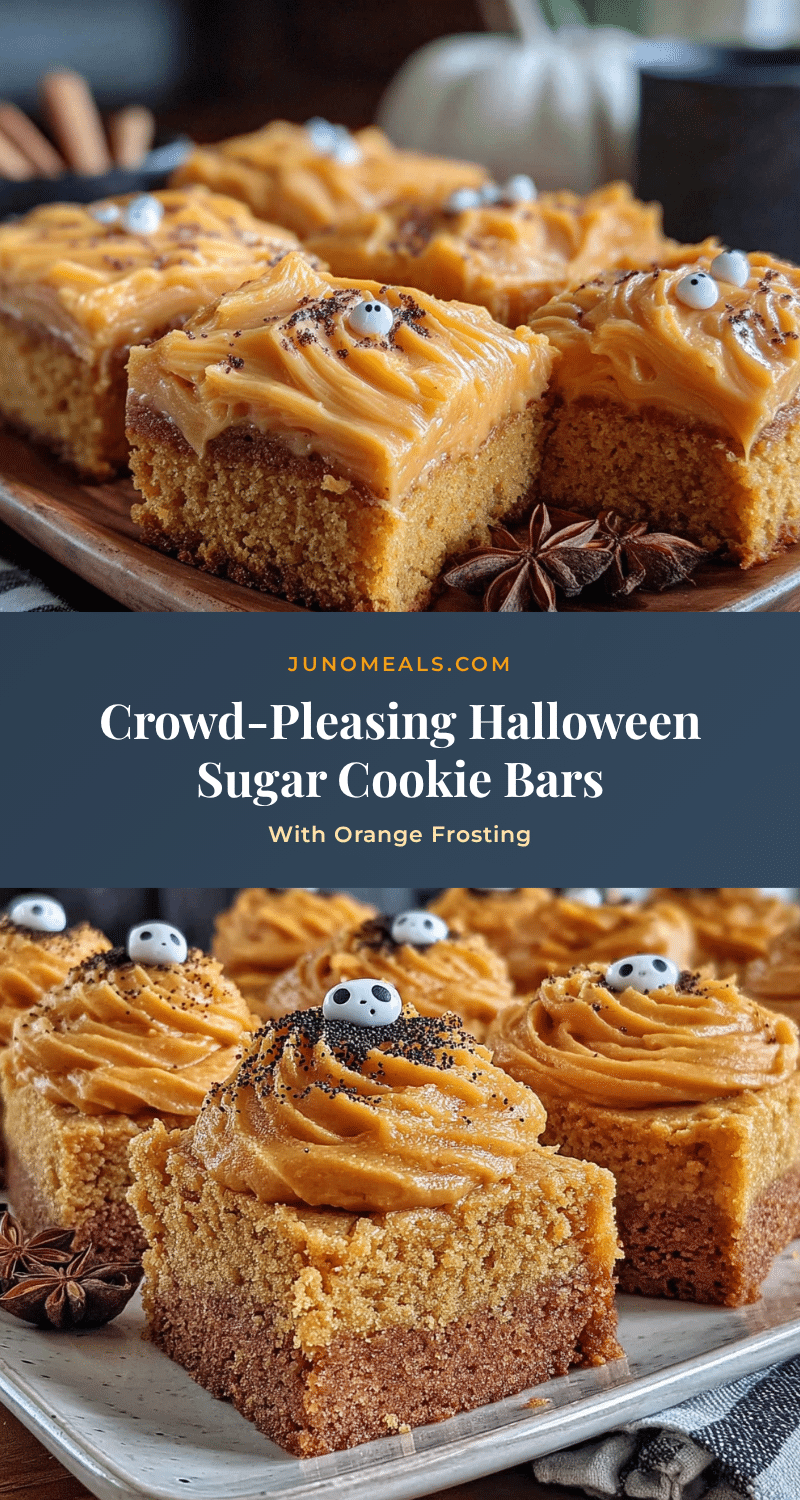
Monster Face Decoration : Instead of sprinkles, use the frosting as glue to create little monster faces on each bar. Candy eyeballs, licorice string mouths, and chocolate chip noses turn these into adorable (or terrifying, depending on your skill level) Halloween creatures. My niece and nephew love helping with this part.
My personal favorite variation? I add a teaspoon of orange extract to both the cookie dough and the frosting for an extra punch of citrus flavor. It’s subtle enough that most people can’t identify it, but they always comment that these taste “more orangey” than other Halloween treats.
Serving & Storage Suggestions
These Halloween sugar cookie bars are at their absolute best at room temperature. The cookie base stays soft and tender, and the frosting has that perfect creamy texture that just melts on your tongue. I usually let them sit out for about 20 minutes after frosting before serving.
For presentation, I love arranging them on a white platter or cake stand so the orange frosting really pops. A few candy pumpkins scattered around the plate adds to the festive feel without looking overdone. If you’re bringing these to a party, stack them in a single layer in a decorative container—stacking them on top of each other will smudge the frosting.
These bars pair beautifully with a cold glass of milk, a warm cup of apple cider, or a pumpkin spice latte. For an adult gathering, they’re wonderful alongside a dark beer or a glass of bourbon—the sweetness of the cookie balances the bitterness beautifully.
Storage Instructions:
- Room Temperature : Store in an airtight container at room temperature for up to 3 days. Place a sheet of wax paper between layers if you need to stack them (but single layer is better).
- Refrigerator : These bars will keep in the refrigerator for up to a week. The cookie base will firm up slightly, but letting them sit at room temperature for 15 minutes before serving brings back the soft texture.
- Freezer : You can freeze the unfrosted cookie bars for up to 3 months. Wrap the entire block tightly in plastic wrap, then aluminum foil. When you’re ready to serve, thaw overnight in the refrigerator, then bring to room temperature and frost. I’ve also frozen frosted bars with good results—just freeze them on a sheet pan until the frosting is solid, then wrap individually.
One thing I’ve noticed: these bars actually taste even better the day after you make them. The flavors meld together overnight, and the cookie base gets even softer. If you’re planning a Halloween party, I highly recommend making them a day ahead.
Nutritional Information & Benefits
Let’s be honest—these are a treat, not a health food. But knowing what’s in them helps you enjoy them mindfully, right?
Per serving (1 bar, based on 24 servings):
- Calories : 285
- Total Fat : 13g
- Saturated Fat : 8g
- Cholesterol : 55mg
- Sodium : 150mg
- Total Carbohydrates : 41g
- Sugars : 28g
- Protein : 3g
On the positive side, the orange juice and zest in the frosting provide a small amount of vitamin C, which is always nice this time of year when everyone’s trying to avoid colds. The butter, while indulgent, does contain fat-soluble vitamins A, D, E, and K. And the eggs add a bit of protein and choline, which supports brain health.
If you’re watching your sugar intake, you can reduce the sugar in the cookie base to 1 cup instead of 1 ½ cups. The texture will be slightly less tender, but the frosting provides plenty of sweetness. For a lower-fat version, you can substitute half the butter with unsweetened applesauce—the bars will be more cake-like but still delicious.
These bars contain gluten, dairy, and eggs, so they’re not suitable for those with allergies to those ingredients. The gluten-free and dairy-free variations I mentioned earlier work well, but I haven’t tested an egg-free version that I’m confident in recommending.
My personal philosophy? Desserts like this are about joy, celebration, and sharing something special with people you care about. One bar isn’t going to derail your healthy eating habits. Enjoy it, savor it, and move on.
Conclusion
If you take away nothing else from this post, I hope it’s this: you don’t need to be a professional baker to make something that stops people in their tracks. These Halloween sugar cookie bars with orange frosting are proof that simple ingredients, made with a little care and a lot of butter, can create something genuinely memorable.
Every time I make these, I think about Karen standing in her kitchen, completely unaware that she was sharing something special. That’s the kind of recipe I want to pass along—the ones that feel effortless but taste like you spent hours on them. The ones that make people ask for the recipe before they’ve even finished eating.
I’d love to hear how these turn out for you. Did you add your own twist? Did your kids help with the monster faces? Did they disappear faster than expected? Drop a comment below and let me know—I read every single one, and your ideas often end up in my own kitchen.
Here’s to a Halloween filled with sweet treats, happy faces, and maybe a little bit of frosting on your nose. Happy baking, friends!
Frequently Asked Questions
Can I use store-bought frosting instead of making homemade orange frosting?
You absolutely can, but I really recommend making the homemade version at least once. The fresh orange zest and juice make such a difference in flavor compared to canned frosting. If you’re short on time, buy a good quality vanilla buttercream and mix in orange zest and a drop of orange extract.
Why did my cookie bars turn out dry?
The most common reason is overbaking. Cookie bars continue to cook from residual heat after they come out of the oven, so pull them when the center still looks slightly underdone. Another possibility is overmeasuring the flour—make sure you’re spooning it into your measuring cup and leveling it off, not scooping directly from the bag.
Can I make these ahead of time for a party?
Yes! These are actually perfect for making ahead. You can bake the cookie base up to 2 days in advance, wrap it tightly, and store it at room temperature. Frost them the morning of your event for the freshest taste and best presentation.
How do I get clean, neat cuts without the frosting smearing?
Refrigerate the frosted bars for 20-30 minutes before cutting. Use a sharp knife and wipe it clean with a damp paper towel between each cut. For the cleanest edges, use a chef’s knife rather than a butter knife.
Can I double this recipe for a larger crowd?
I don’t recommend doubling and baking in one large pan because the edges will burn before the center bakes through. Instead, make two separate batches in two 9×13 pans. You can bake them at the same time if your oven has room and the racks are positioned in the center.
Pin This Recipe!
Easy Halloween Sugar Cookie Bars with Orange Frosting
Soft and buttery sugar cookie bars topped with a tangy homemade orange frosting, perfect for Halloween parties and potlucks. This easy recipe requires no rolling or cutting, and uses simple pantry ingredients.
- Prep Time: 20 minutes
- Cook Time: 20 minutes
- Total Time: 1 hour 40 minutes (includes cooling)
- Yield: 24 servings 1x
- Category: Dessert
- Cuisine: American
Ingredients
- 1 cup unsalted butter, softened
- 1 ½ cups granulated sugar
- 2 large eggs, room temperature
- 2 teaspoons vanilla extract
- 3 cups all-purpose flour
- 1 teaspoon baking powder
- ½ teaspoon baking soda
- ½ teaspoon salt
- ½ cup unsalted butter, softened (for frosting)
- 4 cups powdered sugar, sifted
- 3 tablespoons fresh orange juice
- 1 tablespoon orange zest
- 1 teaspoon vanilla extract
- Pinch of salt
- Orange gel food coloring (optional)
- Halloween sprinkles for decoration
- Optional: candy eyeballs, black licorice strings, or mini chocolate chips for making faces
Instructions
- Preheat your oven to 375°F (190°C). Line a 9×13-inch pan with parchment paper, leaving overhang on the long sides. Lightly grease the parchment.
- In a large bowl, beat the softened butter and granulated sugar together until light and fluffy, about 3-4 minutes.
- Beat in the eggs one at a time, then add the vanilla extract.
- In a separate bowl, whisk together the flour, baking powder, baking soda, and salt.
- Gradually add the flour mixture to the butter mixture, mixing until just combined. Do not overmix.
- Press the dough evenly into the prepared pan. Use a piece of parchment paper on top to press flat.
- Bake for 18-22 minutes, until edges are lightly golden and center is set but still soft. Cool in pan on a wire rack for 10 minutes, then lift out and cool completely.
- For the frosting: Beat the softened butter until smooth. Gradually add sifted powdered sugar, alternating with orange juice. Add orange zest, vanilla, and salt. Beat until light and fluffy. Add food coloring if desired.
- Spread frosting over cooled bars. Add sprinkles immediately. Let frosting set for 15-20 minutes before cutting into 24 squares.
Notes
Don’t rush cooling; frost only when completely cool. For clean cuts, refrigerate frosted bars for 20 minutes before slicing. Bars taste even better the next day.
Nutrition
- Serving Size: 1 bar
- Calories: 285
- Sugar: 28
- Sodium: 150
- Fat: 13
- Saturated Fat: 8
- Carbohydrates: 41
- Protein: 3
Keywords: Halloween, sugar cookie bars, orange frosting, easy dessert, fall baking, party dessert, cookie bars


