My neighbor, Mrs. Kowalski, watched me struggle with a lopsided pumpkin pie at our building’s Halloween potluck sign-up sheet. She didn’t say anything at first. Then she just smiled, tapped her finger on the “appetizer” column, and whispered, “You bring the cheese ball. I’ll show you how to make it look like a spider.” I had never made a cheese ball in my life, honestly. But three days later, I was standing in her tiny kitchen, watching her blend cream cheese and cheddar like she was performing some kind of magic trick. The power flickered once—classic October storm—and we just laughed and kept mixing by the light of a jack-o-lantern candle.
The Spooky Spider Cheese Ball for Halloween Parties was born that night, and let me tell you, it stole the show. I mean, people actually gasped when they saw it. Maybe you’ve been there—you spend hours on a main dish and the appetizer everyone remembers is the one that looked like a creepy crawly thing. Mrs. Kowalski taught me that Halloween food doesn’t have to be complicated; it just has to be clever. She learned the trick from her own mother, who used to make these for school parties back in the 1970s. I’ve tweaked it a little over the years—added some garlic, swapped in different crackers—but the heart of it is still her recipe. It’s the one dish I make every single October without fail.
Why You’ll Love This Recipe
This isn’t just another cheese ball. Trust me, I’ve tested more versions than I care to admit, and this one wins every time. Here’s why this Spooky Spider Cheese Ball for Halloween Parties deserves a spot on your table:
- Quick & Easy: It comes together in about 20 minutes of active prep. You just mix, shape, chill, and decorate. That’s it. No baking, no fussing, no stress.
- Simple Ingredients: You probably already have cream cheese, cheddar, and a few seasonings in your fridge. The only special purchase is the black olives and pretzel sticks for the spider legs.
- Perfect for Halloween Parties: Whether it’s a kid-friendly classroom party or an adults-only costume bash, this appetizer fits right in. It’s spooky without being scary.
- Crowd-Pleaser: I’ve brought this to five different parties now, and every single time, someone asks for the recipe. Kids love the spider look, adults love the creamy, savory flavor.
- Unbelievably Delicious: The texture is silky smooth thanks to the cream cheese, and the combination of sharp cheddar, garlic, and Worcestershire sauce is pure comfort food magic. You’ll find yourself sneaking bites before anyone sees.
What makes this recipe different from the rest is the technique. Instead of just mixing everything together and hoping for the best, I use a trick Mrs. Kowalski taught me: letting the cream cheese soften completely at room temperature before mixing. It sounds simple, but it makes the texture so much creamier. Plus, the seasoning ratio is perfectly balanced—not too garlicky, not too plain. It’s the kind of appetizer that makes you close your eyes after the first bite, even if you’re standing next to a fake cobweb.
What Ingredients You Will Need
This recipe uses simple, everyday ingredients to deliver big flavor and a seriously fun presentation. Most of these are pantry staples or easy to find at any grocery store.
- Cream Cheese: 16 ounces (two 8-ounce blocks), softened to room temperature. This is the base of your cheese ball, so go for full-fat for the best texture. I personally recommend Philadelphia brand—it’s consistently creamy.
- Sharp Cheddar Cheese: 1 cup (about 4 ounces), finely shredded. Pre-shredded cheese works in a pinch, but freshly shredded melts and blends much better. Sharp cheddar gives that bold, tangy flavor that stands up to the cream cheese.
- Garlic Powder: 1 teaspoon. Not garlic salt—you want control over the salt level. Garlic powder distributes evenly and gives that savory depth without being overwhelming.
- Onion Powder: ½ teaspoon. Adds a subtle sweetness that rounds out the sharpness of the cheddar.
- Worcestershire Sauce: 1 tablespoon. This is the secret ingredient that adds umami and depth. Don’t skip it—it makes the flavor taste like you spent hours perfecting it.
- Salt: ¼ teaspoon, or to taste. Remember that the cheddar and Worcestershire already have salt, so go easy.
- Black Pepper: ¼ teaspoon, freshly ground if possible.
- Black Olives: 1 can (about 6 ounces), pitted. You’ll use these for the spider body and eyes. Look for large, firm olives that are easy to slice.
- Pretzel Sticks: 8 whole pretzel sticks for the spider legs. You can also use breadstick twists if you want thicker legs.
- Crackers or Veggies for Serving: About 2 cups total. I like a mix of buttery crackers, cucumber rounds, and bell pepper strips. The neutral flavors let the cheese ball shine.
Ingredient Tips: If you’re making this ahead of time, don’t add the olive spider decoration until right before serving. The olives can make the cheese ball soggy if they sit too long. For a milder flavor, use medium cheddar instead of sharp. And if you want a little heat, add a pinch of cayenne pepper to the cheese mixture—it gives a nice subtle kick without being spicy.
Equipment Needed
You don’t need fancy kitchen gadgets for this Spooky Spider Cheese Ball. Here’s what you’ll need:
- Large Mixing Bowl: Any medium-to-large bowl works. I use a glass mixing bowl because it doesn’t retain odors.
- Hand Mixer or Stand Mixer: A hand mixer makes blending the cream cheese smooth and quick. You can do it by hand with a wooden spoon, but it takes more elbow grease.
- Rubber Spatula: For scraping down the sides of the bowl and shaping the cheese ball.
- Plastic Wrap: Essential for wrapping the cheese ball while it chills. It keeps it from absorbing fridge odors.
- Baking Sheet or Plate: To hold the cheese ball while it sets in the fridge.
- Sharp Knife: For slicing the olives cleanly. A dull knife will squish them.
- Cutting Board: For prepping the olives and any veggie dippers.
- Serving Platter: A flat, wide platter works best for displaying the spider with its legs and surrounding crackers.
Budget-Friendly Tip: If you don’t have a hand mixer, just soften the cream cheese completely (leave it out for a full hour) and mix with a sturdy fork. It takes a few extra minutes but works fine. And honestly, the imperfections from hand-mixing give the cheese ball a more rustic look that feels homemade.
Preparation Method
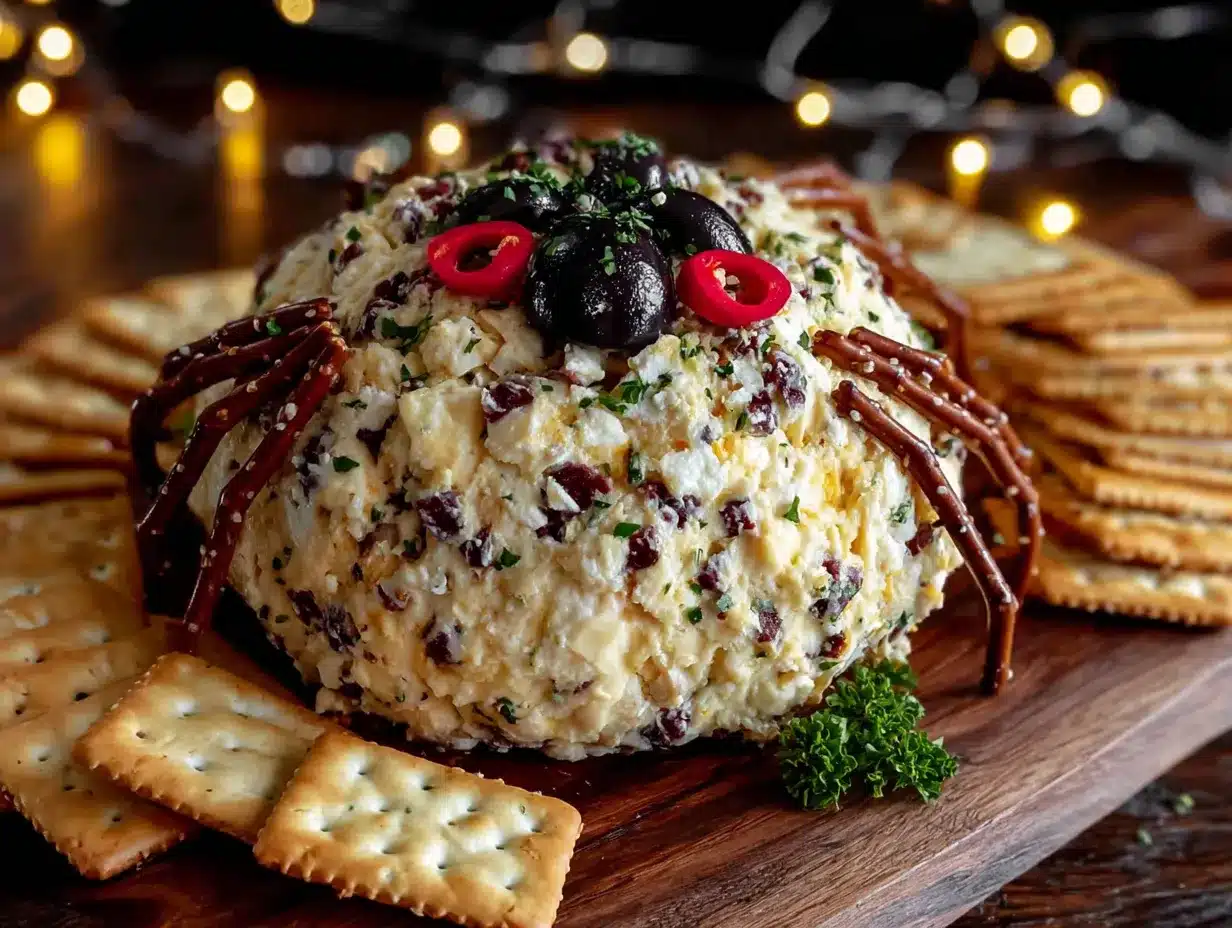
Making this Spooky Spider Cheese Ball for Halloween Parties is surprisingly straightforward. Follow these steps and you’ll have a show-stopping appetizer in no time.
- Soften the Cream Cheese: Take your cream cheese out of the fridge at least 1 hour before you start. It needs to be at room temperature—soft enough that you can easily press your finger into it. Cold cream cheese will be lumpy no matter how long you mix it. Trust me, I learned this the hard way when I tried to rush it once.
- Mix the Base: In your large mixing bowl, add the softened cream cheese, shredded cheddar, garlic powder, onion powder, Worcestershire sauce, salt, and pepper. Beat with your hand mixer on medium speed until everything is completely combined and smooth. Scrape down the sides and bottom of the bowl with your spatula at least once. The mixture should be pale yellow, creamy, and smell absolutely amazing.
- Taste and Adjust: This is the step nobody tells you about, but it’s crucial. Dip a clean finger or a small cracker into the mixture and taste it. Does it need more salt? A little more garlic? Adjust now before it chills. I usually add an extra dash of Worcestershire because I love that savory depth.
- Shape the Body: Transfer the cheese mixture onto a large piece of plastic wrap. Using the plastic wrap to protect your hands, shape the mixture into a ball. Then gently press and shape it into an oval or slightly elongated shape—like a spider body. Don’t worry about perfection; the olives will cover any uneven spots. Wrap it tightly in the plastic wrap.
- Chill the Cheese Ball: Place the wrapped cheese ball on a baking sheet or plate and refrigerate for at least 2 hours. Overnight is even better. This step is non-negotiable—the cheese ball needs to be firm enough to hold its shape when you add the legs and serve it. If it’s too soft, the pretzel legs will slide right off.
- Prepare the Spider Decoration: While the cheese ball chills, get your olives ready. Drain the can of black olives and pat them dry with a paper towel. Slice 6 olives in half lengthwise—these will be the spider’s body segments. For the eyes, take 2 small olives and cut them in half crosswise. Then use a toothpick or the tip of a knife to poke a tiny hole in the center of each round and insert a small piece of white cheese or a dot of cream cheese for the “eye.” It sounds fiddly, but it takes about 2 minutes.
- Assemble the Spider: Once the cheese ball is firm, unwrap it and place it on your serving platter. Gently press the olive halves onto the top of the cheese ball in a line to create the spider’s back. For the legs, carefully insert 8 pretzel sticks into the sides of the cheese ball—4 on each side. Angle them slightly to look like spider legs crawling. Place the two olive eyes at the front of the spider body.
- Add the Dippers: Arrange your crackers, cucumber rounds, and bell pepper strips around the spider. Make it look like the spider is sitting in the middle of a snack spread. Serve immediately or refrigerate for up to 1 hour before serving.
Sensory Cue: When you first mix the cheese, the Worcestershire sauce gives it a deep, savory aroma that fills your kitchen. By the time you’re shaping the ball, your hands will smell like the best garlic bread you’ve ever had. It’s intoxicating.
Cooking Tips & Techniques
After making this Spooky Spider Cheese Ball for Halloween Parties at least a dozen times, I’ve picked up some tricks that make the process smoother and the result more impressive.
Don’t Overmix: Once the ingredients are combined, stop mixing. Overmixing can make the cream cheese too soft and the texture almost greasy. You want it smooth, not aerated.
The Chilling Trick: If you’re short on time, pop the shaped cheese ball in the freezer for 20 minutes instead of 2 hours in the fridge. Just keep an eye on it—you want it firm, not frozen solid. Frozen cheese ball won’t hold the pretzel legs well.
Leg Placement: Insert the pretzel sticks at a slight downward angle so they look like the spider is crawling. If you push them in straight, it looks like a porcupine. I made that mistake once and my spider looked more like a hedgehog with an identity crisis.
Keeping the Eyes On: The olive eyes can fall off if the cheese ball is too soft. Press them in gently but firmly. If they still slide, use a tiny dab of cream cheese as “glue” to hold them in place.
Make-Ahead Strategy: You can prepare the cheese ball (without the decoration) up to 3 days in advance. Just wrap it tightly in plastic wrap and keep it refrigerated. Add the olive decoration and pretzel legs no more than 2 hours before serving. This way, the spider looks fresh and the pretzels stay crunchy.
What Went Wrong Once: I once tried to use low-fat cream cheese to make it “healthier.” Big mistake. The texture was grainy, and the cheese ball wouldn’t hold its shape. Full-fat cream cheese is the way to go for that smooth, spreadable consistency.
Variations & Adaptations
This Spooky Spider Cheese Ball for Halloween Parties is incredibly versatile. Here are some ways to make it your own.
Spicy Spider: Add 1 tablespoon of finely chopped jalapeño (seeds removed) and a pinch of cayenne pepper to the cheese mixture. The heat pairs beautifully with the sharp cheddar and makes the spider feel a little more dangerous.
Herb Garden Spider: Mix in 2 tablespoons of fresh chopped chives and 1 tablespoon of fresh dill. This version tastes lighter and fresher, perfect if you’re serving it alongside a vegetable platter. I made this for a friend’s Halloween brunch and it was a hit.
Dairy-Free Adaptation: Use dairy-free cream cheese and vegan cheddar shreds. Make sure to let the vegan cream cheese soften fully—it can be stiffer than the regular kind. The flavor will be slightly different, but the texture holds up well. I’ve tested this with Kite Hill brand and it worked great.
Gluten-Free Option: The cheese ball itself is naturally gluten-free. Just swap the pretzel sticks for gluten-free pretzel sticks or use carrot sticks for the legs. Make sure your Worcestershire sauce is gluten-free—Lea & Perrins is a safe bet.
Different Dippers: Instead of crackers, try serving with apple slices, celery sticks, or even small breadsticks. The sweet and salty combo of apple and cheese is surprisingly addictive.
Serving & Storage Suggestions
This Spooky Spider Cheese Ball is best served chilled, right out of the fridge. The cold temperature keeps the cheese ball firm and the pretzel legs crunchy. Arrange it on a large platter with the dippers surrounding the spider, almost like it’s sitting in a nest of snacks.
Presentation Tip: Add a few fake spider webs around the platter for extra Halloween flair. Just make sure the decorative webs don’t touch the food. You can also scatter a few whole black olives around the platter to tie the theme together.
Complementary Dishes: This cheese ball pairs beautifully with a warm bowl of pumpkin soup or a tray of mini sliders. For drinks, try a crisp apple cider or a dark beer like a stout. The savory cheese balances the sweetness of the cider and the richness of the beer.
Storage Instructions: If you have leftovers (unlikely, but possible), remove the pretzel legs and olive decorations first. Wrap the cheese ball tightly in plastic wrap and store it in the refrigerator for up to 5 days. The olives can be stored separately in an airtight container for up to a week.
Reheating: Don’t. This is a cold appetizer. If it’s been sitting out for more than 2 hours, just wrap it up and chill it again. The texture will still be great the next day.
Flavor Development: Honestly, the cheese ball tastes even better on day two. The flavors meld together overnight, making it more savory and complex. So don’t stress about making it ahead—it’s actually better that way.
Nutritional Information & Benefits
Per serving (about 2 tablespoons of cheese ball with 4 crackers): approximately 180 calories, 15g fat, 6g protein, 8g carbohydrates, 1g fiber. These values are estimates and will vary based on your specific ingredients and dippers.
Health Benefits: Cream cheese provides calcium and vitamin A, while cheddar adds protein and bone-supporting phosphorus. The garlic powder has anti-inflammatory properties, and black olives are a good source of healthy monounsaturated fats and iron. Sure, it’s an indulgent appetizer, but it’s not empty calories.
Dietary Considerations: This recipe is vegetarian and can be made gluten-free and dairy-free with the substitutions mentioned above. It is not vegan in its standard form due to the cream cheese and cheddar. It contains dairy and may contain gluten depending on your cracker choice.
Personal Wellness Note: I love that this recipe encourages people to eat together, to laugh at a silly-looking spider made of cheese, and to enjoy food without stress. That counts for something, right? Balance is everything.
Conclusion
This Spooky Spider Cheese Ball for Halloween Parties is more than just an appetizer—it’s a conversation starter, a memory maker, and honestly, the easiest way to impress your guests without breaking a sweat. Mrs. Kowalski’s recipe has become my Halloween tradition, and I hope it becomes yours too. The creamy, savory cheese paired with the crunchy pretzel legs and the fun olive decoration never fails to bring smiles.
I encourage you to make this your own. Add your favorite seasonings, swap the dippers, or even make it extra spicy if that’s your style. The beauty of this recipe is how forgiving and adaptable it is. And if your spider ends up looking a little lopsided or one of the legs falls off? That’s fine. It just gives it character.
I’d love to hear how your spider cheese ball turns out! Drop a comment below and tell me about your Halloween party, or share a photo of your creation. Don’t forget to tag me if you post it on social media. Happy Halloween, and happy snacking!
Frequently Asked Questions
Can I make this spider cheese ball a day ahead?
Absolutely. In fact, I recommend it. Prepare the cheese ball (without the olive and pretzel decoration) up to 3 days in advance. Wrap it tightly in plastic wrap and refrigerate. Add the spider legs and olive eyes no more than 2 hours before serving to keep the pretzels crunchy and the olives fresh.
What can I use instead of pretzel sticks for the spider legs?
You have several options. Breadsticks, thin carrot sticks, celery sticks, or even churro sticks for a sweet version all work well. For a gluten-free option, use gluten-free pretzel sticks or sturdy vegetable sticks like jicama or bell pepper strips.
How do I keep the olive eyes from falling off?
Press the olive halves gently but firmly into the cheese ball. If they still feel loose, dab a tiny amount of cream cheese on the back of the olive before pressing it on. This acts like edible glue and holds them in place perfectly.
Can I freeze this cheese ball?
I don’t recommend freezing it. Cream cheese changes texture when frozen and thawed, becoming grainy and watery. The cheddar also loses its creamy consistency. Stick to refrigeration for the best results. It keeps well for up to 5 days in the fridge.
What if I don’t like black olives? Can I use something else?
Of course! You can use sliced bell peppers to create a spider pattern on top, or even use small pieces of roasted red pepper. For the eyes, you can use capers, sliced cherry tomatoes, or even small rounds of cucumber with a dot of cream cheese in the center. Get creative with what you have on hand.
Pin This Recipe!
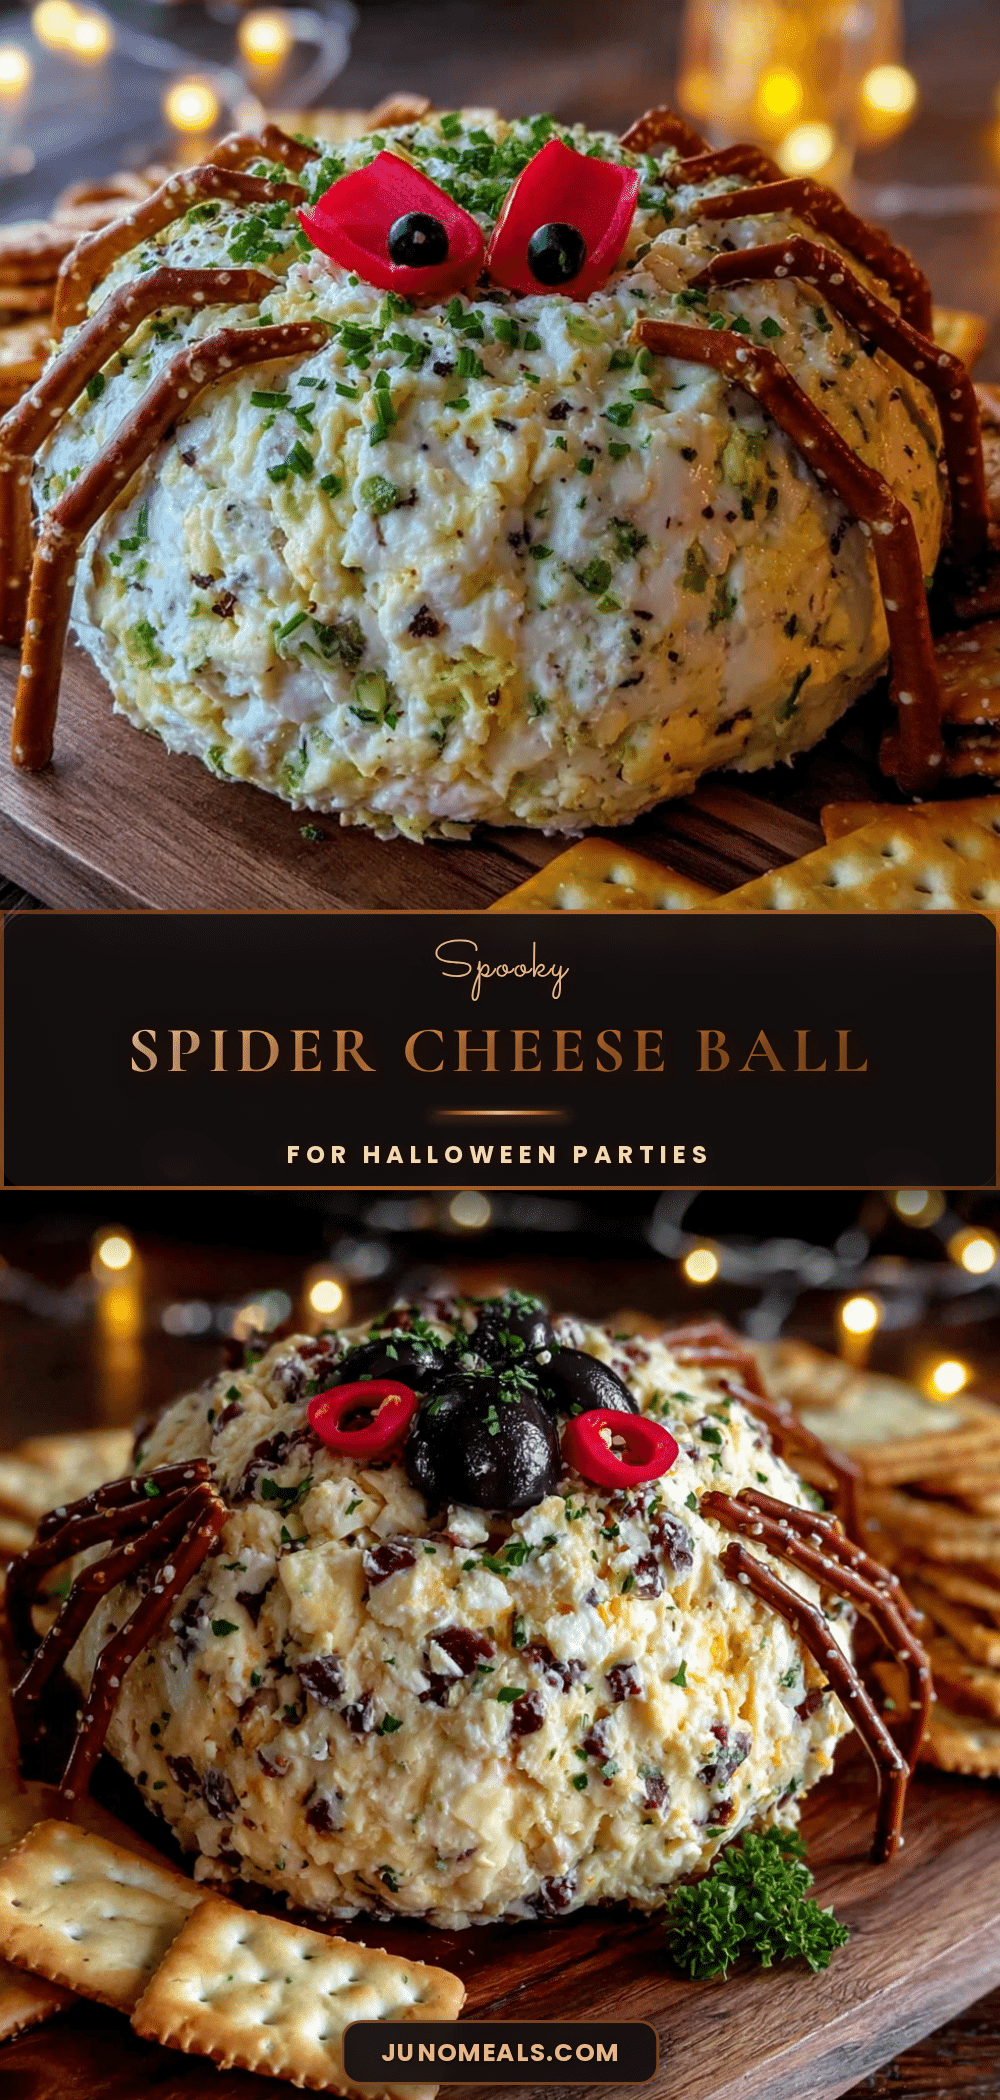
Best Spider Cheese Ball Recipe for Halloween
A spooky and delicious cheese ball shaped like a spider, perfect for Halloween parties. Creamy and savory with a fun presentation that will impress your guests.
- Prep Time: 20 minutes
- Cook Time: 0 minutes
- Total Time: 2 hours 20 minutes (includes chilling)
- Yield: 8 servings 1x
- Category: Appetizer
- Cuisine: American
Ingredients
- 16 ounces cream cheese, softened to room temperature
- 1 cup (4 ounces) sharp cheddar cheese, finely shredded
- 1 teaspoon garlic powder
- ½ teaspoon onion powder
- 1 tablespoon Worcestershire sauce
- ¼ teaspoon salt
- ¼ teaspoon black pepper, freshly ground
- 1 can (6 ounces) black olives, pitted
- 8 whole pretzel sticks
- 2 cups crackers or veggies for serving (e.g., buttery crackers, cucumber rounds, bell pepper strips)
Instructions
- Soften the cream cheese: Take cream cheese out of fridge at least 1 hour before starting. It should be room temperature and soft enough to press your finger into.
- Mix the base: In a large mixing bowl, combine softened cream cheese, shredded cheddar, garlic powder, onion powder, Worcestershire sauce, salt, and pepper. Beat with a hand mixer on medium speed until completely combined and smooth. Scrape down sides and bottom of bowl with a spatula at least once.
- Taste and adjust: Dip a clean finger or small cracker into the mixture and taste. Adjust seasoning if needed (e.g., add more Worcestershire sauce).
- Shape the body: Transfer cheese mixture onto a large piece of plastic wrap. Using the plastic wrap to protect your hands, shape into a ball, then gently press into an oval or slightly elongated shape (like a spider body). Wrap tightly in plastic wrap.
- Chill the cheese ball: Place wrapped cheese ball on a baking sheet or plate and refrigerate for at least 2 hours (overnight is better).
- Prepare the spider decoration: Drain black olives and pat dry. Slice 6 olives in half lengthwise for the spider’s body segments. For the eyes, cut 2 small olives in half crosswise, then use a toothpick or knife tip to poke a tiny hole in the center of each round and insert a small piece of white cheese or a dot of cream cheese for the ‘eye’.
- Assemble the spider: Once cheese ball is firm, unwrap and place on serving platter. Gently press olive halves onto the top in a line to create the spider’s back. Carefully insert 8 pretzel sticks into the sides (4 on each side), angling them slightly to look like spider legs. Place the two olive eyes at the front.
- Add the dippers: Arrange crackers, cucumber rounds, and bell pepper strips around the spider. Serve immediately or refrigerate for up to 1 hour before serving.
Notes
For best results, let cream cheese soften completely at room temperature. Add olive decoration and pretzel legs no more than 2 hours before serving to keep pretzels crunchy. Full-fat cream cheese is recommended for best texture. Can be made up to 3 days ahead (without decoration).
Nutrition
- Serving Size: 2 tablespoons cheese
- Calories: 180
- Sugar: 2
- Sodium: 320
- Fat: 15
- Saturated Fat: 9
- Carbohydrates: 8
- Fiber: 1
- Protein: 6
Keywords: spider cheese ball, Halloween appetizer, cheese ball, Halloween party food, spooky snack, easy appetizer


