My husband had sworn off Halloween food for years. Years. Every October, I’d see those photos of creepy-crawly snacks and adorable ghost pizzas floating around Pinterest, and I’d casually mention how fun they looked. He’d just shake his head. “It’s always more effort than it’s worth,” he’d say. “The kids don’t even eat them, and you’re stuck with a kitchen that looks like a spider exploded in it.” I couldn’t really argue—he had a point.
Then, last year, on a random Tuesday night in mid-October, I decided to make a batch of these Easy Mummy Hot Dogs with Crescent Dough just for myself. I mean, I was tired, the kids were restless, and I needed something—anything—to get us in the spirit without a full-blown production. I figured I’d whip them up, snap a quick photo for the blog, and maybe the kids would nibble on one before bed. Honestly, I wasn’t expecting much.
I got the crescent dough out of the fridge, sliced the hot dogs, and started wrapping. It took maybe ten minutes. Ten. And while they were baking, I started cleaning up the tiny bit of flour I’d spilled on the counter (because, let’s face it, I always spill something). That’s when I heard him. He was standing in the doorway, arms crossed, watching the oven like it was about to perform a magic trick. “Those actually look good,” he said, trying to sound casual.
I didn’t say a word. I just pulled the tray out, let them cool for a minute, and set one on a plate. He picked it up, took a bite, and—I swear—his eyes went a little wide. Then he ate three more. Maybe you’ve been there, right? That moment when a recipe you wrote off as “just for the kids” turns out to be something the whole house fights over. These little mummies did that. They were buttery, salty, and so ridiculously simple that I felt a little silly for not trying them sooner.
That night, I knew this wasn’t just another Halloween snack. It was the one that finally broke the spell. And now, it’s the reason my husband actually asks me what we’re making for Halloween dinner. These Easy Mummy Hot Dogs with Crescent Dough are the real deal—and they’re about to become your new favorite October tradition, too.
Why You’ll Love This Recipe
Let’s be real for a second. Halloween is chaotic. You’ve got costumes to wrangle, candy to buy (and hide from yourself), and a front door that’s opening every five minutes. The last thing you need is a complicated recipe that leaves you with a sink full of dishes. These Easy Mummy Hot Dogs with Crescent Dough are the opposite of that. They’re the weeknight hero you didn’t know you were looking for.
- Quick & Easy: From start to finish, this whole thing takes about 20 minutes. No marinating, no chilling, no fuss. You can literally make these while your kids are putting on their costumes.
- Simple Ingredients: You need exactly two main ingredients—hot dogs and crescent dough. Plus a little mustard for the eyes, but you probably already have that in your fridge door. No special trips to the store required.
- Perfect for Halloween Parties: Whether it’s a classroom party, a trunk-or-treat event, or just a fun dinner before the sugar rush, these fit right in. They look festive without being over-the-top.
- Crowd-Pleaser: I’ve served these to kids, adults, and even my picky neighbor who “doesn’t do themed food.” Everyone reaches for seconds. There’s something about the buttery, flaky dough wrapped around a salty hot dog that just works.
- Unbelievably Delicious: I know it sounds simple, but trust me—the texture is perfect. The crescent dough gets golden and crispy on the edges while staying soft around the hot dog. It’s comfort food at its most basic, and somehow that makes it even better.
What makes these different from every other Halloween snack out there? It’s the technique. Most recipes tell you to cut the dough into thin strips, which is fine, but I’ve found that using the pre-cut perforated triangles is the real secret. You get perfect little mummy bands every time, no measuring or guessing. Plus, the dough is already buttery, so you don’t need to add anything extra. It’s the kind of recipe that makes you look like a rockstar with almost zero effort.
Honestly, this recipe isn’t just good—it’s the kind that makes you close your eyes after the first bite. It’s Halloween comfort food reimagined: faster, simpler, but with the same soul-soothing satisfaction. Perfect for impressing your kids without stress, or turning a regular Tuesday into something memorable.
What Ingredients You Will Need
This recipe uses simple, pantry-friendly ingredients to deliver big flavor and that adorable mummy look without any fuss. You probably have most of these on hand already.
- 1 can (8 oz) refrigerated crescent dough sheets or crescent rolls – I prefer the seamless sheet version (like Pillsbury’s) because it’s easier to cut into even strips. If you can only find the perforated triangles, that’s fine—just press the seams together before cutting. (Using the sheet saves a little time and gives you cleaner mummy wraps.)
- 8 hot dogs – Use your favorite brand. I like all-beef hot dogs for flavor, but turkey or chicken hot dogs work great too. For a fun twist, try mini hot dogs or cocktail sausages for bite-sized mummies. (Look for hot dogs that are uniform in size so they bake evenly.)
- Mustard or ketchup for the eyes – Yellow mustard gives the best “mummy” look with that pale yellow color. Ketchup works too, but it’s a little messier. You can also use small dot of sriracha or even a tiny piece of black olive for a different look. (I use a toothpick to apply the eyes—it’s way easier than trying to pipe it.)
- Optional: Everything bagel seasoning or sesame seeds – Sprinkle a little on top before baking for extra texture and flavor. My kids love the “crunchy bits,” as they call them. (Totally optional, but it adds a nice touch.)
- Optional: Ketchup or ranch for dipping – These are great on their own, but a little dip on the side makes them feel more like a meal. My family loves ranch, but honey mustard or BBQ sauce works too.
Ingredient Selection Tips: I’ve tested this with several brands of crescent dough, and I always come back to Pillsbury. It’s the flakiest and most consistent. For the hot dogs, go with what you like—but avoid the extra-long ones because they’re harder to wrap evenly. If you’re feeding a crowd, grab a pack of mini hot dogs and adjust the bake time to about 8-10 minutes instead of 12-14.
Substitution Guidance: Need a gluten-free option? Use gluten-free crescent dough (it’s available at most major grocery stores now) and follow the same instructions. For a dairy-free version, check the crescent dough label—most are dairy-free, but some brands add butter. And if you’re watching sodium, low-sodium hot dogs work perfectly here.
Equipment Needed
You don’t need anything fancy for these Easy Mummy Hot Dogs with Crescent Dough. That’s part of the charm.
- Baking sheet – A standard half-sheet pan works great. Line it with parchment paper or a silicone baking mat for easy cleanup. (I’ve forgotten the parchment before, and let me tell you, scrubbing baked-on dough is not fun.)
- Sharp knife or pizza cutter – You’ll use this to cut the crescent dough into strips. A pizza cutter makes the job faster and gives you cleaner edges. (I use my pizza cutter for everything now—it’s a game changer.)
- Toothpick – For applying the mustard eyes. You could use a small piping bag or even a squeeze bottle, but a toothpick is way easier to clean.
- Pastry brush (optional) – If you want to brush the dough with egg wash or melted butter for extra golden color, a small pastry brush helps. But honestly, I skip this step most nights and they still come out great.
- Cooling rack – Letting the mummies cool on a rack for a minute or two keeps the bottoms from getting soggy. If you don’t have one, just slide them off the baking sheet onto a plate.
Budget-Friendly Options: Don’t own a pizza cutter? A sharp chef’s knife works just fine. No pastry brush? Use the back of a spoon to dab on any wash. And if you don’t have a cooling rack, a clean cutting board works in a pinch. The goal is fun, not fancy.
Preparation Method
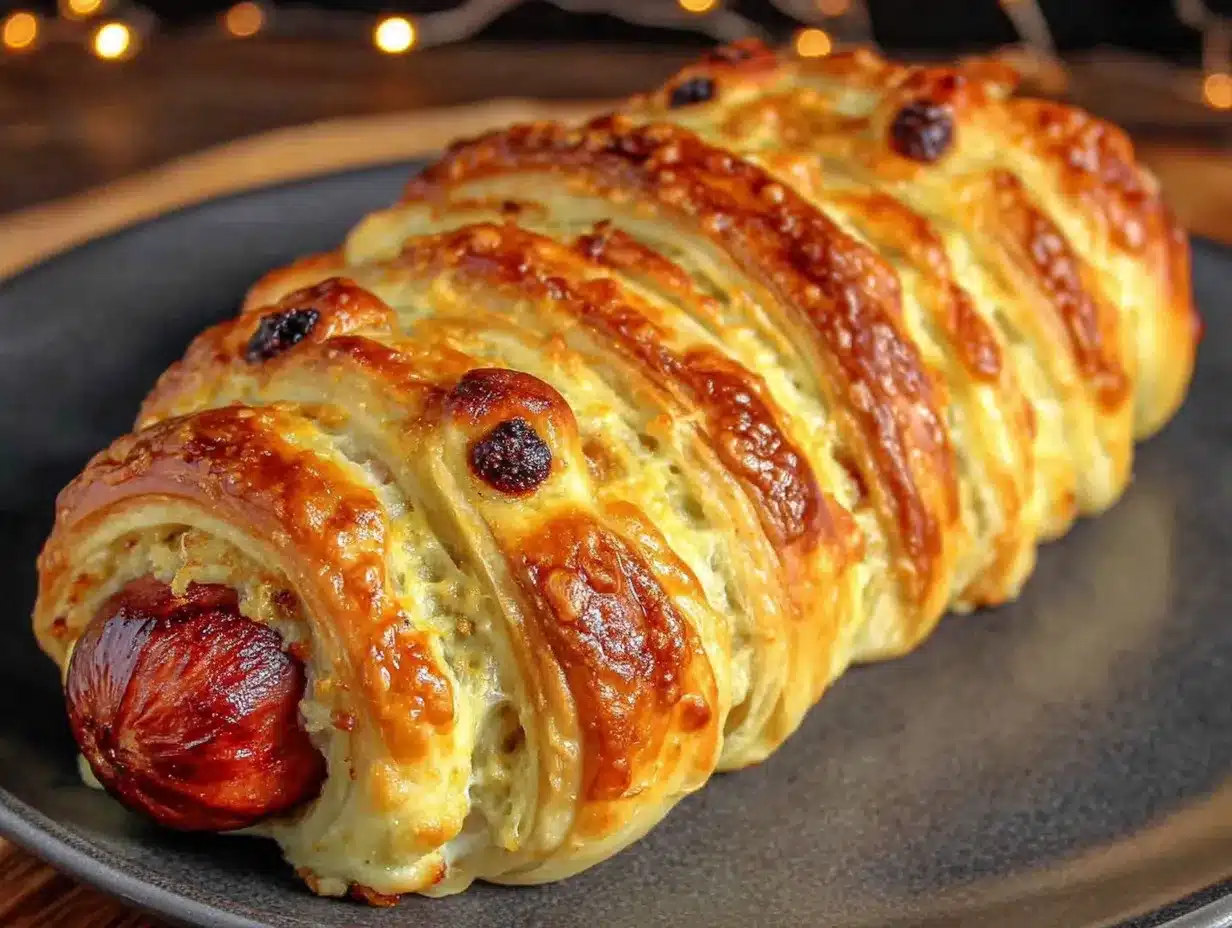
Alright, let’s get these little guys wrapped up. I promise, this is the easiest Halloween recipe you’ll make all season.
- Preheat your oven to 375°F (190°C). Line a baking sheet with parchment paper or a silicone mat. This step saves you from scrubbing later—trust me on this one.
- Unroll the crescent dough. If you’re using a seamless sheet, lay it flat on a clean cutting board. If you’ve got the perforated triangles, gently press the seams together with your fingers until you have one smooth rectangle. (Don’t worry if it’s not perfect—the dough is forgiving.)
- Cut the dough into strips. Using a sharp knife or pizza cutter, slice the dough lengthwise into 8-10 thin strips. Aim for about ½-inch (1.25 cm) wide. The strips don’t have to be perfectly even—some variation gives the mummies a more “wrapped” look. (I usually end up with 8 strips per can, which works out perfectly for 8 hot dogs.)
- Wrap the hot dogs. Take one strip of dough and wrap it around a hot dog, starting at one end and working your way to the other. Leave a small gap near the top for the “face.” Don’t wrap too tightly—the dough will expand as it bakes, and you want those little mummy eyes to show. (I learned this the hard way when my first batch came out looking like blobs.)
- Place the wrapped hot dogs on the prepared baking sheet. Arrange them about 2 inches apart so they have room to puff up. If you’re making a big batch, use two baking sheets or work in batches.
- Bake for 12-14 minutes, or until the dough is golden brown and puffed. The exact time depends on your oven, so start checking at the 10-minute mark. You’re looking for that beautiful golden color on the edges. (The smell in your kitchen right now is incredible—enjoy it.)
- Let them cool for 2-3 minutes on the baking sheet. This is important—the dough is hot and soft right out of the oven, and moving them too soon can cause them to fall apart. A quick rest on a cooling rack helps them set.
- Add the eyes. Dip a toothpick into mustard (or ketchup) and dot two small eyes onto the exposed hot dog near the top. You can make them look scared, happy, or just plain goofy. My kids always argue over who gets to do this step. (Pro tip: wipe the toothpick between dots to keep the eyes clean.)
- Serve immediately. These are best warm, when the dough is still flaky and the hot dog is juicy. Set out some ketchup or ranch for dipping, and watch them disappear.
Sensory Cue: When they’re done, the crescent dough should be golden brown and feel firm to the touch. If you tap one, it should sound slightly hollow on the outside. The hot dog inside will be steaming hot, so let them cool just enough so no one burns their tongue.
Troubleshooting Tip: If your dough strips are too thin and break while wrapping, don’t panic. Just press the broken ends together—they’ll fuse in the oven. And if a mummy unwraps a little during baking, that’s okay. It just looks more “undead,” which is honestly perfect for Halloween.
Cooking Tips & Techniques
I’ve made these Easy Mummy Hot Dogs with Crescent Dough about a dozen times now, and I’ve picked up a few tricks along the way. Let me save you from my early mistakes.
Don’t overwork the dough. Crescent dough is delicate, and the more you handle it, the tougher it gets. When you’re cutting the strips, use a sharp tool and a gentle hand. If the dough starts to feel sticky or warm, pop it in the fridge for 5 minutes. (I once tried to rush through this step and ended up with dough that tore every time. Lesson learned.)
Leave a little space for the eyes. I know it’s tempting to wrap the whole hot dog like a real mummy, but leaving about ½ inch (1.25 cm) of exposed hot dog at the top makes the face pop. Plus, it gives the mustard eyes a clean surface to stick to. If you wrap too high, the dough will puff up and cover the eyes completely.
Use a timer, but trust your eyes. Ovens vary, so while 12-14 minutes is a good guideline, your best bet is to check for that golden-brown color. If the dough is still pale at the 12-minute mark, give it another 2 minutes. If it’s browning too fast, tent the tray loosely with foil. (My old oven ran hot, and I burned a batch before I learned to check early.)
Multitasking tip: While the mummies are baking, set out your dipping sauces and get the plates ready. You can also prep a second batch if you’re feeding a crowd. The whole process moves fast, so having everything ready to go makes the final minutes stress-free.
Consistency is key. For the best results, use hot dogs that are all the same size. If you mix regular and jumbo hot dogs, the smaller ones will overcook while the bigger ones are still heating through. Stick with one size per batch, and you’ll get perfect results every time.
Variations & Adaptations
One of the best things about this recipe is how easy it is to change up. Here are a few ways I’ve adapted it over the years.
Spicy Mummies: Use spicy jalapeño hot dogs or brush the dough with a little sriracha before wrapping. My husband loves these—he says they have a “grown-up kick.” Just be careful not to add too much sauce, or the dough might get soggy.
Cheesy Mummies: Before wrapping, slice the hot dog lengthwise (not all the way through) and stuff a thin strip of cheddar or mozzarella inside. The cheese melts out a little during baking, which looks like mummy goo. My kids go absolutely wild for these.
Vegetarian Version: Swap the hot dogs for vegetarian sausages or even carrot dogs (carrots marinated in soy sauce and smoked paprika). The crescent dough works the same way, and the flavor is surprisingly close. I’ve made these for a friend who doesn’t eat meat, and she said they were “the best Halloween snack ever.”
Breakfast Mummies: Use breakfast sausage links instead of hot dogs, and serve with maple syrup for dipping. I tried this one morning when we were out of hot dogs, and it was a happy accident. The sweet-and-salty combo is amazing.
Gluten-Free Adaptation: As I mentioned earlier, gluten-free crescent dough is available now. It bakes up a little differently—usually a bit denser—but the flavor is still great. Just follow the package instructions for baking time, as it can vary by brand.
My Personal Favorite Variation: I once made these with mini hot dogs and served them on a platter with little “tombstone” labels made from folded tortilla chips. It was ridiculous and over-the-top, but the kids at the party talked about it for weeks. Sometimes going a little extra is worth it.
Serving & Storage Suggestions
These Easy Mummy Hot Dogs with Crescent Dough are best served warm, straight from the oven. The dough is at its flakiest, and the hot dog is perfectly juicy. But I’ve also served them at room temperature at parties, and they’re still delicious.
Presentation Ideas: Arrange the mummies on a platter with a small bowl of mustard “goo” for dipping. You can also add some “graveyard” decorations around the platter—crushed chocolate cookies for dirt, gummy worms, and a few candy eyeballs. It makes the whole spread feel festive without much extra work.
Complementary Dishes: These pair well with a simple side salad or some veggie sticks with ranch dip. For a full Halloween meal, I like to serve them alongside a bowl of pumpkin soup or some roasted carrot “fingers.” (Yes, that’s a thing, and kids love it.)
Storage Instructions: If you have leftovers (which is rare in my house), let them cool completely, then store them in an airtight container in the refrigerator for up to 3 days. The dough will soften a bit, but they’re still tasty.
Reheating Methods: To bring back some of the crispiness, reheat them in a 350°F (175°C) oven for 5-7 minutes. The microwave works in a pinch (30 seconds), but the dough will be soft, not crispy. I usually go with the oven if I have an extra 5 minutes.
Flavor Development: Honestly, these are best fresh. The dough loses its magic after a day or two, so I only make as many as I think we’ll eat in one sitting. But if you do have leftovers, they make a fun lunchbox surprise the next day.
Nutritional Information & Benefits
Let’s be honest—these aren’t health food. But they’re a fun treat, and knowing what’s in them helps you balance out the rest of your Halloween meal.
Estimated Nutritional Values (per mummy):
- Calories: 180-220
- Fat: 12-15g
- Carbohydrates: 14-18g
- Protein: 6-8g
- Sodium: 450-550mg
Health Benefits: Hot dogs are a source of protein, and crescent dough provides quick energy from carbs. If you use turkey or chicken hot dogs, you’ll cut the fat and calories by about a third. And if you add a side of veggies, you’ve got a balanced (if indulgent) meal.
Dietary Considerations: This recipe is not gluten-free unless you use gluten-free dough. It contains dairy in the crescent dough (check labels for specifics). For a lower-sodium option, use low-sodium hot dogs and skip any extra salt in the dough.
Potential Allergens: Wheat (gluten), dairy, and soy (in some hot dogs). Always check labels if you’re cooking for someone with allergies.
My Personal Take: I don’t make these every week—they’re a seasonal treat, and that’s part of what makes them special. But when I do make them, I don’t stress about the numbers. Halloween is about having fun, and these mummies deliver on that front.
Conclusion
These Easy Mummy Hot Dogs with Crescent Dough are proof that Halloween doesn’t have to be complicated to be memorable. They come together in under 20 minutes, use ingredients you probably already have, and somehow manage to make everyone at the table smile. I’ve made them for costume parties, school events, and quiet family dinners, and they never fail to deliver.
What I love most about this recipe is how it invites creativity. You can make them spicy, cheesy, or even breakfast-style. You can go all out with the presentation or just throw them on a plate and call it dinner. There’s no wrong way to do it, and that’s the beauty of it. Whether you’re a seasoned Halloween pro or a reluctant convert like my husband, these mummies will win you over.
So go ahead—grab a can of crescent dough and some hot dogs, and give these a try. I’d love to hear how they turn out for you. Leave a comment below and tell me your favorite variation, or share a photo of your mummy platter. And if you’re looking for more easy Halloween ideas, check out my Halloween Pizza Mummies and Spiderweb Dip—they’re just as fun and just as simple. Happy Halloween, friends!
Frequently Asked Questions
Can I make these ahead of time?
Yes! You can assemble the mummies up to 24 hours in advance. Just wrap the hot dogs, place them on the baking sheet, cover with plastic wrap, and refrigerate. Bake them fresh when you’re ready to serve. Add a minute or two to the baking time since they’ll be cold from the fridge.
Can I use puff pastry instead of crescent dough?
Absolutely. Puff pastry will give you a flakier, more buttery texture. Just thaw it according to the package directions, cut it into strips, and proceed with the recipe. The baking time might be slightly longer—around 15-18 minutes—so keep an eye on the color.
How do I keep the dough from unraveling while baking?
Make sure you’re wrapping the dough snugly but not too tight. Starting at one end and working your way to the other helps keep everything in place. If a strip still looks loose, you can tuck the end under the hot dog before baking. The dough will puff up and seal itself as it bakes.
Can I use mini hot dogs or cocktail sausages?
Yes! Mini hot dogs are perfect for parties. Just cut the crescent dough into thinner strips (about ¼ inch or 0.6 cm wide) and wrap them the same way. Bake for 8-10 minutes instead of 12-14. They’re great for little hands.
What’s the best way to add the eyes?
I use a toothpick dipped in yellow mustard. It gives you control over the size and placement. If you want bigger eyes, use a small piping tip or even the tip of a squeeze bottle. For a spookier look, try using small dots of sriracha or tiny pieces of black olive.
Pin This Recipe!

Easy Mummy Hot Dogs: Best Halloween Recipe with Crescent Dough

These Easy Mummy Hot Dogs with Crescent Dough are a quick, fun, and delicious Halloween snack that comes together in under 20 minutes. Buttery crescent dough wraps around salty hot dogs, creating a crowd-pleasing treat perfect for parties or a festive family dinner.
- Prep Time: 10 minutes
- Cook Time: 12-14 minutes
- Total Time: 22-24 minutes
- Yield: 8 servings 1x
- Category: Appetizer
- Cuisine: American
Ingredients
- 1 can (8 oz) refrigerated crescent dough sheets or crescent rolls
- 8 hot dogs
- Mustard or ketchup for the eyes
- Optional: Everything bagel seasoning or sesame seeds
- Optional: Ketchup or ranch for dipping
Instructions
- Preheat your oven to 375°F (190°C). Line a baking sheet with parchment paper or a silicone mat.
- Unroll the crescent dough. If using a seamless sheet, lay it flat on a clean cutting board. If using perforated triangles, gently press the seams together to form a smooth rectangle.
- Using a sharp knife or pizza cutter, slice the dough lengthwise into 8-10 thin strips, about ½-inch (1.25 cm) wide.
- Take one strip of dough and wrap it around a hot dog, starting at one end and working to the other. Leave a small gap near the top for the face. Do not wrap too tightly.
- Place the wrapped hot dogs on the prepared baking sheet, about 2 inches apart.
- Bake for 12-14 minutes, or until the dough is golden brown and puffed. Start checking at the 10-minute mark.
- Let them cool for 2-3 minutes on the baking sheet.
- Dip a toothpick into mustard (or ketchup) and dot two small eyes onto the exposed hot dog near the top.
- Serve immediately, with optional dipping sauces.
Notes
For best results, use hot dogs of uniform size. If dough strips break, press ends together—they will fuse during baking. For a gluten-free version, use gluten-free crescent dough. For a dairy-free version, check crescent dough label. Leftovers can be stored in an airtight container in the refrigerator for up to 3 days; reheat in a 350°F oven for 5-7 minutes to restore crispiness.
Nutrition
- Serving Size: 1 mummy
- Calories: 200
- Sugar: 3
- Sodium: 500
- Fat: 13.5
- Saturated Fat: 4.5
- Carbohydrates: 16
- Protein: 7
Keywords: mummy hot dogs, Halloween recipe, crescent dough, easy snack, kid-friendly, party food


