My sister-in-law, Rachel, wasn’t trying to be a hero that Tuesday afternoon. I’d stopped by to drop off a casserole dish she’d lent me, and the sight hit me before I even got through the mudroom. She was sitting at her kitchen table with a bunch of little paper cones, each one looking like a tiny, edible pumpkin. Honestly, I thought she was making some intricate craft project. “Oh, these?” she said, barely looking up from arranging a piece of cheese. “Just something for the kids’ Halloween party.” Just something. Let me tell you, there was nothing “just” about them. They were these perfect little cones filled with orange goodies—cheese cubes, crackers, fruit—all arranged to look like miniature pumpkins. I mean, I’ve seen charcuterie boards, but this was something else entirely. It was so simple, yet so completely clever that I felt a little jealous I hadn’t thought of it myself. She wasn’t trying to impress anyone. She was just trying to get her kids to eat something other than candy that week. And that, you know, is the magic of a great recipe. It solves a real problem in the most delightful way. Maybe you’ve been there, staring down a week of sugar-fueled chaos, wondering how to get something remotely nutritious into your kids without a fight. This is the answer. I asked her to show me how, and we’ve been making them for every fall gathering since. They’re the thing that gets the “oohs” and “ahhs” from the grown-ups and the giggles from the kids. And honestly, they’re the easiest way to feel like a hosting superstar without breaking a sweat.
Why You’ll Love These Mini Pumpkin Charcuterie Cones
These aren’t just cute snacks; they’re a total game-changer for any gathering. I’ve tested these at potlucks, birthday parties, and even a casual Friday night movie night, and they always steal the show. Here’s why they’ve become my go-to fall recipe.
- Kid-Approved & Parent-Approved: They look like a treat but sneak in real food like cheese and fruit. It’s a win-win for everyone at the table.
- Stress-Free Hosting: You can prep everything hours before your guests arrive. Just assemble the cones right before serving, and you’re done. No last-minute cooking required.
- Perfect for Gatherings: These are ideal for Halloween parties, Thanksgiving kids’ tables, or even a fall-themed playdate. They’re portable, so no mess on your furniture.
- Endlessly Customizable: Got a picky eater? No problem. You can swap out ingredients based on what your kids actually like. It’s a charcuterie board in a cone, so everyone gets their own.
- Unbelievably Cute: Let’s be honest, the visual factor is huge. The little pumpkin shapes are just too adorable not to smile at. They make the table look festive and fun.
What makes this recipe different from other snack boards is the portion control and the fun factor. Each cone is a personal serving, which means no double-dipping and no arguments over the last piece of cheese. It’s the kind of snack that makes you close your eyes after the first bite—not because it’s complex, but because it’s so perfectly simple and satisfying. It’s comfort food reimagined for a party, healthier than a bag of chips, but with the same soul-soothing satisfaction of a great snack. Perfect for impressing guests without stress, or turning a simple afternoon into something memorable.
What Ingredients You Will Need
This recipe uses simple, wholesome ingredients to deliver big flavor and adorable presentation without the fuss. Most of these are pantry staples or easy to find at your local grocery store. The key is to focus on orange and yellow foods to build that pumpkin look.
- For the Cones:
- Mini paper cones (available at craft stores or online; about 3-4 inches tall) – these are the base of your pumpkin.
- Orange cheese cubes (like cheddar or Colby Jack, cut into small squares) – these form the main “pumpkin” body.
- Yellow or white cheese cubes (like Monterey Jack or mozzarella) – for contrast and to fill out the shape.
- Small crackers (like Ritz or mini pretzel crisps) – these act as the “seeds” or add texture inside the cone.
- Orange bell pepper strips (cut into thin, short sticks) – adds a fresh crunch and more orange color.
- Mandarin orange segments (canned or fresh, drained well) – for a sweet, juicy pop of orange.
- Dried apricots (cut into small wedges) – another sweet, chewy orange option.
- Baby carrots (cut into thin rounds or small sticks) – adds a classic orange veggie crunch.
- For the “Stem” & Decorations:
- Pretzel sticks (broken in half) – these become the perfect pumpkin stem sticking out of the top.
- Green grapes (cut in half) – to look like little leaves next to the stem.
- Small green candy melts or M&Ms (optional) – for a sweeter leaf look.
- Green apple slices (thin wedges) – a fresh option for the leaves.
- Optional Add-Ins:
- Sunflower seeds (shelled) – for a nut-free crunch.
- Pumpkin seeds (pepitas) – to keep with the theme.
- Mini mozzarella balls (bocconcini) – for a mild, creamy texture.
- Turkey pepperoni slices (cut into small triangles) – for a savory, protein-packed option.
I recommend using a good block of sharp cheddar from a brand like Cabot or Tillamook for the best flavor and color. When choosing your orange bell pepper, look for one that’s firm and bright in color. If you’re using canned mandarin oranges, make sure to drain them on a paper towel for a few minutes so they don’t make the crackers soggy. For a gluten-free option, use gluten-free crackers and pretzels. For a dairy-free version, swap the cheese for dairy-free cheese cubes or add extra fruit and veggies.
Equipment Needed
You don’t need any fancy gadgets for this, which is part of the beauty. Here’s what you’ll need to make these adorable cones.
- Mini Paper Cones: These are the star of the show. You can find them at craft stores like Michaels or Hobby Lobby, or on Amazon. They come in packs of 50, so you’ll have plenty for a party. I’ve used them for popcorn and candy before, but they’re perfect for this.
- Small Cookie Scoop or Melon Baller: This is my secret weapon for getting uniform cheese cubes and fruit pieces. It makes the cones look so much more polished.
- Sharp Knife & Cutting Board: A good, sharp knife is essential for cutting the cheese and veggies into neat, small pieces. A dull knife will just crush everything.
- Small Bowls: For holding your prepped ingredients. I like to use a few small ramekins to keep everything organized.
- Piping Bags or Resealable Plastic Bags: If you want to get really fancy, you can pipe in some cream cheese or hummus as a base layer. But it’s totally optional.
- Tweezers or Small Tongs: For placing the delicate pieces like the pretzel stem and grape leaf without messing up the other items. It sounds extra, but it makes a huge difference.
If you don’t have mini cones, you can use small paper cups or even make your own from sturdy cardstock. I’ve also seen people use waffle cones, but those are much larger and change the scale. Stick with the small cones for the best “mini pumpkin” effect.
Preparation Method
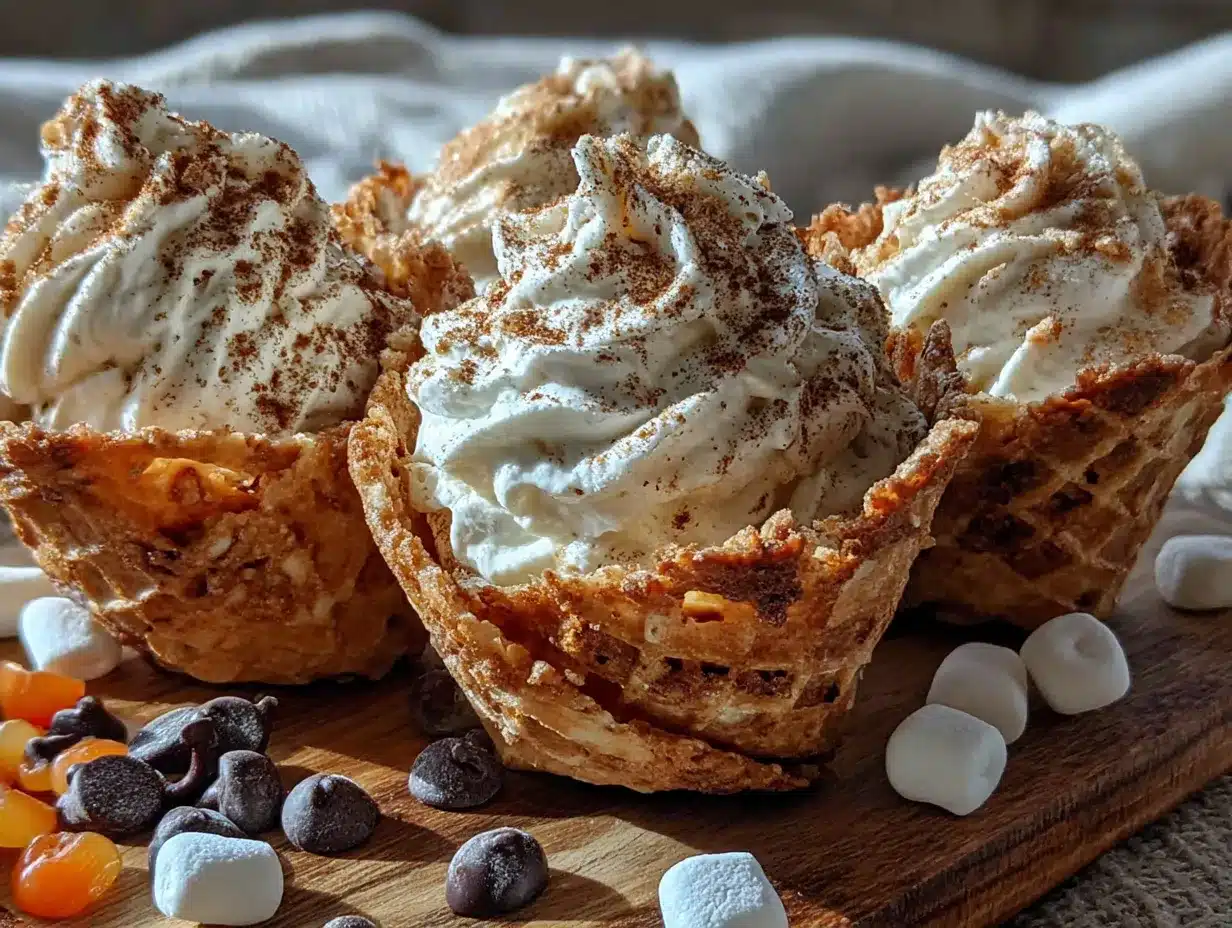
Here’s the step-by-step process to create these adorable little pumpkins. The best part? There’s no actual cooking involved. It’s all about assembly and creativity.
- Prep Your Ingredients (15 minutes): Start by cutting all your cheese into small, uniform cubes, about 1/2 inch in size. Cut your orange bell pepper into thin, 1-inch long strips. Drain your mandarin oranges and pat them dry. Cut your baby carrots into thin rounds. Break your pretzel sticks in half. Halve your green grapes. Having everything ready to go makes assembly a breeze.
- Set Up Your Assembly Line (5 minutes): Place your mini cones in a small glass or cup to keep them upright. This is a game-changer. It keeps them from tipping over while you fill them. Arrange your prepped ingredients in small bowls around you.
- Create the Base Layer (2 minutes per cone): Start by placing a few small crackers at the bottom of the cone. This creates a stable base and adds a nice crunch. Then, add a layer of cheese cubes, mixing the orange and yellow ones for color contrast.
- Build the Pumpkin Shape (3 minutes per cone): This is the fun part. You want to create a rounded, pumpkin-like shape at the top of the cone. Start layering your orange ingredients—cheese cubes, mandarin oranges, bell pepper strips, and carrot rounds—in a dome shape. Pack them in gently but firmly so they stay put. The goal is to have a nice, full mound that looks like a small pumpkin.
- Add the Stem and Leaves (1 minute per cone): Once your pumpkin body is formed, it’s time for the finishing touches. Gently push a half-pretzel stick into the very top center of the mound. This is your stem. Then, place two green grape halves on either side of the stem to look like leaves. You can also use a small green M&M for a sweeter touch.
- Final Touches (1 minute per cone): Look at your cone from all angles. Are there any gaps? Fill them in with a small piece of cheese or a sunflower seed. You want it to look full and lush. I like to add a few pumpkin seeds scattered around the base of the stem for extra texture.
- Serve Immediately or Refrigerate: These are best served fresh. If you need to make them ahead, you can prep all the ingredients and store them separately. Assemble the cones just before your guests arrive. If you do need to refrigerate assembled cones, place them in a single layer in a covered container for up to 2 hours. The crackers might get a little soft, but they’ll still be delicious.
A quick note: Don’t overfill the cone! You want a nice, rounded top, but if you pack it too tight, the cone might tear. It’s a delicate balance, but you’ll get the hang of it after the first one. I promise.
Cooking Tips & Techniques
I’ve made these cones more times than I can count, and I’ve learned a few things the hard way. Here are my top tips to make sure yours turn out perfectly.
- Keep Ingredients Dry: This is the most important rule. Wet ingredients will make your crackers and cones soggy. Pat your mandarin oranges and bell peppers dry with a paper towel before adding them. It makes a world of difference.
- Use a Base for Stability: I always put a few small crackers or a small piece of cheese at the very bottom of the cone. This prevents the smaller pieces from falling out the bottom and gives the cone a solid foundation.
- Work in Layers: Don’t just dump everything in. Build the cone in layers, gently pressing each layer down before adding the next. This creates a more stable structure and a better-looking final product.
- Vary the Textures: The best cones have a mix of textures. Combine the crunch of a cracker with the softness of a cheese cube and the juiciness of a mandarin orange. It keeps each bite interesting.
- Don’t Be Afraid to Get Specific: I once tried to use a very soft brie cheese. It was a disaster. It just squished out the sides. Stick with firmer cheeses like cheddar, gouda, or Colby Jack for the best results.
One of my biggest failures was trying to make these for a party without prepping the ingredients first. I was running around cutting cheese while my guests were arriving. It was chaos. Now, I always prep everything the night before. I cut the cheese, wash the grapes, and break the pretzels. Then, assembly takes me less than 10 minutes right before everyone shows up. Multitasking is key, but only if you’re prepared.
Variations & Adaptations
The beauty of this recipe is how easy it is to change it up. Here are some of my favorite variations that I’ve tried over the years.
- The Sweet Pumpkin: Swap all the savory ingredients for sweet ones. Use mini marshmallows, yogurt-covered raisins, banana slices (dipped in lemon juice to prevent browning), and small pieces of angel food cake. Use a small piece of a chocolate stick for the stem and mint leaves for the greens.
- The Protein-Packed Version: For a more filling snack, add small cubes of cooked chicken, turkey meatballs, or hard-boiled egg wedges. Use cheese cubes and cucumber slices for the orange and green colors. This is perfect for a post-soccer game snack.
- The Allergy-Friendly Pumpkin: For a nut-free and gluten-free version, use gluten-free pretzels and crackers. Replace cheese with dairy-free cheese cubes or extra fruit. Sunflower seeds are a great nut-free seed option. Always check labels to be sure.
- The Breakfast Cone: This is a fun one for a Halloween morning. Use small pancakes or waffle pieces as the base, add yogurt-covered raisins, and top with a small clementine wedge. Use a piece of a green apple slice for the leaf.
I once made a “monster” version for a birthday party where I used green grapes and green apple slices to make them look like little monsters instead of pumpkins. I used a small piece of a black olive for the eye. The kids went wild for them. Don’t be afraid to get creative with the theme!
Serving & Storage Suggestions
These cones are best served at room temperature, right after assembly. The flavors are fresh and the textures are at their peak. Here’s how to make them shine at your gathering.
For presentation, arrange the cones upright in a small, stable cup or a mason jar. You can also place them on a large platter, nestled together so they support each other. I like to sprinkle a few pumpkin seeds and candy corn around the base of the platter for a festive look. They pair beautifully with a warm mug of apple cider for the adults and a glass of milk for the kids. They also go great alongside a bowl of warm soup or a plate of mini sliders.
For storage, these are best eaten the day they are made. If you have leftovers (which is rare!), you can store them in an airtight container in the refrigerator for up to 24 hours. The crackers will soften, but the flavor will still be good. I do not recommend freezing them. The textures will become mushy and unappetizing. The flavors actually don’t develop much over time, so fresh is always best. If you’re prepping for a party, just store all the components separately in the fridge and assemble right before serving.
Nutritional Information & Benefits
While this is a fun snack, it can also be a surprisingly nutritious one, depending on what you put in it. Here’s a rough estimate for a cone made with cheese, crackers, bell peppers, and mandarin oranges.
Estimated Nutritional Values (per cone):
| Nutrient | Amount |
|---|---|
| Calories | ~120-150 |
| Protein | 5-7g |
| Carbohydrates | 12-15g |
| Fat | 6-8g |
| Fiber | 1-2g |
The cheese provides a good source of calcium and protein, which is great for growing kids. The bell peppers and carrots are packed with Vitamin A and antioxidants. The mandarin oranges offer a boost of Vitamin C. This is a much better option than a bag of chips or a candy bar for a party snack. It’s a great way to get kids to eat their veggies without a fight. From a wellness perspective, I love that this snack feels indulgent and fun, but it’s actually full of real, whole foods. It’s a balance I’m always trying to strike as a parent.
Dietary Considerations: This recipe can be made gluten-free, dairy-free, nut-free, and vegetarian. Please check all labels for allergens. The main allergens present in the base recipe are dairy (cheese) and gluten (crackers and pretzels).
Frequently Asked Questions
Can I make these mini pumpkin charcuterie cones ahead of time?
Yes, but only partially. You can prep all your ingredients—cut the cheese, wash the fruit, break the pretzels—up to 24 hours in advance and store them in separate airtight containers in the fridge. Assemble the cones no more than 2 hours before you plan to serve them to keep the crackers from getting soggy.
What can I use instead of mini paper cones?
If you can’t find the mini cones, you can use small paper cups (like the ones for ketchup), or even make your own from sturdy cardstock or construction paper. Just roll them into a cone shape and tape them closed. You can also use small waffle cones, but those are much bigger and will change the look.
My kids are picky eaters. What if they don’t like cheese?
No problem at all! You can make a completely cheese-free version. Use extra fruit like apple chunks, pear slices, and grapes. Add some cucumber slices or bell pepper strips. You can even add small cubes of cooked chicken or turkey for protein. The “pumpkin” shape comes from the orange and yellow ingredients, so focus on those colors.
How do I keep the cones from falling over?
The easiest trick is to place the empty cones in a small glass, a mason jar, or an egg carton while you fill them. This keeps them perfectly upright and stable. Once they are filled, they are quite stable on their own because the weight of the ingredients is at the bottom.
Can I use these for a school party or a nut-free event?
Absolutely! This recipe is naturally nut-free if you skip any nut-based ingredients. Just be sure to check the labels on your crackers, cheese, and any other packaged items to ensure they are processed in a nut-free facility. Sunflower seeds or pumpkin seeds are a great nut-free crunch option.
Conclusion
These adorable mini pumpkin charcuterie cones are more than just a cute snack—they’re a solution to the age-old problem of getting kids to eat real food at a party. They’re fun to make, even more fun to eat, and they make you look like a total rockstar host with almost zero effort. I love that they bring a little bit of that festive, fall magic to any table without requiring hours in the kitchen. I encourage you to make these your own. Swap in your kids’ favorite fruits and cheeses. Change the theme for a different holiday. The possibilities are endless. I’d love to hear how yours turn out! Please leave a comment below and share your own variations—or just tell me about the smiles they brought to your little ones’ faces. Happy snacking!
Pin This Recipe!

Best Mini Pumpkin Charcuterie Cones for Kids

These adorable mini pumpkin charcuterie cones are a fun, healthy snack for kids’ Halloween parties or fall gatherings. Made with cheese, fruit, and veggies arranged to look like tiny pumpkins, they’re a stress-free way to get kids to eat real food without a fight.
- Prep Time: 15 minutes
- Cook Time: 0 minutes
- Total Time: 15 minutes
- Yield: 4 servings
- Category: Appetizer
- Cuisine: American
Ingredients
- Mini paper cones (about 3-4 inches tall)
- Orange cheese cubes (like cheddar or Colby Jack, cut into small squares)
- Yellow or white cheese cubes (like Monterey Jack or mozzarella)
- Small crackers (like Ritz or mini pretzel crisps)
- Orange bell pepper strips (cut into thin, short sticks)
- Mandarin orange segments (canned or fresh, drained well)
- Dried apricots (cut into small wedges)
- Baby carrots (cut into thin rounds or small sticks)
- Pretzel sticks (broken in half)
- Green grapes (cut in half)
- Small green candy melts or M&Ms (optional)
- Green apple slices (thin wedges)
- Sunflower seeds (shelled, optional)
- Pumpkin seeds (pepitas, optional)
- Mini mozzarella balls (bocconcini, optional)
- Turkey pepperoni slices (cut into small triangles, optional)
Instructions
- Prep Your Ingredients (15 minutes): Cut all cheese into small, uniform cubes, about 1/2 inch in size. Cut orange bell pepper into thin, 1-inch long strips. Drain mandarin oranges and pat them dry. Cut baby carrots into thin rounds. Break pretzel sticks in half. Halve green grapes.
- Set Up Your Assembly Line (5 minutes): Place mini cones in a small glass or cup to keep them upright. Arrange prepped ingredients in small bowls around you.
- Create the Base Layer (2 minutes per cone): Place a few small crackers at the bottom of the cone. Add a layer of cheese cubes, mixing orange and yellow ones for color contrast.
- Build the Pumpkin Shape (3 minutes per cone): Layer orange ingredients—cheese cubes, mandarin oranges, bell pepper strips, and carrot rounds—in a dome shape. Pack them in gently but firmly so they stay put, creating a nice, full mound that looks like a small pumpkin.
- Add the Stem and Leaves (1 minute per cone): Gently push a half-pretzel stick into the very top center of the mound for the stem. Place two green grape halves on either side of the stem to look like leaves. Optionally, use a small green M&M for a sweeter touch.
- Final Touches (1 minute per cone): Check the cone from all angles and fill any gaps with a small piece of cheese or a sunflower seed. Add a few pumpkin seeds scattered around the base of the stem for extra texture.
- Serve Immediately or Refrigerate: Serve fresh. If making ahead, prep all ingredients and store separately. Assemble cones just before serving. Refrigerate assembled cones in a single layer in a covered container for up to 2 hours.
Notes
Keep ingredients dry to prevent sogginess. Use a base of crackers for stability. Work in layers for a stable structure. Vary textures for interest. Use firm cheeses like cheddar or Colby Jack. Prep ingredients the night before for easy assembly.
Nutrition
- Serving Size: 1 cone
- Calories: 120150
- Sugar: 57
- Sodium: 200300
- Fat: 68
- Saturated Fat: 34
- Carbohydrates: 1215
- Fiber: 12
- Protein: 57
Keywords: mini pumpkin charcuterie cones, Halloween snacks for kids, fall party appetizers, healthy kids snacks, charcuterie cones, pumpkin shaped snacks


