My neighbor, a retired kindergarten teacher named Carol, watched me wrestling with a piping bag of frosting on my kitchen counter last October. I was trying to make elaborate ghost cupcakes for my kid’s class party, and honestly, I was about five minutes away from throwing the whole thing in the trash. She didn’t say anything at first. She just leaned on the doorframe, sipped her coffee, and gave me that look—the one that says “you’re making this way harder than it needs to be.”
Then she walked over, grabbed a box of instant pudding from my pantry, and said, “Let me show you something.” That’s how I learned about dirt cups. No piping bags, no fancy decorating tips, no stress. Just chocolate pudding, crushed cookies, and a handful of gummy worms. Carol had been making these with her students for thirty years, and she told me they were the only Halloween treat that never failed to get a room full of kids grinning.
I’ll be honest—I was skeptical at first. Could something this simple really be worth serving at a party? But then I watched my own kids, covered in chocolate mustaches, laughing as they pulled gummy worms out of their cups. And I realized Carol was right. Sometimes the best recipes aren’t about showing off. They’re about making something that actually works, especially when you’re short on time and patience. Maybe you’ve been there—staring at a Pinterest-perfect dessert that requires three hours and ingredients you can’t pronounce. These dirt cups are the opposite of that.
Why You’ll Love This Recipe
Let me tell you why these quick Halloween dirt cups have become my secret weapon for every fall gathering. First, they come together in about five minutes flat. I’m not exaggerating—if you have the ingredients ready, you can have these assembled before your kids finish arguing over who gets the red gummy worm.
- Quick & Easy: We’re talking five minutes of active work. No baking, no complicated steps, no waiting for things to cool. This is the kind of recipe you can make while your toddler is having a meltdown or while you’re on a conference call.
- Simple Ingredients: You probably have most of these in your kitchen right now. Instant chocolate pudding, milk, Oreo cookies, and gummy worms. That’s it. No special trips to a fancy grocery store.
- Perfect for Halloween Parties: Whether it’s a classroom celebration, a trunk-or-treat event, or just a fun treat after trick-or-treating, these dirt cups fit right in. Kids go absolutely wild for them.
- Crowd-Pleaser: I’ve served these to kids, adults, and even picky grandparents who claimed they didn’t like sweets. Every single person ended up scraping the bottom of their cup.
- Unbelievably Delicious: The combination of creamy chocolate pudding and crunchy cookie crumbs is pure comfort food. And the gummy worms? They add this chewy, fruity surprise that makes every bite interesting.
What makes these different from other Halloween desserts is the texture contrast. The pudding is silky smooth, the cookie crumbs are crunchy, and the gummy worms are chewy. It’s a party in your mouth, honestly. And because there’s no baking involved, you can make these with your kids without worrying about hot ovens or sharp knives. That’s a win in my book.
What Ingredients You Will Need
This recipe uses simple, everyday ingredients that work together to create something surprisingly delicious. The beauty of these dirt cups is that you don’t need anything fancy—just pantry staples and a bag of gummy worms.
- 1 box (3.9 oz) instant chocolate pudding mix (I prefer Jell-O brand for the smoothest texture, but store brands work fine too)
- 2 cups cold milk (whole milk gives the richest pudding, but 2% or even oat milk works in a pinch)
- 20 Oreo cookies (regular or double stuff—both work great. The cream filling adds a little extra sweetness to the “dirt”)
- 1 cup gummy worms (look for the classic sour or regular varieties. I like the ones with different colors for the best visual effect)
- 6 small clear cups or glasses (4-ounce size works perfectly. Clear cups let you see the layers, which is half the fun)
- Optional: whipped topping (a dollop on top makes it feel extra special, but it’s totally optional)
Let me share a quick tip about the pudding mix. Make sure you’re using instant pudding, not cook-and-serve. Instant pudding sets up in about five minutes, which is the whole point of this recipe. Cook-and-serve requires heating on the stove and then chilling for hours. Trust me, I learned this the hard way when I grabbed the wrong box one time.
For the Oreos, I’ve found that crushing them in a zip-top bag with a rolling pin gives you the most control over the texture. You want some fine crumbs and some slightly larger pieces—it looks more like real dirt that way. If you’re in a hurry, you can pulse them in a food processor, but be careful not to overdo it. You don’t want powder.
The gummy worms are where you can get creative. I usually buy the classic sour worms, but I’ve also used the giant ones cut in half for a more dramatic effect. My kids love when I hide some worms completely under the cookie crumbs so they have to “dig” for them. It’s a small touch that makes a big difference in the fun factor.
Equipment Needed
You don’t need much for this recipe, which is part of why I love it. Here’s what you’ll need:
- Medium mixing bowl (any size works, but medium is perfect for whisking the pudding)
- Whisk or electric mixer (a whisk works fine, but an electric mixer makes the pudding extra smooth in about 30 seconds)
- Measuring cups (for the milk)
- Zip-top bag or food processor (for crushing the Oreos)
- Rolling pin or heavy pan (if using the zip-top bag method)
- 6 small clear cups or glasses (4-6 ounce size. I found a pack of clear plastic cups at the dollar store that works perfectly)
- Spoon or small spatula (for layering)
If you don’t have a rolling pin, a heavy-bottomed pan or even a wine bottle works great for crushing the cookies. I’ve used both, and honestly, the wine bottle was more fun. Just make sure the bag is sealed tight before you start—I learned that lesson when cookie crumbs ended up all over my kitchen floor.
For the cups, clear is definitely better than opaque. Part of the magic of dirt cups is seeing the layers of chocolate pudding, cookie crumbs, and gummy worms. I’ve also made these in small mason jars, which look adorable and make great party favors.
Preparation Method
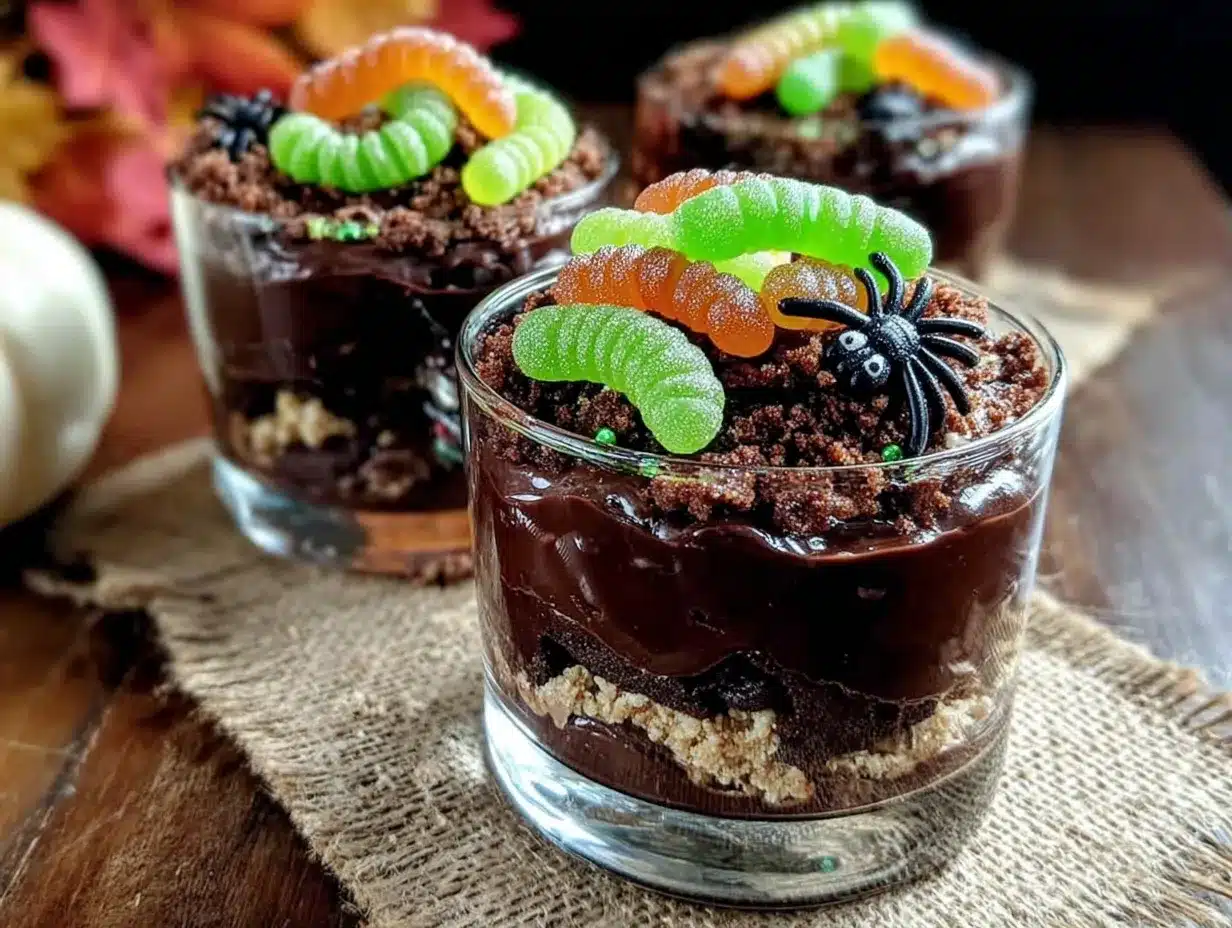
- Make the pudding: In your medium mixing bowl, whisk together the instant chocolate pudding mix and 2 cups of cold milk. Whisk for about 2 minutes until the mixture starts to thicken. If you’re using an electric mixer, beat on low speed for about 1 minute. The pudding will be thin at first, but don’t worry—it will set up as it sits.
- Let the pudding set: Let the pudding sit for about 5 minutes. You’ll notice it getting thicker and creamier. This is the perfect time to crush your Oreos. The pudding should be thick enough that it doesn’t run when you spoon it into the cups.
- Crush the Oreos: Place the Oreo cookies in a zip-top bag and seal it tight. Use a rolling pin or heavy pan to crush them into fine crumbs with some small chunks. You want the texture of potting soil—some fine particles and some slightly bigger pieces. Alternatively, pulse them in a food processor for about 10 seconds.
- Layer the cups: Spoon about 2 tablespoons of the chocolate pudding into the bottom of each clear cup. Spread it evenly with the back of your spoon. This is the “soil” layer.
- Add the first cookie layer: Sprinkle about 1 tablespoon of crushed Oreos over the pudding. You want an even layer that covers the pudding completely.
- Place the gummy worms: Push 2-3 gummy worms into the cookie layer, letting some stick out the top. This is where the fun happens—arrange them so it looks like worms are crawling out of the dirt.
- Add the second pudding layer: Spoon another 2 tablespoons of pudding over the cookie and worm layer. Spread it gently so you don’t push the worms all the way down.
- Top with cookie crumbs: Sprinkle the remaining crushed Oreos over the top. You want a generous layer that completely covers the pudding. This is the “dirt” on top.
- Add more worms: Place another gummy worm or two on top, partially buried in the cookie crumbs. This makes it look like the worms are crawling out of the dirt.
- Chill (optional but recommended): Refrigerate the dirt cups for at least 30 minutes before serving. This helps the pudding set completely and makes the texture even better. If you’re in a hurry, you can serve them immediately—they’re still delicious.
Here’s a sensory cue that I’ve learned to watch for: when you spoon the pudding into the cups, it should hold its shape slightly but still be soft enough to spread. If it’s too runny, give it another minute or two to set. If it’s too thick, you might have over-whisked it—but honestly, that’s hard to do with instant pudding.
One thing I always tell people: don’t overthink the layering. These are supposed to look messy and earthy. That’s the whole point. If your layers aren’t perfectly even, it just looks more like real dirt. Embrace the imperfection.
Cooking Tips & Techniques
After making these dirt cups at least two dozen times, I’ve picked up a few tricks that make the process even smoother. Let me share what I’ve learned—including the mistakes I’ve made so you don’t have to repeat them.
Use cold milk straight from the fridge. This is non-negotiable for instant pudding. Warm milk won’t thicken properly, and you’ll end up with soupy pudding that never sets. I learned this the hard way when I was in a rush and used milk that had been sitting on the counter. The pudding never thickened, and I ended up with chocolate soup.
Crush the cookies while the pudding sets. This is a great multitasking strategy. While your pudding is thickening, crush those Oreos. By the time you’re done, the pudding will be ready to layer. It’s all about timing, and this recipe makes it easy.
Don’t overmix the pudding. Whisk just until the powder dissolves and the mixture starts to thicken. Overmixing can make the pudding grainy. You want it smooth and creamy, not lumpy.
Use a spoon to layer, not a piping bag. I know some bloggers recommend piping the pudding for clean layers, but honestly, that’s way more work than necessary. A regular spoon works fine, and the slightly messy look adds to the “dirt” aesthetic.
Keep extra gummy worms on hand. Trust me on this one. Kids (and adults) will want to snack on them while you’re assembling. Plus, you might want to add a few extra to the tops for visual appeal. I always buy two bags instead of one.
Make these ahead of time. These dirt cups actually taste better after they’ve sat in the fridge for a few hours. The cookie crumbs soften slightly and meld with the pudding, creating this amazing texture that’s part pudding, part crust. I usually make them the night before a party.
Variations & Adaptations
One of the best things about this recipe is how easy it is to customize. Here are some variations I’ve tried and loved:
Dairy-Free Version: Use almond milk, oat milk, or coconut milk in place of regular milk. Just make sure you’re using instant pudding that’s labeled as vegan—some brands contain dairy. I’ve had great results with almond milk, though the pudding is slightly less thick. Also, use dairy-free chocolate cookies like Newman’s Own Oreo-style cookies.
Gluten-Free Option: This one’s easy—just use gluten-free chocolate sandwich cookies. There are several brands available now, and they crush up just like regular Oreos. The pudding itself is naturally gluten-free, so you’re good there.
Different Pudding Flavors: While chocolate is classic, I’ve made these with vanilla pudding and crushed golden Oreos for a “sand” effect. My kids loved it. You can also try butterscotch or white chocolate pudding for a different flavor profile.
Add a Peanut Butter Twist: Stir a tablespoon of peanut butter into the pudding before layering. It adds a rich, nutty flavor that pairs beautifully with the chocolate. Just make sure no one has peanut allergies if you’re serving these at a party.
Make It Extra Spooky: Add some candy eyeballs to the top of the dirt cups. They look like little creatures peeking out of the dirt. I did this for a Halloween party last year, and everyone lost their minds over how cute and creepy they looked.
Individual Serving Sizes: You can make these in shot glasses for adult parties or in larger mason jars for a more substantial dessert. The proportions are easy to adjust—just keep the ratio of pudding to cookie crumbs about 2:1.
Serving & Storage Suggestions
These dirt cups are best served cold, straight from the refrigerator. The contrast between the cold, creamy pudding and the crunchy cookie crumbs is what makes them so satisfying. I like to serve them with a small spoon and a napkin—things can get a little messy, but that’s part of the fun.
For presentation, I arrange the cups on a tray or platter and scatter a few extra gummy worms around the base. It creates this fun, playful look that kids absolutely love. If you’re serving these at a Halloween party, you can add some fake spider webs or plastic spiders around the tray for extra spookiness.
Storage: These dirt cups will keep in the refrigerator for up to 3 days. Cover them with plastic wrap or a lid to prevent the cookie crumbs from getting too soggy. The texture is best within the first 24 hours, but they’re still delicious after that.
Freezing: I don’t recommend freezing these. The pudding gets icy and the texture changes. Plus, they’re so quick to make that there’s really no need to freeze them.
Reheating: Don’t. These are meant to be served cold. If you want a warm dessert, make a different recipe.
One thing I’ve noticed: the flavors actually get better after a few hours in the fridge. The cookie crumbs soften and infuse the pudding with their chocolatey flavor. If you can, make these the night before you plan to serve them. Your future self will thank you.
Nutritional Information & Benefits
Let’s be real—these are a treat, not a health food. But here’s the nutritional breakdown for one serving (based on 6 servings):
| Nutrient | Amount per Serving |
|---|---|
| Calories | 280 |
| Total Fat | 8g |
| Saturated Fat | 3g |
| Cholesterol | 5mg |
| Sodium | 380mg |
| Total Carbohydrates | 48g |
| Dietary Fiber | 1g |
| Sugars | 32g |
| Protein | 5g |
The good news? These are portion-controlled, which helps with moderation. Each cup is a reasonable serving size, unlike a slice of cake that you might go back for seconds on. The pudding contains calcium from the milk, and the Oreos provide a little bit of iron. The gummy worms? Well, they’re pure sugar, but they make the whole experience fun.
If you’re looking to make these a bit healthier, you can use sugar-free pudding mix and low-fat milk. The taste is still great, and you’ll save about 60 calories per serving. You can also use reduced-fat Oreos, though honestly, I think the full-fat version tastes better.
These are not suitable for vegans or people with dairy allergies unless you use the substitutions I mentioned earlier. They also contain gluten from the cookies, so keep that in mind if you’re serving someone with celiac disease.
Conclusion
These quick Halloween dirt cups are proof that you don’t need to spend hours in the kitchen to create something memorable. They’re fun, delicious, and so simple that even the most kitchen-phobic person can pull them off. Every time I make them, I think about Carol standing in my doorway, showing me that sometimes the best recipes are the ones that don’t try too hard.
I love these because they bring people together. Kids get excited about the gummy worms. Adults appreciate how easy they are. And everyone ends up with chocolate on their faces and smiles on their lips. That’s what Halloween should be about—not stress, not perfection, just good times and good treats.
So go ahead and make these for your next Halloween party, classroom celebration, or just a random Tuesday when you need a little fun. Customize them however you like—add more worms, use different cookies, make them dairy-free. The recipe is just a starting point. Make it your own.
I’d love to hear how yours turn out! Drop a comment below and let me know if you tried any fun variations. And if you’re looking for more easy Halloween treats, don’t miss our spider web dip or these pumpkin patch brownies. Happy Halloween, friends!
Frequently Asked Questions
Can I make these dirt cups ahead of time?
Absolutely! These actually taste better after sitting in the fridge for a few hours. You can make them up to 2 days in advance. Just cover them with plastic wrap to keep the cookie crumbs from getting too soggy.
Can I use homemade pudding instead of instant?
You can, but it changes the recipe significantly. Homemade pudding needs time to chill and set, which defeats the purpose of a 5-minute dessert. If you want to use homemade pudding, make it first and let it cool completely before layering.
What if I don’t have Oreos?
Any chocolate sandwich cookie will work. You can also use chocolate graham crackers, chocolate wafer cookies, or even crushed chocolate chip cookies. The key is getting that dark, earthy color that looks like dirt.
How do I keep the gummy worms from sinking?
This is a common problem! The trick is to add the worms after the first cookie layer, not directly into the pudding. The cookie crumbs create a barrier that helps hold the worms in place. You can also refrigerate the cups for 10 minutes before adding the worms to let the pudding firm up a bit.
Can I use sugar-free pudding mix?
Yes, sugar-free instant pudding works perfectly. Just follow the same instructions. The taste is slightly different, but still delicious. This is a great option if you’re watching your sugar intake or serving these to someone with diabetes.
Pin This Recipe!
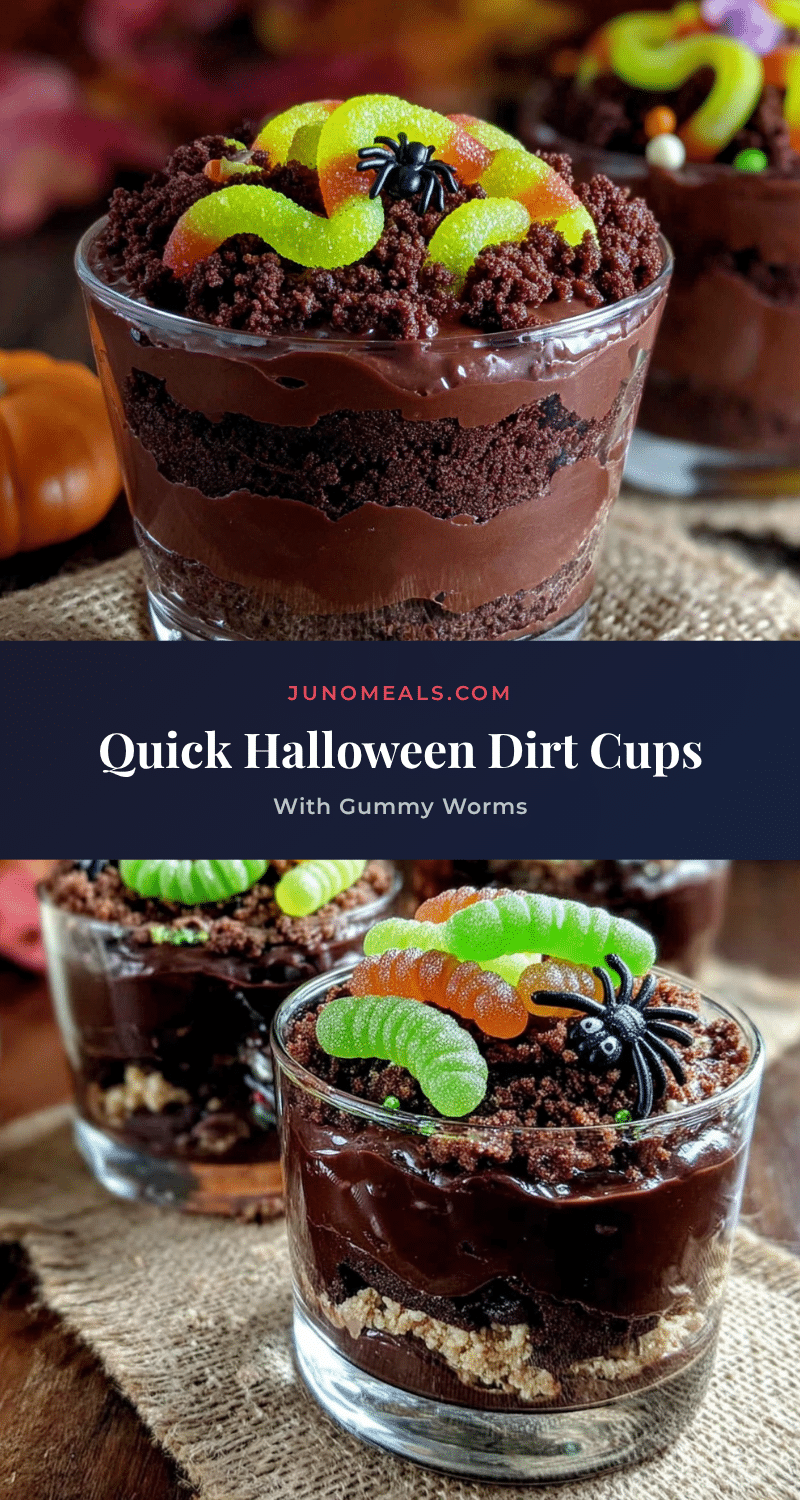
Easy Halloween Dirt Cups: 5-Minute Gummy Worm Treats
These quick and easy Halloween dirt cups are made with chocolate pudding, crushed Oreos, and gummy worms. No baking required, ready in 5 minutes, and perfect for parties.
- Prep Time: 5 minutes
- Cook Time: 0 minutes
- Total Time: 35 minutes (including chilling)
- Yield: 6 servings 1x
- Category: Dessert
- Cuisine: American
Ingredients
- 1 box (3.9 oz) instant chocolate pudding mix
- 2 cups cold milk
- 20 Oreo cookies
- 1 cup gummy worms
- 6 small clear cups or glasses (4-ounce size)
- Optional: whipped topping
Instructions
- In a medium mixing bowl, whisk together the instant chocolate pudding mix and 2 cups of cold milk. Whisk for about 2 minutes until the mixture starts to thicken. If using an electric mixer, beat on low speed for about 1 minute.
- Let the pudding sit for about 5 minutes to set.
- Place the Oreo cookies in a zip-top bag and seal it tight. Use a rolling pin or heavy pan to crush them into fine crumbs with some small chunks. Alternatively, pulse them in a food processor for about 10 seconds.
- Spoon about 2 tablespoons of the chocolate pudding into the bottom of each clear cup. Spread it evenly with the back of your spoon.
- Sprinkle about 1 tablespoon of crushed Oreos over the pudding.
- Push 2-3 gummy worms into the cookie layer, letting some stick out the top.
- Spoon another 2 tablespoons of pudding over the cookie and worm layer. Spread gently.
- Sprinkle the remaining crushed Oreos over the top to cover the pudding completely.
- Place another gummy worm or two on top, partially buried in the cookie crumbs.
- Refrigerate for at least 30 minutes before serving (optional but recommended).
Notes
Use cold milk straight from the fridge for best results. Crush cookies while pudding sets. Don’t overmix the pudding. Keep extra gummy worms on hand. These taste better after sitting in the fridge for a few hours. Can be made up to 2 days in advance.
Nutrition
- Serving Size: 1 cup
- Calories: 280
- Sugar: 32
- Sodium: 380
- Fat: 8
- Saturated Fat: 3
- Carbohydrates: 48
- Fiber: 1
- Protein: 5
Keywords: Halloween dirt cups, gummy worm treats, no-bake dessert, easy Halloween dessert, chocolate pudding cups


