“But why can’t you just dump everything in one bowl?” my brother asked, watching me pull out a second mixing bowl. I started to explain why that wouldn’t work — something about the order of wet and dry ingredients, about over-mixing, about the science of it all. Then I stopped. Honestly? I had no good reason. I was just doing it the way I’d always been taught.
So I handed him the whisk and said, “Fine. You do it.” And he did. He dumped the flour right into the pumpkin mixture, added the chocolate chips without dusting them first, and stirred with the kind of reckless confidence only a non-baker possesses. I was certain I’d be scraping a dense, gummy mess into the trash within the hour. Maybe you’ve been there — watching someone break a rule you’ve followed for years and feeling that twinge of, well, annoyance mixed with curiosity.
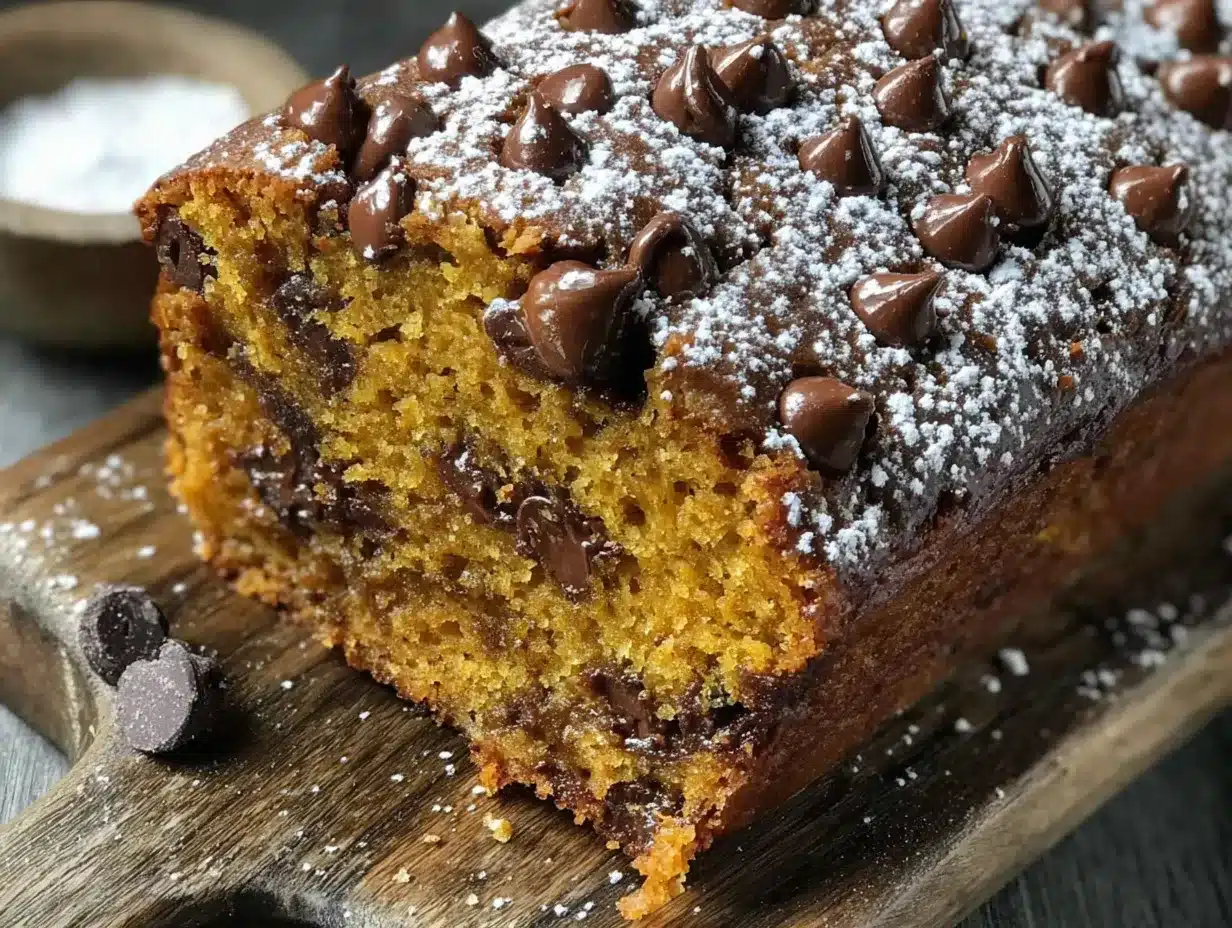
But here’s the thing. That bread came out of the oven looking perfect. Golden on top, cracked in that way bakery loaves are, with little puddles of melted chocolate peeking through. And the taste? It was the most tender, moist pumpkin chocolate chip bread I’d ever made. My brother just shrugged and said, “Told you.” I stood there with a spatula in my hand, humbled by a beginner’s instinct that turned out to be exactly right. That was three winters ago, and I haven’t used a second bowl since. This recipe stayed with me because it proved that sometimes the best cooking happens when you let go of the rules.
Why You’ll Love This Recipe
This cozy one-bowl pumpkin chocolate chip bread isn’t just another pumpkin recipe. It’s the one I’ve tested more times than I can count, tweaking and perfecting until every single slice delivers exactly what you want from fall baking. Let me tell you why it’s different.
- Quick & Easy: From start to oven in under 15 minutes. One bowl, one whisk, zero fuss. Perfect for those afternoons when you need something warm and comforting without a massive kitchen cleanup.
- Simple Ingredients: No fancy grocery trips needed. Canned pumpkin, basic pantry staples, and chocolate chips. You probably have everything right now.
- Perfect for Cozy Evenings: This bread was made for cold weather, rainy Sundays, or any day that needs a little warming up. It’s the kind of thing you bake when you want your house to smell like fall.
- Crowd-Pleaser: I’ve brought this to potlucks, family dinners, and neighbor meet-and-greets. It disappears every single time. Kids love the chocolate, adults love the pumpkin spice balance.
- Unbelievably Delicious: The texture is what gets me every time. It’s incredibly moist without being dense, with a tender crumb that practically melts. The chocolate chips add these little pockets of richness that make each bite feel special.
What makes this recipe different? It’s the one-bowl method. By mixing everything together without separating wet and dry ingredients, you actually get a more tender bread. Less mixing means less gluten development, which means a softer, more delicate texture. Plus, the pumpkin keeps it incredibly moist for days. This isn’t just another version of pumpkin bread — it’s the easiest, most forgiving, and most delicious version I’ve ever made. It’s comfort food reimagined: faster, simpler, but with the same soul-soothing satisfaction that makes you close your eyes after the first bite.
What Ingredients You Will Need
This recipe uses simple, wholesome ingredients to deliver bold pumpkin flavor and satisfying texture without any fuss. Most of these are pantry staples, which makes this bread perfect for spontaneous baking cravings.
- All-purpose flour — 1 ¾ cups (220g). This gives the bread structure without making it heavy. I prefer Gold Medal or King Arthur for consistent results.
- Granulated sugar — ¾ cup (150g). Adds sweetness and helps create that tender crumb. You can reduce to ½ cup if you prefer less sweet bread.
- Light brown sugar — ½ cup (100g), packed. This adds moisture and a subtle molasses flavor that pairs beautifully with pumpkin. Dark brown sugar works too.
- Baking soda — 1 teaspoon. This is our leavening agent. Make sure it’s fresh — test it by dropping a bit in vinegar; it should fizz immediately.
- Baking powder — 1 teaspoon. Gives extra lift for a lighter texture.
- Pumpkin pie spice — 2 teaspoons. You can use store-bought or make your own with cinnamon, nutmeg, ginger, and cloves. I actually prefer homemade — it’s fresher and you can adjust the ratios.
- Cinnamon — 1 teaspoon. Because more cinnamon is always better in pumpkin recipes.
- Salt — ½ teaspoon. Don’t skip this. It balances the sweetness and enhances all the warm spices.
- Pumpkin puree — 1 cup (245g). Use canned pumpkin, not pumpkin pie filling. Libby’s is my go-to brand for consistent texture and flavor.
- Vegetable oil — ½ cup (120ml). Keeps the bread incredibly moist. Canola or any neutral oil works. Melted coconut oil is a great substitute.
- Large eggs — 2, at room temperature. Room temperature eggs incorporate more easily and create a better emulsion. If you forgot to take them out, place them in warm water for 5 minutes.
- Vanilla extract — 2 teaspoons. Pure vanilla makes a difference here. Imitation works in a pinch, but pure adds a deeper flavor.
- Milk — ¼ cup (60ml). Any kind works — dairy, almond, oat. It thins the batter slightly for a better texture.
- Semi-sweet chocolate chips — 1 cup (175g). I prefer Ghirardelli for their rich flavor and how they hold their shape during baking. Dark chocolate chips are also fantastic here.
Equipment Needed
The beauty of this recipe is how little equipment you actually need. Here’s what I use every single time:
- Large mixing bowl — Any big bowl works. I use a ceramic one because it feels cozy, but glass or stainless steel is fine.
- Whisk — For combining everything smoothly. A wooden spoon works too, but a whisk makes it easier to break up any flour lumps.
- Rubber spatula — For scraping down the sides and folding in chocolate chips. Honestly, I’ve used a regular spoon in a pinch.
- 9×5-inch loaf pan — This is the standard size. If you use an 8×4-inch pan, you’ll need to bake it longer. Glass or metal both work, but metal gives a nicer golden crust.
- Parchment paper — Not strictly necessary, but it makes lifting the bread out so much easier. I always line my pan with a sling of parchment.
- Cooling rack — Lets air circulate so the bottom doesn’t get soggy. If you don’t have one, just tilt the loaf on its side after 10 minutes.
That’s it. No stand mixer, no sifter, no fancy gadgets. This recipe was designed for real kitchens with real limitations.
Preparation Method
Preheat your oven to 350°F (175°C). Grease your 9×5-inch loaf pan or line it with parchment paper, leaving some overhang on the long sides for easy lifting later.
- Mix the dry ingredients first — In your large mixing bowl, add the flour, granulated sugar, brown sugar, baking soda, baking powder, pumpkin pie spice, cinnamon, and salt. Whisk them together until everything is evenly distributed. This takes about 30 seconds. You want to break up any brown sugar clumps. I usually smash them against the side of the bowl with the whisk.
- Add the wet ingredients — Make a well in the center of the dry ingredients. Pour in the pumpkin puree, vegetable oil, eggs, vanilla extract, and milk. Start whisking from the center, gradually incorporating the dry ingredients into the wet. Don’t overthink this — just mix until you no longer see streaks of flour. It should take about 1 minute of gentle stirring. The batter will be thick and smell incredible already.
- Fold in the chocolate chips — Add the chocolate chips to the batter and fold them in with your rubber spatula. Just 5 or 6 strokes. You want them evenly distributed, but don’t overmix. If you mix too much, the bread can become tough. I like to reserve a handful of chips to sprinkle on top of the batter once it’s in the pan — it makes the top look gorgeous.
- Transfer to the pan — Pour the batter into your prepared loaf pan and spread it evenly. It will be thick, so use your spatula to push it into the corners. Sprinkle those reserved chocolate chips on top, pressing them in gently so they stick.
- Bake — Place the pan in the center of the oven and bake for 50-60 minutes. At the 45-minute mark, start checking. The bread is done when a toothpick inserted into the center comes out clean or with just a few moist crumbs. If the top is browning too quickly, tent it loosely with aluminum foil around the 40-minute mark.
- Cool — Let the bread cool in the pan for 15 minutes. Then use the parchment sling to lift it out and transfer it to a cooling rack. Let it cool completely before slicing — about 1 hour. I know it’s tempting to cut into it warm, but it will be too tender and might crumble. Trust me, I’ve learned this the hard way.
A few sensory cues: The batter should be thick but scoopable, like a very dense muffin batter. When you pour it into the pan, it should hold its shape rather than spreading flat. The kitchen should smell like fall within the first 10 minutes of baking. The bread is done when the top is golden brown, cracked beautifully, and feels springy when you press the center gently.
Cooking Tips & Techniques
I’ve made this bread more times than I can count, and I’ve learned a few things along the way. Some from success, some from spectacular failures.
Don’t overmix the batter. This is the most important tip I can give you. Mix until the flour just disappears. Overmixing develops gluten, which makes the bread tough and dense instead of tender. The one-bowl method already minimizes gluten development, but you can still overdo it with aggressive stirring.
Room temperature ingredients matter. I know it’s annoying to wait for eggs to warm up, but cold ingredients don’t emulsify as well. The result can be a slightly greasy or uneven texture. If you’re in a rush, place the eggs in a bowl of warm water for 5 minutes and microwave the milk for 15 seconds.
Check your baking soda freshness. Old baking soda won’t give you the rise you need. If your bread comes out flat and dense, stale leavening is usually the culprit. I replace mine every 3 months.
Use good quality chocolate chips. Cheap chocolate chips often have stabilizers that prevent them from melting properly. They stay in hard little pellets instead of creating those gooey pockets. Spend the extra dollar on a good brand — it makes a noticeable difference.
Let it cool completely. I can’t stress this enough. The first time I made this, I cut into it after 20 minutes because I couldn’t wait. The middle was still slightly underdone and the bread fell apart. The cooling process allows the structure to set. Patience pays off here.
If the top is browning too fast, tent it. Every oven runs differently. If yours runs hot, the top can get dark while the middle is still raw. A loose piece of foil placed over the top around the 40-minute mark prevents burning while the inside finishes baking.
Variations & Adaptations
This recipe is incredibly forgiving and adaptable. Here are some variations I’ve tried and loved:
Gluten-Free Version: Substitute the all-purpose flour with a 1:1 gluten-free baking flour blend. I’ve used Bob’s Red Mill with great results. The texture will be slightly more crumbly, but it’s still delicious. Add an extra tablespoon of milk since gluten-free flours tend to absorb more liquid.
Dairy-Free Version: Use a neutral oil instead of butter (which this recipe already does), and swap the milk for almond, oat, or coconut milk. Make sure your chocolate chips are dairy-free — many semi-sweet brands are, but check the label.
Add Nuts: Fold in ½ cup of chopped walnuts or pecans along with the chocolate chips. Toast them first for extra flavor. I love the crunch they add against the soft, tender bread.
Spice It Up: Add ¼ teaspoon of cardamom or ginger for a different spice profile. I sometimes add a pinch of black pepper — it sounds strange, but it enhances the pumpkin flavor in a subtle way.
Make It Muffins: This batter makes excellent pumpkin chocolate chip muffins. Divide it into a lined muffin tin and bake at 350°F for 18-22 minutes. Perfect for breakfast or snacks.
Double Chocolate: Replace ¼ cup of the flour with unsweetened cocoa powder for a chocolate-pumpkin hybrid. It’s rich, decadent, and absolutely divine.
Lower Sugar: Reduce the granulated sugar to ½ cup and the brown sugar to ¼ cup. The bread will be less sweet, but the chocolate chips still provide plenty of sweetness in each bite.
Serving & Storage Suggestions
This pumpkin chocolate chip bread is at its best served slightly warm, but it’s delicious at room temperature too. Here’s how I like to enjoy it:
Serving Temperature: Warm a slice in the microwave for 10-15 seconds. The chocolate chips get slightly melty, and the pumpkin flavor becomes more pronounced. It’s pure comfort.
Toppings: Spread a pat of salted butter on a warm slice — the salt against the sweet chocolate is heavenly. For a treat, add a drizzle of honey or a dollop of whipped cream. Cream cheese frosting turns it into a dessert loaf that’s perfect for company.
Pairings: Serve with a hot cup of coffee, chai tea, or a glass of cold milk. It also pairs beautifully with a scoop of vanilla ice cream for an easy dessert.
Storage: Keep the bread in an airtight container at room temperature for up to 4 days. The moisture from the pumpkin actually keeps it fresh longer than regular quick breads. I wrap mine in plastic wrap first, then place it in a container.
Freezing: This bread freezes beautifully. Wrap the cooled loaf tightly in plastic wrap, then aluminum foil, and freeze for up to 3 months. To thaw, leave it on the counter overnight or warm individual slices in the microwave. I always make a double batch and freeze one for later — it’s like finding a gift in your freezer.
Flavor Development: Here’s something interesting — the flavors actually deepen after a day. The spices meld together, and the pumpkin becomes more pronounced. I honestly prefer this bread on day two. If you can resist eating it all immediately, you’re in for a treat.
Nutritional Information & Benefits
Here’s the approximate nutritional breakdown per slice (based on 10 slices):
- Calories: 320
- Total Fat: 14g
- Saturated Fat: 4g
- Cholesterol: 37mg
- Sodium: 280mg
- Total Carbohydrates: 46g
- Dietary Fiber: 2g
- Sugars: 28g
- Protein: 5g
Health Benefits: Pumpkin is packed with vitamin A, which supports eye health and immune function. It’s also rich in fiber and antioxidants. The chocolate chips provide a small dose of antioxidants from cocoa. While this is definitely a treat, the pumpkin adds more nutritional value than your typical quick bread.
Dietary Considerations: This recipe contains gluten, dairy (milk), and eggs. It can be made gluten-free and dairy-free with the substitutions mentioned above. It’s nut-free as written, making it safe for school lunches and gatherings.
Personal Note: I love that this bread feels indulgent while still using real, wholesome ingredients. It’s the kind of treat you can feel good about serving your family — or yourself — on a cozy afternoon.
Conclusion
This cozy one-bowl pumpkin chocolate chip bread has become my go-to fall recipe for a reason. It’s simple enough for a weekday afternoon, impressive enough to bring to a gathering, and comforting enough to feel like a hug in food form. The one-bowl method makes it almost effortless, and the combination of warm spices, tender pumpkin, and melty chocolate is simply unbeatable.
I love this recipe because it reminds me that cooking doesn’t have to be complicated to be wonderful. Sometimes the best things come from breaking the rules — or in my case, letting someone else break them for you. My brother still brings up that day every time I make this bread. “Remember when you thought I was ruining it?” he says with a grin.
Now I want to hear from you. Have you tried this recipe? Did you add your own twist? Drop a comment below and let me know how it turned out. And if you’re looking for another cozy fall treat, you might enjoy this pumpkin spice latte muffins recipe — it uses the same one-bowl approach. Share this recipe with someone who needs a little warmth today, and happy baking!
Frequently Asked Questions
Can I use fresh pumpkin instead of canned?
Yes, you can use fresh pumpkin puree. Roast a small sugar pumpkin until tender, then blend until smooth. However, fresh pumpkin has more water content than canned, so you may need to drain it slightly or reduce the milk by a tablespoon. Canned pumpkin gives more consistent results, which is why I recommend it.
Why did my bread sink in the middle?
A sunken middle usually means the bread was underbaked. Make sure your oven is fully preheated and bake until a toothpick comes out clean. Opening the oven door too early can also cause sinking. Wait until at least the 45-minute mark before checking.
Can I use pumpkin pie filling instead of pumpkin puree?
I wouldn’t recommend it. Pumpkin pie filling is pre-sweetened and spiced, which will throw off the sugar and spice balance in this recipe. Stick with 100% pumpkin puree for the best results.
How do I make this bread vegan?
Replace the eggs with flax eggs (1 tablespoon ground flaxseed + 3 tablespoons water per egg) and use a plant-based milk. The texture will be slightly denser, but it still works beautifully. Make sure your chocolate chips are vegan-friendly too.
Can I double this recipe?
Absolutely. This recipe doubles perfectly. You can bake it in two loaf pans at the same time, or make one loaf and a batch of muffins. Just make sure your oven has enough space for air to circulate, and rotate the pans halfway through baking.
Pin This Recipe!
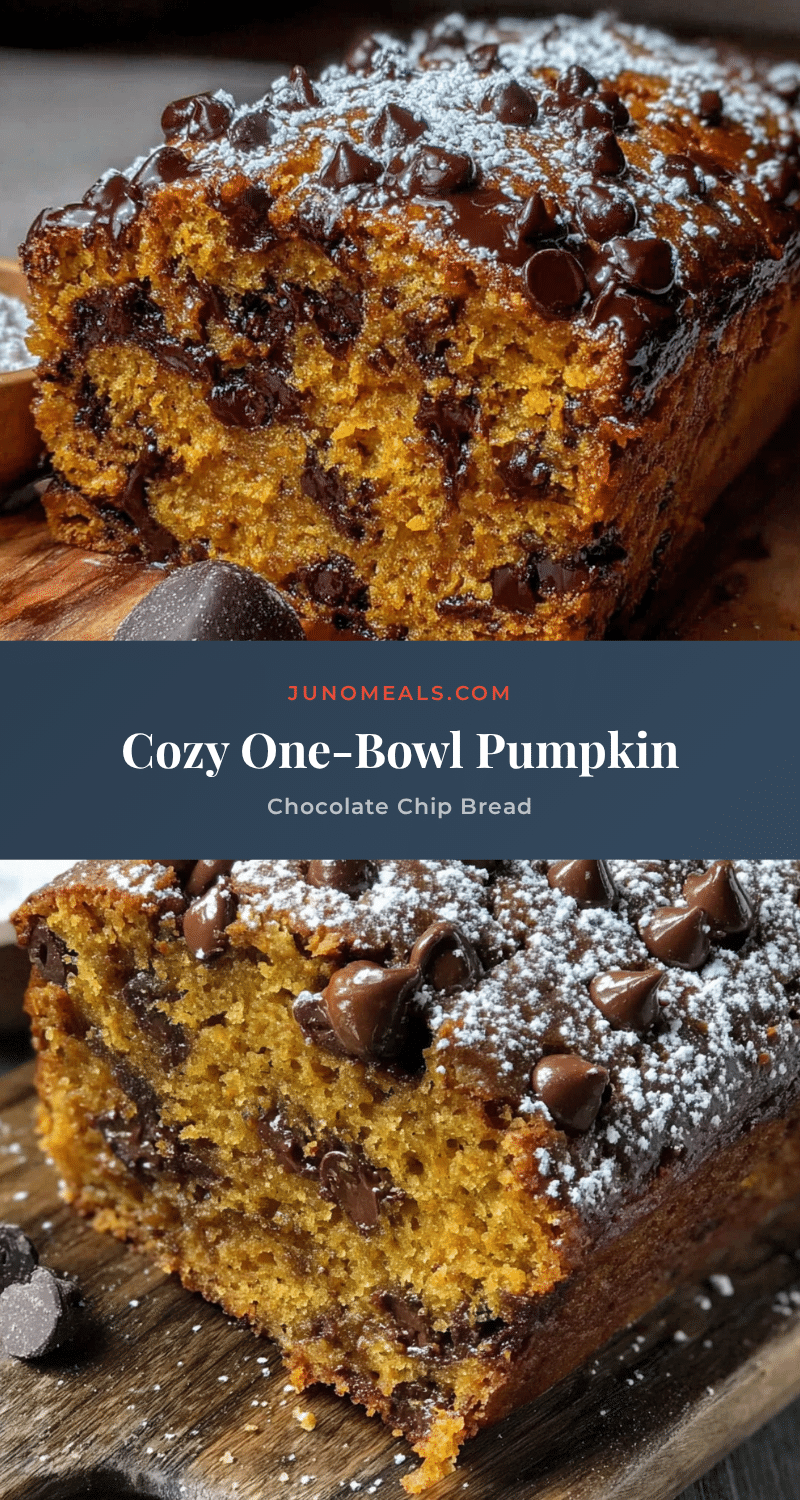
Cozy One-Bowl Pumpkin Chocolate Chip Bread Recipe
This incredibly moist and tender pumpkin chocolate chip bread uses a simple one-bowl method for minimal cleanup and maximum flavor. Perfect for cozy fall evenings, it’s a crowd-pleaser that combines warm pumpkin spice with rich chocolate chips.
- Prep Time: 15 minutes
- Cook Time: 55 minutes
- Total Time: 1 hour 10 minutes
- Yield: 10 servings 1x
- Category: Dessert
- Cuisine: American
Ingredients
- 1 ¾ cups (220g) all-purpose flour
- ¾ cup (150g) granulated sugar
- ½ cup (100g) light brown sugar, packed
- 1 teaspoon baking soda
- 1 teaspoon baking powder
- 2 teaspoons pumpkin pie spice
- 1 teaspoon cinnamon
- ½ teaspoon salt
- 1 cup (245g) pumpkin puree
- ½ cup (120ml) vegetable oil
- 2 large eggs, at room temperature
- 2 teaspoons vanilla extract
- ¼ cup (60ml) milk
- 1 cup (175g) semi-sweet chocolate chips
Instructions
- Preheat oven to 350°F (175°C). Grease a 9×5-inch loaf pan or line with parchment paper, leaving overhang on the long sides.
- In a large mixing bowl, whisk together flour, granulated sugar, brown sugar, baking soda, baking powder, pumpkin pie spice, cinnamon, and salt until evenly distributed.
- Make a well in the center of the dry ingredients. Add pumpkin puree, vegetable oil, eggs, vanilla extract, and milk. Whisk from the center outward until just combined and no streaks of flour remain.
- Fold in chocolate chips with a rubber spatula, reserving a handful to sprinkle on top. Do not overmix.
- Pour batter into prepared loaf pan and spread evenly. Sprinkle reserved chocolate chips on top and press gently.
- Bake for 50-60 minutes, checking at 45 minutes. Bread is done when a toothpick inserted in the center comes out clean or with a few moist crumbs. If top browns too quickly, tent with foil at 40 minutes.
- Cool in pan for 15 minutes, then lift out using parchment sling and transfer to a cooling rack. Cool completely before slicing, about 1 hour.
Notes
Do not overmix the batter to keep the bread tender. Room temperature ingredients help with emulsification. Let the bread cool completely before slicing to prevent crumbling. For best flavor, enjoy on day two when spices have melded.
Nutrition
- Serving Size: 1 slice
- Calories: 320
- Sugar: 28
- Sodium: 280
- Fat: 14
- Saturated Fat: 4
- Carbohydrates: 46
- Fiber: 2
- Protein: 5
Keywords: pumpkin bread, chocolate chip, one-bowl, fall baking, quick bread, pumpkin chocolate chip bread


