The butter was browning in the pan, the marshmallows were deflating in a sticky white heap, and my four-year-old was standing on a chair, face smeared with orange food coloring, demanding to know if the Rice Krispies were “scared.” My neighbor had just texted that she and her kids were stopping by in thirty minutes for an impromptu Halloween playdate. I had zero snacks, zero plans, and a pantry that looked like a sad, forgotten corner of a grocery store. The only things staring back at me were a half-used box of Rice Krispies, a bag of stale marshmallows, and a block of butter that was definitely past its prime.
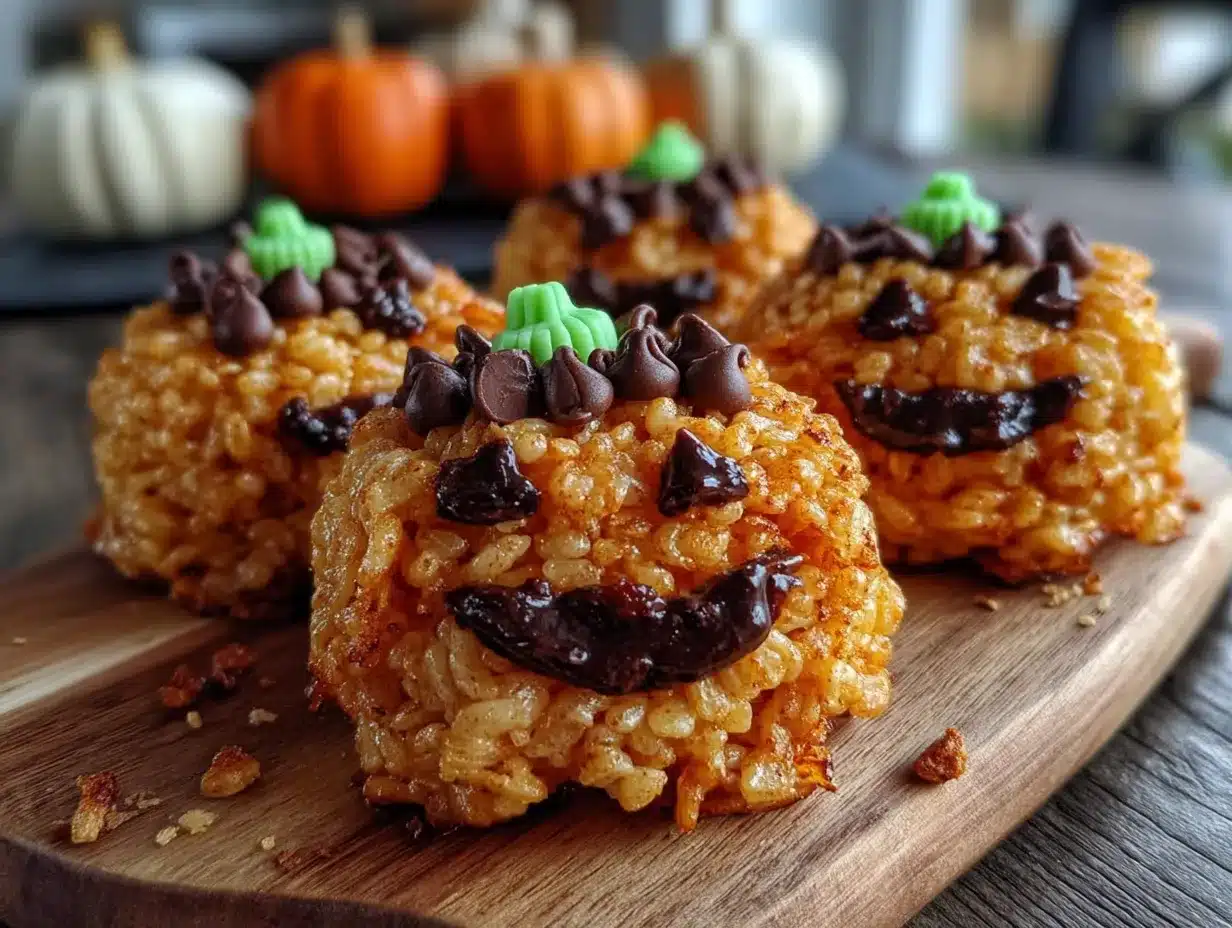
I wasn’t trying to be creative. I was trying to survive the next hour without handing out straight-up sugar packets. But as I stirred that molten marshmallow goo, I had a ridiculous thought—what if I just… shaped them? Into pumpkins? My kid had a set of cheap Halloween cookie cutters from a dollar store haul, and a few orange candy melts I’d forgotten about from a failed cake pop experiment. Honestly, it felt more like a desperate gamble than a recipe. But thirty minutes later, I had a plate of clumsy, smiling, slightly lopsided Jack-O-Lantern faces sitting on my counter. They were messy. They were imperfect. And the kids absolutely lost their minds. That’s the thing about these Easy Halloween Rice Krispie Jack-O-Lantern Treats — they aren’t about perfection. They’re about the sticky, laughing chaos of making something fun out of nothing.
Why You’ll Love This Recipe
Let me be real with you for a second. I have tested a lot of Halloween treats over the years. Some were gorgeous but took three hours. Others were fast but tasted like cardboard. These Jack-O-Lantern treats hit that sweet spot where fun meets actually edible. Here is why they have become my go-to for every spooky season gathering.
- Quick & Easy: From start to finish, you are looking at about 20 minutes of active work. No baking, no complicated piping, no fancy equipment. If you can melt butter and stir, you can make these.
- Simple Ingredients: You probably have most of these in your pantry right now. Rice Krispies, marshmallows, butter, and a few orange candy melts. No special grocery store runs required.
- Perfect for Halloween Parties: Whether it is a classroom treat, a neighbor gift, or just a fun afternoon activity with the kids, these treats fit the bill. They look festive without being overly fussy.
- Crowd-Pleaser: I have yet to meet a kid (or adult, honestly) who turns down a Rice Krispie treat. The pumpkin shape just makes them extra fun to grab.
- Unbelievably Delicious: The classic marshmallow-butter combo is already a winner. Adding a thin layer of orange candy melt on top gives it a slight snap that contrasts beautifully with the chewy, soft center. It is next-level comfort food disguised as a craft project.
What makes this different from every other Halloween treat out there? It is the texture. You aren’t just eating a blob of sugar. The candy coating gives you that initial crunch, then you sink into the soft, marshmallow-y middle. It is a two-bite experience that feels way more sophisticated than a simple cereal bar. And honestly, the fact that you can make these with kids without losing your mind is a huge win. This is the kind of recipe that makes you feel like a fun parent without actually having to be a Pinterest-perfect one.
What Ingredients You Will Need
This recipe uses simple, wholesome-ish ingredients to deliver bold flavor and satisfying texture without the fuss. Most of these are pantry staples, which is exactly what you want when a Halloween craving hits unexpectedly.
- 3 tablespoons unsalted butter (I use salted butter in a pinch and just skip the extra salt, but unsalted gives you more control over the final taste)
- 1 package (10 oz) marshmallows (standard size, not mini—mini melt faster but can get gummy if you aren’t careful)
- 6 cups Rice Krispies cereal (or any crispy rice cereal; store brands work fine, but I find the name brand holds its crunch a little better)
- 1 cup orange candy melts (I prefer Wilton brand for consistent melting, but any brand works—just avoid white chocolate chips with added oil, they seize up)
- 1/2 cup semi-sweet chocolate chips (for the faces—dark chocolate works too if you want a less sweet contrast)
- 1 teaspoon coconut oil or vegetable shortening (optional, but helps thin the candy melts for a smoother coating)
- Orange food coloring gel (optional if your candy melts are already orange, but I like a few drops for a more vibrant shade)
A few quick notes on ingredients. For the butter, I recommend using a good quality unsalted butter like Kerrygold if you have it—it adds a richness that makes the treats taste more indulgent. For the candy melts, avoid the “melting wafers” that are flavored like fruit—they have a weird artificial taste. Stick to plain orange candy melts or use white chocolate with orange food coloring. If you are avoiding dairy, you can use vegan butter and dairy-free marshmallows (Dandies brand works great), but the texture will be slightly less chewy. And for the Rice Krispies, make sure they are fresh. Stale cereal leads to soggy treats, and nobody wants that.
Equipment Needed
You don’t need a professional kitchen to pull these off, but a few specific tools make the process much smoother.
- Large pot or Dutch oven: You need something big enough to stir the marshmallow mixture without it spilling over. A 5-quart pot works perfectly.
- Silicone spatula: A rubber or silicone spatula is essential for scraping every bit of marshmallow goo off the sides. Metal spoons will scratch your pot and make cleanup harder.
- 9×13-inch baking dish: For pressing the cereal mixture into an even layer. Line it with parchment paper for easy removal.
- Pumpkin-shaped cookie cutter: A medium-sized cutter (about 3 inches) works best. You can also use a round cutter and carve the stem with a knife if you are in a pinch.
- Microwave-safe bowl: For melting the candy melts and chocolate. Glass or ceramic works best—plastic can warp.
- Piping bag or small zip-top bag: For piping the chocolate faces. A zip-top bag with a tiny corner snipped off works just as well as a fancy piping bag.
- Parchment paper or silicone baking mat: For letting the coated treats set without sticking.
If you don’t have a pumpkin cookie cutter, don’t panic. I have used a small round biscuit cutter and carved a stem shape with a paring knife. It takes a little more patience, but the result is still adorable. Also, a bench scraper is a lifesaver for pressing the cereal mixture flat without burning your fingers.
Preparation Method
- Prep your pan. Line a 9×13-inch baking dish with parchment paper, leaving some overhang on the sides. Lightly grease the parchment with butter or non-stick spray. This step is non-negotiable—trust me, I learned the hard way when my first batch stuck like cement.
- Melt the butter. Place the 3 tablespoons of unsalted butter in a large pot over medium-low heat. Let it melt slowly, swirling occasionally. You want it fully melted but not browned—if it starts to foam, pull it off the heat for a second.
- Add the marshmallows. Pour the entire 10-ounce bag of marshmallows into the pot. Stir constantly with your silicone spatula until they are completely melted and smooth. This takes about 3-4 minutes. Don’t walk away—marshmallows can burn quickly if left unattended.
- Remove from heat. Once the marshmallows are smooth, take the pot off the burner immediately. Stir in a pinch of salt if you are using unsalted butter. This balances the sweetness.
- Add the cereal. Pour the 6 cups of Rice Krispies into the pot. Fold gently until every piece of cereal is coated in the marshmallow mixture. Be careful not to crush the cereal—you want those airy puffs intact for the best texture.
- Press into the pan. Transfer the mixture to your prepared baking dish. Using a greased spatula or your hands (lightly buttered), press the mixture into an even layer. Don’t press too hard—you want it compact but not dense. Let it cool completely at room temperature, about 30 minutes.
- Cut out the pumpkins. Once the slab is cool, use your pumpkin-shaped cookie cutter to cut out shapes. Press straight down and twist gently to release. If the cutter sticks, dip it in a little cold water between cuts. You should get about 12-15 pumpkins depending on your cutter size.
- Melt the candy coating. Place the orange candy melts in a microwave-safe bowl with 1 teaspoon of coconut oil. Microwave in 20-second bursts, stirring between each, until smooth. Be careful not to overheat—candy melts seize up if they get too hot.
- Coat the pumpkins. Dip each pumpkin into the melted candy coating, using a fork to turn and coat evenly. Let the excess drip off, then place on a parchment-lined baking sheet. Work quickly—the coating sets fast.
- Add the faces. Melt the semi-sweet chocolate chips in a separate bowl using the same microwave method. Transfer to a small piping bag or zip-top bag. Snip a tiny corner and pipe Jack-O-Lantern faces onto each treat. Get creative—happy faces, spooky faces, silly faces. Let the chocolate set for about 15 minutes.
One pro tip: if the candy coating starts to thicken as it cools, pop it back in the microwave for 10 seconds. Also, if you are making these with kids, let them pipe the faces—the imperfections make them cuter. My daughter’s first attempt looked like a confused ghost, and it was honestly the best one.
Cooking Tips & Techniques
I have made these treats at least a dozen times, and I have learned a few things the hard way. Here are the tricks that make the difference between a good batch and a great one.
Don’t overheat the marshmallows. This is the number one mistake people make. If you cook the marshmallows too long or on too high heat, they turn into a sticky, rubbery mess. Low and slow is the way to go. The mixture should be smooth and glossy, not stringy.
Grease everything. Your hands, your spatula, your cookie cutter, your pan. Rice Krispie mixture sticks to everything like glue. I keep a small bowl of melted butter nearby and dip my fingers in before pressing the mixture down. It saves so much frustration.
Work in batches for the coating. If you try to coat all the pumpkins at once, the candy coating will start to set before you finish. Dip 3-4 at a time, pipe the faces, and move on. It keeps the chocolate from smearing.
Let the cereal cool completely before cutting. I know it is tempting to rush, but warm cereal crumbles. Patience pays off with clean, sharp edges. If you are in a hurry, pop the pan in the fridge for 15 minutes.
Use a toothpick for details. For smaller features like eyes or a wavy mouth, dip a toothpick in the melted chocolate and draw directly onto the treat. It gives you more control than a piping bag.
One failure I remember vividly: I tried to use white chocolate chips dyed orange with food coloring instead of candy melts. The chocolate seized up, turned into a grainy mess, and I had to throw the whole batch away. Stick to actual candy melts—they are formulated to melt smoothly and set with a nice shine.
Variations & Adaptations
This recipe is incredibly forgiving, so feel free to play around. Here are some variations I have tried and loved.
- Gluten-Free Version: Rice Krispies are naturally gluten-free, but check the label to be sure. Some store brands add malt flavoring that contains gluten. Use certified gluten-free cereal if needed.
- Vegan Option: Swap the butter for vegan butter and use vegan marshmallows (Dandies brand is my favorite). The texture will be slightly less chewy, but the flavor is still spot-on.
- Spooky Shapes: Don’t limit yourself to pumpkins. Use ghost, bat, or cat-shaped cookie cutters for variety. You can even make a few different shapes from the same batch of cereal.
- Flavor Twists: Add 1/2 teaspoon of pumpkin pie spice or cinnamon to the marshmallow mixture for a fall-flavored version. Or stir in 1/4 cup of mini chocolate chips before pressing the mixture into the pan.
- No-Candy-Coating Version: If you want to skip the orange coating, just shape the treats into pumpkins and pipe the faces directly onto the cereal. They won’t be as shiny, but they are still adorable and less sweet.
- Colorful Faces: Use green or black candy melts for the faces instead of chocolate. It gives the treats a more whimsical, colorful look.
I once made a batch with crushed pretzels mixed into the cereal for a salty-sweet twist. It was a hit at a Halloween potluck, though the pretzels softened after a day. If you try that, serve them fresh.
Serving & Storage Suggestions
These treats are best served at room temperature, right after the chocolate sets. The candy coating should be firm but not hard, and the cereal should be chewy with a slight crunch.
For presentation, arrange them on a platter lined with orange or black napkins. You can stack them in a jar for a cute party favor or place them individually in cellophane bags tied with ribbon. They look great on a dessert table alongside mini lemon blueberry cheesecakes for a balanced spread of treats.
Storage: Keep the treats in an airtight container at room temperature for up to 3 days. Do not refrigerate them—the cold air makes the cereal soggy and the candy coating can sweat. If you need to store them longer, freeze them in a single layer on a baking sheet, then transfer to a freezer-safe bag. They will keep for up to 2 months. Thaw at room temperature for about 30 minutes before serving.
Reheating: If the treats lose their chewiness after a day, pop them in the microwave for 5-10 seconds. It revives the marshmallow texture without melting the candy coating. Just don’t overdo it—10 seconds is plenty.
One thing I love about these treats is that the flavors actually meld together after a day. The marshmallow and candy coating settle into a harmonious sweetness that tastes even better than fresh. So if you are making them for a party, prep them a day ahead.
Nutritional Information & Benefits
Let’s be honest—these are a treat, not a health food. But here is a rough estimate per serving (based on 12 treats):
- Calories: Approximately 220-250 per treat
- Fat: 10-12 grams (mostly from butter and candy coating)
- Carbohydrates: 32-35 grams
- Sugar: 18-20 grams
- Protein: 2-3 grams
- Sodium: 150-180 mg
While these aren’t packed with nutrients, they do offer a small amount of iron from the fortified cereal. The butter provides a touch of vitamin A, and the chocolate offers antioxidants from cocoa. But honestly, these are about joy and celebration, not daily nutrition.
For dietary considerations, this recipe contains dairy (butter, candy melts) and gluten (cereal, though certified gluten-free options exist). If you have allergies, the vegan and gluten-free variations work well. I personally love that these treats are nut-free, making them safe for school parties where nut allergies are a concern.
My personal wellness perspective: I believe in balance. These treats are for special occasions—Halloween, birthday parties, or a fun afternoon with the kids. They are not an everyday snack, and that is okay. Food is about connection and celebration, and these treats deliver on both fronts.
Conclusion
These Easy Halloween Rice Krispie Jack-O-Lantern Treats are proof that you don’t need to be a professional baker to create something magical. They are forgiving, fun, and absolutely delicious. Whether you are making them for a classroom party, a Halloween gathering, or just a silly afternoon with your kids, they deliver every time.
I love that this recipe lets you be creative without the pressure of perfection. The faces can be silly, spooky, or sweet—each one is a little work of art. And the best part? You get to eat your mistakes. Honestly, that is my favorite kind of cooking.
I would love to see your creations! Tag me in your photos or leave a comment below sharing how your Jack-O-Lantern faces turned out. Did you try a variation? Did your kids come up with a design I haven’t thought of? Let me know. And if you are looking for more easy, fun recipes, check out our full recipe collection for more inspiration.
Happy Halloween, and happy snacking!
Frequently Asked Questions
Can I use homemade marshmallows for this recipe?
You can, but I don’t recommend it. Homemade marshmallows have a different moisture content and can make the treats too sticky. Store-bought marshmallows are formulated to melt smoothly and give the right texture.
How do I prevent the treats from sticking to the cookie cutter?
Dip the cookie cutter in cold water or lightly grease it with butter between cuts. This prevents the cereal from sticking and gives you clean edges.
Can I make these treats ahead of time?
Yes! You can make them up to 2 days in advance. Store them in an airtight container at room temperature. For longer storage, freeze them for up to 2 months.
Why did my candy coating seize up?
Candy coating seizes when it gets too hot or comes into contact with water. Always microwave in short bursts and use a completely dry bowl. If it seizes, add a teaspoon of coconut oil and stir gently—sometimes it can be saved.
Can I use a different cereal?
Absolutely! You can use any crispy rice cereal or even try cocoa-flavored cereal for a chocolate twist. Just keep in mind that different cereals have different densities, so you may need to adjust the marshmallow ratio slightly.
Pin This Recipe!
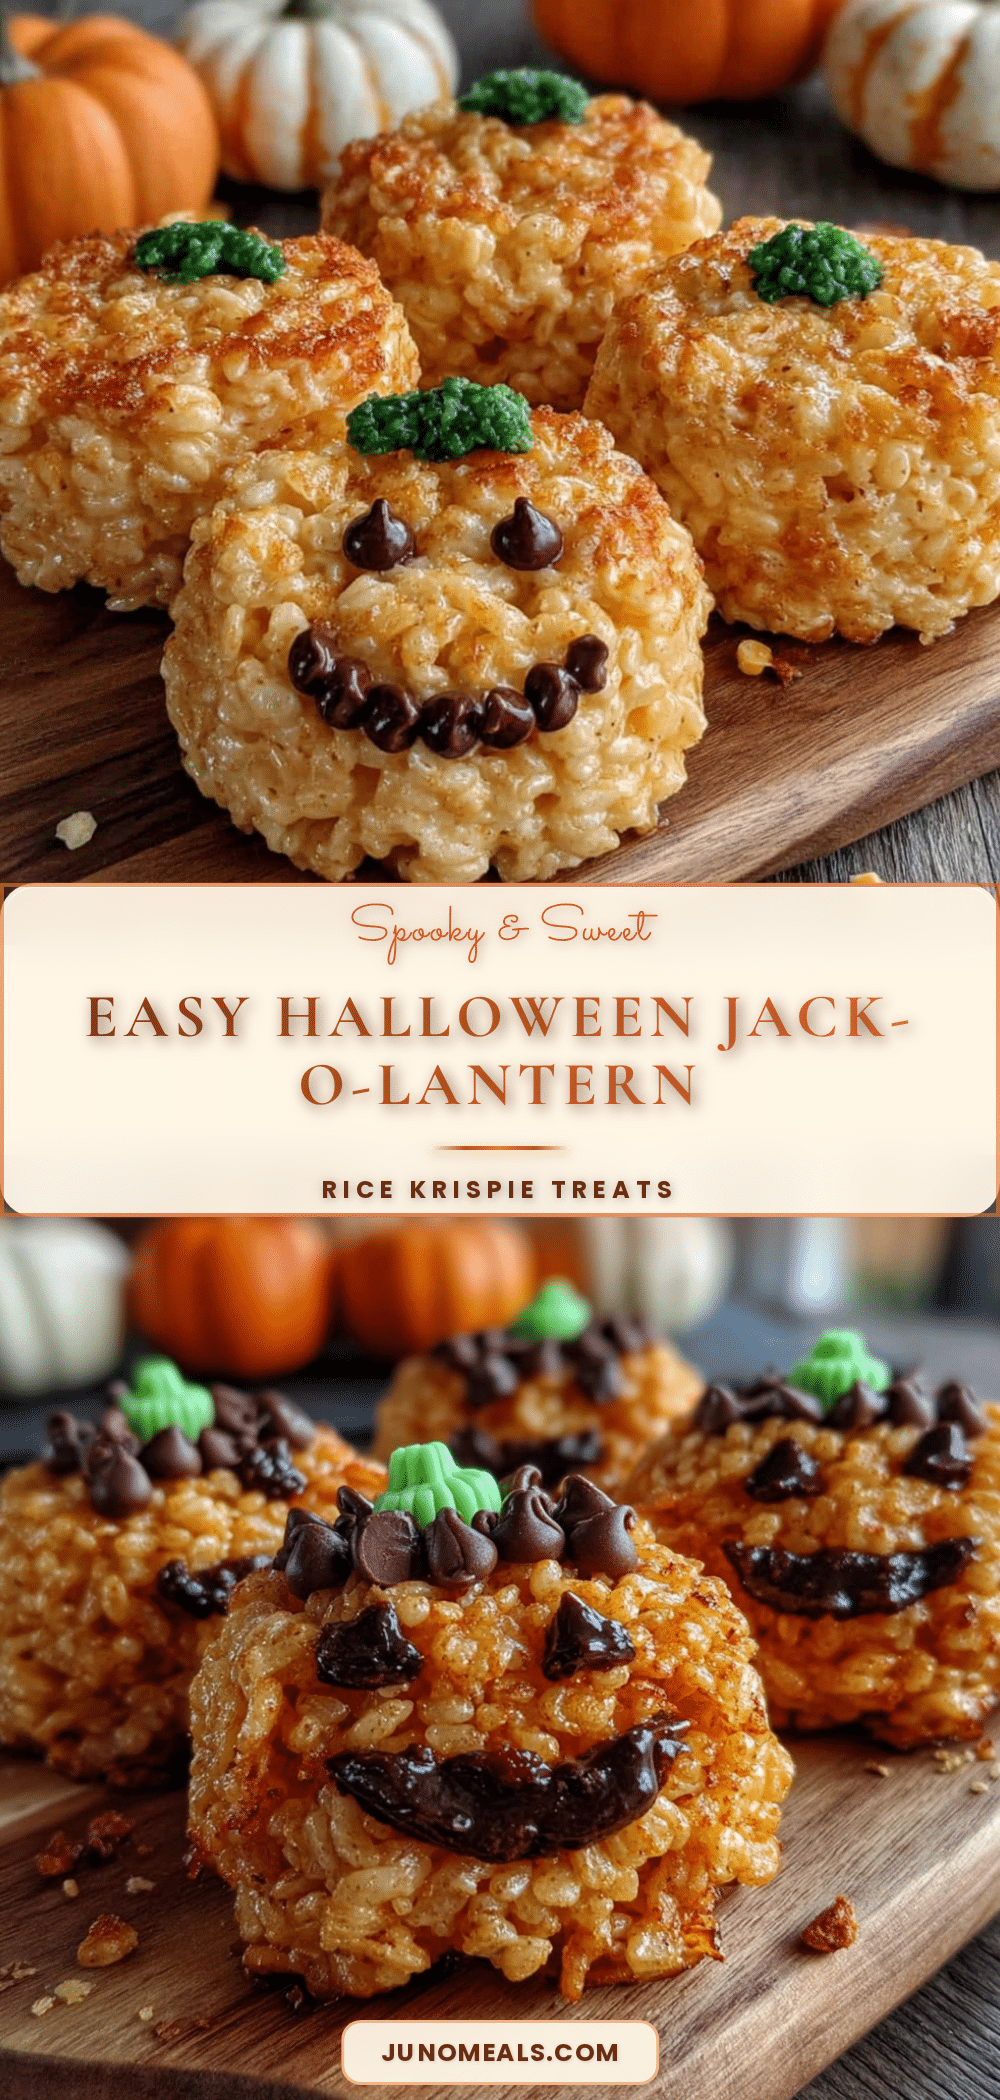
Easy Halloween Rice Krispie Treats: Best Jack-O-Lantern Recipe

These Easy Halloween Rice Krispie Jack-O-Lantern Treats are a quick, fun, and delicious no-bake treat perfect for Halloween parties. Made with simple pantry ingredients, they feature a chewy marshmallow center with a crunchy orange candy coating and chocolate faces.
- Prep Time: 20 minutes
- Cook Time: 10 minutes
- Total Time: 30 minutes
- Yield: 12-15 treats 1x
- Category: Dessert
- Cuisine: American
Ingredients
- 3 tablespoons unsalted butter
- 1 package (10 oz) marshmallows
- 6 cups Rice Krispies cereal
- 1 cup orange candy melts
- 1/2 cup semi-sweet chocolate chips
- 1 teaspoon coconut oil or vegetable shortening (optional)
- Orange food coloring gel (optional)
Instructions
- Line a 9×13-inch baking dish with parchment paper, leaving overhang on the sides. Lightly grease the parchment with butter or non-stick spray.
- Place 3 tablespoons unsalted butter in a large pot over medium-low heat. Melt slowly, swirling occasionally, until fully melted but not browned.
- Pour the entire 10-ounce bag of marshmallows into the pot. Stir constantly with a silicone spatula until completely melted and smooth, about 3-4 minutes.
- Remove the pot from heat immediately. Stir in a pinch of salt if using unsalted butter.
- Pour 6 cups Rice Krispies cereal into the pot. Fold gently until every piece of cereal is coated in the marshmallow mixture, being careful not to crush the cereal.
- Transfer the mixture to the prepared baking dish. Using a greased spatula or lightly buttered hands, press into an even layer. Let cool completely at room temperature, about 30 minutes.
- Once cool, use a pumpkin-shaped cookie cutter to cut out shapes. Press straight down and twist gently to release. You should get about 12-15 pumpkins.
- Place orange candy melts in a microwave-safe bowl with 1 teaspoon coconut oil. Microwave in 20-second bursts, stirring between each, until smooth.
- Dip each pumpkin into the melted candy coating, using a fork to turn and coat evenly. Let excess drip off, then place on a parchment-lined baking sheet.
- Melt semi-sweet chocolate chips in a separate bowl using the same microwave method. Transfer to a small piping bag or zip-top bag, snip a tiny corner, and pipe Jack-O-Lantern faces onto each treat. Let chocolate set for about 15 minutes.
Notes
Don’t overheat the marshmallows—low and slow is key. Grease everything (hands, spatula, cookie cutter, pan) to prevent sticking. Let the cereal cool completely before cutting for clean edges. If candy coating thickens, microwave for 10 seconds. For smaller details, use a toothpick dipped in melted chocolate. Store in an airtight container at room temperature for up to 3 days; do not refrigerate. Freeze for up to 2 months.
Nutrition
- Serving Size: 1 treat
- Calories: 220250
- Sugar: 1820
- Sodium: 150180
- Fat: 1012
- Saturated Fat: 68
- Carbohydrates: 3235
- Fiber: 1
- Protein: 23
Keywords: Halloween treats, Rice Krispie treats, Jack-O-Lantern, no-bake dessert, easy Halloween recipe, kid-friendly, pumpkin treats


