“Mom, can we make the hot dogs that look like dead guys again?” — that’s what my eight-year-old said last October, and honestly, I haven’t looked at a pack of hot dogs the same way since.
It was the week before Halloween, and I was scrolling through my phone looking for something—anything—that wouldn’t require a trip to three different stores for specialty ingredients. You know how it is. The costume was sorted (a very insistent ghost), the candy was bought (and hidden), but I needed something for the school party that wasn’t another bag of chips. That’s when I stumbled on the idea of wrapping hot dogs in crescent dough and calling them mummies. My kid lost his mind. And honestly? So did I.
These Easy Mini Mummy Hot Dogs with Mustard Eyes aren’t fancy. They’re not gourmet. But they’re the kind of snack that makes people stop mid-conversation and say, “Wait, are those mummies?” And then they eat three. The dough gets all flaky and golden, the hot dog gets that perfect snap when you bite into it, and the mustard eyes give them just enough personality to be creepy without being gross. (My daughter calls them “friendly dead guys,” which I think is the sweet spot.)
I’ve made these for three different Halloween parties now, and they disappear every single time. The best part? They take maybe twenty minutes from start to finish. No stress, no mess, just a plate of little mummies that somehow make everyone smile. That’s the kind of Halloween magic I can get behind.
Why You’ll Love This Recipe
Let me tell you why these little guys have become my go-to for every Halloween gathering. I’ve tested this recipe through three different brands of crescent dough, two types of hot dogs, and even a gluten-free attempt that actually worked. Here’s what makes them worth your time:
- Quick & Easy: From fridge to table in under 25 minutes. Seriously, that’s less time than it takes to argue with your kids about their costume.
- Simple Ingredients: You need exactly four things—hot dogs, crescent dough, mustard, and an egg. That’s it. No weird specialty items you’ll never use again.
- Perfect for Halloween Parties: Whether it’s a school event, a neighborhood gathering, or just a spooky movie night at home, these fit right in.
- Crowd-Pleaser: I’ve watched adults eat six of these in one sitting. Kids love them because they’re fun. Adults love them because they taste like a warm pretzel wrapped around a hot dog.
- Unbelievably Adorable: The mustard eyes give them actual personality. My niece named hers “Mildred” and refused to eat her. (I ate Mildred later. She was delicious.)
What makes this version different from all the others out there? It’s the little things—cutting the crescent dough strips just right so they don’t unravel, using the perfect amount of mustard so it doesn’t bleed into the dough, and brushing the egg wash on twice for that deep golden color that makes them look almost professional. I’ve messed up every possible step so you don’t have to.
This is comfort food with a Halloween twist. It’s the snack that makes people feel like you put in way more effort than you actually did. And honestly? That’s my favorite kind of recipe.
What Ingredients You Will Need
This recipe uses simple, everyday ingredients to create something that looks way more complicated than it actually is. No fancy shopping trips required—you probably already have most of these in your kitchen.
- 1 package (8 oz) refrigerated crescent roll dough: I prefer Pillsbury for consistent results, but store brands work fine too. Look for the sheet-style crescent dough if you can find it—it saves you from having to press the perforations together. (Though honestly, pressing them together takes about ten seconds.)
- 12 mini hot dogs or cocktail sausages: I use Hillshire Farm Lit’l Smokies for their size and snap. You can also use regular hot dogs cut into thirds—just make sure the pieces are about 2 inches long so they fit the dough strips properly.
- 1 large egg: For the egg wash. This gives the dough that gorgeous golden-brown color that makes them look bakery-quality. If you forget to take the egg out ahead of time, run it under warm water for 30 seconds—works like a charm.
- Yellow mustard: The classic choice for the eyes. The bright yellow color pops against the golden dough and gives the mummies that slightly derpy, adorable expression. You can use spicy brown mustard if you want a more subtle look, but honestly, the yellow is part of the charm.
Optional but recommended:
- Sesame seeds or poppy seeds: Sprinkle these on before baking for extra texture. They make the mummies look like they’ve been rolling around in a graveyard. (In a cute way.)
- Ketchup or marinara sauce: For dipping. Some people like ranch dressing too—I won’t judge.
Substitution guidance: If you need a gluten-free option, look for gluten-free crescent dough—it’s available at most major grocery stores now. For a dairy-free version, use dairy-free crescent dough and skip the egg wash (brush with a little olive oil instead for color). You can swap in vegan hot dogs if that’s your thing, though the texture will be slightly different.
Equipment Needed
The beauty of this recipe is that you probably already own everything you need. No special Halloween-themed gadgets required—though I won’t stop you if you want to buy a spider-shaped serving platter.
- Baking sheet: A standard half-sheet pan works perfectly. Line it with parchment paper for easy cleanup—trust me on this one.
- Parchment paper: Non-negotiable in my kitchen. It prevents sticking and makes cleanup a breeze. I’ve forgotten it before, and scraping burnt mustard off a baking sheet is not how I want to spend my Halloween.
- Sharp knife or pizza cutter: For cutting the crescent dough into strips. A pizza cutter gives you cleaner edges, but a knife works just fine.
- Small bowl: For whisking the egg wash. Any small bowl will do—I use the same one I use for scrambled eggs.
- Pastry brush: For applying the egg wash. If you don’t have one, use a clean finger or a folded paper towel. (I’ve done both. The paper towel method is surprisingly effective.)
- Toothpick: For applying the mustard eyes. You could use a piping bag if you’re fancy, but a toothpick gives you more control for those tiny dots.
Budget-friendly tip: Don’t own a pastry brush? Neither did I for years. Just dip a folded corner of a paper towel into the egg wash and dab it on. Works perfectly and costs nothing extra.
Preparation Method
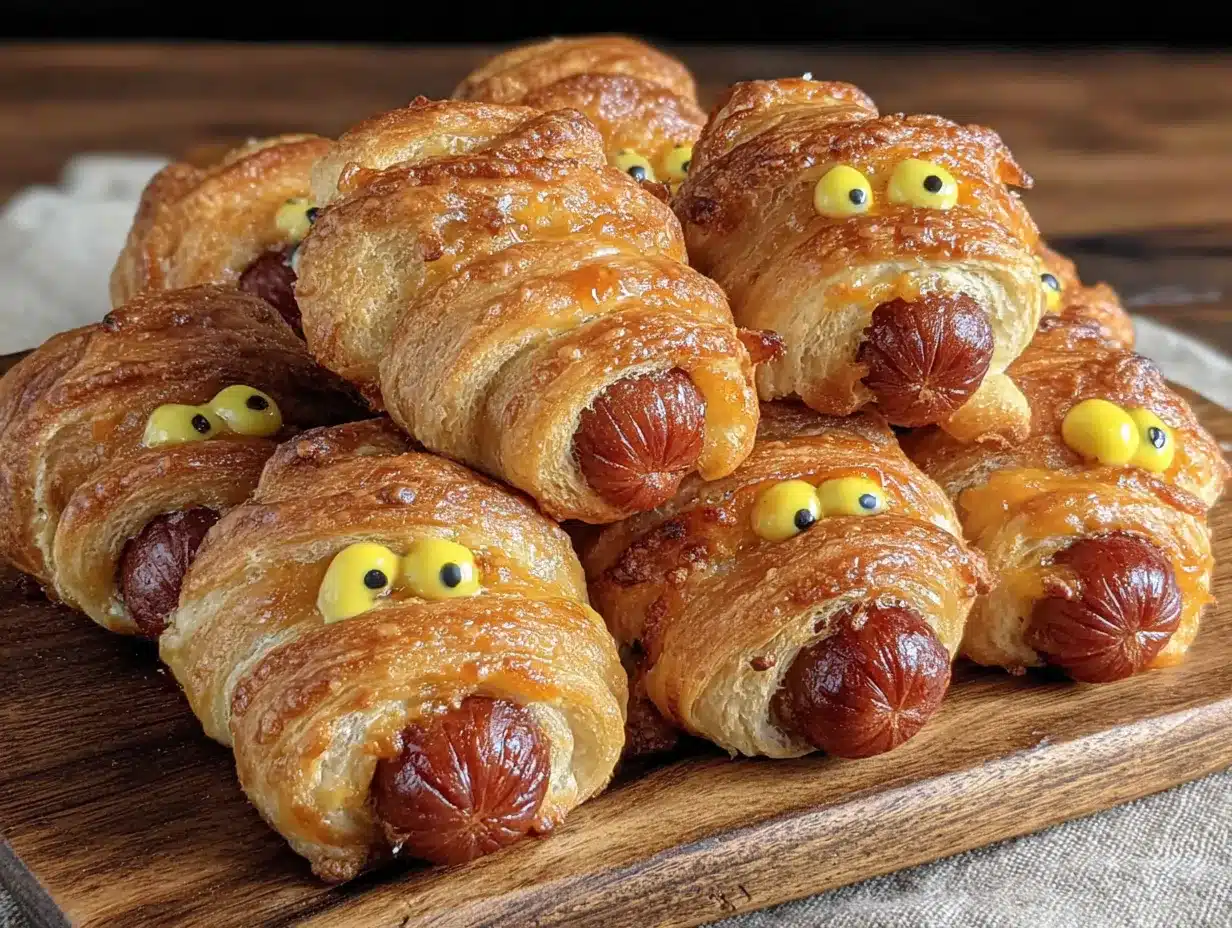
Alright, let’s make some mummies. I’ve broken this down step by step so you don’t end up with a tangled mess of dough and hot dogs—which, by the way, I’ve done before, and it’s not pretty.
- Preheat your oven to 375°F (190°C). Line your baking sheet with parchment paper. This is the first thing you should do because the rest goes fast once you get started.
- Unroll the crescent dough onto a clean cutting board. If you’re using the perforated kind, press the seams together gently with your fingers to create one solid sheet. Don’t worry if it’s not perfect—the strips will hide any imperfections. (I’ve had seams come apart during rolling before, and they still baked up fine.)
- Cut the dough into strips. Using your sharp knife or pizza cutter, slice the dough lengthwise into 8-10 thin strips, each about 1/2 inch wide. The strips don’t need to be perfectly even—mummies are supposed to look a little ragged anyway. If a strip breaks, just press it back together with your fingers.
- Wrap the hot dogs. Take one mini hot dog and place it at the end of a dough strip. Wrap the strip around the hot dog at a slight angle, overlapping the dough slightly as you go. Leave a small gap at the top for the eyes—about 1/4 inch of exposed hot dog. Don’t wrap too tightly, or the dough won’t puff up properly. You want it cozy but not suffocating.
- Place the wrapped mummies on your prepared baking sheet, spacing them about 1 inch apart. They’ll puff up a bit while baking, so give them room to breathe.
- Prepare the egg wash. Crack the egg into your small bowl and whisk it with 1 tablespoon of water until it’s completely combined and slightly frothy. This gives the dough that beautiful golden sheen.
- Brush the mummies with the egg wash. Use your pastry brush (or paper towel method) to coat each mummy evenly. Don’t skip this step—it’s what makes them look like they came from a bakery instead of your kitchen. For extra color, let the first coat dry for 2 minutes, then apply a second coat.
- Bake for 12-15 minutes, or until the dough is golden brown and puffed. The hot dogs should be heated through. Keep an eye on them after the 12-minute mark—ovens vary, and you don’t want burnt mummies. (Though honestly, slightly overdone mummies just look more authentic.)
- Let them cool on the baking sheet for 2-3 minutes. This gives the dough time to set so it doesn’t fall apart when you add the eyes.
- Add the mustard eyes. Dip a toothpick into the yellow mustard and dot two small eyes onto the exposed hot dog at the top of each mummy. Don’t make them too big—you want cute, not creepy. Unless you’re going for creepy, in which case, go nuts.
Sensory cues: The dough should feel slightly firm but still pliable when you wrap it. After baking, you’re looking for a deep golden-brown color—not pale, not burnt. The kitchen will smell like buttery crescent rolls and savory hot dogs, which is basically the smell of a happy Halloween.
Cooking Tips & Techniques
I’ve made these mummies at least a dozen times now, and I’ve learned a few things the hard way. Here’s what I wish someone had told me before my first attempt:
Don’t overwork the dough. Crescent dough gets tough if you handle it too much. Keep your movements quick and gentle. If the dough starts feeling sticky or warm, pop it in the fridge for 5 minutes to firm up. I learned this after my first batch came out looking like sad, deflated bandages.
The perfect strip width matters. Too wide, and the mummy looks chunky and the dough doesn’t cook through properly. Too thin, and the strips break apart during wrapping. Aim for about 1/2 inch—roughly the width of two stacked quarters. If you’re unsure, err on the side of slightly wider. You can always trim them down.
Leave room for the eyes. This seems obvious, but I’ve definitely wrapped a few mummies all the way to the top and then had nowhere to put the eyes. Leave about 1/4 inch of exposed hot dog at the top. It looks more mummy-like anyway—like they’re peeking out of their wrappings.
Double the egg wash for bakery-quality color. One coat gives you a nice golden color. Two coats, applied two minutes apart, gives you that deep, glossy, professional-looking finish. It takes an extra 30 seconds and makes a huge difference.
Let them rest before serving. I know it’s tempting to serve them immediately, but letting them sit for 3-4 minutes allows the dough to set properly. Hot crescent dough straight from the oven tends to fall apart. Patience pays off here.
Common mistake to avoid: Don’t use too much mustard for the eyes. A tiny dot is all you need. Too much mustard will bleed into the dough as it sits, creating yellow streaks that look more like a science experiment than a Halloween snack. Trust me on this one.
Variations & Adaptations
One of the best things about this recipe is how easy it is to customize. Here are some variations I’ve tried and loved:
The Spicy Mummy: Use spicy Italian sausages instead of mini hot dogs. The heat from the sausage pairs beautifully with the buttery crescent dough. I made these for a Halloween party where everyone was over 21, and they were a huge hit. Just make sure the sausages are fully cooked before wrapping.
The Cheese-Stuffed Mummy: Cut a slit lengthwise in each hot dog and stuff it with a thin strip of cheddar or mozzarella cheese before wrapping. The cheese melts out slightly during baking, creating little cheese “bandages” that look even more mummy-like. My kids call these the “cheesy dead guys.”
The Vegetarian Version: Use vegetarian hot dogs or tofu sausages. The texture is slightly softer, but the flavor still works. I’ve used MorningStar Farms veggie dogs with great results. Just be aware that veggie dogs tend to brown faster, so check them at the 10-minute mark.
The Breakfast Mummy: Swap the hot dogs for breakfast sausage links and serve with maple syrup for dipping. This is my secret weapon for Halloween morning before school. The sweet-and-savory combination is surprisingly addictive.
The Gluten-Free Mummy: Use gluten-free crescent dough (I like the brand from Schär) and proceed as usual. The dough is a bit more fragile, so handle it gently. They won’t puff up quite as much, but they’ll still taste great.
If you’re looking for more party-friendly recipes that come together quickly, you might enjoy these mini lemon blueberry cheesecakes—they’re perfect for balancing out all the savory snacks at your Halloween spread.
Serving & Storage Suggestions
These mummies are best served warm, right out of the oven. The contrast between the hot, snappy hot dog and the flaky, buttery dough is what makes them so addictive. But they’re also perfectly good at room temperature, which makes them ideal for parties where food sits out for a while.
Serving temperature: Serve warm or at room temperature. If you’re bringing them to a party, bake them just before you leave and let them cool in the car. They’ll still be warm when you arrive.
Presentation ideas: Arrange them on a platter in a circle, like they’re having a mummy meeting. Add a small bowl of ketchup or marinara in the center for dipping. For extra Halloween flair, scatter some candy corn or fake spiderwebs around the platter. (Just don’t eat the fake spiderwebs—learned that one the hard way.)
What to serve with them: These pair beautifully with other finger foods. A bowl of chili, some cheese and crackers, or even a simple green salad if you’re trying to pretend you’re eating healthy. For drinks, apple cider or a Halloween-themed punch works great.
Storage instructions: Store leftover mummies in an airtight container in the refrigerator for up to 3 days. The dough will soften slightly, but they’ll still taste good. To reheat, pop them in a 350°F oven for 5-7 minutes, or until warmed through. The microwave works in a pinch, but the dough won’t be as crispy.
Freezer instructions: You can freeze the unbaked mummies for up to 2 months. Arrange them on a baking sheet and freeze until solid, then transfer to a freezer bag. Bake directly from frozen, adding 2-3 minutes to the baking time. This is my secret for last-minute Halloween parties—I always have a batch ready to go.
Flavor development note: These are actually best the day they’re made. The dough stays flaky and the hot dogs stay snappy. After a day in the fridge, the texture changes—still good, but not as magical. So make them fresh if you can.
Nutritional Information & Benefits
Let’s be real—these are not health food. They’re Halloween treats, and they’re meant to be enjoyed. But here’s the breakdown if you’re curious:
| Per Serving (2 mummies) | Amount |
|---|---|
| Calories | 280-320 |
| Total Fat | 18g |
| Saturated Fat | 7g |
| Cholesterol | 45mg |
| Sodium | 680mg |
| Total Carbohydrates | 22g |
| Protein | 10g |
Health benefits: Okay, so the hot dogs provide a decent amount of protein—about 10 grams per serving. The crescent dough gives you some carbohydrates for quick energy. And the mustard? Well, mustard has antioxidants. (I’m reaching here, but it’s technically true.)
Dietary considerations: These are not gluten-free unless you use gluten-free dough. They contain dairy from the crescent dough and eggs from the egg wash. For a lower-sodium version, use reduced-sodium hot dogs and skip the extra salt in the egg wash.
My personal perspective: Look, Halloween comes once a year. I’m not going to stress about the nutritional content of a few mini hot dogs wrapped in dough. Life is about balance—eat your vegetables during the week and enjoy your mummy hot dogs on Halloween. Your body knows what to do with a little bit of indulgence.
Conclusion
These Easy Mini Mummy Hot Dogs with Mustard Eyes are exactly what a Halloween snack should be—fun, delicious, and ridiculously simple to make. They don’t require any special skills or ingredients, and they always get the reaction you’re hoping for: smiles, laughter, and people reaching for seconds.
I love that this recipe has become our family’s Halloween tradition. My kids fight over who gets to add the mustard eyes (we’ve established a rotating schedule), and my husband has perfected his “mummy voice” that he uses every time he serves them. It’s silly and simple and exactly what Halloween should be about.
You can customize these however you want—spicy, cheesy, vegetarian, whatever fits your crowd. That’s the beauty of a recipe this basic. It’s a blank canvas for your Halloween creativity.
So go ahead. Make a batch for your next Halloween party. Make them for movie night. Make them just because it’s October and you feel like being a little bit silly. And when someone asks you for the recipe—because they will—send them my way.
Have you made these before? Do you have a favorite Halloween snack that always steals the show? Drop a comment below and tell me about it. I’m always looking for new ideas to add to our Halloween rotation. Happy cooking, and happy Halloween!
Frequently Asked Questions
Can I make these ahead of time?
Absolutely! You can assemble the mummies up to 24 hours in advance and keep them covered in the refrigerator. Just add the egg wash right before baking for the best color. You can also freeze them unbaked for up to 2 months—bake straight from frozen, adding a few extra minutes to the cooking time.
What can I use instead of crescent dough?
Puff pastry works beautifully—just cut it into strips the same way. You can also use pizza dough, though it will be chewier and less flaky. For a gluten-free option, look for gluten-free crescent dough or puff pastry at your local grocery store. I’ve also seen people use canned biscuit dough, flattened and cut into strips, with good results.
How do I keep the dough from unraveling during baking?
Make sure you’re wrapping the strips at a slight angle with a bit of overlap. The dough should be snug but not tight. Also, pressing the end of the strip gently against the wrapped dough helps it stick. The egg wash also acts as a glue—brushing it over the wrapped mummies helps seal everything together.
Can I use ketchup or something else for the eyes?
You can, but mustard works best because it’s thick enough to stay in place and doesn’t spread into the dough. Ketchup tends to be too runny and will create red blotches. If you want a different color, try sriracha for red eyes (and a little heat) or a dab of cream cheese mixed with food coloring for a milder option.
How do I make these for a crowd?
This recipe scales up beautifully. For a large party, I usually triple or quadruple the recipe. Use multiple baking sheets and rotate them halfway through baking for even cooking. You can also keep the first batch warm in a 200°F oven while the second batch bakes. Just don’t add the mustard eyes until right before serving—they stay fresher that way.
For more easy snack ideas that work for any occasion, check out our full collection of recipes—there’s something for every craving and every celebration.
Pin This Recipe!
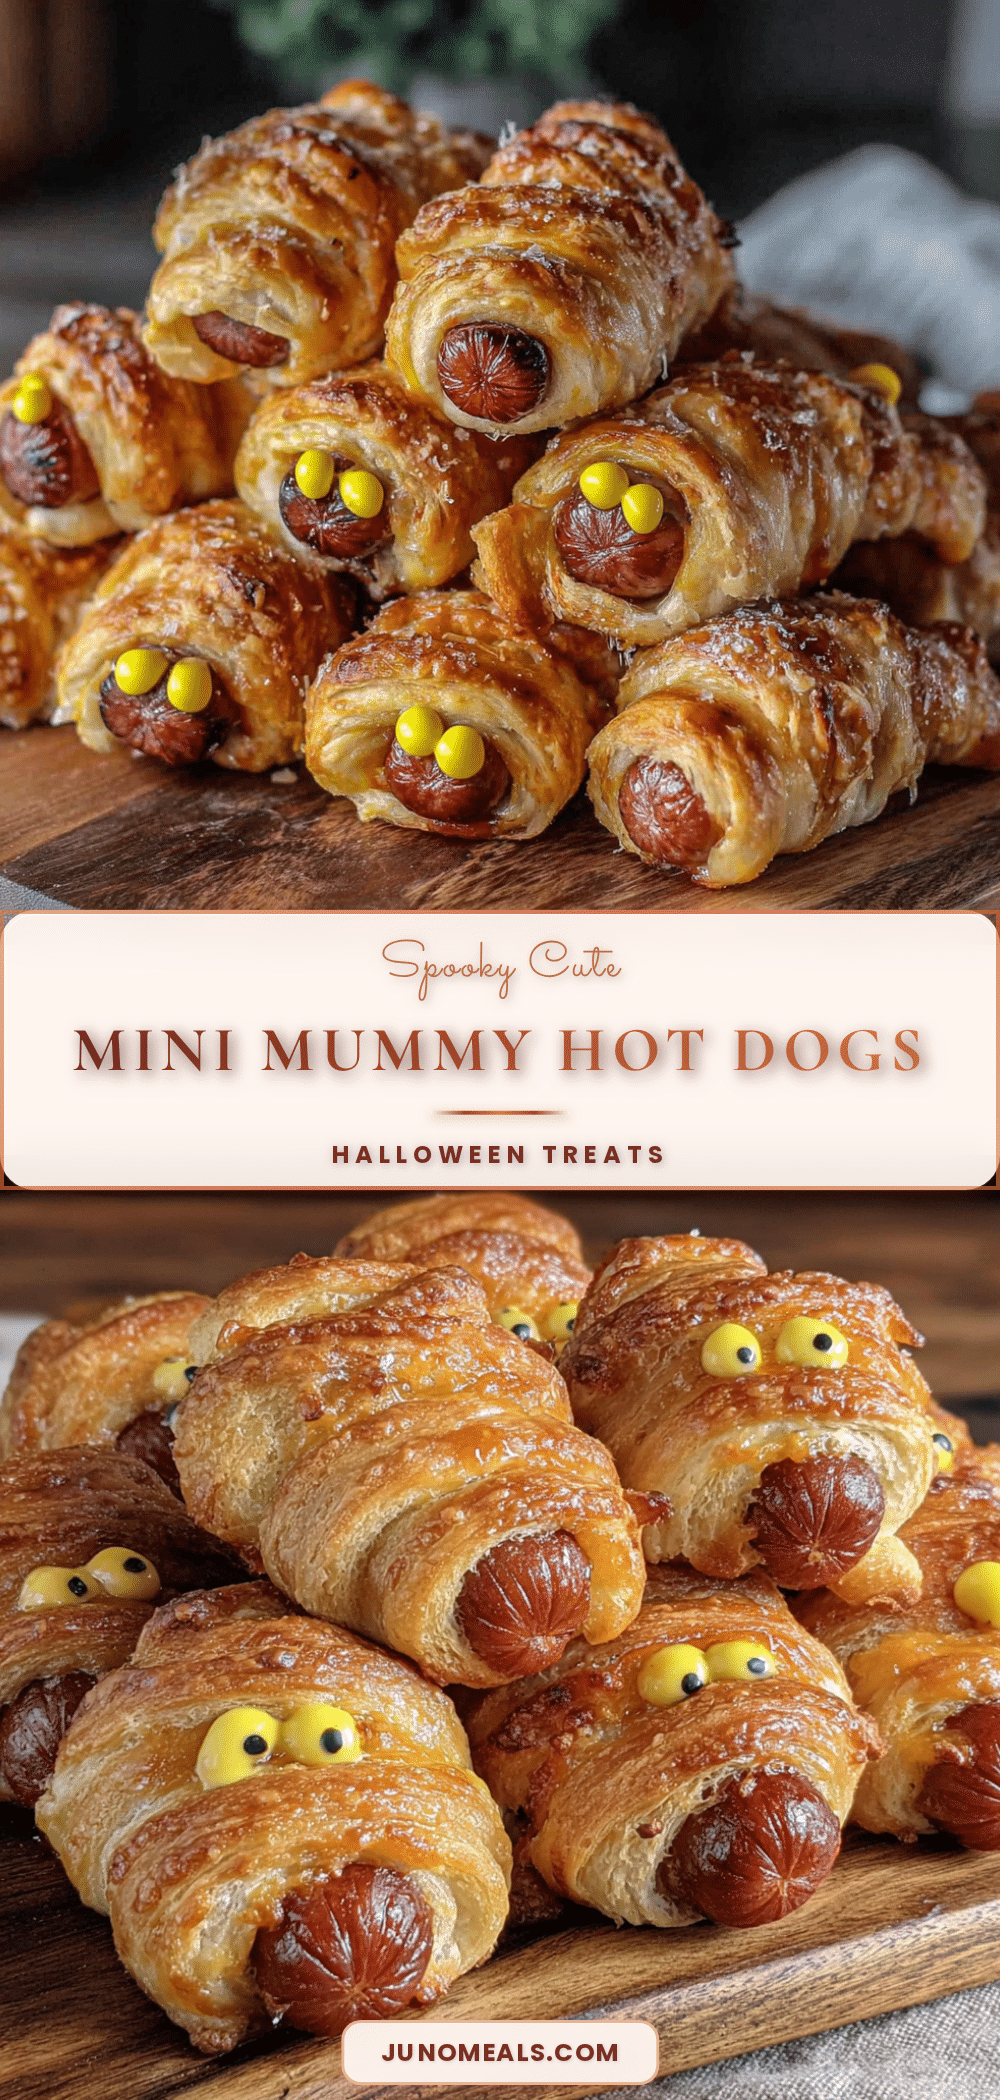
Easy Mini Mummy Hot Dogs with Mustard Eyes: Best Halloween Snack

These Easy Mini Mummy Hot Dogs with Mustard Eyes are a fun, quick, and adorable Halloween snack made with just four simple ingredients. Wrapped in flaky crescent dough with mustard eyes, they’re perfect for parties and disappear every time.
- Prep Time: 10 minutes
- Cook Time: 15 minutes
- Total Time: 25 minutes
- Yield: 6 servings (2 mummies per serving) 1x
- Category: Appetizer
- Cuisine: American
Ingredients
- 1 package (8 oz) refrigerated crescent roll dough
- 12 mini hot dogs or cocktail sausages (such as Hillshire Farm Lit’l Smokies)
- 1 large egg
- Yellow mustard
- Sesame seeds or poppy seeds (optional, for garnish)
- Ketchup or marinara sauce (for dipping, optional)
Instructions
- Preheat your oven to 375°F (190°C). Line your baking sheet with parchment paper.
- Unroll the crescent dough onto a clean cutting board. If using perforated dough, press the seams together gently to create one solid sheet.
- Cut the dough lengthwise into 8-10 thin strips, each about 1/2 inch wide.
- Take one mini hot dog and place it at the end of a dough strip. Wrap the strip around the hot dog at a slight angle, overlapping slightly. Leave about 1/4 inch of exposed hot dog at the top for the eyes. Don’t wrap too tightly.
- Place the wrapped mummies on the prepared baking sheet, spacing them about 1 inch apart.
- In a small bowl, whisk the egg with 1 tablespoon of water until combined and slightly frothy.
- Brush each mummy evenly with the egg wash. For extra color, let the first coat dry for 2 minutes, then apply a second coat.
- Bake for 12-15 minutes, or until the dough is golden brown and puffed, and the hot dogs are heated through.
- Let them cool on the baking sheet for 2-3 minutes.
- Dip a toothpick into yellow mustard and dot two small eyes onto the exposed hot dog at the top of each mummy.
Notes
Don’t overwork the dough; keep movements quick and gentle. For best color, apply a double coat of egg wash. Let mummies rest for 3-4 minutes before serving to allow dough to set. Use a toothpick for precise mustard eyes to avoid bleeding. Can be assembled up to 24 hours in advance and refrigerated; add egg wash just before baking. Freeze unbaked mummies for up to 2 months; bake from frozen, adding 2-3 minutes.
Nutrition
- Serving Size: 2 mummies
- Calories: 300
- Sugar: 4
- Sodium: 680
- Fat: 18
- Saturated Fat: 7
- Carbohydrates: 22
- Protein: 10
Keywords: Halloween snack, mummy hot dogs, crescent dough hot dogs, easy Halloween recipe, party appetizer, kid-friendly


