“You really just… rolled peanut butter into a ball and called it lunch?” My sister was standing in my kitchen doorway, gym bag still slung over her shoulder, watching me pack these little chocolate spheres into a container. She wasn’t being mean—she was genuinely confused. And honestly? She had a point. I had spent the last twenty minutes mixing, rolling, and tasting (for quality control, obviously) what looked like toddler-friendly snack balls. But here’s the thing—I hadn’t eaten a real meal in six hours, I had a deadline in forty minutes, and my blood sugar was hanging on by a thread. These chocolate peanut butter protein balls weren’t just lunch. They were survival.
I’d been seeing versions of no-bake energy bites all over the internet for years. Some looked gorgeous—rolled in coconut flakes, drizzled with dark chocolate, sitting pretty on a wooden board. But I needed something I could make in under ten minutes, eat with one hand while typing, and actually feel full after. Not just a sugar spike followed by a 3 PM crash. So I started tweaking. Less honey than the recipes called for. A pinch of salt because peanut butter deserves it. And cocoa powder—not just a sprinkle, but enough to make them taste like a real treat. Because if I’m eating a ball of oats and peanut butter, it better taste like dessert.
The first batch was too dry. The second fell apart. The third—this one right here—was the one that made me stop and actually enjoy the process. They’re not fancy. They’re not photogenic in that perfect food-stylist way. But they work. They taste like fudgy brownie batter, they keep me full for hours, and I don’t have to turn on the oven. That’s the kind of recipe that sticks around in your life. Not because it’s trendy, but because it actually helps you get through the day.
Why You’ll Love This Recipe
Let me tell you why these easy chocolate peanut butter protein balls have become a non-negotiable in my weekly routine. I’ve tested this recipe at least a dozen times—changing the ratio of oats to peanut butter, swapping sweeteners, even trying different protein powders (some were… memorable in the worst way). This version is the one I keep coming back to, and here’s why it might become your new go-to too.
- Ready in 10 Minutes: No oven, no stovetop, no waiting. Mix, roll, eat. That’s it. Perfect for those days when you need something fast but can’t stomach another sad granola bar.
- Simple Pantry Ingredients: You probably already have rolled oats, peanut butter, cocoa powder, and honey in your kitchen right now. No special trips to the store for chia seeds or obscure superfood powders.
- Perfect for Meal Prep: Make a batch on Sunday, and you’ve got grab-and-go snacks for the whole week. They actually taste better after a day in the fridge—the flavors meld together and get all fudgy.
- Kid-Approved and Adult-Loved: My niece calls them “brownie balls” and has no idea they’re packed with protein and fiber. Sometimes I don’t tell adults either—they just disappear.
- Actually Satisfying: The combination of protein, healthy fats, and fiber means you won’t be hungry an hour later. These aren’t empty calories—they’re fuel that tastes like dessert.
What makes this recipe different from all the other energy ball recipes out there? It’s the texture. Most no-bake protein balls end up either too dry and crumbly or too sticky and hard to handle. I spent weeks figuring out the exact ratio that gives you a fudgy, slightly dense bite that holds together without falling apart in your lunch bag. The secret is letting the mixture rest for five minutes before rolling—the oats absorb some moisture and everything comes together perfectly. It’s a tiny step, but it makes all the difference.
Honestly, this is the kind of recipe that makes you feel like you’ve got your act together. Even on chaotic mornings when you’re running late and haven’t had a real meal in sight, having a container of these in the fridge means you’re covered. They’re not just snacks—they’re a little act of kindness to your future self.
What Ingredients You Will Need
This recipe uses simple, wholesome ingredients to deliver bold chocolate flavor and satisfying texture without any fuss. Most of these are pantry staples, which is exactly what you want in a no-bake recipe that comes together in minutes.
- Rolled Oats (1 cup / 90g) — Not quick oats! Rolled oats give the right texture—chewy but not mushy. Quick oats absorb too much moisture and turn into paste. Trust me on this one. I like Bob’s Red Mill old-fashioned oats for consistent results.
- Creamy Peanut Butter (½ cup / 130g) — Use natural peanut butter with no added sugar or oil if possible. The kind that separates and needs stirring works best. Avoid the super processed stuff with hydrogenated oils—it makes the balls greasy. If your peanut butter is too thick, warm it slightly before mixing.
- Cocoa Powder (3 tablespoons / 18g) — Unsweetened cocoa powder, not hot chocolate mix. Dutch-processed gives a deeper, more mellow chocolate flavor, but regular natural cocoa works great too. I’ve used both and honestly, just use what you have.
- Honey (3 tablespoons / 60ml) — Maple syrup works too, but honey gives a better binding texture. If you’re vegan, use maple syrup or agave—just know the mixture might be slightly stickier. Add an extra tablespoon of oats if needed.
- Vanilla Extract (1 teaspoon) — Pure vanilla extract adds warmth and rounds out the chocolate flavor. Skip the imitation stuff if you can—it makes a difference in no-bake recipes where the vanilla isn’t cooked off.
- Salt (¼ teaspoon) — Don’t skip this! Salt intensifies the chocolate flavor and balances the sweetness. I use fine sea salt. If your peanut butter is already salted, reduce to a pinch.
- Chocolate Chips (¼ cup / 45g, optional but recommended) — Mini chocolate chips distribute better, but regular ones work too. Dark chocolate chips keep things less sweet. I add these for little pockets of melted chocolate texture—totally optional but highly encouraged.
- Flaxseed Meal (2 tablespoons / 14g, optional) — Adds omega-3s and fiber without changing the taste. I throw this in when I want an extra nutritional boost. You won’t even notice it’s there.
Ingredient Selection Tips: For the best texture, look for peanut butter that’s just peanuts and salt—no added sugar or palm oil. The natural oils help the balls hold together without getting greasy. For the oats, go with certified gluten-free rolled oats if you’re serving anyone with celiac disease or gluten sensitivity. And for the cocoa powder, I personally prefer Ghirardelli or Hershey’s Special Dark—they’re widely available and give a rich chocolate flavor that doesn’t taste artificial.
Substitution Guidance: Nut allergy? Sunflower seed butter works beautifully—just know the final color will be more greenish-brown (it’s the natural reaction of sunflower seeds with baking soda, even though there’s no baking soda here, the chlorophyll still reacts). For a lower-carb version, swap the oats for unsweetened shredded coconut or almond flour. And if you’re out of honey, maple syrup or brown rice syrup both work—just adjust the oat quantity slightly to account for differences in moisture.
Equipment Needed
You don’t need much for this recipe, which is part of why I love it. Here’s what you’ll need:
- Large Mixing Bowl — Any medium-to-large bowl works. I use a glass mixing bowl because it doesn’t retain odors, but ceramic or stainless steel is fine too.
- Measuring Cups and Spoons — Accurate measurements matter here because the texture is finicky. I use metal measuring cups for dry ingredients and glass for liquids.
- Rubber Spatula or Wooden Spoon — For mixing everything together. A rubber spatula is easier for scraping the sides and getting every last bit of peanut butter incorporated.
- Baking Sheet or Plate — To hold the rolled balls while they set. Line it with parchment paper if you have it—makes cleanup easier and prevents sticking.
- Cookie Scoop (Optional) — A 1-tablespoon cookie scoop gives you evenly sized balls without the mess. If you don’t have one, just use your hands—it’s more fun anyway.
- Refrigerator Space — These need at least 30 minutes to firm up. Clear a shelf beforehand so you’re not playing Tetris with your leftovers.
I’ve made these with nothing but a bowl and my hands when I was traveling and staying at an Airbnb with minimal kitchen gear. They turned out fine. The only non-negotiable is the fridge—without chilling, they’re too soft to hold their shape. Everything else is flexible.
Preparation Method
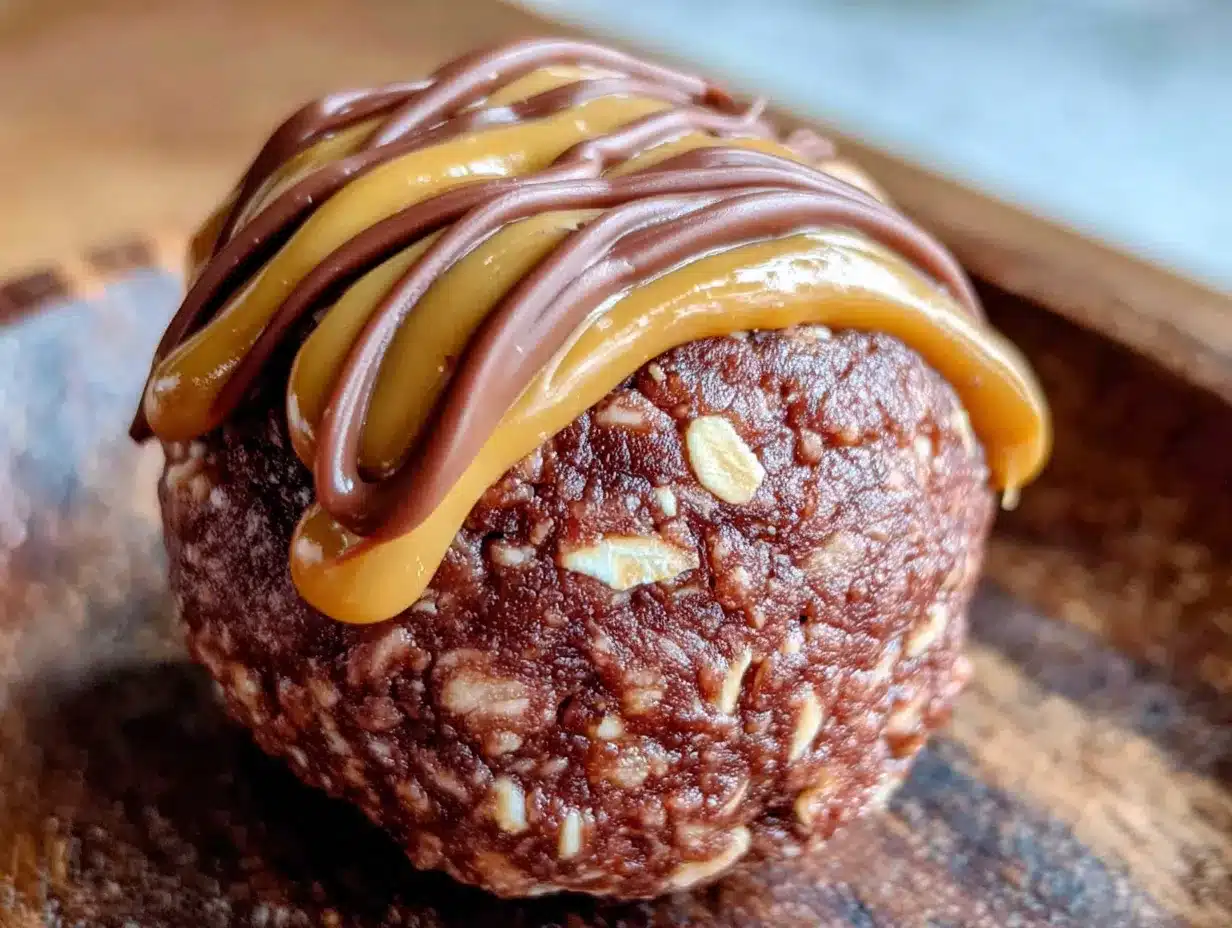
This comes together fast, so have everything measured and ready before you start. Here’s exactly how I make them:
- Combine the dry ingredients. In a large mixing bowl, add 1 cup (90g) rolled oats, 3 tablespoons (18g) cocoa powder, ¼ teaspoon salt, and 2 tablespoons (14g) flaxseed meal if using. Whisk them together until the cocoa powder is evenly distributed. This prevents clumps later.
- Add the wet ingredients. Add ½ cup (130g) creamy peanut butter, 3 tablespoons (60ml) honey, and 1 teaspoon vanilla extract to the bowl. Don’t stir yet—just plop them on top of the dry ingredients.
- Mix until combined. Use your rubber spatula to fold everything together. Start slowly to avoid sending cocoa powder flying everywhere (learned this the hard way). The mixture will look dry and crumbly at first—keep going. As the peanut butter and honey work into the oats, it’ll come together into a thick, fudgy dough. This takes about 2 minutes of thorough mixing.
- Let the mixture rest. Here’s the trick that changed everything: let the mixture sit for 5 minutes before rolling. I know you’re hungry and want to skip this step, but don’t. The oats need time to absorb moisture from the peanut butter and honey. After 5 minutes, the mixture will be much easier to roll and won’t fall apart.
- Fold in chocolate chips (optional). If you’re using chocolate chips, stir them in after the rest time. The dough should be cool enough that the chips won’t melt. If it’s still warm from your hands, let it cool another 2 minutes first.
- Roll into balls. Using slightly damp hands (this prevents sticking), scoop about 1 tablespoon of mixture and roll it between your palms into a smooth ball. You should get about 14-16 balls depending on size. Place them on a parchment-lined baking sheet or plate as you go.
- Chill for at least 30 minutes. This is crucial. The balls need time to firm up so they hold their shape. After 30 minutes in the fridge, they’re ready to eat. For the best texture, let them chill for a full hour.
- Optional: Roll in toppings. Before chilling, you can roll the balls in shredded coconut, crushed nuts, or extra cocoa powder for a prettier presentation. Do this immediately after rolling while the surface is still slightly sticky.
Sensory cues: The dough should feel like slightly sticky cookie dough—not wet, not dry. If it crumbles when you squeeze it, add a teaspoon of honey or peanut butter. If it’s too sticky to handle, add a tablespoon of oats. The finished balls should feel firm but not hard after chilling, with a slight give when you press them.
Troubleshooting tip: If your mixture is too dry and won’t hold together, your peanut butter might be too thick or your oats too old. Add a teaspoon of warm water or extra honey and mix again. If it’s too wet and sticky, your peanut butter might have added oils—add more oats a tablespoon at a time until the texture feels right.
Cooking Tips & Techniques
After making these chocolate peanut butter protein balls at least thirty times (not exaggerating), I’ve collected a few hard-won lessons. Let me save you some trouble.
The peanut butter temperature matters. Cold peanut butter straight from the fridge is impossible to mix evenly. Let it sit at room temperature for 15 minutes before starting. If you forgot to plan ahead, microwave it for 10 seconds—just don’t overheat it or the oils will separate.
Wet hands are your best friend. The mixture is sticky. Like, really sticky. Running your hands under cold water and shaking off the excess before rolling makes everything so much easier. Re-wet between every 3-4 balls. This tip alone turned my rolling process from frustrating to almost meditative.
Don’t overmix the oats. Once everything is combined, stop mixing. Overworking the dough breaks down the oats and makes the texture gummy instead of pleasantly chewy. You want some oat texture remaining—it’s part of the appeal.
Size matters for portion control. I use a 1-tablespoon scoop for consistent sizing. Too big and you’re eating 300 calories in one ball without realizing it. Too small and you’ll eat four and still feel hungry. One tablespoon is the sweet spot—satisfying but reasonable.
The chilling step is non-negotiable. I once tried to rush this and packed them in my bag after only 10 minutes in the fridge. They turned into a sad, squished mess by lunchtime. Give them the full 30 minutes minimum. Overnight is even better—the flavors meld and the texture becomes perfectly fudgy.
My biggest failure: I once substituted almond butter for peanut butter without adjusting anything else. The mixture was so dry and crumbly that nothing would hold together. I ended up adding an extra 2 tablespoons of honey and still had to press the mixture into bars instead of rolling balls. It tasted fine, but it was not the same recipe. Moral of the story: different nut butters have different moisture levels, so always start with the recommended type.
Variations & Adaptations
One of the best things about this recipe is how flexible it is. Here are some variations I’ve tried and loved:
Vegan Version: Swap the honey for maple syrup or brown rice syrup. The texture will be slightly stickier, so add an extra tablespoon of oats. Use dairy-free chocolate chips if you’re adding them. Everything else stays the same.
Gluten-Free Option: Use certified gluten-free rolled oats. That’s literally the only change. Bob’s Red Mill makes a great gluten-free oat that works perfectly here. Double-check your cocoa powder too—most are gluten-free, but some brands process them in facilities that also handle wheat.
Higher Protein Version: Add 1 scoop (about 30g) of chocolate or vanilla protein powder. Reduce the oats by 2 tablespoons to compensate for the dry powder. You might need an extra tablespoon of honey or a splash of milk to bring the mixture together. I’ve used both whey and plant-based protein powders—whey gives a smoother texture, while plant-based can be a bit grittier but still tasty.
Low-Sugar Version: Use sugar-free peanut butter and replace the honey with a sugar-free syrup like Lakanto maple syrup. Add an extra tablespoon of peanut butter to help with binding. The taste is slightly less sweet, but the chocolate flavor still shines through.
Seasonal Twist: In fall, add ½ teaspoon pumpkin pie spice and swap the chocolate chips for white chocolate chips. In summer, add ¼ cup freeze-dried strawberries crushed into powder—it gives a chocolate-covered strawberry vibe that’s surprisingly good.
My personal favorite variation: I once added 2 tablespoons of instant espresso powder (dissolved in 1 teaspoon of warm water) to the mixture. The coffee flavor doesn’t scream “coffee”—it just deepens the chocolate taste in a way that’s hard to describe. My sister, who hates coffee, ate three before I told her. She was mad, but she also asked for the recipe.
Serving & Storage Suggestions
These chocolate peanut butter protein balls are best served cold straight from the fridge. The texture is firm but fudgy, and the chocolate flavor is most pronounced when they’re chilled. That said, they’re perfectly fine at room temperature for a few hours—great for packing in lunch boxes or taking on hikes.
How to serve: Arrange them on a small plate or in a bowl for snacking. For parties, I sometimes skewer them on toothpicks and arrange them on a platter with fresh berries—they look surprisingly elegant for something that took ten minutes to make. Pair them with a glass of cold milk or a hot cup of coffee for the ultimate afternoon pick-me-up.
Storage instructions: Keep the balls in an airtight container in the refrigerator for up to 2 weeks. I use a glass meal prep container with a tight-fitting lid. Layer them between sheets of parchment paper if you’re stacking them to prevent sticking. They also freeze beautifully—place them in a single layer on a baking sheet, freeze until solid (about 1 hour), then transfer to a freezer bag. They’ll keep for up to 3 months.
Reheating tips: These are meant to be eaten cold or at room temperature, but if you want a softer texture, let them sit on the counter for 10 minutes before eating. For a warm treat, microwave one ball for 8-10 seconds—it gets soft and almost brownie-like. Don’t overdo it or they’ll fall apart.
Flavor development: Honestly, these taste better on day two. The oats fully absorb the moisture, the flavors meld together, and the texture becomes perfectly uniform. I always make a batch the night before I need them for this reason. If you can wait 24 hours before diving in, you’ll be rewarded with the best version of these balls.
Nutritional Information & Benefits
Per ball (based on 15 balls, using natural peanut butter and honey):
- Calories: ~145
- Protein: 6g
- Fat: 8g (mostly healthy unsaturated fats from peanut butter)
- Carbohydrates: 14g
- Fiber: 3g
- Sugar: 7g (naturally occurring from honey, plus a small amount from peanut butter)
Health Benefits: These aren’t just empty calories. The rolled oats provide steady-release energy thanks to their complex carbohydrates and soluble fiber, which also supports heart health. Peanut butter delivers plant-based protein and monounsaturated fats that keep you full and satisfied. Cocoa powder is rich in antioxidants called flavonoids, which have been linked to improved heart health and brain function. And if you add the flaxseed meal, you’re getting omega-3 fatty acids and extra fiber—great for digestion and reducing inflammation.
Dietary Considerations: This recipe is naturally vegetarian and can easily be made vegan, gluten-free, and dairy-free with the substitutions mentioned above. It contains peanuts (obviously) and oats, which are naturally gluten-free but may be cross-contaminated—use certified gluten-free oats if needed. The honey means it’s not suitable for strict vegans in its original form, but the maple syrup swap works perfectly.
Personal wellness perspective: I don’t believe in labeling foods as “good” or “bad.” These protein balls are a tool in my wellness toolbox—something that helps me get through busy days without reaching for ultra-processed snacks that leave me feeling sluggish. They’re not a meal replacement, but they’re a far better choice than the vending machine options at 3 PM when your energy is crashing. And honestly, knowing I have a healthy option ready in the fridge makes it easier to make better choices throughout the day.
FAQs
Can I use quick oats instead of rolled oats?
You can, but the texture will be different—much softer and almost mushy. Quick oats absorb more liquid and break down faster, so the balls won’t have that pleasant chewy texture. If quick oats are all you have, reduce the honey by 1 tablespoon and add an extra 2 tablespoons of oats. They’ll still taste good, just with a different mouthfeel.
Why are my protein balls falling apart?
This usually happens for one of three reasons: the mixture didn’t rest long enough before rolling, your peanut butter is too thick and dry, or you skipped the chilling step. Let the mixture rest for a full 5 minutes after mixing—the oats need time to absorb moisture. If it’s still crumbly, add a teaspoon of honey or warm water. And don’t skip the 30-minute chill—it’s essential for the balls to hold their shape.
How long do these protein balls last at room temperature?
They’re fine at room temperature for up to 4 hours, making them great for lunch boxes, road trips, or hiking. After that, they start to soften and can become a bit greasy, especially if it’s warm. For best quality, keep them refrigerated until you’re ready to eat them. If you’re packing them for a day out, use an insulated lunch bag with an ice pack.
Can I make these without a food processor?
Absolutely—no food processor needed! Everything is mixed by hand in a single bowl. The only tool you really need is a spoon or spatula and your hands for rolling. This is one of those recipes that’s almost easier without fancy equipment because you can feel the texture coming together and adjust as needed.
Can I double this recipe?
Yes, and I often do. The recipe doubles perfectly—just use a larger bowl and mix thoroughly. The only thing to watch is the resting time: with a larger batch, the mixture might need an extra minute or two of resting to come together evenly. And you’ll definitely need more fridge space for chilling the finished balls. I usually make a double batch on Sunday and have snacks for the whole week.
Conclusion
These easy chocolate peanut butter protein balls have become such a staple in my kitchen that I almost forget there was a time I didn’t make them. They’re the recipe I turn to when I need something fast, when I want something that tastes like dessert but fuels me like a meal, and when I just want to make something simple that actually works. No complicated techniques, no obscure ingredients, no hours in the kitchen—just good food that makes life a little easier.
What I love most about this recipe is how forgiving it is. You can tweak it based on what you have in your pantry, adjust the sweetness to your taste, or add mix-ins based on your mood. It’s a template, not a rigid formula. And that’s the kind of cooking I believe in—recipes that give you a solid foundation but leave room for your own creativity.
I’d love to hear how yours turn out. Did you add something unexpected? Make a substitution that worked surprisingly well? Or maybe you kept it exactly as written and loved it? Drop a comment below and let me know—I read every single one, and your ideas might end up in my next batch. And if you’re looking for more no-fuss recipes, check out these mini lemon blueberry cheesecakes for another easy treat, or browse through all our quick recipes here for more inspiration. Happy rolling!
Pin This Recipe!
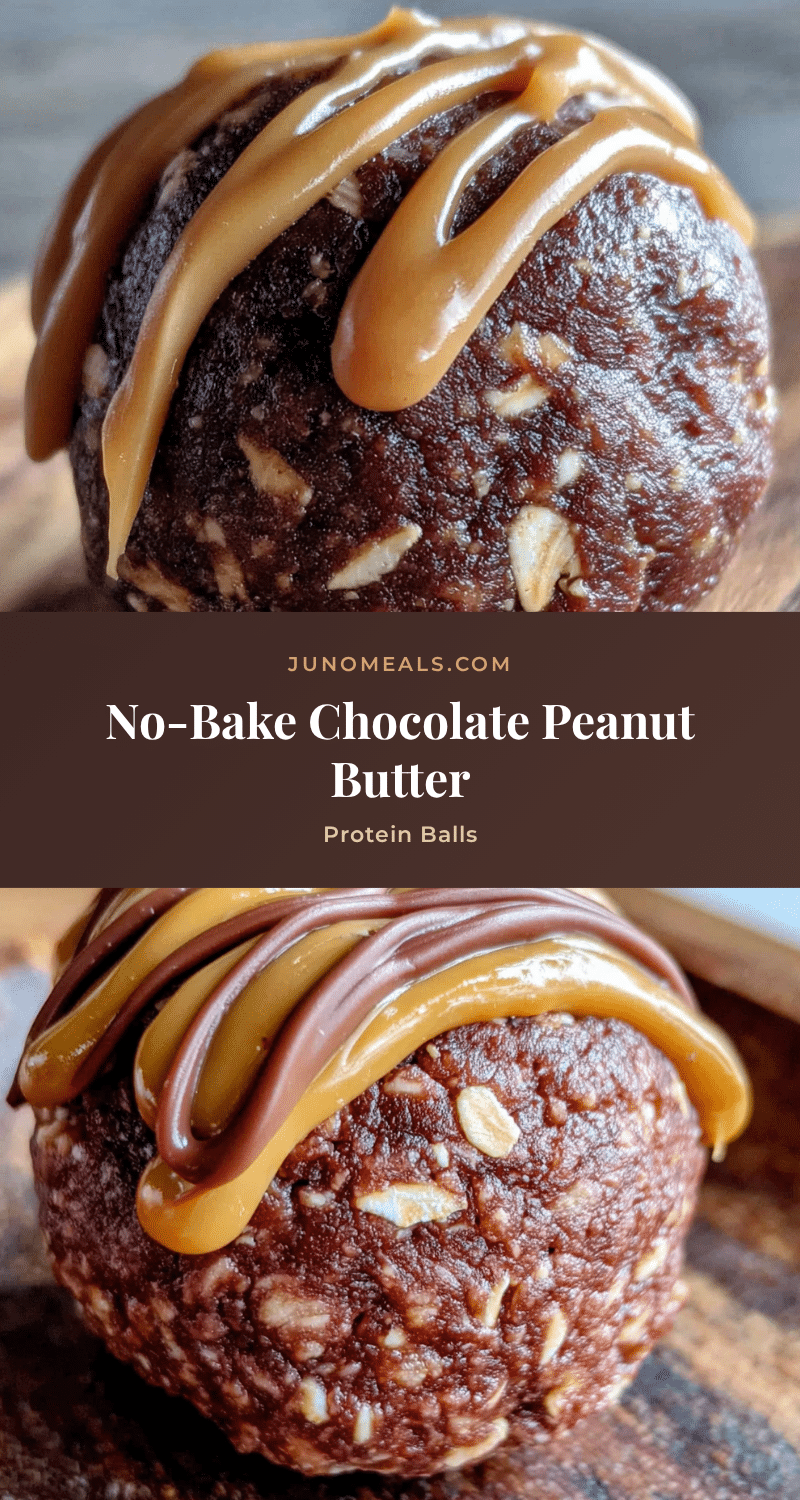
Easy No-Bake Chocolate Peanut Butter Protein Balls
These no-bake chocolate peanut butter protein balls are ready in 10 minutes and taste like fudgy brownie batter. Made with simple pantry ingredients, they’re perfect for meal prep and actually keep you full for hours.
- Prep Time: 10 minutes
- Cook Time: 0 minutes
- Total Time: 40 minutes (includes 30 minutes chilling)
- Yield: 14-16 balls 1x
- Category: Snack
- Cuisine: American
Ingredients
- 1 cup (90g) rolled oats (not quick oats)
- ½ cup (130g) creamy peanut butter (natural, no added sugar or oil preferred)
- 3 tablespoons (18g) unsweetened cocoa powder (Dutch-processed or natural)
- 3 tablespoons (60ml) honey (or maple syrup for vegan)
- 1 teaspoon vanilla extract
- ¼ teaspoon fine sea salt (reduce if peanut butter is salted)
- ¼ cup (45g) chocolate chips (mini or dark, optional but recommended)
- 2 tablespoons (14g) flaxseed meal (optional)
Instructions
- Combine the dry ingredients: In a large mixing bowl, whisk together 1 cup (90g) rolled oats, 3 tablespoons (18g) cocoa powder, ¼ teaspoon salt, and 2 tablespoons (14g) flaxseed meal (if using) until evenly distributed.
- Add the wet ingredients: Add ½ cup (130g) creamy peanut butter, 3 tablespoons (60ml) honey, and 1 teaspoon vanilla extract to the bowl. Do not stir yet.
- Mix until combined: Use a rubber spatula to fold everything together. The mixture will look dry and crumbly at first; continue mixing for about 2 minutes until a thick, fudgy dough forms.
- Let the mixture rest: Allow the mixture to sit for 5 minutes before rolling. This allows the oats to absorb moisture, making the dough easier to roll and preventing crumbling.
- Fold in chocolate chips (optional): If using chocolate chips, stir them in after the rest time. Ensure the dough is cool enough that the chips won’t melt.
- Roll into balls: Using slightly damp hands (to prevent sticking), scoop about 1 tablespoon of mixture and roll it between your palms into a smooth ball. You should get about 14-16 balls. Place them on a parchment-lined baking sheet or plate.
- Chill for at least 30 minutes: Refrigerate the balls for at least 30 minutes to firm up. For best texture, chill for a full hour. The balls are ready to eat after chilling.
- Optional: Roll in toppings: Before chilling, roll the balls in shredded coconut, crushed nuts, or extra cocoa powder for a prettier presentation. Do this immediately after rolling while the surface is still sticky.
Notes
For best texture, let the mixture rest for 5 minutes before rolling. Use slightly damp hands to prevent sticking. Chilling is non-negotiable for the balls to hold their shape. These taste even better on day two after the flavors meld. Store in an airtight container in the refrigerator for up to 2 weeks, or freeze for up to 3 months.
Nutrition
- Serving Size: 1 ball
- Calories: 145
- Sugar: 7
- Sodium: 85
- Fat: 8
- Saturated Fat: 1.5
- Carbohydrates: 14
- Fiber: 3
- Protein: 6
Keywords: no-bake protein balls, chocolate peanut butter energy balls, healthy snacks, meal prep snacks, gluten-free protein balls, vegan protein balls, easy energy bites


