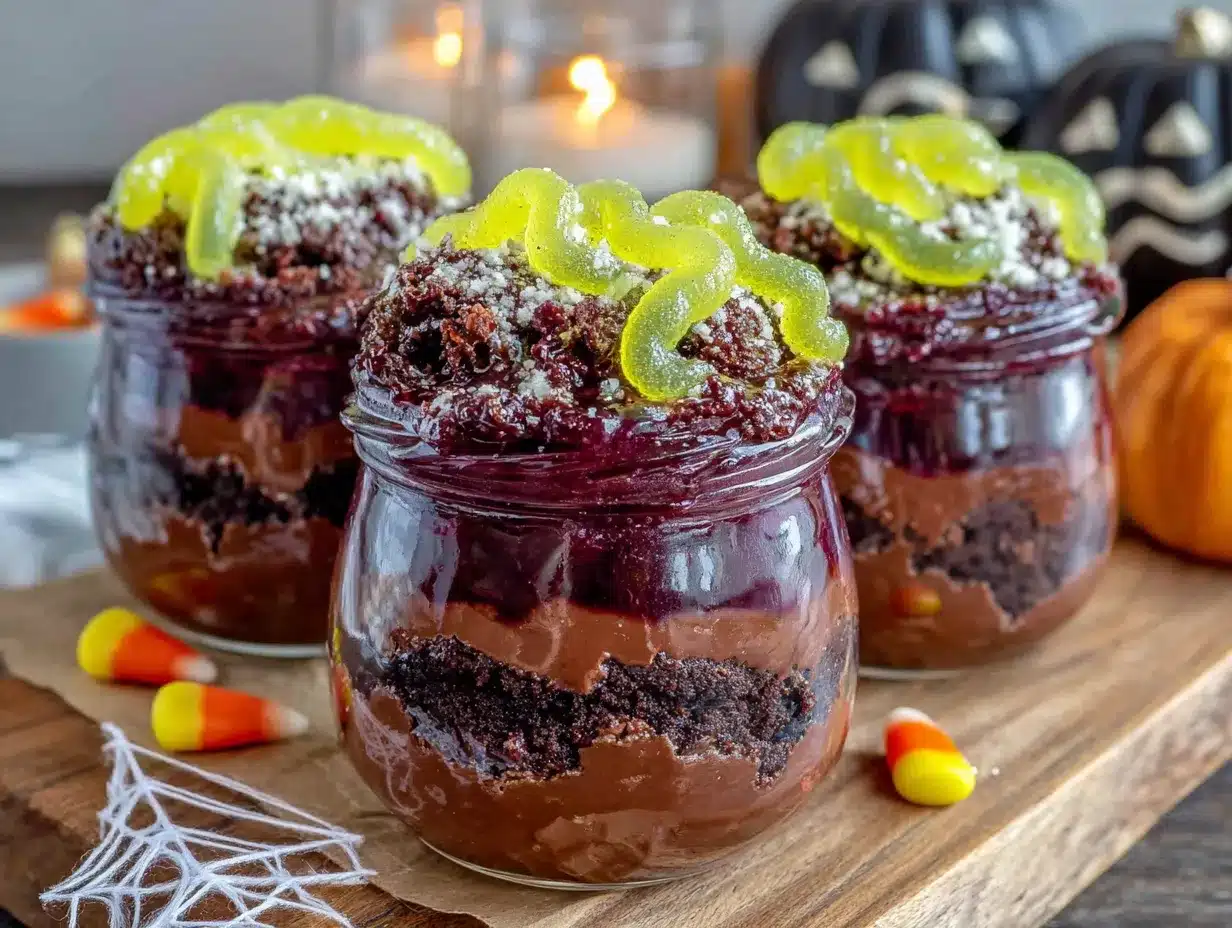
The pudding cups sat on the counter, six little plastic tumblers filled with crushed Oreos and chocolate pudding. My niece walked past, stopped, then did a double-take. “Wait—are those real?” She was pointing at the gummy worms wriggling out of the “dirt.” I just smiled. That moment—the pause, the disbelief, the grin—is exactly why I keep making these Easy Halloween Dirt Cups with Gummy Worms year after year.
I didn’t grow up making these. Honestly, I stumbled onto the idea while staring at a bag of Halloween candy I bought way too early (classic move). I had leftover pudding mix from a failed dessert experiment and a package of gummy worms that were definitely not going to survive the week. So I threw them together, thinking it was too simple to be special. Turns out, simple is exactly the point.
The first batch disappeared at a neighborhood potluck before I even got a photo. People kept asking, “How did you make the dirt?” and I had to admit it was just crushed cookies. No magic. No secret technique. Just a few ingredients and a little bit of presentation. That honesty actually made people love them more.
These dirt cups aren’t fancy, and they don’t pretend to be. They’re the kind of dessert that makes kids light up and adults secretly grab seconds when no one’s looking. And honestly? That’s my favorite kind of recipe.
Why You’ll Love This Recipe
Let’s be real for a second. You’re busy. Halloween sneaks up on you, and suddenly you need something for the classroom party, the office potluck, or just a fun treat for your own little monsters. These Easy Halloween Dirt Cups with Gummy Worms are the answer you didn’t know you needed.
- No Baking Required: Zero oven time. No preheating, no watching, no burning. Just mix, layer, and chill.
- 5 Minutes of Active Time: I’m not exaggerating. If you have the ingredients ready, you can assemble these in the time it takes to find a Halloween playlist.
- Kid-Friendly from Start to Finish: Little hands can help crush cookies, layer pudding, and stick in the worms. It’s a whole activity, not just a dessert.
- Budget-Friendly Ingredients: Instant pudding, Oreos, and gummy worms. That’s it. No fancy baking chocolate or specialty stores required.
- Customizable for Any Allergy: Use dairy-free pudding and cookies, swap for gluten-free Oreos—this recipe bends to your needs without breaking.
- Always a Crowd-Pleaser: I’ve served these at parties with adults who swore they were “too old for this” and watched them eat two. The presentation does the heavy lifting.
What makes these different from every other dirt cup recipe? It’s the texture. I don’t just dump crushed cookies on top. I layer them, creating that authentic “dirt” look with actual depth. And I use a specific trick for the gummy worms that makes them look like they’re crawling out—not just sitting there. It’s a small detail, but it’s the difference between “oh, cute” and “wait, that’s actually creepy.”
This is the recipe that makes you look like you tried harder than you did. And I think we could all use more of those in our lives.
What Ingredients You Will Need
This recipe uses simple, everyday ingredients that you can find at any grocery store. No hunting down obscure items or spending a fortune. Here’s what you need to make these Easy Halloween Dirt Cups with Gummy Worms:
For the Pudding Layer
- 1 box (3.9 oz) instant chocolate pudding mix — I prefer Jell-O brand for consistent texture, but any brand works
- 2 cups cold milk — Whole milk gives the creamiest result, but 2% or oat milk work fine (just avoid skim, it gets runny)
For the “Dirt” Topping
- 1 package (14.3 oz) Oreo cookies — Regular or Double Stuf, doesn’t matter. You’ll only use the cookie part, so save the cream filling for another treat (or eat it while you work—no judgment)
For the Decoration
- 1 bag gummy worms — Get the sour kind if you want a tangy contrast to the sweet pudding. I like the classic bright colors for maximum Halloween vibes
- Optional: green or orange sprinkles — Adds a festive touch if you’re feeling extra
- Optional: small plastic spiders or tombstone decorations — For garnish, not eating
Ingredient Tips from My Kitchen
I’ve made these dirt cups probably twenty times now, and here’s what I’ve learned. The pudding needs to set properly, so don’t rush it. Use cold milk straight from the fridge, and whisk until it thickens—about two minutes by hand or one minute with an electric mixer. If you use a dairy-free milk alternative, check that it’s unsweetened and unflavored. Vanilla almond milk adds a weird aftertaste that doesn’t work with chocolate.
For the Oreos, I’ve tried using store-brand chocolate sandwich cookies, and honestly, they’re fine. But real Oreos crush into that dark, almost-black “dirt” color better. The off-brands tend to be lighter and look more like mud than dirt. If you’re serving these to kids who notice details, stick with the name brand.
Gummy worms vary wildly in texture. The soft, squishy ones work best because they’re easier to poke into the pudding. The really chewy ones (looking at you, sour belts) can break your pudding cup if you’re not careful. I use Trolli or Black Forest brand for the best worm-to-pudding ratio.
Equipment Needed
You don’t need a professional kitchen for these Easy Halloween Dirt Cups with Gummy Worms. Here’s what you’ll actually use:
- 6 small clear cups or glasses — Plastic party cups work, but clear glass or plastic shows off the layers. I use 8-ounce tumblers from the dollar store
- Mixing bowl and whisk — For the pudding. A hand mixer speeds things up but isn’t necessary
- Ziploc bag or food processor — For crushing the Oreos. A rolling pin also works if you want to release some frustration
- Measuring cups and spoons — For the milk, though honestly, I eyeball it now
- Spatula or spoon — For layering. A small offset spatula helps get clean layers
- Small cookie scoop or tablespoon — For evenly distributing the crushed cookies
I used a food processor for years before realizing a Ziploc bag and a heavy pan worked just as well. The food processor gives a finer, more even crumb, but the bag method lets you control the texture better—some bigger chunks mixed with fine crumbs looks more like real dirt. Plus, it’s one less thing to wash.
If you’re making these for a party and need more than six, just multiply everything. The recipe scales perfectly. I’ve made thirty at once for a school event using a big punch bowl and individual cups.
Preparation Method
Making these Easy Halloween Dirt Cups with Gummy Worms is almost too easy. But I’ll walk you through every step so you get that perfect layered look every time.
-
Make the pudding. In a medium mixing bowl, combine the instant chocolate pudding mix with 2 cups of cold milk. Whisk vigorously for about 2 minutes, or until the mixture thickens. It should be smooth with no lumps. If you see lumps, keep whisking—they’ll dissolve. Let the pudding sit for 5 minutes to set completely. It should be thick enough to hold a layer without running into the cookie crumbs.
-
Crush the Oreos. While the pudding sets, separate the Oreo cookies from the cream filling. You can do this by twisting each cookie gently—most of the cream will stick to one side. Scrape it off with a knife or your finger (and eat it, obviously). Place the chocolate cookie wafers in a Ziploc bag and seal it. Use a rolling pin or the bottom of a heavy pan to crush them into fine crumbs. You want a mix of textures: mostly fine dust with some small pebbly bits. This takes about 3-4 minutes of crushing. If you’re using a food processor, pulse 8-10 times until you get the right texture.
-
Layer the cups. Take your clear cups and start building. Spoon about 2 tablespoons of crushed Oreos into the bottom of each cup. Press it down lightly with the back of a spoon to create a compact base layer. This prevents the pudding from mixing into the “dirt” too much.
-
Add the pudding. Spoon or pour the chocolate pudding over the cookie layer, filling each cup about two-thirds full. Leave some room at the top for the final dirt layer and the worms. Tap the cups gently on the counter to settle the pudding and remove any air bubbles.
-
Top with more dirt. Sprinkle another 2-3 tablespoons of crushed Oreos over the pudding, creating a thick, even layer. This is the “surface” of your dirt cup, so make it look intentional. Don’t press it down—leave it loose and crumbly for that freshly-dug look.
-
Add the gummy worms. Here’s the trick: take a gummy worm and gently push it into the pudding at an angle, leaving about half the worm sticking out. Don’t just lay it on top—that looks like a worm on a plate, not a worm crawling out of dirt. Push it in so it looks like it’s emerging. Repeat with 2-3 worms per cup, varying the angles and positions. Some can be fully buried with just a tail showing. Others can be halfway out, reaching toward the sky.
-
Chill (optional but recommended). Refrigerate the cups for at least 30 minutes before serving. This lets the flavors meld and makes the texture even better. The cookies soften slightly, creating that authentic dirt mouthfeel. If you’re serving immediately, they’re still delicious—just a bit crunchier.
Pro tip from my kitchen: If you’re making these ahead of time, wait to add the gummy worms until just before serving. They can bleed color into the pudding if left overnight, turning the chocolate a weird greenish-brown. I learned this the hard way before a Halloween party. The worms looked sad and the pudding looked swampy. Not cute.
Cooking Tips & Techniques
After making these Easy Halloween Dirt Cups with Gummy Worms more times than I can count, I’ve collected a few tricks that make the difference between good and great.
The biggest mistake people make is using instant pudding that hasn’t set properly. If you rush this step, your pudding will be too thin, and the cookie crumbs will sink into it, creating a muddy mess instead of clean layers. Let it set for the full 5 minutes, or even 10 if you have time. The pudding should hold its shape when you scoop it.
Another common fail is crushing the Oreos too fine. If you turn them into dust, they look more like potting soil than dirt. Keep some texture. A few bigger pieces here and there make it look realistic. I like to crush most of the cookies to a fine crumb, then add a few hand-crushed chunks for variety.
Timing strategy: Make the pudding and crush the cookies while the pudding sets. This multitasking saves you about 10 minutes. Then assembly takes less than 5 minutes per batch of six cups. If you’re making multiple batches, do all the prep work first, then assemble everything at once.
For consistency: Use a cookie scoop or measuring spoon for the cookie layers. Eyeballing it leads to uneven cups where some have too much dirt and others have too little. I use a 2-tablespoon scoop for the bottom layer and a 3-tablespoon scoop for the top.
My biggest failure: I once tried to make these with homemade chocolate pudding from scratch. It was too runny, too rich, and the layers completely dissolved into each other. The result was a brown slurry with floating worm pieces. My kids called it “worm soup” and refused to eat it. Stick with instant pudding. It’s designed for this exact purpose.
Variations & Adaptations
These Easy Halloween Dirt Cups with Gummy Worms are endlessly adaptable. Here are some ways I’ve changed them up over the years:
Dairy-Free Version: Use almond milk, oat milk, or coconut milk with a dairy-free instant pudding mix. Most store brands have a vegan option now. The texture is slightly less creamy, but still delicious. I’ve also used coconut cream for an extra-rich version that’s surprisingly good.
Gluten-Free Option: Gluten-free chocolate sandwich cookies are widely available. Brands like Glutino and Kinnikinnick make excellent versions. The texture is a bit different—they’re crunchier and don’t soften as much—but they work perfectly for the dirt effect.
Pumpkin Spice Version: For a fall twist, replace the chocolate pudding with vanilla or butterscotch pudding, and add a teaspoon of pumpkin pie spice to the cookie crumbs. Use gummy pumpkins instead of worms. I made this for a Thanksgiving potluck and it was a hit.
Adult Halloween Version: Add a splash of Kahlua or Baileys to the pudding before layering. Use dark chocolate pudding and espresso-infused cookies. The worms stay the same, but the whole thing feels more sophisticated. Just label them clearly so kids don’t grab the wrong cup.
Crunchy Topping: Mix crushed pretzels or graham crackers into the cookie crumbs for extra texture. The salt from the pretzels contrasts beautifully with the sweet pudding. I did this accidentally once when I ran out of Oreos and needed to stretch the topping. Now it’s my preferred version.
For a complete Halloween dessert table, pair these dirt cups with other spooky treats. They’re especially good alongside a warm apple cider or hot chocolate bar.
Serving & Storage Suggestions
These Easy Halloween Dirt Cups with Gummy Worms are best served cold, straight from the fridge. The contrast between the cold, creamy pudding and the slightly softened cookie crumbs is what makes them irresistible.
Serving temperature: Take them out of the fridge about 5 minutes before serving. This takes the chill off without letting the pudding warm up too much. If they sit out for more than 30 minutes, the cookies get soggy and the worms start to droop.
Presentation ideas: Arrange the cups on a black or orange platter for maximum Halloween effect. Add a few fake spiders or plastic bones around the base. I once served these on a tray covered in crushed chocolate graham crackers to look like a graveyard. It took an extra 2 minutes and people lost their minds.
Storage: Cover each cup with plastic wrap or a small lid and refrigerate for up to 3 days. The pudding stays fresh, but the cookie topping will soften over time. If you’re making these more than a day ahead, store the cookie crumbs separately and add them just before serving. The worms should also be added fresh to prevent color bleeding.
Reheating: Don’t. These are meant to be cold. If you want a warm dessert, this isn’t the recipe for you.
How flavors develop: The pudding actually tastes better after a few hours in the fridge. The flavors meld together, and the texture becomes more cohesive. Day-old dirt cups are often better than fresh ones, as long as the toppings are still crunchy.
If you’re looking for another no-bake dessert that’s perfect for parties, these mini cheesecakes are a great option. They take a bit more time but are equally impressive.
Nutritional Information & Benefits
Let’s be honest—these Easy Halloween Dirt Cups with Gummy Worms are a treat, not a health food. But here’s what you’re working with per serving (one cup, using whole milk and regular Oreos):
- Calories: Approximately 380-420
- Fat: 16g
- Carbohydrates: 58g
- Sugar: 42g
- Protein: 6g
- Calcium: 15% of daily value (from milk)
- Iron: 10% of daily value (from Oreos)
Health considerations: These are high in sugar and processed ingredients, so they’re best as an occasional treat. If you’re serving them to kids with dietary restrictions, the dairy-free and gluten-free variations work well. Always check labels for potential allergens—some gummy worms contain wheat starch or gelatin.
Surprising benefit: The milk in the pudding provides calcium and vitamin D, and the cocoa in the chocolate pudding contains antioxidants. It’s not a health food, but it’s not completely empty calories either. Everything in moderation, right?
Portion control bonus: Because these are served in individual cups, it’s easier to control portions than with a cake or pie. One cup is satisfying without being excessive. I’ve found that kids who might eat three slices of cake are perfectly happy with one dirt cup.
Conclusion
These Easy Halloween Dirt Cups with Gummy Worms are proof that you don’t need complicated techniques or fancy ingredients to make something memorable. They’re simple, they’re fun, and they deliver that wow factor every single time.
I love this recipe because it brings out the kid in everyone. Adults who walk past with a polite smile stop and do a double-take when they see the worms. Kids light up like it’s actual magic. And the best part? You made that happen with pudding and cookies and a bag of gummy worms.
Don’t be afraid to make these your own. Add extra worms, use different cookie flavors, or turn them into a full Halloween dessert bar. The recipe is a starting point, not a rulebook. The only rule is that you have fun with it.
I’d love to hear how yours turn out. Did you add any twists? Did the kids help? Did anyone actually fall for the “dirt” trick? Drop a comment below and share your Halloween dessert stories. And if you make these for a party, tag me in your photos—I want to see those worms crawling out of your cups!
Happy Halloween, and happy snacking!
Frequently Asked Questions
Can I make these dirt cups the night before?
Yes, but with one important caveat. Assemble the pudding and cookie layers the night before, but wait to add the gummy worms until just before serving. The worms can bleed color into the pudding if left overnight, turning it an unappetizing shade. Store the cups covered in the fridge and add the worms fresh.
What if I don’t have clear cups?
Any cup works, but clear cups show off the layers, which is half the fun. If you only have opaque cups, consider adding a label or tag that says “Dirt Cup” so people know what they’re getting. Mason jars, small glass bowls, or even paper cups with a clear window work great.
Can I use sugar-free pudding mix?
Absolutely. Sugar-free instant pudding works exactly the same way. The texture is slightly less creamy, but the difference is minimal. Use skim milk or a low-fat milk alternative to keep the calories down. The cookie crumbs will still add sugar, so the overall dessert will still be sweet.
How do I keep the gummy worms from sinking?
Make sure your pudding is fully set before adding the worms. If the pudding is still runny, the worms will sink to the bottom. Let the pudding set for at least 5-10 minutes, and if it still seems thin, refrigerate it for 15 minutes before assembling. Also, insert the worms at an angle rather than straight down—this helps them stay in place.
Can I use a different type of cookie for the dirt?
Yes, but the color matters. Chocolate cookies give that dark, realistic dirt look. Vanilla or golden cookies will look more like sand than dirt. If you want a different flavor, try chocolate graham crackers, chocolate wafer cookies, or even crushed chocolate cereal like Cocoa Pebbles. Just aim for a dark brown color and a fine crumb texture.
Pin This Recipe!
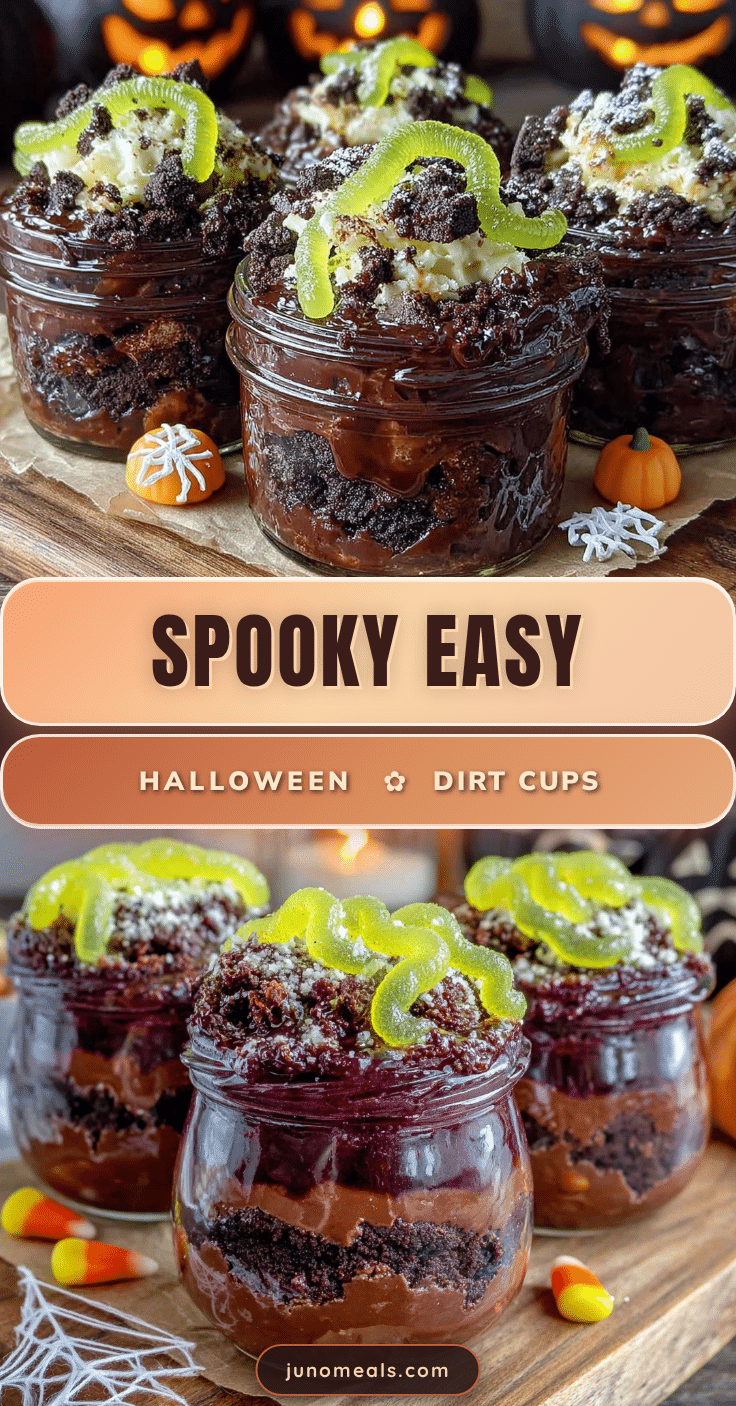
Easy Halloween Dirt Cups with Gummy Worms: 5-Minute Dessert
These no-bake Halloween dirt cups with gummy worms are a quick, kid-friendly dessert made with chocolate pudding, crushed Oreos, and gummy worms. Perfect for parties and potlucks, they come together in just 5 minutes of active time.
- Prep Time: 5 minutes
- Cook Time: 0 minutes
- Total Time: 35 minutes (including chilling time)
- Yield: 6 servings 1x
- Category: Dessert
- Cuisine: American
Ingredients
- 1 box (3.9 oz) instant chocolate pudding mix
- 2 cups cold milk (whole milk preferred, but 2% or oat milk work)
- 1 package (14.3 oz) Oreo cookies (regular or Double Stuf)
- 1 bag gummy worms (sour or classic, Trolli or Black Forest recommended)
- Optional: green or orange sprinkles
- Optional: small plastic spiders or tombstone decorations
Instructions
- In a medium mixing bowl, combine the instant chocolate pudding mix with 2 cups of cold milk. Whisk vigorously for about 2 minutes until thickened. Let sit for 5 minutes to set completely.
- While the pudding sets, separate the Oreo cookies from the cream filling. Place the chocolate cookie wafers in a Ziploc bag and crush with a rolling pin or heavy pan into fine crumbs with some small pebbly bits. Alternatively, pulse in a food processor 8-10 times.
- Spoon about 2 tablespoons of crushed Oreos into the bottom of each clear cup. Press down lightly with the back of a spoon to create a compact base layer.
- Spoon or pour the chocolate pudding over the cookie layer, filling each cup about two-thirds full. Tap cups gently on the counter to settle the pudding and remove air bubbles.
- Sprinkle another 2-3 tablespoons of crushed Oreos over the pudding, creating a thick, even layer. Leave it loose and crumbly.
- Gently push gummy worms into the pudding at an angle, leaving about half the worm sticking out. Repeat with 2-3 worms per cup, varying angles and positions.
- Refrigerate for at least 30 minutes before serving for best texture. If serving immediately, they are still delicious but crunchier.
Notes
For best results, let pudding set fully before adding worms to prevent sinking. Add gummy worms just before serving to avoid color bleeding into the pudding. Store covered in refrigerator for up to 3 days, but cookie topping will soften over time. For make-ahead, store cookie crumbs separately and add fresh before serving.
Nutrition
- Serving Size: 1 cup
- Calories: 400
- Sugar: 42
- Sodium: 380
- Fat: 16
- Saturated Fat: 7
- Carbohydrates: 58
- Fiber: 2
- Protein: 6
Keywords: Halloween dessert, dirt cups, gummy worms, no-bake dessert, kid-friendly, easy dessert, chocolate pudding, Oreo, Halloween party


