That first hit of cinnamon — warm, sharp, and sweet — hitting you before you even open the oven door. It still takes me straight to my friend Clara’s tiny apartment kitchen, three autumns ago. She was the type of baker who never followed a recipe exactly, just threw things together and called it “rustic.” I was skeptical. I mean, snickerdoodles are sacred, right? Cheesecake is a whole other commitment. And pumpkin? That felt like trying to cram three holidays into one pan.
But then she handed me a bar, still warm, the top crinkled like a cookie and the center so creamy it barely held its shape. One bite, and honestly, I had to sit down. It wasn’t just good. It was the kind of dessert that makes you stop talking mid-conversation. The pumpkin was subtle, not screaming for attention. The cinnamon-crusted edge gave way to this velvety, tangy cheesecake layer that melted into a soft, buttery cookie base. I asked for the recipe, and she laughed. “I don’t have one. I just winged it.”
So I spent the next two weekends in my own kitchen, trying to reverse-engineer that perfect bite. I burned a batch. I made one that was too dense. Another was so liquidy it basically became pumpkin soup with a cookie crust. But eventually, I nailed it. This Perfect Cinnamon Pumpkin Cheesecake Snickerdoodle Bars recipe is the result of all those happy accidents. It’s the bar that makes you close your eyes after the first bite, and it’s way easier than it sounds.
Why You’ll Love This Recipe
Let’s be real — most fall desserts are either too complicated or too predictable. These bars are the happy middle ground. They taste like you spent hours layering flavors, but the technique is surprisingly forgiving. I’ve tested this recipe six times now (my neighbors are very happy), and it works every single time.
- Quick & Easy: From start to finish, you’re looking at about an hour. That includes chilling time. No water baths, no complicated folding — just simple layers that come together in one bowl for the crust and another for the filling.
- Simple Ingredients: You probably have most of this in your pantry already. Butter, sugar, flour, cinnamon, cream cheese, eggs. The pumpkin is the only “special” item, and it’s in every grocery store from September through December.
- Perfect for Fall Gatherings: Bring these to a Friendsgiving, a potluck, or just a cozy Sunday afternoon, and watch them disappear. They’re sturdy enough to travel, fancy enough to impress, and familiar enough that nobody will be scared off.
- Crowd-Pleaser: I’ve served these to kids who claim they don’t like pumpkin, adults who “don’t do sweets,” and my dad who only eats chocolate desserts. Every single one of them asked for a second piece.
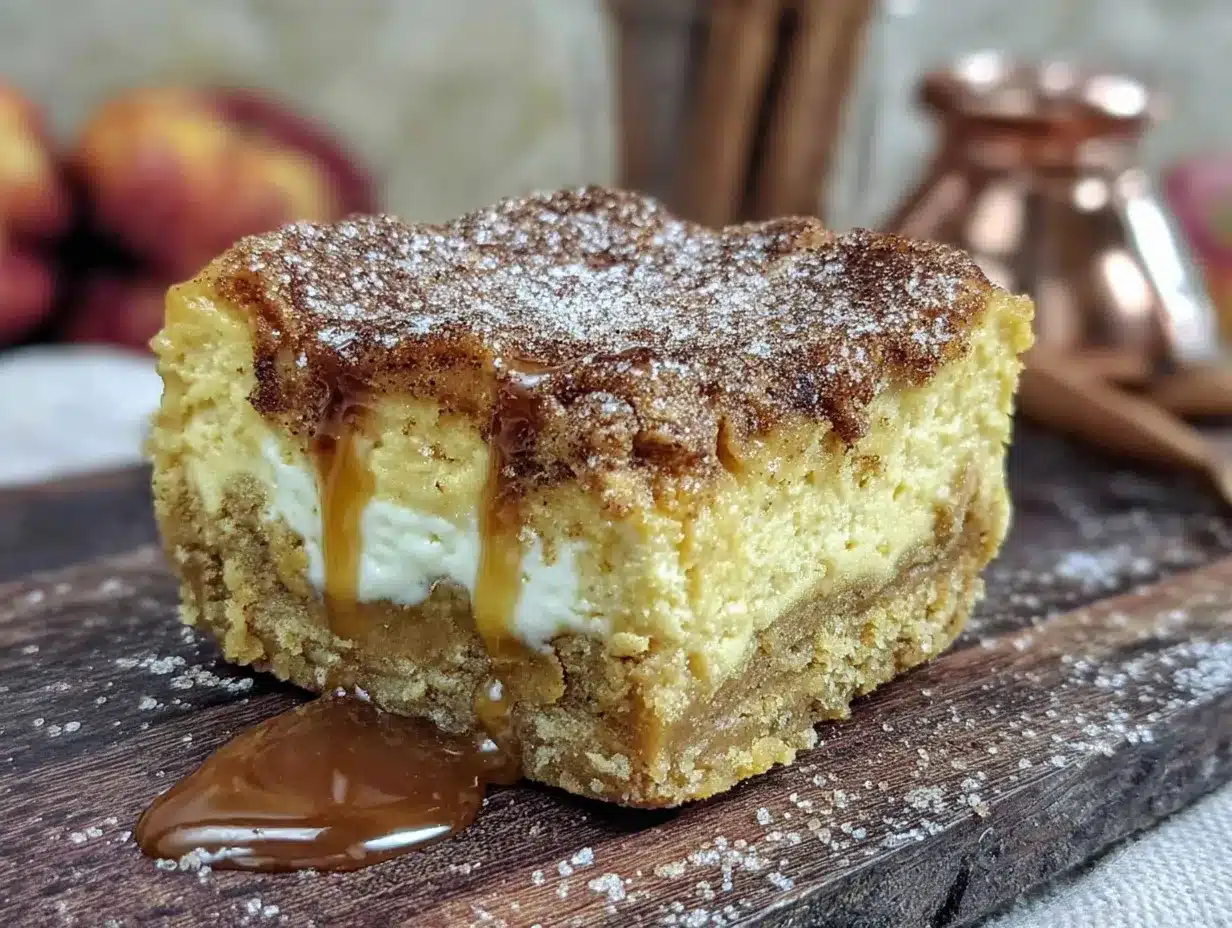
- Unbelievably Delicious: The texture is what gets you. That snickerdoodle crust is slightly crisp on the outside, soft on the inside, and the cheesecake layer is rich but not heavy. The pumpkin adds moisture without making it soggy. It’s the kind of bar where the whole is truly greater than the sum of its parts.
What makes this recipe different from the dozens of pumpkin bars out there? It’s the cinnamon-sugar crust. Most recipes just sprinkle it on top, but here, we press it into the bottom of the pan and then sprinkle another layer on top before baking. That double hit of cinnamon creates a texture that’s almost like a shortbread cookie, sturdy enough to hold the creamy cheesecake but tender enough to melt in your mouth.
This isn’t just another pumpkin dessert. It’s the one you’ll make every single fall, and then you’ll wonder why you only make it in fall.
What Ingredients You Will Need
This recipe uses simple, wholesome ingredients to deliver that perfect balance of creamy, spiced, and buttery. Most of these are pantry staples, so you might already have everything on hand.
For the Crust & Topping
- 2 ½ cups all-purpose flour (scoop and level for accuracy)
- 1 cup unsalted butter, softened (I prefer Kerrygold for its rich flavor, but any good butter works)
- 1 cup granulated sugar
- 1 large egg (room temperature)
- 2 teaspoons cream of tartar (this is what gives snickerdoodles their signature tangy flavor — don’t skip it)
- 1 teaspoon baking soda
- ½ teaspoon salt
- 3 tablespoons ground cinnamon (divided — 2 for the crust mixture, 1 for the topping)
- ¼ cup granulated sugar (for the cinnamon-sugar topping)
For the Cheesecake Layer
- 16 ounces cream cheese, softened (two blocks, full-fat for best texture — low-fat can make the filling runny)
- ¾ cup granulated sugar
- 2 large eggs (room temperature)
- 1 teaspoon vanilla extract
- 1 cup pumpkin puree (not pumpkin pie filling — make sure it’s 100% pure pumpkin)
- 1 teaspoon pumpkin pie spice (or a mix of cinnamon, nutmeg, ginger, and cloves)
- 1 tablespoon all-purpose flour (this helps stabilize the cheesecake and prevents cracking)
Ingredient Tips: I recommend using Libby’s pumpkin puree for consistent results — it’s thicker and less watery than some store brands. If your cream cheese is cold, let it sit on the counter for at least 30 minutes before starting. Cold cream cheese creates lumps that are nearly impossible to beat out. And please, please use real butter. Margarine will change the texture of the crust completely.
Substitution Guidance: For a gluten-free version, swap the all-purpose flour with a 1:1 gluten-free baking blend. For a dairy-free option, use vegan butter and dairy-free cream cheese, though the texture will be slightly softer. If you don’t have pumpkin pie spice, mix ½ teaspoon cinnamon, ¼ teaspoon nutmeg, ¼ teaspoon ginger, and a pinch of cloves.
Equipment Needed
You don’t need a fancy kitchen to make these bars. Here’s what you’ll actually use:
- 9×13-inch baking pan — glass or metal both work, but glass gives you a slightly softer bottom crust
- Parchment paper — absolutely essential for easy removal. Trust me, I learned this the hard way after a stuck-bar disaster
- Electric hand mixer or stand mixer — you can do this by hand, but your arm will thank you for the mixer
- Two large mixing bowls — one for the crust, one for the cheesecake filling
- Rubber spatula — for scraping every last bit of cheesecake into the pan
- Measuring cups and spoons
- Cooling rack — helps the bars cool evenly without soggy bottoms
If you don’t have a 9×13 pan, you can use two 8×8 pans and adjust the baking time down by about 5 minutes. I’ve also made these in a 10-inch cast iron skillet for a more rustic look — just increase the baking time by 5-7 minutes and keep an eye on the edges.
Preparation Method
This looks like a lot of steps, but I promise it flows quickly once you get going. Read through everything first, then start.
Step 1: Prep Your Pan (5 minutes)
Preheat your oven to 350°F (175°C). Line your 9×13-inch pan with parchment paper, leaving a 2-inch overhang on the long sides. This creates “handles” that let you lift the entire block of bars out after they cool. Lightly spray the parchment with non-stick spray — just a quick mist.
Step 2: Make the Snickerdoodle Crust (10 minutes)
In a large bowl, cream together the softened butter and 1 cup of granulated sugar until light and fluffy — about 2-3 minutes with an electric mixer. You want it to look pale and airy. Add the egg and beat until combined. In a separate small bowl, whisk together the flour, cream of tartar, baking soda, salt, and 2 tablespoons of the cinnamon. Gradually add the dry ingredients to the wet mixture, mixing on low until just combined. Don’t overmix, or the crust will be tough.
The dough will be soft and slightly sticky — that’s perfect. Reserve about 1 cup of this dough for the topping. Press the remaining dough evenly into the bottom of your prepared pan. Use your fingers or the bottom of a measuring cup to get it flat and even. This is your base layer.
Step 3: Make the Cheesecake Filling (10 minutes)
In a clean bowl, beat the softened cream cheese and ¾ cup sugar until smooth and creamy — about 2 minutes. Scrape down the sides of the bowl. Add the eggs one at a time, beating well after each addition. Mix in the vanilla extract. Now add the pumpkin puree and pumpkin pie spice, and beat until everything is fully combined and a beautiful orange color. Finally, mix in the 1 tablespoon of flour. This little bit of flour is my secret weapon against cheesecake cracks — it stabilizes the filling without making it heavy.
Pour the cheesecake filling over the crust layer and spread it evenly with your spatula. Tap the pan gently on the counter a few times to release any air bubbles.
Step 4: Add the Topping (5 minutes)
Take the reserved 1 cup of snickerdoodle dough and crumble it evenly over the top of the cheesecake filling. Don’t press it down — leave it in small, rustic clumps. Some of the cheesecake will peek through, and that’s exactly what you want. In a small bowl, mix the remaining 1 tablespoon of cinnamon with ¼ cup of sugar. Sprinkle this cinnamon-sugar mixture generously over the entire top of the bars.
Step 5: Bake (35-40 minutes)
Bake at 350°F for 35-40 minutes. The edges should be golden brown and slightly puffed, and the center should be set but still have a slight jiggle — like Jell-O, not like liquid. If the top is browning too quickly after 25 minutes, tent loosely with aluminum foil.
Sensory Cue: Your kitchen will smell like a fall candle factory exploded — in the best way. The cinnamon will be warm and sweet, and you’ll catch hints of nutmeg and vanilla. The top should look crinkly and golden, with bits of the snickerdoodle dough poking through the cinnamon sugar.
Step 6: Cool and Chill (2+ hours)
Let the bars cool completely in the pan on a wire rack — about 1 hour. Then, refrigerate for at least 1 more hour, or up to overnight. This is the hardest part, I know. But the chilling step is non-negotiable if you want clean, beautiful slices. Warm cheesecake is delicious, but it’s also a mess. Cold cheesecake cuts like a dream.
Once fully chilled, use the parchment handles to lift the entire block out of the pan. Place it on a cutting board and slice into 24 bars (6 rows by 4 rows). For the cleanest cuts, wipe your knife clean between slices.
Cooking Tips & Techniques
I’ve made this recipe enough times to know exactly where things can go wrong. Here’s what I’ve learned:
Don’t overbake. This is the number one mistake. Cheesecake continues to set as it cools, so pulling it out when the center is still slightly jiggly is actually perfect. Overbaked cheesecake turns dry and cracks. If you see a crack forming on the surface, you’ve gone about 3 minutes too long. Next time, pull it out earlier.
Room temperature ingredients matter. I know, I know, nobody plans ahead. But cold cream cheese creates lumps, and cold eggs can make the filling curdle. If you forget to take them out, here’s a hack: place the cream cheese (still wrapped) in a bowl of warm water for 10 minutes, and put the eggs in a cup of warm water for 5 minutes. It works.
Press the crust firmly. A loose crust means the cheesecake filling will seep underneath during baking, creating a messy, soggy bottom. Use the bottom of a measuring cup or a flat glass to really pack that dough down. You want it to be about ¼-inch thick and even across the whole pan.
Let it chill completely. I once tried to cut these after only 30 minutes in the fridge. It was a tragedy. The bars were still warm in the center, and the knife just smooshed everything together. Patience is the secret ingredient here.
Use a sharp knife. A dull knife drags through the cheesecake instead of cutting cleanly. Run your knife under hot water, dry it off, and slice. Wipe and repeat between each cut. This gives you those beautiful, Instagram-worthy edges.
Variations & Adaptations
Once you’ve mastered the base recipe, here are some fun ways to change it up:
- Gluten-Free Version: Swap the all-purpose flour with a 1:1 gluten-free baking blend. I’ve used Bob’s Red Mill with great results. The texture will be slightly crumblier, but the flavor is still spot on.
- Vegan Adaptation: Use vegan butter (I like Miyoko’s), dairy-free cream cheese (Tofutti or Kite Hill), and a flax egg (1 tablespoon ground flaxseed mixed with 3 tablespoons water, let sit for 5 minutes). The texture will be softer, so freeze for 30 minutes before slicing.
- Pumpkin Spice Latte Twist: Add 1 tablespoon of instant espresso powder to the cheesecake filling along with the pumpkin. It deepens the flavor and gives it that coffee-shop vibe. I tried this last week, and it’s now my favorite variation.
- Nutty Crunch: Stir ½ cup of chopped pecans or walnuts into the crumble topping before baking. The nuts toast in the oven and add a wonderful crunch against the creamy cheesecake.
- Chocolate Drizzle: Once the bars are fully chilled and sliced, drizzle melted dark chocolate over the top. Let it set for 10 minutes before serving. The chocolate and pumpkin combination is surprisingly perfect.
If you love experimenting with different flavor combinations, you might also enjoy these mini lemon blueberry cheesecakes — they use a similar cream cheese base but with a bright, citrusy twist that’s perfect for spring.
Serving & Storage Suggestions
These bars are delicious at any temperature, but I prefer them chilled straight from the fridge. The cold, creamy texture contrasts beautifully with the crumbly, cinnamon-spiced crust. If you want to serve them at room temperature, let them sit out for about 15 minutes — any longer and the cheesecake gets too soft.
Presentation Idea: Arrange the bars on a wooden board or a white platter. Dust with a light sprinkle of cinnamon on top. For an extra touch, add a small dollop of whipped cream and a few fresh cranberries on the side. It looks stunning and takes 30 seconds.
What to Serve With Them: A hot cup of coffee or chai tea is the perfect pairing. The spices in the bars complement the warmth of the drinks. For a dessert spread, serve alongside vanilla ice cream or a simple caramel sauce drizzle. If you’re planning a full fall menu, check out the other seasonal recipes on this site for more inspiration.
Storage: Keep the bars in an airtight container in the refrigerator for up to 5 days. Layer them with parchment paper between each row to prevent sticking. The flavor actually gets better on day two — the spices meld together and the texture firms up beautifully.
Freezing: These freeze like a dream. Wrap individual bars tightly in plastic wrap, then place them in a freezer-safe bag or container. Freeze for up to 3 months. To thaw, transfer to the refrigerator overnight. You can also eat them straight from the freezer — they’re like a creamy, cinnamon-spiced ice cream bar.
Reheating: I don’t recommend microwaving these, as the cheesecake can get rubbery. If you want them warm, place a bar on a baking sheet and heat in a 300°F oven for 5-7 minutes. The edges will crisp up slightly, and the center will soften without losing its structure.
Nutritional Information & Benefits
Let’s be honest — this is a dessert, not a health food. But there are a few redeeming qualities hidden in those layers.
| Nutrient | Per Bar (1/24 of recipe) |
|---|---|
| Calories | ~245 |
| Total Fat | 14g |
| Saturated Fat | 8g |
| Carbohydrates | 28g |
| Sugar | 18g |
| Protein | 4g |
| Vitamin A | 45% DV |
| Calcium | 4% DV |
Health Highlights: Pumpkin is packed with vitamin A, which supports eye health and immune function. It’s also a good source of fiber. The cream cheese provides a small amount of calcium and protein. Cinnamon has anti-inflammatory properties and can help regulate blood sugar levels — though with 18g of sugar per bar, it’s not exactly a free pass. I like to think of these as a “better-for-you” indulgence, not a health food. Enjoy one with a glass of milk and call it balance.
Dietary Considerations: This recipe contains gluten, dairy, and eggs. For allergen-friendly options, see the variations section above.
Conclusion
These Perfect Cinnamon Pumpkin Cheesecake Snickerdoodle Bars are the kind of dessert that makes you feel like a hero in the kitchen without actually having to work that hard. They look impressive, taste like you spent all day, and come together in about an hour of active time. The combination of a buttery, cinnamon-spiced snickerdoodle crust, a creamy pumpkin cheesecake filling, and a crumbly, sugary top is honestly unbeatable.
I love this recipe because it’s forgiving. It’s okay if your crumble isn’t perfect. It’s okay if the bars aren’t exactly square. What matters is the flavor — warm, spiced, creamy, and absolutely unforgettable. I’ve made these for family dinners, holiday parties, and lazy Sunday afternoons, and every single time, someone asks for the recipe.
Now I want to hear from you. Have you tried making these? Did you add your own twist? Drop a comment below and let me know how they turned out. And if you share a photo on Pinterest or Instagram, tag me — I love seeing your creations. Happy baking, friends!
Frequently Asked Questions
Can I use pumpkin pie filling instead of pumpkin puree?
No, please don’t. Pumpkin pie filling is already sweetened and spiced, so it will throw off the sugar and spice balance in the recipe. The bars will end up overly sweet and the texture will be too dense. Stick with 100% pure pumpkin puree.
Why did my cheesecake layer crack?
Cracks usually happen from overbaking or sudden temperature changes. Pull the bars out when the center is still slightly jiggly. Also, let them cool gradually — don’t put them straight from the oven into the fridge. Let them sit on the counter for an hour first.
Can I make these bars ahead of time?
Absolutely. In fact, they taste even better the next day. You can make them up to 2 days in advance and store them in the refrigerator. If you’re making them for a party, bake, cool, and chill overnight, then slice and serve the next day.
Can I use a different spice blend?
Of course. If you don’t have pumpkin pie spice, use a mix of cinnamon, nutmeg, ginger, and a pinch of cloves. You can also add a teaspoon of cardamom for a more aromatic flavor, or a pinch of cayenne for a subtle heat that pairs beautifully with the pumpkin.
How do I get clean, neat slices?
Chill the bars for at least 2 hours before slicing. Use a sharp knife and run it under hot water, then dry it off. Make one clean cut, wipe the knife clean, and repeat. This prevents the cheesecake from dragging and gives you those beautiful, professional-looking edges.
Pin This Recipe!
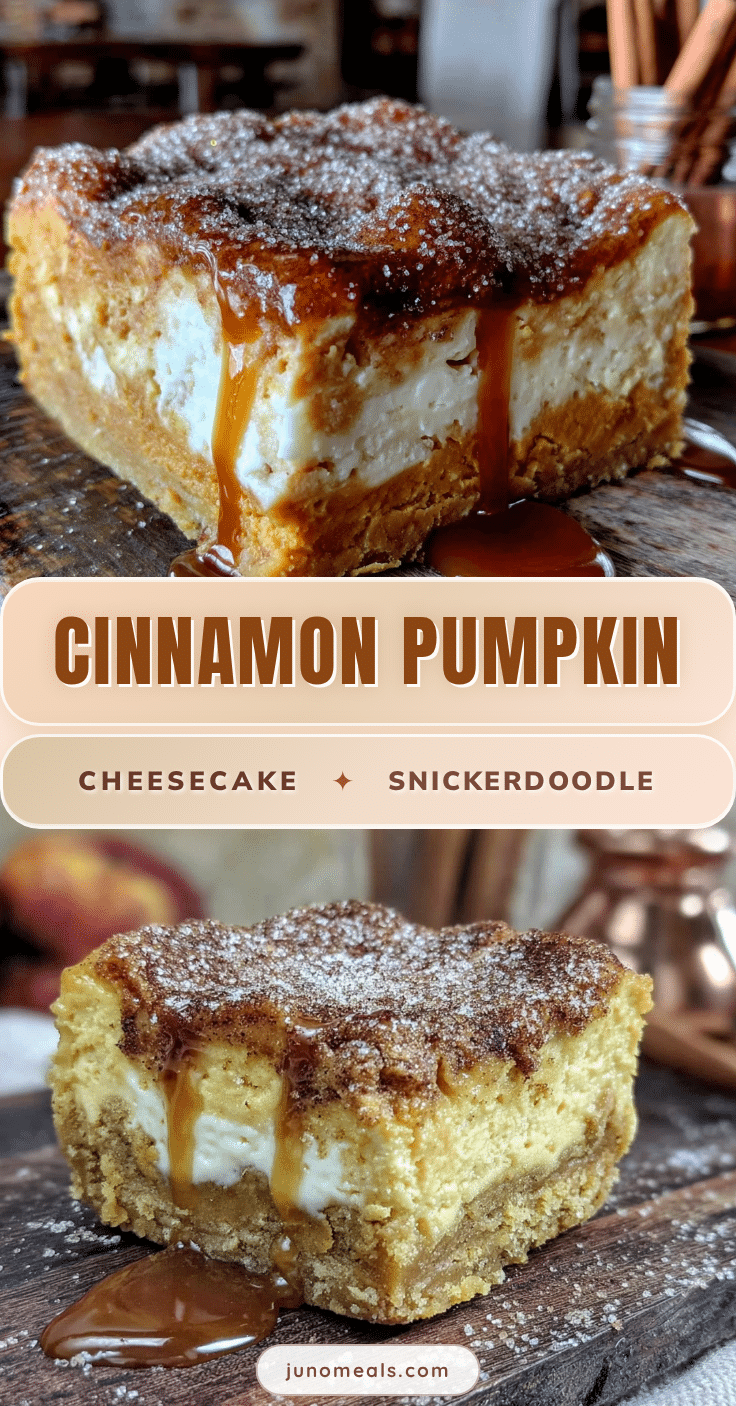
Perfect Cinnamon Pumpkin Cheesecake Snickerdoodle Bars
These bars combine a buttery, cinnamon-spiced snickerdoodle crust with a creamy pumpkin cheesecake filling and a crumbly, sugary top. They’re the perfect fall dessert that tastes like you spent hours but comes together in about an hour.
- Prep Time: 20 minutes
- Cook Time: 35-40 minutes
- Total Time: 1 hour (plus 2+ hours chilling)
- Yield: 24 bars 1x
- Category: Dessert
- Cuisine: American
Ingredients
- 2 ½ cups all-purpose flour
- 1 cup unsalted butter, softened
- 1 cup granulated sugar
- 1 large egg, room temperature
- 2 teaspoons cream of tartar
- 1 teaspoon baking soda
- ½ teaspoon salt
- 3 tablespoons ground cinnamon, divided
- ¼ cup granulated sugar (for topping)
- 16 ounces cream cheese, softened
- ¾ cup granulated sugar
- 2 large eggs, room temperature
- 1 teaspoon vanilla extract
- 1 cup pumpkin puree (not pumpkin pie filling)
- 1 teaspoon pumpkin pie spice
- 1 tablespoon all-purpose flour
Instructions
- Preheat oven to 350°F (175°C). Line a 9×13-inch baking pan with parchment paper, leaving a 2-inch overhang on the long sides. Lightly spray with non-stick spray.
- In a large bowl, cream together softened butter and 1 cup granulated sugar until light and fluffy, about 2-3 minutes. Add egg and beat until combined.
- In a separate bowl, whisk together flour, cream of tartar, baking soda, salt, and 2 tablespoons cinnamon. Gradually add to wet mixture, mixing on low until just combined. Reserve 1 cup of dough for topping. Press remaining dough evenly into prepared pan.
- In a clean bowl, beat softened cream cheese and ¾ cup sugar until smooth, about 2 minutes. Add eggs one at a time, beating well after each. Mix in vanilla, pumpkin puree, pumpkin pie spice, and 1 tablespoon flour until fully combined.
- Pour cheesecake filling over crust and spread evenly. Crumble reserved dough over the top. In a small bowl, mix remaining 1 tablespoon cinnamon with ¼ cup sugar and sprinkle over the top.
- Bake for 35-40 minutes, until edges are golden and center is set but slightly jiggly. If top browns too quickly, tent with foil after 25 minutes.
- Cool completely in pan on a wire rack (about 1 hour), then refrigerate for at least 1 hour or overnight.
- Use parchment handles to lift bars out of pan. Slice into 24 bars (6×4). Wipe knife clean between cuts for neat slices.
Notes
Don’t overbake; center should be slightly jiggly. Use room temperature ingredients for best texture. Press crust firmly to prevent seepage. Chill completely before slicing for clean cuts. For gluten-free, use 1:1 gluten-free baking blend. For dairy-free, use vegan butter and dairy-free cream cheese.
Nutrition
- Serving Size: 1 bar
- Calories: 245
- Sugar: 18
- Sodium: 180
- Fat: 14
- Saturated Fat: 8
- Carbohydrates: 28
- Fiber: 1
- Protein: 4
Keywords: pumpkin cheesecake bars, snickerdoodle bars, fall dessert, pumpkin dessert, cinnamon bars, cheesecake bars


