My neighbor texted me a photo of her snack spread last October, and I honestly just stared at it for a minute. It was this gorgeous board covered in orange, black, and white treats, with little candy corn ghosts peeking out from between cheese wedges. I asked her what she called it, and she said, “Oh, it’s just my Halloween charcuterie board with candy corn—the kids devoured it in ten minutes flat.” That was the moment I realized I had been overcomplicating holiday entertaining for years. I had been stressing over themed cupcakes and elaborate dips when all anyone really wanted was a big, beautiful board they could graze on while watching Hocus Pocus.
So I went home and started building my own version. I grabbed a wooden board from my pantry, some sharp cheddar I had leftover from taco night, and a bag of candy corn I swore I wasn’t going to buy (but, you know, it was on sale). The first attempt was messy. The cheese slid into the candy, the pretzels looked sad, and I had way too much space in the middle. But by the third try, something clicked. The board felt alive, like a little edible landscape of Halloween colors and textures.
Now this board is my go-to for every Halloween gathering, from casual family movie nights to neighborhood potlucks. It takes about fifteen minutes to throw together, and it always gets that same reaction my neighbor’s board got—wide eyes, a quick photo, and then total silence as everyone digs in. There’s something about the mix of salty cheese, crunchy pretzels, and that sweet, waxy candy corn that just works. Honestly, this is the kind of recipe that makes you feel like a kitchen genius without actually doing much work.
Why You’ll Love This Recipe
This isn’t your average cheese board. This Halloween charcuterie board with candy corn is designed to be the centerpiece of your party without making you spend hours in the kitchen. I’ve tested this board at three separate gatherings now, and every single time, people ask for the “recipe” (which feels funny to call it that, since it’s really just assembly). But the feedback has been consistent enough that I feel confident saying this is a winner.
- Quick & Easy: This board comes together in under 15 minutes. Seriously. No baking, no cooking, just slicing and arranging.
- Simple Ingredients: Most of these items are regular grocery store finds. You don’t need a specialty cheese shop or an online candy order.
- Perfect for Halloween Parties: Whether you’re hosting a costume party, a kid-friendly gathering, or just want something fun for a spooky movie night, this board fits right in.
- Crowd-Pleaser: I’ve watched picky eaters, cheese snobs, and candy lovers all happily pick from the same board. It somehow pleases everyone.
- Unbelievably Delicious: The combination of sharp cheddar with sweet candy corn is weirdly addictive. I can’t explain the science, but I can confirm the results.
What makes this board different from the rest is the attention to color balance. I didn’t just throw things on a platter. I thought about how the orange cheddar would pop against the black olives, how the white brie would mirror the white tips of the candy corn, and how the pretzel sticks would add that necessary crunch between all the soft textures. It’s not just another snack board—it’s a curated Halloween experience that looks like you spent way more time on it than you actually did.
This is the kind of recipe that makes you close your eyes after the first bite, not because it’s fancy, but because it’s exactly what you wanted. It’s comfort food reimagined for the holiday season—faster, simpler, but with the same soul-soothing satisfaction. Perfect for impressing guests without the stress, or turning a simple Friday night into something memorable.
What Ingredients You Will Need
This Halloween charcuterie board with candy corn relies on a mix of savory, salty, and sweet components. The beauty is that you can swap things based on what you already have, but here’s what I use for the most visually striking and delicious version.
Cheeses
- Sharp cheddar cheese, sliced into thin triangles or cubes (orange color is key for the Halloween theme)
- Brie cheese, whole wheel or large wedge (the white rind mimics the white tips of candy corn)
- Smoked gouda, cubed (adds a deep, smoky flavor that contrasts nicely with the sweetness)
- Pepper jack cheese, sliced (optional, but the little red flecks add a pop of color)
Meats
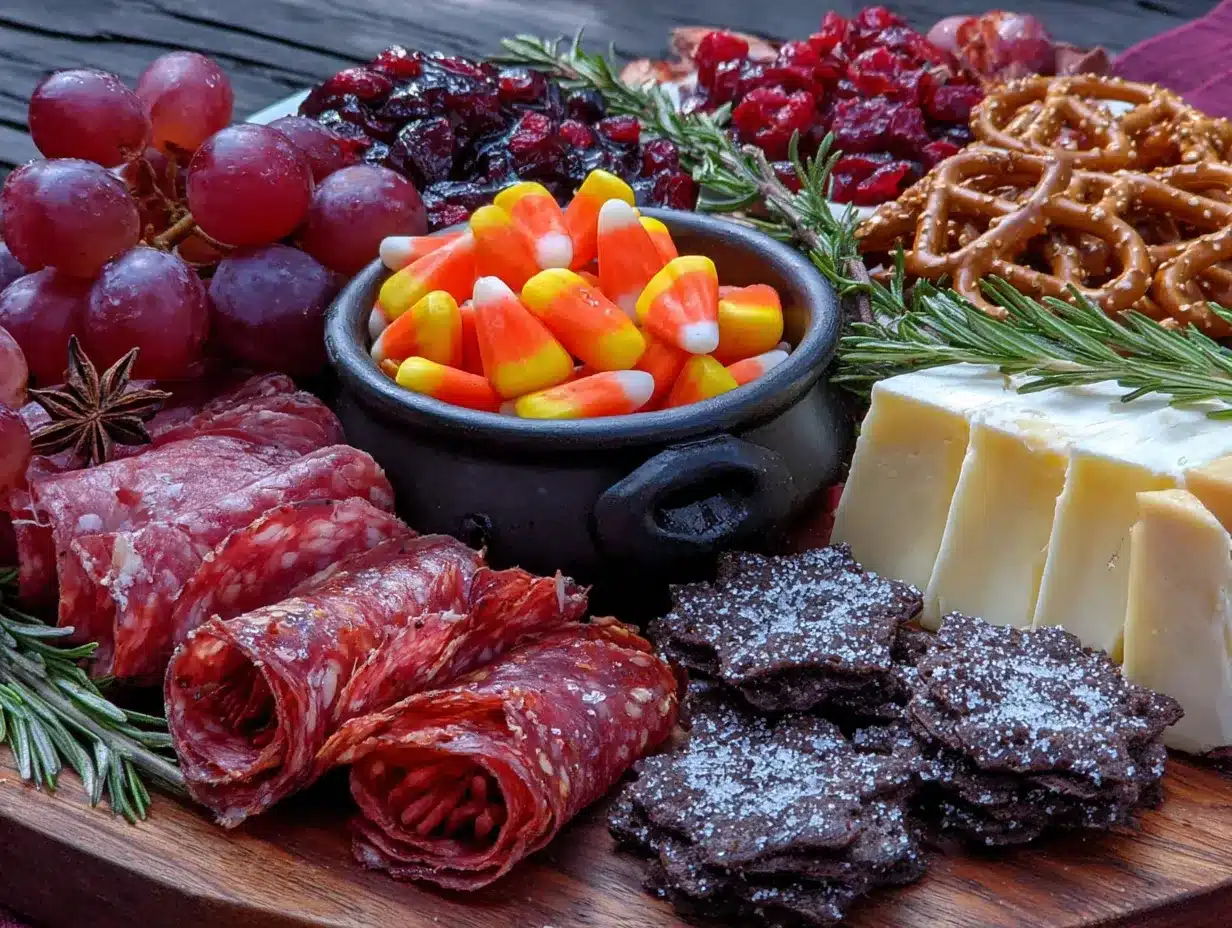
- Salami, thinly sliced and folded into ribbons (I prefer genoa salami for its peppery kick)
- Prosciutto, torn into pieces (adds a salty, melt-in-your-mouth texture)
- Pepperoni, whole slices (the red color works great for the Halloween palette)
Candy & Sweets
- Candy corn, about 1 cup (the star of the show—use the classic Brach’s brand for that perfect tri-color look)
- Chocolate-covered pretzels, about 1 cup (adds crunch and a sweet-salty balance)
- Orange and black jelly beans, about ½ cup (for extra color and a chewy texture)
- Dark chocolate squares, broken into pieces (the bitterness balances the sugar overload)
Fruits & Vegetables
- Red grapes, small clusters (the deep purple looks almost black in low light—very Halloween)
- Black olives, whole or sliced (adds that dark, savory element)
- Dried apricots, halved (the orange color reinforces the candy corn theme)
- Fresh rosemary sprigs (for garnish, not eating—adds a woodsy, witchy vibe)
Crackers & Bread
- Water crackers, plain (neutral base that doesn’t compete with flavors)
- Pretzel sticks, about 1 cup (great for dipping and adds vertical interest)
- Baguette slices, lightly toasted (optional, but adds a rustic touch)
I recommend using Tillamook sharp cheddar for its consistent flavor and meltability. For the candy corn, Brach’s is the gold standard—it has that perfect chewy-yet-firm texture that doesn’t get stuck in your teeth quite as badly as store brands. Look for a brie that feels slightly soft at the center when you press it gently; that means it’s perfectly ripe.
If you’re feeding a crowd that avoids pork, swap the salami and prosciutto for turkey-based alternatives or omit the meat entirely—the board will still look full and festive. For a gluten-free version, replace the crackers and pretzels with rice crackers and gluten-free pretzel sticks.
Equipment Needed
- Large wooden cutting board or serving platter (at least 12×16 inches—you need room to spread things out)
- Small ramekins or bowls (for holding loose items like candy corn and olives so they don’t roll everywhere)
- Cheese knife set (a soft cheese knife for the brie and a hard cheese knife for the cheddar)
- Small tongs (for guests to serve themselves without touching everything)
- Parchment paper (optional, but makes cleanup way easier if you’re using a porous wooden board)
If you don’t have a large wooden board, a baking sheet lined with parchment paper works just fine. I’ve used a clean pizza pan in a pinch, and honestly, it looked kind of cool. For the ramekins, any small bowls or even cleaned yogurt containers will do—just make sure they’re stable and won’t tip over when people reach for the candy corn.
I learned the hard way that using a single cheese knife for everything means your brie ends up tasting like pepper jack. Keep them separate, or at least wipe the blade between cheeses. Also, if you’re using a new wooden board, oil it first with food-grade mineral oil so the cheese juices don’t stain the wood.
Preparation Method
Building this Halloween charcuterie board with candy corn is more about geometry than cooking. Here’s my step-by-step process that I’ve refined over several attempts.
- Start with the bowls. Place your ramekins or small bowls on the board first. I put one in the upper left corner for candy corn, one in the lower right corner for black olives, and one in the center for the chocolate-covered pretzels. This creates a triangular flow that guides the eye across the board. Make sure the bowls aren’t too close to the edge—you want room for everything else.
- Add the cheese wedges. Place the brie wheel in the upper right quadrant, slightly off-center. Fan out the sliced cheddar in a crescent shape below it. Cube the smoked gouda and scatter the pieces in small clusters around the lower left area. Space the cheeses out so guests don’t have to reach over one to get to another. I usually place them about 2-3 inches apart.
- Fold the meats. Take each slice of salami and fold it in half, then in half again, creating a little ribbon. Place these in a small pile near the cheddar. Tear the prosciutto into rough strips and drape them loosely near the brie. The pepperoni slices can go flat in a stack near the center. Don’t overthink the meat placement—just make sure they’re not all clumped together.
- Fill in with crackers. Arrange the water crackers in a fan pattern along the bottom edge of the board. Place the pretzel sticks vertically in small bundles near the bowls. If you’re using baguette slices, line them up along the left side. Crackers act as the edible “frame” for your board, so distribute them evenly around the perimeter.
- Add the fruits and vegetables. Tuck small clusters of red grapes into the gaps between cheeses and meats. Scatter the dried apricot halves near the cheddar (the orange-on-orange looks intentional and pretty). Place the black olives in their bowl and scatter a few loose ones around the board for visual interest. The rosemary sprigs go last—tuck them under cheese wedges or between bowls so they look like they’re growing out of the board.
- Finish with the candy. Pour the candy corn into its designated bowl, but also sprinkle a few pieces directly on the board around the brie. This creates a bridge between the savory and sweet sections. Add the orange and black jelly beans in small clusters near the pepperoni. Break the dark chocolate squares into irregular pieces and scatter them near the pretzels.
- Step back and adjust. Look at the board from above. Are there any empty spots that look sad? Fill them with extra crackers or a few more grapes. Is everything too crowded? Remove a few items to create breathing room. The goal is to look abundant but not chaotic—like a still life painting, not a yard sale.
At this point, the board should look like a colorful, textured landscape. The orange cheddar should pop against the dark grapes, the white brie should mirror the candy corn tips, and the whole thing should make you want to take a photo before anyone touches it. Total assembly time is about 12-15 minutes if you’re moving at a relaxed pace.
One thing I learned the hard way: don’t put the candy corn directly on the board without a bowl underneath, especially if your board is damp from washing. The moisture will make the candy corn sticky and weird. Always use a liner or bowl for anything that could melt or stick.
Cooking Tips & Techniques
Over the years, I’ve made plenty of mistakes with boards like this. Here’s what I’ve learned so you don’t have to repeat my errors.
Temperature matters more than you think. Take the cheeses out of the refrigerator about 30 minutes before you start assembling. Cold cheese doesn’t have the same creamy texture or bold flavor. Brie in particular becomes so much better at room temperature—it gets almost runny and spreads like a dream on crackers. I once served a board with ice-cold cheddar and it tasted like rubber. Never again.
Balance your flavors across the board. Don’t put all the sweet stuff on one side and all the savory on the other. Guests should be able to grab a piece of candy corn, a cube of cheese, and a cracker all from the same general area. I like to create little “pods” of flavor combinations. For example, near the brie, I’ll place a few dark chocolate squares and some dried apricots. Near the cheddar, I’ll put the salami and olives. This way, every section of the board offers a complete tasting experience.
Use vertical elements for visual interest. Flat boards can look boring. I use pretzel sticks standing upright in small clusters, salami ribbons that rise above the surface, and rosemary sprigs that stick out at angles. These vertical elements draw the eye and make the board feel more dynamic. Just don’t go overboard—you want the food to be accessible, not architectural.
Prep everything before you start arranging. Slice all your cheeses, fold all your meats, and have your bowls ready before you touch the board. Once you start placing items, you want to keep moving. Stopping to slice more cheese halfway through breaks your flow and can lead to uneven spacing. I lay everything out on a separate cutting board first, then transfer it all at once.
My biggest failure was the time I tried to assemble this board while distracted by guests asking questions. I ended up putting the candy corn directly on a damp board, and within ten minutes, it had started to dissolve into a sticky mess. The board looked like a crime scene. Now I always do the assembly before anyone arrives, and I keep a damp paper towel nearby to wipe up any spills immediately.
Variations & Adaptations
This Halloween charcuterie board with candy corn is endlessly customizable. Here are some variations I’ve tried and loved.
Kid-Friendly Version: Replace the brie and smoked gouda with mild cheddar and colby jack. Swap the prosciutto for turkey slices (kids often find the texture of prosciutto off-putting). Add gummy worms and candy pumpkins alongside the candy corn. My niece’s eyes lit up when she saw the gummy worms crawling between the cheese cubes. It was a huge hit.
Spicy Adult Version: Add pepper jack cheese, spicy salami, and jalapeño-stuffed olives. Include a small bowl of honey sriracha for drizzling over the brie. The heat from the peppers contrasts beautifully with the sweetness of the candy corn. I served this version at a Halloween party for adults, and the spicy-sweet combo was the first thing to disappear.
Vegan-Friendly Version: Use vegan cheese alternatives (I like Follow Your Heart’s cheddar-style blocks and Treeline’s cashew-based soft cheese). Replace the meats with marinated artichoke hearts, roasted red peppers, and seasoned chickpeas. Keep the candy corn (it’s accidentally vegan!) and add dark chocolate that’s dairy-free. This version is lighter but still feels indulgent.
Gluten-Free Version: Swap all crackers and pretzels for gluten-free alternatives. Rice crackers, gluten-free pretzel sticks, and sliced vegetables like cucumber rounds and bell pepper strips work great. Make sure your meats and cheeses are certified gluten-free if that’s a concern. I’ve made this for a friend with celiac disease, and she said it was the first Halloween board she could fully enjoy without worry.
I personally love the spicy adult version. There’s something about the way the heat from the pepper jack lingers on your tongue, and then you bite into a piece of candy corn, and it’s like a little flavor explosion. It’s unexpected and delightful, and it always gets people talking.
Serving & Storage Suggestions
This board is best served at room temperature, so let it sit out for about 20 minutes after assembly before presenting it. The cheeses will be softer, the meats will be more flavorful, and the candy corn will be at that perfect chewy consistency. If you’re serving it outdoors on a cool fall evening, it will hold up well for about 2 hours before the cheese starts to get greasy.
For presentation, I like to place the board on a table with small plates, napkins, and a few extra serving utensils nearby. If you’re feeling fancy, add a small sign that says “Witch’s Snack Board” or “Candy Corn Grazing Platter.” It’s a fun touch that makes guests smile. I also like to have a separate bowl of extra candy corn nearby for refills—because trust me, that bowl will empty fast.
For drinks, this board pairs beautifully with a crisp apple cider (hot or cold), a dry rosé, or a pumpkin beer. The sweetness of the candy corn and the saltiness of the cheese play well with all of these. If you’re serving kids, apple juice or sparkling water with a splash of orange juice works great.
Storage is simple but requires some separation. If you have leftovers (which honestly, rarely happens), remove the candy corn and chocolate from the board and store them in airtight containers at room temperature. The cheeses and meats should be wrapped separately in wax paper or plastic wrap and refrigerated. The crackers and pretzels can go in a ziplock bag. Don’t try to store the assembled board in the fridge—the moisture will ruin the crackers and make the candy corn sticky.
Flavors actually develop nicely overnight for the cheeses and meats. The next day, the cheddar will taste even sharper, and the brie will have absorbed some of the smoky flavor from the gouda if they were stored near each other. Just bring everything back to room temperature before serving again.
Nutritional Information & Benefits
While this Halloween charcuterie board with candy corn is definitely a treat, there are some surprising nutritional highlights worth noting. The values below are estimates for a typical serving (about ¼ of the board).
| Nutrient | Amount Per Serving |
|---|---|
| Calories | 450-550 |
| Protein | 18-22g |
| Fat | 28-35g |
| Carbohydrates | 35-45g |
| Fiber | 2-4g |
| Sugar | 20-25g |
Pin This Recipe!
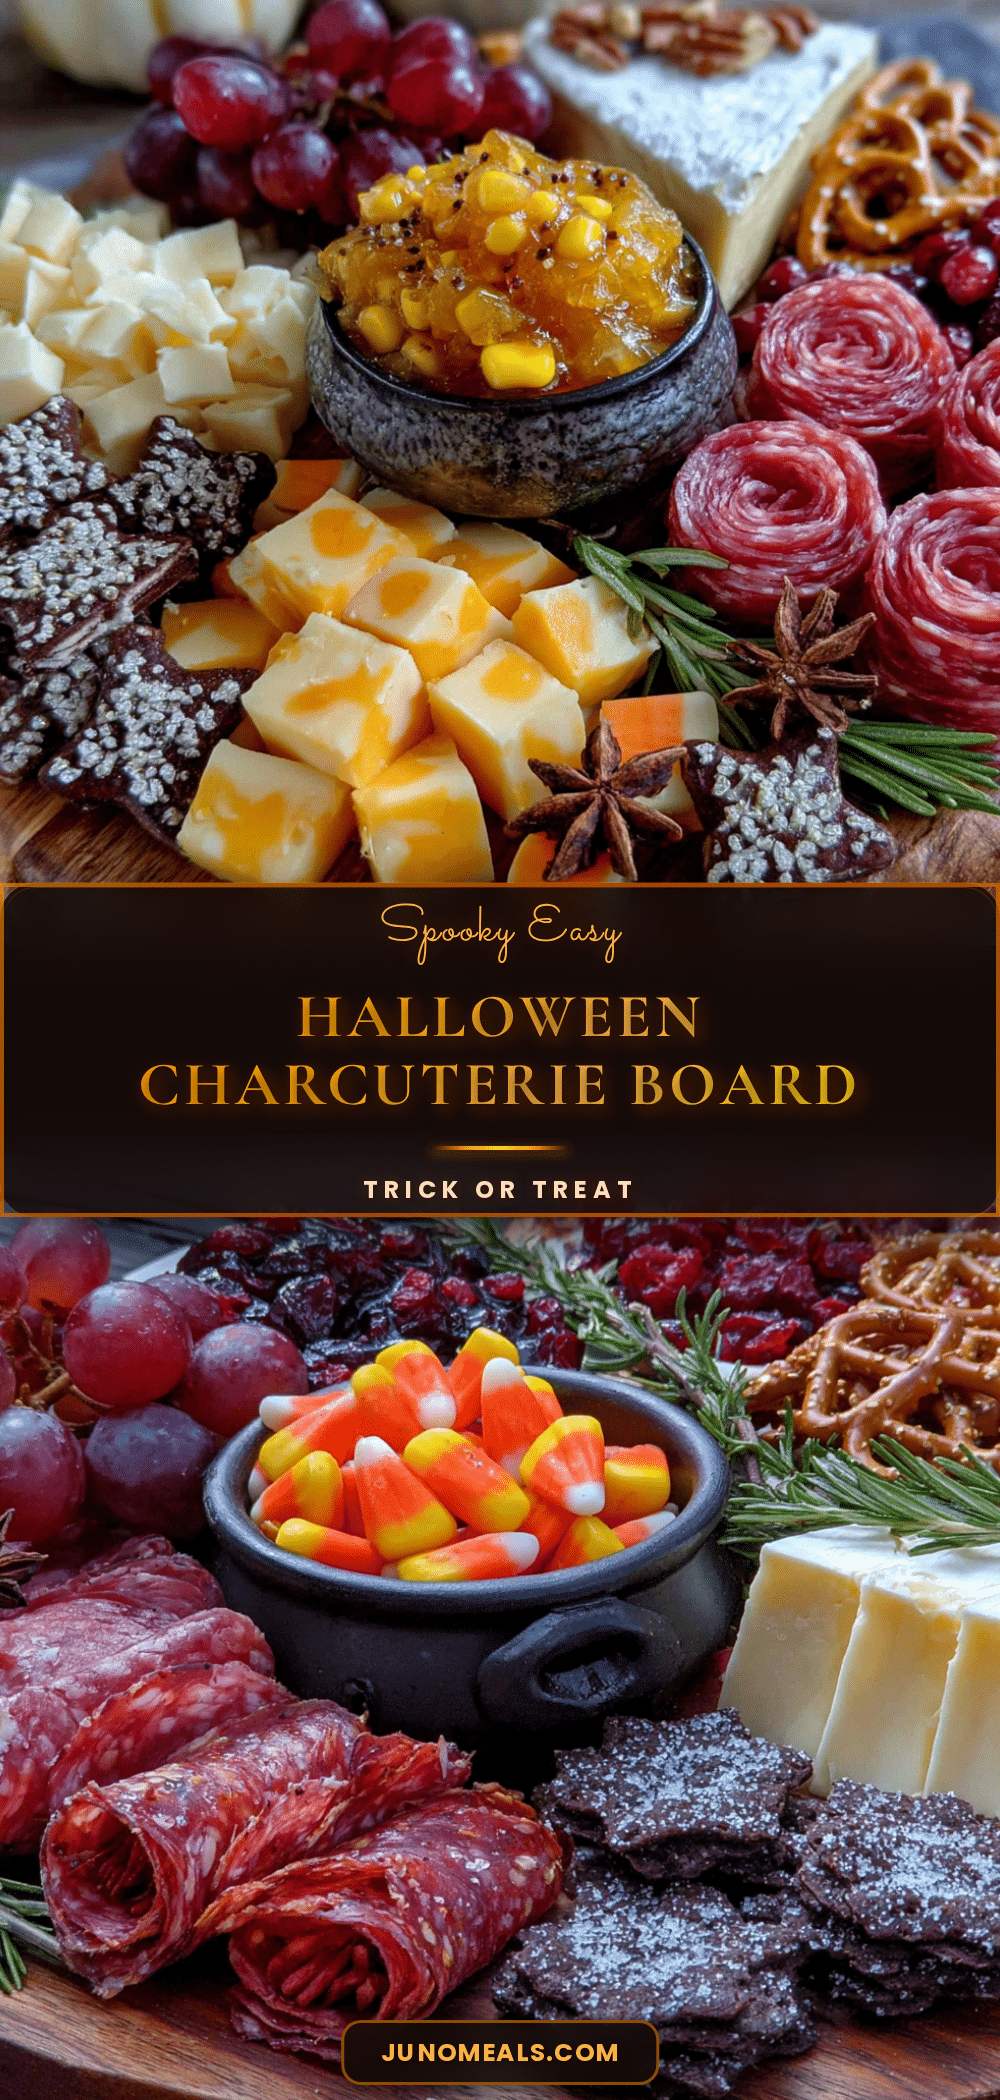
Easy Halloween Charcuterie Board with Candy Corn Treats
A quick and easy Halloween charcuterie board featuring sharp cheddar, brie, salami, and candy corn. Perfect for parties and movie nights, this board comes together in under 15 minutes and is a crowd-pleaser.
- Prep Time: 15 minutes
- Cook Time: 0 minutes
- Total Time: 15 minutes
- Yield: 6-8 servings
- Category: Appetizer
- Cuisine: American
Ingredients
- Sharp cheddar cheese, sliced into thin triangles or cubes
- Brie cheese, whole wheel or large wedge
- Smoked gouda, cubed
- Pepper jack cheese, sliced (optional)
- Salami, thinly sliced and folded into ribbons
- Prosciutto, torn into pieces
- Pepperoni, whole slices
- Candy corn, about 1 cup
- Chocolate-covered pretzels, about 1 cup
- Orange and black jelly beans, about ½ cup
- Dark chocolate squares, broken into pieces
- Red grapes, small clusters
- Black olives, whole or sliced
- Dried apricots, halved
- Fresh rosemary sprigs (for garnish)
- Water crackers, plain
- Pretzel sticks, about 1 cup
- Baguette slices, lightly toasted (optional)
Instructions
- Start with the bowls. Place ramekins or small bowls on the board: one in the upper left for candy corn, one in the lower right for black olives, and one in the center for chocolate-covered pretzels.
- Add the cheese wedges. Place the brie wheel in the upper right quadrant. Fan out sliced cheddar in a crescent shape below it. Cube the smoked gouda and scatter in small clusters around the lower left area. Space cheeses 2-3 inches apart.
- Fold the meats. Fold each salami slice in half, then in half again to create ribbons. Place near the cheddar. Tear prosciutto into rough strips and drape near the brie. Place pepperoni slices flat in a stack near the center.
- Fill in with crackers. Arrange water crackers in a fan pattern along the bottom edge. Place pretzel sticks vertically in small bundles near the bowls. If using baguette slices, line them up along the left side.
- Add the fruits and vegetables. Tuck small clusters of red grapes into gaps. Scatter dried apricot halves near the cheddar. Place black olives in their bowl and scatter a few loose ones around. Tuck rosemary sprigs under cheese wedges or between bowls.
- Finish with the candy. Pour candy corn into its bowl and sprinkle a few pieces directly on the board around the brie. Add orange and black jelly beans in small clusters near the pepperoni. Break dark chocolate squares into irregular pieces and scatter near the pretzels.
- Step back and adjust. Look at the board from above. Fill empty spots with extra crackers or grapes. Remove items if overcrowded. The goal is an abundant but not chaotic look.
Notes
Take cheeses out of refrigerator 30 minutes before assembling for best flavor. Use a bowl for candy corn to prevent stickiness. Prep all ingredients before arranging. For a gluten-free version, use rice crackers and gluten-free pretzel sticks. For a vegan version, use vegan cheese and marinated vegetables.
Nutrition
- Serving Size: 1/4 of the board
- Calories: 450550
- Sugar: 2025
- Fat: 2835
- Carbohydrates: 3545
- Fiber: 24
- Protein: 1822
Keywords: Halloween charcuterie board, candy corn, cheese board, easy appetizer, party snack, Halloween party


