My niece was perched on my kitchen counter, legs swinging, watching me frost a batch of cupcakes for her birthday party. She was at that age where everything grown-ups did was either fascinating or suspicious. “What else are you making?” she asked, eyeing the bowl of almond slivers I had sitting on the counter. I hadn’t really planned on making anything else, honestly. The cupcakes were done, the pizza was ordered, and I was just coasting. But she had that look — the one that says “I’m expecting something magical.”
So I grabbed my go-to sugar cookie dough from the fridge (leftover from a batch I’d prepped for a recipe testing session earlier that week), and I started shaping it into long, knobby logs. I pressed an almond sliver into the tip of each one, and suddenly, they looked exactly like gnarled, bony witch fingers. She gasped. I mean, actually gasped. And that, my friends, is how a last-minute kitchen improvisation became the most requested Halloween snack in our family.
These witch finger cookies are creepy, buttery, and surprisingly simple to pull off. They have that perfect balance of “ew, gross” and “give me another one” that makes Halloween treats so much fun. The best part? You don’t need any special cookie cutters or fancy decorating tools. Just your hands, a little imagination, and a willingness to get a bit weird with your baking.
Honestly, I’ve made these every Halloween since that day, and they never fail to get a reaction. They’re the kind of snack that makes people do a double-take before they laugh and grab a handful. And isn’t that exactly what Halloween is all about?
Why You’ll Love This Recipe
I have tested this recipe more times than I care to admit, tweaking the dough consistency, the baking time, and even the angle of the almond “fingernails.” Here is why this version is the one you need in your Halloween rotation.
- Seriously Easy to Make : You don’t need to be a pastry chef to pull these off. The dough comes together in one bowl, and shaping the fingers is genuinely fun. It takes about 20 minutes of active time, and the rest is just chilling and baking.
- Pantry-Friendly Ingredients : Butter, sugar, flour, an egg, vanilla, and a bag of sliced almonds. That’s it. No weird food coloring (unless you want it), no specialty extracts, no hunting down obscure baking supplies at three different stores.
- Perfect for Halloween Parties : These are the ultimate conversation starter at any spooky gathering. Kids love them, adults get a kick out of them, and they look incredible on a dessert table next to other festive treats like these mini lemon blueberry cheesecakes.
- Naturally Creepy : Unlike some Halloween cookies that require meticulous piping or fondant work, these look genuinely unsettling with almost no effort. The almond sliver “fingernail” is the secret weapon here — it looks disturbingly real.
- Deliciously Buttery : Let’s be real — if they didn’t taste good, nobody would eat them. These are essentially a slightly sturdier sugar cookie with a tender, melt-in-your-mouth texture. The almond adds a lovely nutty crunch that complements the sweet dough perfectly.
What makes this recipe different from the dozens of other witch finger recipes out there? I spent a whole afternoon testing different dough-to-almond ratios. Too much almond flavor, and it overpowers the cookie. Too little, and the fingernail falls off during baking. This version nails the balance — the almond stays put, the cookie holds its shape, and the flavor is just right.
What Ingredients You Will Need
This recipe relies on a handful of basic baking staples to create a cookie that is sturdy enough to hold its shape but tender enough to be delicious. Every ingredient plays a specific role here, so let’s walk through them.
- Unsalted butter, softened (1 cup / 2 sticks / 226g): I always use unsalted butter so I can control the salt level. Let it sit at room temperature for about 30 minutes before you start. Cold butter won’t cream properly, and melted butter will make the cookies spread too much.
- Granulated sugar (1 cup / 200g): Regular white sugar gives these cookies their delicate sweetness and helps with that slightly crisp edge. I don’t recommend using brown sugar here — it adds too much moisture and the fingers won’t hold their shape as well.
- Large egg (1, room temperature): The egg binds everything together. If you forget to take it out of the fridge ahead of time, just place it in a bowl of warm water for 5 minutes.
- Vanilla extract (1 teaspoon / 5ml): Pure vanilla extract adds warmth and depth. Imitation vanilla works in a pinch, but the flavor won’t be quite as rich.
- Almond extract (½ teaspoon / 2.5ml): This is optional, but I love the subtle marzipan-like flavor it adds. It also reinforces the almond “fingernail” on top. Use it sparingly — a little goes a long way.
- All-purpose flour (2 ½ cups / 312g): Spoon and level your flour — don’t scoop directly from the bag. Packed flour will make the dough dry and crumbly.
- Salt (½ teaspoon / 3g): Salt balances the sweetness and enhances the buttery flavor. I use fine sea salt for baking.
- Sliced almonds (about 60-70 pieces): These become the fingernails. Look for natural, unroasted, unsalted sliced almonds. They need to be large enough to cover the tip of the finger — the thin, wide slices work best.
- Red food coloring or jam (optional, for “blood” effect): A dab of red gel food coloring or a smear of strawberry jam at the base of the fingernail adds an extra-gross touch. Totally optional, but kids absolutely love it.
Equipment Needed
You don’t need any fancy equipment for this recipe, which is part of what makes it so great. Here’s what you’ll want to have on hand.
- Mixing bowls (one medium, one small): For creaming the butter and sugar, and for beating the egg.
- Electric hand mixer or stand mixer: You can cream the butter and sugar by hand with a wooden spoon, but a mixer makes it much easier and gives you a fluffier texture.
- Baking sheets (2-3, depending on size): Line them with parchment paper or silicone baking mats. The cookies don’t spread much, so you can fit about 12 fingers per standard sheet.
- Parchment paper or silicone baking mats: Non-stick is essential here — the cookies can stick to ungreased metal.
- Plastic wrap: For chilling the dough. You’ll need to wrap the logs tightly before shaping.
- Sharp knife or bench scraper: For cutting the dough into finger-sized pieces.
- Cooling rack: Let the cookies cool completely before moving them, or the “fingernails” might slide off.
If you don’t have a mixer, no worries. I’ve made these by hand before, and it just takes a little more elbow grease. The dough comes together surprisingly easily. Just make sure your butter is really soft.
Preparation Method
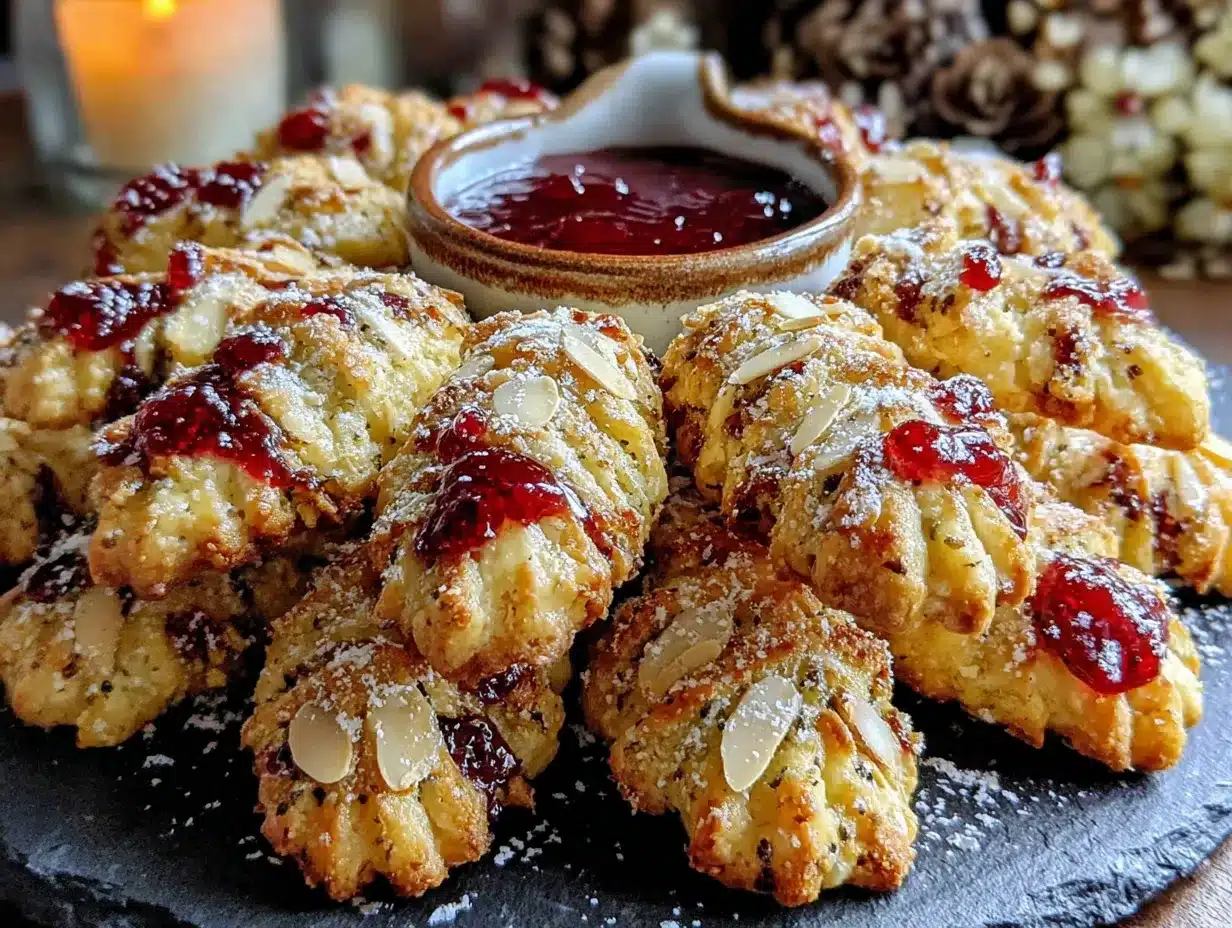
This is where the magic — and the mild horror — happens. Follow these steps carefully, and you’ll have a batch of cookies that look genuinely unsettling but taste absolutely wonderful.
- Cream the butter and sugar. In a large mixing bowl, beat the softened butter and granulated sugar together until light, fluffy, and pale in color. This takes about 3-4 minutes with an electric mixer on medium speed. Scrape down the sides of the bowl halfway through. You’re looking for a texture that’s soft and airy, almost like a thick frosting.
- Add the wet ingredients. Beat in the egg, vanilla extract, and almond extract (if using) until fully combined. The mixture might look slightly curdled at this point — that’s totally normal. Don’t panic.
- Mix the dry ingredients. In a separate bowl, whisk together the all-purpose flour and salt. Gradually add this to the wet mixture, mixing on low speed until a soft dough forms. The dough should be pliable but not sticky. If it feels too sticky, add another tablespoon of flour. If it’s too dry and crumbly, add a teaspoon of milk.
- Chill the dough. Divide the dough in half. Wrap each half in plastic wrap and flatten into a disc. Refrigerate for at least 30 minutes, or up to 2 days. Chilling is non-negotiable here — warm dough will spread and lose its finger shape. Trust me, I learned this the hard way on my first attempt.
- Preheat the oven. When you’re ready to bake, preheat your oven to 350°F (175°C). Line your baking sheets with parchment paper or silicone mats.
- Shape the fingers. Take one disc of chilled dough and roll it into a log about 1 inch thick. Cut the log into 1½-inch pieces. Roll each piece between your palms to form a finger shape — slightly thicker at the top (where the fingernail goes) and tapering slightly at the bottom. Use the back of a knife to gently press knuckle lines into the dough. Don’t press too hard — you want indentations, not cuts.
- Attach the fingernails. Press a sliced almond firmly onto the thicker end of each finger. The pointed end of the almond should face outward, like a nail. Gently press the dough around the base of the almond to secure it. If you want extra creepiness, dab a tiny bit of red food coloring or jam at the base of the almond to look like bloody cuticles.
- Bake. Arrange the fingers on the prepared baking sheets, leaving about 1 inch of space between them. Bake for 10-12 minutes, or until the edges are just barely golden. The cookies will look pale — that’s what you want. Overbaking will make them too hard.
- Cool completely. Let the cookies cool on the baking sheet for 5 minutes, then transfer them to a wire rack to cool completely. The almond “nails” will set as they cool. Don’t try to move them too early, or the almond might fall off.
Cooking Tips & Techniques
After making these cookies for countless Halloween parties, I’ve picked up a few tricks that make the process smoother and the results more convincing. Here are my best tips.
Chill the shaped fingers before baking. This is a game-changer. Once you’ve shaped all the fingers and attached the almonds, pop the baking sheet into the fridge for 10-15 minutes before baking. This firms up the butter and helps the cookies hold their shape even better. The knuckle indentations will stay defined, and the fingers won’t puff up into blobs.
Use the right almond placement. The almond should be pressed into the dough at a slight angle, not straight on. Real fingernails grow at an angle, and this small detail makes a huge difference in how realistic they look. Also, make sure the almond is fully embedded — if it’s sitting on top, it’ll fall off during baking.
Don’t overwork the dough. When you’re shaping the fingers, handle the dough as little as possible. Overworking it warms up the butter and develops the gluten, which can make the cookies tough. If the dough starts getting sticky, pop it back in the fridge for 5 minutes.
Watch the bake time carefully. These cookies go from perfect to overdone very quickly. I start checking at the 9-minute mark. The bottoms should be lightly golden, but the tops should still be pale. If the edges are browning, they’ve been in too long.
Add texture for realism. Real fingers aren’t perfectly smooth. After shaping, lightly press the dough with your fingertips to create slight unevenness. A few gentle pinches here and there add wrinkles and make them look more like actual fingers. I once made a batch that was too smooth, and my niece said they looked like “robot fingers.” Lesson learned.
Variations & Adaptations
One of the best things about this recipe is how easily it adapts to different tastes and dietary needs. Here are some variations I’ve tried over the years.
Gluten-Free Version : Substitute the all-purpose flour with a 1:1 gluten-free baking flour blend. I’ve used Bob’s Red Mill and King Arthur brands with great success. The texture will be slightly more crumbly, so handle the dough gently. Add an extra tablespoon of butter if the dough feels too dry.
Vegan Witch Fingers : Use vegan butter sticks (not margarine from a tub) and a flax egg (1 tablespoon ground flaxseed mixed with 3 tablespoons water, let sit for 5 minutes). The texture won’t be quite as tender, but they still taste great. Coconut oil solid works too, but the cookies will have a slight coconut flavor.
Chocolate Witch Fingers : Replace ¼ cup of the flour with unsweetened cocoa powder. The chocolate version looks even creepier, honestly — like dirt-covered fingers. You can also dip the tips in melted white chocolate after baking for a “bone” effect.
Spooky Color Variations : Add a few drops of green or purple gel food coloring to the dough for a truly unnatural look. Green fingers look like something out of a swamp monster movie. Just knead the color in gently after the dough comes together.
Different “Fingernail” Options : If you don’t have sliced almonds, try using whole almonds (cut in half lengthwise), pumpkin seeds, or even small pieces of white chocolate. Each gives a slightly different look. The pumpkin seeds create a more jagged, zombie-like nail.
Serving & Storage Suggestions
These cookies are best served at room temperature, which makes them perfect for parties. Arrange them on a platter in a way that looks like a hand reaching up from the ground — it’s a fun presentation that always gets a reaction.
For serving, I like to place them on a dark plate or a black tablecloth to make the pale cookies stand out. A few fake spider webs or plastic spiders scattered around the platter add to the spooky vibe. If you’re serving them alongside other treats, they pair beautifully with a warm cup of apple cider or a mug of hot chocolate.
Storage : Store the baked cookies in an airtight container at room temperature for up to 5 days. Place a sheet of parchment paper between layers to prevent the almonds from scratching the surface of the cookies below. Do not refrigerate them — the fridge will make them dry and hard.
Freezing : You can freeze the unbaked, shaped fingers on a baking sheet until solid, then transfer them to a freezer bag. Bake directly from frozen, adding 2-3 minutes to the baking time. I do this every year — I make a double batch in early October and freeze half for the week of Halloween. It’s a lifesaver when you’re busy.
Reheating : These cookies don’t really need reheating, but if you want that fresh-from-the-oven warmth, pop them in a 300°F oven for 3-4 minutes. Let them cool for a minute before serving so the almond doesn’t burn your tongue.
Nutritional Information & Benefits
Let’s be honest — these are cookies, so they’re not health food. But knowing what’s in them can help you enjoy them mindfully. Here’s the approximate nutritional breakdown per cookie (based on a batch of 30).
| Nutrient | Amount per Cookie |
|---|---|
| Calories | 135 |
| Total Fat | 7g |
| Saturated Fat | 4g |
| Cholesterol | 20mg |
| Sodium | 45mg |
| Total Carbohydrates | 17g |
| Sugars | 8g |
| Protein | 2g |
The almonds actually add a small amount of healthy fats and vitamin E, which is a nice bonus. If you’re watching your sugar intake, you can reduce the sugar to ¾ cup without affecting the texture too much — the cookies will just be slightly less sweet.
These cookies are vegetarian but not vegan (unless modified). They contain gluten, dairy, eggs, and nuts (almonds). If you’re serving them at a party, it’s always a good idea to label them clearly for anyone with allergies.
Conclusion
These spooky witch finger cookies are the kind of recipe that makes Halloween baking feel genuinely fun. They’re not fussy, they don’t require special skills, and they deliver that perfect mix of creepy and delicious that makes holiday treats so memorable. Every time I make them, I remember my niece sitting on that counter, watching me shape the dough, and I smile.
I encourage you to make these your own. Add more knuckle lines, experiment with different colors, or go all out with the bloody cuticle effect. The best part about this recipe is that it’s forgiving — even a slightly misshapen finger looks more realistic, not less. So don’t stress about perfection. Just have fun with it.
If you make these, I’d love to hear how they turned out. Drop a comment below and let me know what your family and friends thought — did anyone scream? Did anyone refuse to eat them? Did anyone try to sneak an extra handful when you weren’t looking? Those are the stories that make Halloween baking worth it. Happy haunting, and happy baking!
Frequently Asked Questions
Can I make the dough ahead of time?
Absolutely. The dough can be refrigerated for up to 2 days before shaping and baking. You can also freeze the dough discs for up to 3 months. Just thaw them in the fridge overnight before using.
Why did my cookies spread and lose their shape?
This usually happens when the dough isn’t chilled enough. Make sure you chill the dough for at least 30 minutes before shaping, and chill the shaped fingers for 10-15 minutes before baking. If your kitchen is warm, pop the baking sheet in the fridge between batches.
Can I use margarine instead of butter?
I don’t recommend it. Margarine has a higher water content than butter, which will make the cookies spread more and affect the texture. Stick with real butter for the best results.
How do I keep the almond fingernails from falling off?
Press the almond firmly into the dough and make sure the dough wraps slightly around the base. Chilling the shaped fingers helps the dough grip the almond. If some still fall off during baking, just press them back on while the cookies are still warm.
Can I make these cookies less sweet?
Yes, you can reduce the sugar to ¾ cup without significant texture changes. The cookies will be less sweet but still delicious. You can also use a sugar substitute like monk fruit sweetener, but the texture may be slightly different.
Pin This Recipe!

Easy Witch Finger Cookies: Best Spooky Halloween Snack

These creepy, buttery witch finger cookies are surprisingly simple to make with basic pantry ingredients. Perfect for Halloween parties, they deliver that perfect mix of ‘ew, gross’ and ‘give me another one’ that makes holiday treats so memorable.
- Prep Time: 20 minutes
- Cook Time: 12 minutes
- Total Time: 1 hour 2 minutes (includes 30 minutes chilling)
- Yield: 30 cookies 1x
- Category: Dessert
- Cuisine: American
Ingredients
- 1 cup (2 sticks / 226g) unsalted butter, softened
- 1 cup (200g) granulated sugar
- 1 large egg, room temperature
- 1 teaspoon (5ml) vanilla extract
- ½ teaspoon (2.5ml) almond extract (optional)
- 2 ½ cups (312g) all-purpose flour
- ½ teaspoon (3g) fine sea salt
- 60–70 sliced almonds (natural, unroasted, unsalted)
- Red food coloring or strawberry jam (optional, for ‘blood’ effect)
Instructions
- Cream the butter and sugar: In a large mixing bowl, beat the softened butter and granulated sugar together until light, fluffy, and pale in color, about 3-4 minutes with an electric mixer on medium speed. Scrape down the sides of the bowl halfway through.
- Add the wet ingredients: Beat in the egg, vanilla extract, and almond extract (if using) until fully combined. The mixture might look slightly curdled; this is normal.
- Mix the dry ingredients: In a separate bowl, whisk together the all-purpose flour and salt. Gradually add this to the wet mixture, mixing on low speed until a soft dough forms. The dough should be pliable but not sticky. If too sticky, add another tablespoon of flour. If too dry and crumbly, add a teaspoon of milk.
- Chill the dough: Divide the dough in half. Wrap each half in plastic wrap and flatten into a disc. Refrigerate for at least 30 minutes, or up to 2 days.
- Preheat the oven: When ready to bake, preheat oven to 350°F (175°C). Line baking sheets with parchment paper or silicone mats.
- Shape the fingers: Take one disc of chilled dough and roll it into a log about 1 inch thick. Cut the log into 1½-inch pieces. Roll each piece between your palms to form a finger shape—slightly thicker at the top (where the fingernail goes) and tapering slightly at the bottom. Use the back of a knife to gently press knuckle lines into the dough, creating indentations.
- Attach the fingernails: Press a sliced almond firmly onto the thicker end of each finger, pointed end facing outward like a nail. Gently press the dough around the base of the almond to secure it. For extra creepiness, dab a tiny bit of red food coloring or jam at the base of the almond.
- Bake: Arrange the fingers on prepared baking sheets, leaving about 1 inch of space between them. Bake for 10-12 minutes, or until edges are just barely golden. The cookies will look pale.
- Cool completely: Let cookies cool on the baking sheet for 5 minutes, then transfer to a wire rack to cool completely. The almond ‘nails’ will set as they cool.
Notes
Chill the shaped fingers for 10-15 minutes before baking to help them hold their shape. Press the almond at a slight angle for a more realistic look. Don’t overwork the dough to keep cookies tender. Start checking at 9 minutes to avoid overbaking. For gluten-free, use a 1:1 gluten-free flour blend. For vegan, use vegan butter and a flax egg. Store in an airtight container at room temperature for up to 5 days. Freeze unbaked shaped fingers for up to 3 months.
Nutrition
- Serving Size: 1 cookie
- Calories: 135
- Sugar: 8
- Sodium: 45
- Fat: 7
- Saturated Fat: 4
- Carbohydrates: 17
- Protein: 2
Keywords: witch finger cookies, Halloween cookies, spooky cookies, sugar cookies, almond cookies, easy Halloween treat, creepy cookies


