I thought I had this whole Halloween thing figured out. Pinterest-perfect mummy hot dogs, the kind with tidy little crescent roll wrappings and neat little mustard eyes. It took about twelve minutes for that to fall apart completely. My first attempt looked less like a mummy and more like a sad, doughy burrito that had been in a fight. The second batch? The “bandages” unwrapped themselves in the oven like they were trying to escape. Honestly, I was ready to just order pizza and call it a night.
But then, standing there in a kitchen dusted with flour and feeling thoroughly humbled by refrigerated dough, I had a thought. What if I just stopped trying to be perfect? What if I wrapped these things like a five-year-old would—messy, overlapping, a little chaotic? And you know what? That was the trick. The imperfect ones looked more like actual mummies. The ones with the dough hanging loose and the ends sticking out? Those were the ones that got the biggest laughs at the party. This Easy Mummy-Wrapped Halloween Hot Dogs recipe isn’t about precision. It’s about embracing the wobbly, goofy spirit of Halloween. It’s the kind of food that makes kids giggle and adults forget they’re supposed to be stressed about the appetizer spread.
They’re crispy, salty, and surprisingly satisfying—a little pocket of buttery, flaky dough wrapped around a classic hot dog. And the best part? They come together in about twenty minutes, which leaves you more time for carving pumpkins or, you know, hiding the good candy from the kids. These mummy dogs have become our official Halloween Eve tradition, and they never fail to spark that slightly spooky, totally silly feeling that makes this holiday so fun.
Why You’ll Love This Recipe
Let’s be real for a second. Halloween cooking can be a trap. You either spend hours on something that looks amazing but tastes like cardboard, or you serve something delicious that looks like a science experiment gone wrong. These mummy dogs break that cycle completely. They’re the perfect intersection of “wow, that’s cute” and “wow, I need another one.”
- Quick & Easy : From fridge to table in under 25 minutes. This is not a project, it’s a snack. Perfect for that frantic window between school pick-up and trick-or-treating.
- Simple Ingredients : Three main components. Hot dogs, crescent roll dough, and mustard. That’s it. No weird gelatin molds or black food coloring stains on your countertops.
- Perfect for Parties : These are the undisputed champions of the Halloween potluck. They travel well, they’re easy to grab, and they look adorable sitting on a platter next to a bowl of mini lemon blueberry cheesecakes for a perfectly balanced spooky spread.
- Crowd-Pleaser : Kids devour them. Adults sneak them when they think no one is looking. I’ve seen a grown man eat six of these without blinking.
- Unbelievably Delicious : It’s the texture that gets you. The outside is golden and flaky, the inside is warm and juicy, and that little dab of mustard is like a savory exclamation point.
What makes this version different from the dozens of other mummy dog recipes out there? It’s the technique. Most recipes tell you to cut thin strips of dough and wrap them neatly. That’s stressful and it takes forever. My method uses a simple, strategic cut that lets you wrap the entire dog in about fifteen seconds. It’s not just faster—it creates those uneven, overlapping bandages that look genuinely spooky. This isn’t just another version of a Halloween snack. It’s the version you’ll actually want to make again next year.
What Ingredients You Will Need
This recipe is a masterclass in minimalism. You don’t need a specialty grocery store or a second mortgage to pull it off. These are the kind of ingredients you probably already have hiding in your fridge and pantry, waiting for their moment to shine.
- Hot dogs (8 standard-sized): This is the heart of the operation. I prefer beef hot dogs for their richer flavor, but any variety works. If you’re feeling fancy, you can use jumbo hot dogs, but you’ll need to adjust the baking time by a few minutes. For a slightly smoky flavor, try using cheddarwurst or another pre-cooked sausage—just make sure it’s fully cooked before you wrap it.
- 1 can (8 oz) refrigerated crescent roll dough: The MVP of this recipe. I have tested this with several brands, and Pillsbury is my go-to for consistent flakiness. Do not try to use crescent dough sheets (the seamless kind) unless you are prepared to cut your own strips. The pre-perforated triangles are actually perfect for this. Pro tip: make sure your dough is cold. Warm dough is sticky, stretchy, and impossible to work with.
- Mustard (for the eyes): This is purely cosmetic, but it’s what makes the mummies look like mummies. Yellow mustard is the classic choice because it’s bright and visible. You can use a squeeze bottle for precision, or just dab it on with a toothpick for a more rustic, “zombie” look. If you hate mustard, a tiny dab of sriracha or ketchup works in a pinch, though the color won’t pop as much.
- Optional: Everything Bagel Seasoning or Sesame Seeds: Not traditional, but a total game-changer. A light sprinkle before baking adds a subtle savory crunch that makes these taste almost gourmet. I started doing this after a happy accident involving a spilled jar, and I’ve never gone back.
- Cooking Spray or Parchment Paper: You need something to keep these from sticking to the baking sheet. Parchment paper is my preference because it makes cleanup a breeze and prevents the bottoms from browning too quickly.
The beauty of this ingredient list is its flexibility. You can swap in turkey dogs for a lighter option, use gluten-free crescent dough if needed (just check the package for baking time adjustments), or even use vegan hot dogs for a plant-based version. The core concept is so simple that it forgives almost any substitution.
Equipment Needed
You don’t need a professional kitchen to make these mummy dogs. In fact, the simpler your setup, the better. I’ve made these in a cramped apartment kitchen with a warped baking sheet, and they still turned out fantastic. Here’s what you’ll actually need.
- Baking Sheet: A standard half-sheet pan is perfect. If you only have a dark-colored pan, keep an eye on the bottoms—they can brown faster. A light-colored pan gives you a little more forgiveness.
- Parchment Paper or Silicone Baking Mat: Highly recommended. It prevents sticking and makes cleanup almost nonexistent. If you use a silicone mat, you might need to add a minute or two to the baking time.
- Sharp Knife or Pizza Cutter: You need something sharp to cut the crescent dough. A pizza cutter is actually my favorite tool for this job because it glides through the dough without dragging or tearing it. A sharp chef’s knife works just as well.
- Small Bowl (for mustard eyes): If you’re using a toothpick to apply the mustard, a small bowl gives you a place to dab it off. If you’re using a squeeze bottle, ignore this.
- Toothpicks (optional): If you want to get really precise with the mustard eyes, dip the tip of a toothpick into the mustard and dot it onto the baked mummy. This gives you more control than a squeeze bottle.
- Cooling Rack: Not essential, but nice to have. It lets air circulate around the mummies, keeping the bottoms from getting soggy as they cool.
I’ve tried making these with a pastry wheel and even a butter knife in a pinch. The butter knife worked, but it was messy and the dough got a little squished. Stick with something sharp and you’ll save yourself a headache.
Preparation Method
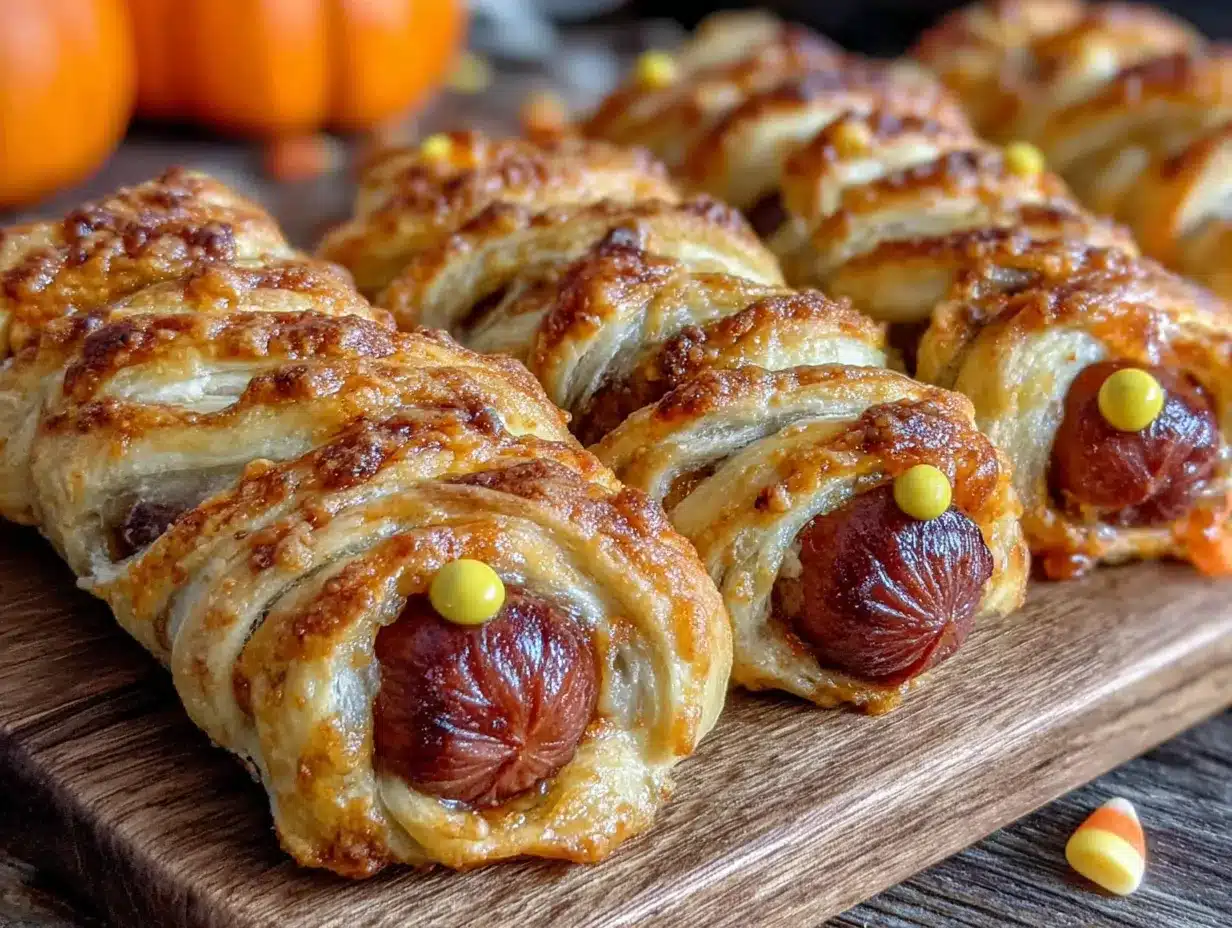
Alright, let’s get into the actual making of these little guys. The process is simple, but there are a few tiny details that make the difference between a good mummy dog and a great one. Trust me on the dough-cutting technique—it’s the secret weapon.
- Preheat your oven to 375°F (190°C). Line a baking sheet with parchment paper. Do not skip this step. Cold dough on a cold pan is a recipe for sticking and tearing. Get that oven hot and ready.
- Open the can of crescent dough. Unroll it onto a clean cutting board. You’ll have 8 triangles. Don’t separate them yet. Instead, press the perforated seams together gently with your fingers to seal them. You should now have a large rectangular sheet of dough.
- Cut the dough into strips. Using a sharp knife or pizza cutter, cut the dough crosswise into 8 even strips. Each strip should be about 1 to 1.5 inches wide. If your strips are uneven, that’s fine—it adds to the mummy look. I’ve had strips that were practically ribbons and strips that were chunky, and both worked.
- Wrap the hot dogs. Take one hot dog and place it at one end of a dough strip. Wrap the dough around the hot dog at a slight angle, overlapping the dough as you go. Leave a small gap at the top of the hot dog for the “face.” Don’t wrap too tightly—you want the dough to puff up and create those bumpy, mummy-like ridges. A loose wrap is your friend here. Repeat with the remaining hot dogs and dough strips.
- Place the wrapped hot dogs on the prepared baking sheet. Make sure they are spaced about an inch apart. They will puff up a bit, so give them some breathing room. If they’re too close, they’ll steam instead of getting crispy.
- Bake for 12-15 minutes, or until the dough is golden brown and cooked through. The exact time depends on your oven and how thick your dough strips are. At 12 minutes, start checking. You want a deep golden color, not just pale tan. If the dough looks doughy at all, give it another minute or two.
- Let them cool for 2-3 minutes on the baking sheet. This is important. The dough is fragile right out of the oven, and moving them too soon can cause the bandages to fall off. A short rest lets the structure set.
- Add the mustard eyes. Once the mummy dogs are cool enough to handle (but still warm), add two small dots of mustard for eyes. You can use a squeeze bottle for neat dots, or a toothpick for a more rustic, slightly terrifying look. I prefer the toothpick method—it gives them personality.
That’s it. Eight simple steps and you have a platter of adorable, edible mummies. The first time you do this, it might feel a little clumsy. By the third or fourth hot dog, you’ll find a rhythm. By the end of the batch, you’ll be wrapping dough like a pro.
Cooking Tips & Techniques
I have made this recipe approximately seventeen times. I’ve burned them, undercooked them, and produced mummies that looked like they were melting. Here are the lessons I learned the hard way so you don’t have to.
The Dough Temperature Trap: Crescent dough is a diva. It needs to be cold. If your dough gets too warm while you’re working with it, it becomes sticky, stretchy, and impossible to cut cleanly. If this happens, just pop the whole sheet of cut strips into the fridge for five minutes. It’s a reset button that saves your sanity.
The Over-Wrapping Mistake: I cannot stress this enough—do not wrap the dough tightly. Tight wrapping squeezes the hot dog and prevents the dough from puffing up. Loose, overlapping wraps create those lovely, textured ridges that make the mummies look authentic. Think of it like bandaging a wound: you want it secure, but not strangling the patient.
The Uneven Baking Issue: If your dough strips are wildly different sizes, the thin ones will burn before the thick ones are done. Try to keep your strips relatively uniform. If you end up with a few skinny strips, put those mummies on the outer edges of the baking sheet where the heat is slightly less intense.
Timing and Multitasking: Here’s my workflow. While the oven is preheating, I cut the dough. While the mummies are baking, I set out the mustard and get the serving platter ready. While they’re cooling, I make the mustard eyes. This whole process takes about 20 minutes from start to finish, and there’s no frantic scrambling at the end.
The Cold Oven Warning: Do not put these in a cold oven and hope they’ll cook as it preheats. The slow temperature rise will melt the dough before it has a chance to set, and you’ll end up with a greasy, deflated mess. Always preheat fully.
Variations & Adaptations
Once you’ve mastered the basic mummy dog, the world is your spooky oyster. Here are a few twists I’ve tried and loved.
- The Cheesy Mummy: Before wrapping the hot dog, slice it lengthwise (not all the way through) and stuff a thin strip of cheddar or mozzarella cheese inside. The cheese will melt and ooze out slightly during baking, creating a “wound” effect. It’s delicious and delightfully gross.
- The Spicy Mummy: Brush the wrapped hot dogs with a mixture of melted butter and hot sauce before baking. The heat cuts through the richness of the dough perfectly. I use Sriracha, but any hot sauce works. Just don’t use so much that the dough gets soggy.
- The Veggie Mummy: Use your favorite plant-based hot dog or sausage. The cooking time is usually the same, but check the package directions for the specific brand. I’ve used both tofu-based and pea-protein-based dogs, and they both work beautifully.
- The Breakfast Mummy: Swap the hot dog for a fully cooked breakfast sausage link. These are smaller, so you’ll need to cut your dough strips thinner. They make an amazing Halloween morning surprise for the kids.
- The Gluten-Free Mummy: Use a gluten-free crescent dough or puff pastry. The texture will be slightly different—a bit more crumbly—but the flavor and fun factor are still there. Just watch the baking time, as gluten-free doughs can brown faster.
My personal favorite variation is the Cheesy Mummy. I stumbled onto it when I had leftover cheese from making burgers, and it was a revelation. The melted cheese looks genuinely creepy, like something is leaking out of the bandages. It’s perfect for a Halloween party where you want to lean into the gore factor without actually serving anything disgusting.
Serving & Storage Suggestions
These mummy dogs are best served warm, right out of the oven, when the dough is at its flakiest and the hot dog is at its juiciest. I like to arrange them on a dark platter or a black cutting board to make the golden color pop. A small bowl of extra mustard for dipping on the side is always a hit, and it gives people something to do with their hands.
For a full Halloween spread, pair them with a bowl of other party-friendly recipes from the blog to create a menu that covers all the bases. They also go surprisingly well with a simple side of potato chips or a crisp green salad to cut through the richness.
Storage: If you have leftovers (a rare occurrence in my house), let them cool completely, then store them in an airtight container in the refrigerator for up to 3 days. The dough will soften a bit, but they’ll still be tasty.
Reheating: Do not use the microwave. It will turn the dough into a sad, soggy sponge. Instead, reheat them in a 350°F oven for 5-7 minutes, or until the dough crisps back up. An air fryer also works beautifully—3 minutes at 350°F will do the trick.
Freezing: You can freeze the unbaked, wrapped hot dogs. Place them on a baking sheet and freeze until solid, then transfer to a freezer bag. When you’re ready to bake, add 3-5 minutes to the baking time. Do not thaw them first—bake from frozen for best results.
The flavor of these doesn’t really “develop” over time like a stew or a chili. They’re at their absolute peak fresh from the oven. But I’ll admit, I’ve eaten them cold out of the fridge at 11 PM and they were still pretty great.
Nutritional Information & Benefits
Let’s be honest—this is a treat, not a health food. But if you’re going to indulge, you might as well know what you’re working with. The following values are estimates based on standard ingredients and one serving (one mummy dog).
| Nutrient | Amount per Serving |
|---|---|
| Calories | 210-250 |
| Total Fat | 14g |
| Saturated Fat | 5g |
| Cholesterol | 25mg |
| Sodium | 650-750mg |
| Carbohydrates | 16g |
| Protein | 7g |
On the bright side, hot dogs do contain some protein, and the crescent dough provides a small amount of iron and B vitamins. If you use turkey or chicken hot dogs, you can cut the fat and calories significantly. The biggest nutritional concern here is sodium, so if you’re watching your salt intake, consider this a once-in-a-while treat rather than a weekly staple.
From a wellness perspective, I think there’s immense value in food that brings joy and connection. Halloween comes once a year, and these mummy dogs are part of the fun. Pair them with a big glass of water and some carrot sticks, and you’ve got balance.
Conclusion
These Easy Mummy-Wrapped Halloween Hot Dogs are the perfect example of why I love holiday cooking. They’re silly, simple, and genuinely satisfying. They don’t require a culinary degree or a trip to a specialty store. They just require a can of dough, some hot dogs, and a willingness to embrace a little imperfection. The first time you pull a tray of these out of the oven and see those golden, lumpy bandages peeking out, you’ll understand exactly what I mean.
I encourage you to make these your own. Add cheese, spice them up, or let the kids go wild with the mustard eyes. The best version of this recipe is the one that makes you smile. And if you happen to burn a batch or two along the way? That’s just part of the Halloween spirit. We’ve all been there.
I’d love to hear how your mummy dogs turned out. Did you try a fun variation? Did your kids gobble them up before you could even take a picture? Drop a comment below and share your spooky creations. And if you’re looking for more Halloween inspiration, don’t forget to browse the full recipe collection for more festive ideas. Happy Halloween, and happy cooking!
Frequently Asked Questions
Can I use puff pastry instead of crescent dough?
Absolutely. Puff pastry will give you a flakier, more buttery texture. Just thaw it according to the package directions, cut it into strips, and proceed as usual. The baking time may be slightly longer, so keep an eye on the color.
How do I keep the dough from unwrapping during baking?
This usually happens if the dough is wrapped too tightly or if the ends aren’t tucked under the hot dog. Make sure the tail end of the dough strip is pressed gently against the hot dog. A light touch is all it needs.
Can I make these ahead of time for a party?
Yes! You can assemble them up to 24 hours in advance. Keep them covered in the refrigerator on the baking sheet. Bake them just before serving for the best texture. If you’re really short on time, you can bake them a few hours ahead and reheat them in a 350°F oven for 5 minutes.
What can I use instead of mustard for the eyes?
If you’re not a mustard fan, try using a tiny dab of ketchup, sriracha, or even a small piece of black olive. For a sweet version, you can use a dot of melted chocolate or a tiny candy eyeball pressed into the dough before baking.
My dough is too sticky to work with. What should I do?
This is almost always a temperature issue. Pop the dough strips into the refrigerator for 10-15 minutes to firm up. You can also lightly dust your hands and the cutting board with a little flour to help with stickiness, but be careful not to use too much or the dough will lose its flakiness.
Pin This Recipe!
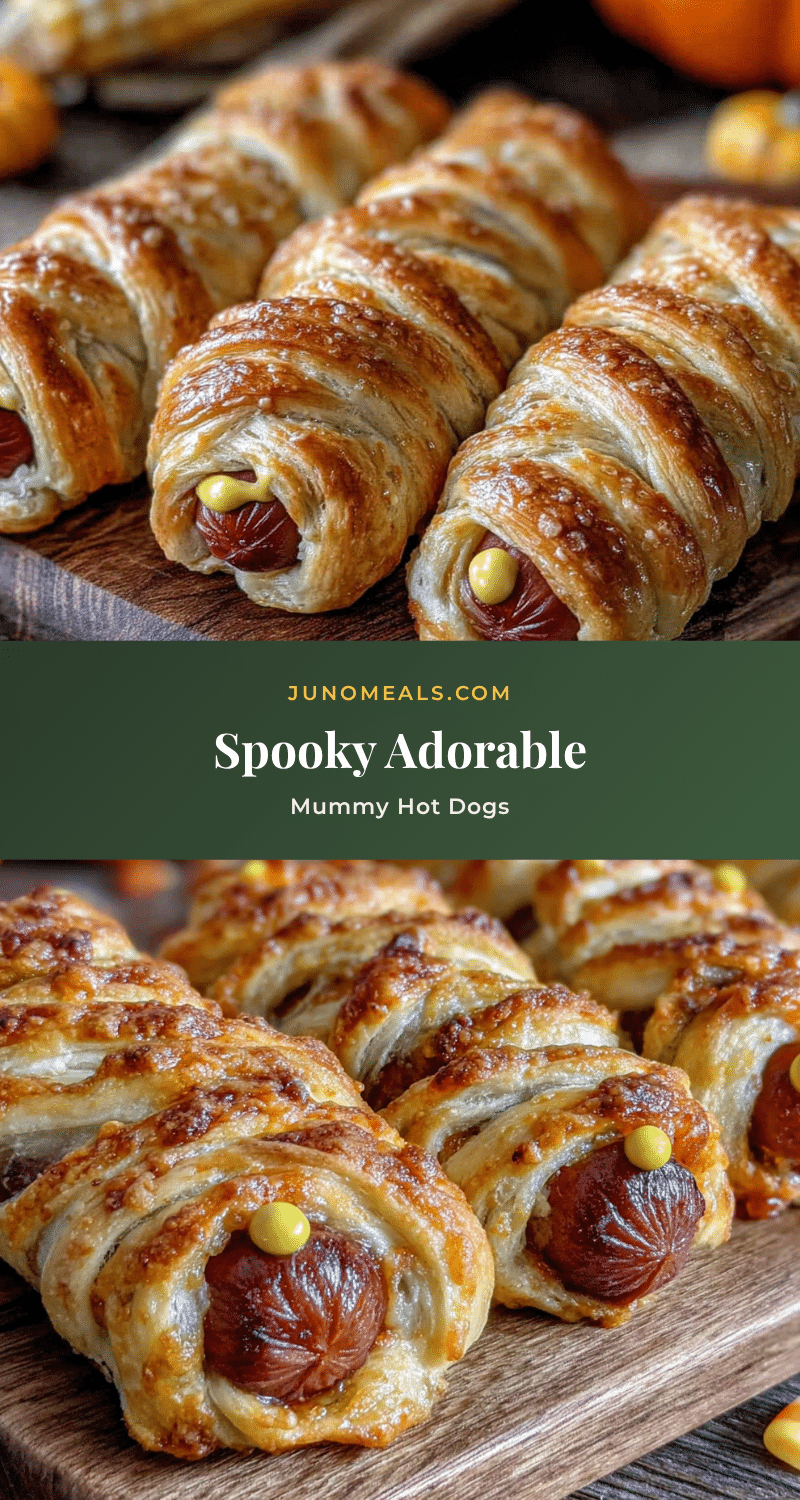
Easy Mummy Hot Dogs: Best Halloween Recipe
These Easy Mummy-Wrapped Halloween Hot Dogs are crispy, salty, and surprisingly satisfying—a little pocket of buttery, flaky dough wrapped around a classic hot dog. They come together in about twenty minutes, perfect for a fun and spooky Halloween treat.
- Prep Time: 10 minutes
- Cook Time: 15 minutes
- Total Time: 25 minutes
- Yield: 8 servings 1x
- Category: Appetizer
- Cuisine: American
Ingredients
- 8 standard-sized hot dogs
- 1 can (8 oz) refrigerated crescent roll dough
- Mustard (for the eyes)
- Optional: Everything Bagel Seasoning or Sesame Seeds
- Cooking Spray or Parchment Paper
Instructions
- Preheat your oven to 375°F (190°C). Line a baking sheet with parchment paper.
- Open the can of crescent dough. Unroll it onto a clean cutting board. Press the perforated seams together gently with your fingers to seal them, forming a large rectangular sheet of dough.
- Using a sharp knife or pizza cutter, cut the dough crosswise into 8 even strips, each about 1 to 1.5 inches wide.
- Take one hot dog and place it at one end of a dough strip. Wrap the dough around the hot dog at a slight angle, overlapping the dough as you go. Leave a small gap at the top of the hot dog for the ‘face.’ Do not wrap too tightly.
- Place the wrapped hot dogs on the prepared baking sheet, spaced about an inch apart.
- Bake for 12-15 minutes, or until the dough is golden brown and cooked through.
- Let them cool for 2-3 minutes on the baking sheet.
- Once the mummy dogs are cool enough to handle (but still warm), add two small dots of mustard for eyes using a squeeze bottle or toothpick.
Notes
Keep the crescent dough cold for easier handling. Do not wrap the dough too tightly; loose, overlapping wraps create better mummy texture. For best results, reheat leftovers in a 350°F oven for 5-7 minutes, not the microwave.
Nutrition
- Serving Size: 1 mummy dog
- Calories: 230
- Sugar: 2
- Sodium: 700
- Fat: 14
- Saturated Fat: 5
- Carbohydrates: 16
- Protein: 7
Keywords: Halloween, mummy hot dogs, easy Halloween recipe, hot dog appetizer, crescent roll recipe, spooky snacks, party food


