Late October, a Tuesday night, and all I wanted was to make something ridiculous. Not a serious dessert. Not a perfectly piped masterpiece for Instagram. Just a cookie that looked like a tiny, grumpy black cat staring back at me from the cooling rack. The kitchen was quiet except for the hum of the oven, and I had a half-used bag of black food coloring staring me down from the pantry. That’s how these Adorable Black Cat Halloween Sugar Cookies were born—not from a grand plan, but from a sudden, stubborn urge to make something fun for no good reason at all.
I’m not a decorator. Honestly, I’m the kind of baker who gets frosting on my nose and has to resist licking the spatula mid-step. But these cookies? They don’t require steady hands or a pastry degree. They just need a little patience and a willingness to embrace the slightly lopsided charm of a homemade cat face. (Let’s face it, cats are already a little lopsided anyway.)
There’s something about shaping dough into ears and pressing in candy eyes that feels almost meditative. You’re not just baking—you’re building a tiny, edible creature. And when you pull that tray out of the oven and see a row of little black cats staring up at you, it’s hard not to smile. That’s the whole point, really. These Adorable Black Cat Halloween Sugar Cookies aren’t about perfection. They’re about the joy of making something that makes you laugh, even before you take a bite.
Why You’ll Love This Recipe
I’ve tested this recipe about four times now—because the first batch turned into blobs, the second batch spread too much, and the third batch finally gave me that perfect, slightly puffy cat shape. Here’s why I think you’ll love it as much as I do:
- Simple Ingredients: No weird specialty items. Butter, sugar, flour, eggs—the usual suspects. You probably have most of this in your kitchen right now.
- Quick & Easy: From start to finish, you’re looking at about 45 minutes of active work. The dough needs a quick chill, but that’s mostly hands-off time.
- Perfect for Halloween Parties: These little guys are total crowd-pleasers. Kids love them, adults pretend they’re too cool but then grab three.
- No Fancy Equipment Needed: You don’t need a piping bag or a million tips. Just a knife, a toothpick, and some candy eyes.
- Unbelievably Cute: Look, I’m not going to pretend these aren’t adorable. They are. The first time I made them, I literally squealed. No shame.
What makes these different from other Halloween cookies? It’s the texture. The dough is soft but sturdy enough to hold its shape, and the edges get just slightly crisp while the centers stay tender. Plus, the black cocoa powder gives them a deep, dark color without that weird artificial aftertaste. These aren’t just pretty faces—they’re genuinely good sugar cookies.
I’ll be honest: the first time I made these, I messed up the chilling time and ended up with flat, sad cat pancakes. But after a few tweaks, I figured out the trick. And now? This is the only Halloween cookie recipe I’ll ever need. It’s the kind that makes you close your eyes after the first bite, because it tastes exactly like childhood—just with a spooky twist.
What Ingredients You Will Need
This recipe uses simple, wholesome ingredients to deliver bold flavor and satisfying texture without the fuss. Most of these are pantry staples, so you probably won’t need to make a special trip to the store.
- Unsalted butter, softened (1 cup / 226g) — Adds richness and helps the cookies spread just the right amount. I always use unsalted so I can control the salt level.
- Granulated sugar (1 cup / 200g) — For sweetness and that slight crispness on the edges.
- Large egg (1) — Binds everything together. Room temperature is best for even mixing.
- Vanilla extract (1 teaspoon) — Adds warmth and depth. I prefer pure vanilla over imitation, but either works.
- All-purpose flour (2 cups / 250g) — The backbone of the cookie. Spoon and level it for accuracy—don’t scoop straight from the bag.
- Black cocoa powder (¼ cup / 25g) — This is the secret to that deep, dark color. Regular cocoa powder will give you grayish cats, not black ones. I recommend brands like King Arthur or Rodelle for the best color.
- Baking powder (½ teaspoon) — Helps the cookies puff up slightly without spreading too much.
- Salt (¼ teaspoon) — Balances the sweetness and enhances the cocoa flavor.
- Candy eyes — Those little edible googly eyes you find at baking supply stores or online. You’ll need about 24 for 12 cookies.
- Black decorating gel or royal icing — For drawing whiskers and mouths. I prefer gel because it’s easier to control, but royal icing works beautifully if you have a steady hand.
Optional but fun: You can add a pinch of espresso powder to deepen the chocolate flavor, but it’s not necessary. Also, if you want to make these gluten-free, swap the all-purpose flour with a 1:1 gluten-free baking blend. I’ve tested it with Bob’s Red Mill and it worked great—just add an extra tablespoon of flour if the dough feels too sticky.
Equipment Needed
You don’t need a ton of fancy tools for these cookies, which is honestly my favorite part. Here’s what you’ll need:
- Mixing bowls — One large, one medium. I use glass because it’s easy to see when the butter and sugar are properly creamed.
- Electric hand mixer or stand mixer — A hand mixer works perfectly. If you’re using a stand mixer, use the paddle attachment.
- Rolling pin — Any standard rolling pin will do. I prefer a wooden one with adjustable rings for even thickness.
- Sharp knife or pizza cutter — For cutting the cat shapes. A knife gives you more control over the ears.
- Baking sheets — Two large sheets work best. Line them with parchment paper or a silicone baking mat.
- Cooling rack — Essential for letting the cookies cool completely before decorating.
- Toothpicks — For drawing whiskers and adjusting candy eyes.
- Small offset spatula — Optional, but helpful for transferring the cut dough to the baking sheet.
I’ve made these cookies with just a butter knife and a baking sheet before, so don’t stress if you don’t have every single item. The most important thing is the parchment paper—without it, the cookies might stick, and nobody wants a cat with a missing ear.
Preparation Method
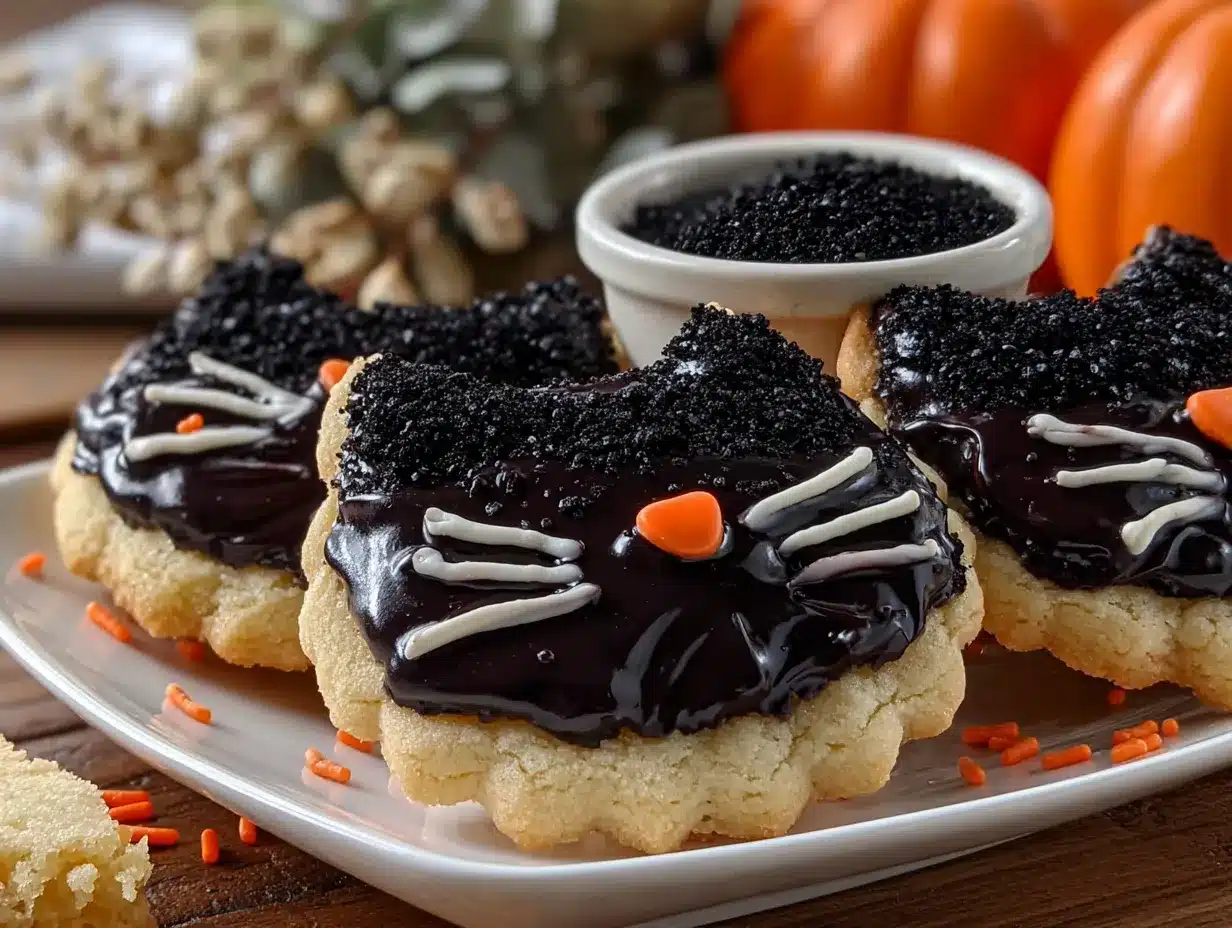
Let’s get into the actual process. I’ve broken this down step-by-step so you don’t end up with cat pancakes like I did the first time.
Step 1: Make the Dough
In a large bowl, cream the softened butter and granulated sugar together until light and fluffy—about 3 minutes with an electric mixer on medium speed. Scrape down the sides of the bowl, then add the egg and vanilla extract. Mix until combined. The mixture should look smooth and slightly glossy.
In a separate medium bowl, whisk together the flour, black cocoa powder, baking powder, and salt. Slowly add the dry ingredients to the wet mixture, mixing on low speed until just combined. Don’t overmix—stop as soon as you don’t see any more streaks of flour. The dough will be soft but not sticky.
Step 2: Chill the Dough
Divide the dough into two discs, wrap each in plastic wrap, and refrigerate for at least 30 minutes. This is non-negotiable. Chilling firms up the butter, which prevents the cookies from spreading into shapeless blobs in the oven. If you skip this step, you’ll get sad, flat cats. Trust me on this one.
Step 3: Shape the Cookies
Preheat your oven to 350°F (175°C). Line two baking sheets with parchment paper.
On a lightly floured surface, roll out one disc of dough to about ¼-inch thickness. Use a sharp knife or pizza cutter to cut out simple cat shapes—basically a circle with two triangles on top for ears. Don’t worry if they’re not perfect; homemade cats have more charm that way. Use a small offset spatula to transfer the shapes to the prepared baking sheets, spacing them about 2 inches apart.
Pro tip: If the dough gets too soft while you’re cutting, pop it back in the fridge for 10 minutes. Warm dough is sticky dough, and sticky dough is a nightmare to work with.
Step 4: Bake
Bake the cookies for 8-10 minutes. You want the edges to be set but the centers to look slightly underdone—they’ll continue baking on the hot sheet. The cookies should be firm to the touch but not browned. (Black cocoa powder makes it hard to tell when they’re done, so rely on touch, not color.)
Let the cookies cool on the baking sheet for 5 minutes, then transfer them to a wire rack to cool completely. This is important—moving them too soon can cause them to break, especially around the delicate ears.
Step 5: Decorate
Once the cookies are completely cool, it’s time to give them faces. Use a dab of black decorating gel to attach two candy eyes to each cookie. Then, use the gel to draw tiny whiskers and a little cat mouth. If you’re feeling fancy, you can add a tiny pink nose using pink gel or a sprinkle.
Let the decorated cookies sit for about 15 minutes so the gel sets. Then serve, or store in an airtight container.
Cooking Tips & Techniques
I’ve made plenty of mistakes with these cookies so you don’t have to. Here are the lessons I learned the hard way:
- Don’t skip the chill time: I know it’s tempting to rush, but chilled dough is the difference between a cat and a blob. If your kitchen is warm, chill the shaped cookies on the baking sheet for 10 minutes before baking.
- Watch the ears: The ears are the most fragile part. If they break off, don’t panic—just use a little decorating gel to glue them back on. Nobody will notice.
- Use black cocoa powder: Regular cocoa powder will give you grayish-brown cats. Black cocoa powder is darker and has a milder flavor that pairs perfectly with sugar cookies.
- Don’t overbake: These cookies are meant to be soft. Overbaking makes them dry and crumbly. Pull them out when the edges are set but the centers still look slightly soft.
- Multitask wisely: While the first batch is baking, roll out the second disc of dough. But don’t try to do too much at once—I once burned a batch because I was too busy cutting shapes.
One more thing: if you’re making these with kids, expect some chaos. The cookies won’t look perfect, and that’s the whole point. Some of my favorite batches have been the ones with lopsided ears and crooked whiskers.
Variations & Adaptations
These cookies are surprisingly versatile. Here are a few ways to switch things up:
- Gluten-Free Version: Swap the all-purpose flour with a 1:1 gluten-free baking blend. Add an extra tablespoon of flour if the dough feels too sticky. I’ve tested this with King Arthur Measure for Measure and it works beautifully.
- Vegan Version: Use vegan butter and a flax egg (1 tablespoon ground flaxseed mixed with 3 tablespoons water). The texture will be slightly softer, but the cats will still hold their shape.
- Different Flavors: Add a teaspoon of peppermint extract for a minty twist, or swap the vanilla for almond extract. You can also add orange zest for a subtle citrus kick.
- No Black Cocoa: If you don’t have black cocoa powder, use regular cocoa powder and add a few drops of black food coloring to the dough. Just be careful—too much liquid can change the texture.
- Spooky Variations: Turn these into ghost cookies by skipping the ears and using white icing, or make pumpkin cats by adding orange food coloring. The possibilities are endless.
I once made a batch with a pinch of cayenne pepper for a spicy-sweet kick. It was weirdly good, but probably not for everyone. Experiment and see what you like!
Serving & Storage Suggestions
These cookies are best served at room temperature, ideally within 24 hours of baking. The candy eyes stay put, and the cookies are perfectly soft with a slight edge of crunch.
For serving, arrange them on a platter with some fake spiderwebs or little plastic spiders for a fun Halloween vibe. They pair beautifully with a glass of cold milk, a hot cup of coffee, or even a scoop of vanilla ice cream for an indulgent dessert.
Storage: Keep the decorated cookies in an airtight container at room temperature for up to 5 days. Layer them between sheets of parchment paper to prevent the candy eyes from sticking. Do not refrigerate—the cookies will dry out and lose their soft texture.
Freezing: You can freeze the baked, undecorated cookies for up to 3 months. Wrap them tightly in plastic wrap and then foil. When you’re ready to decorate, thaw them at room temperature and add the eyes and whiskers. The flavor actually improves after freezing—the cookies seem to get even softer.
One note: the candy eyes can get a little sticky in humid weather. If you’re making these for a party, decorate them no more than a day in advance to keep them looking fresh.
Nutritional Information & Benefits
Let’s be real—these are cookies, not health food. But here’s the approximate nutritional breakdown per cookie (based on 12 cookies):
- Calories: 280
- Fat: 14g
- Carbohydrates: 36g
- Protein: 3g
- Sugar: 18g
That said, black cocoa powder actually contains antioxidants, and butter provides vitamin A. So there are tiny, tiny benefits hidden in there. (I’m reaching, I know.)
These cookies are vegetarian, but they do contain dairy, eggs, and gluten. If you’re making them for a party, it’s always a good idea to label them so guests with allergies know what they’re eating.
Honestly, I don’t make these for the nutritional value. I make them because they make me happy. And sometimes, that’s enough.
Conclusion
These Adorable Black Cat Halloween Sugar Cookies are exactly what they sound like: cute, a little spooky, and completely delicious. They’re the kind of recipe that turns a regular Tuesday night into something memorable—something worth smiling over.
I hope you give them a try, and I hope you don’t stress about making them perfect. The best batches are the ones with the crooked ears and the slightly smudged whiskers. That’s where the personality comes from.
If you make these, I’d love to see them. Tag me in your photos, leave a comment below, or tell me about your own Halloween baking traditions. And if you’re looking for more fun, seasonal treats, check out my mini lemon blueberry cheesecakes—they’re perfect for any fall gathering. Or browse the full collection of recipes for more inspiration.
Happy Halloween, and happy baking. You’ve got this.
Frequently Asked Questions
Can I use regular cocoa powder instead of black cocoa powder?
You can, but your cookies will be grayish-brown instead of black. If you want that deep, dark color, stick with black cocoa powder. You can find it online or at specialty baking stores.
How do I keep the cookies from spreading?
Chill the dough for at least 30 minutes before rolling and cutting. Also, make sure your butter isn’t too soft when you start. If the dough feels sticky at any point, pop it back in the fridge.
Can I freeze the dough instead of baking it?
Absolutely. Wrap the dough tightly in plastic wrap and freeze for up to 3 months. Thaw overnight in the fridge before rolling and cutting.
What if I don’t have candy eyes?
You can pipe the eyes with black decorating gel, or use small chocolate chips pressed into the dough before baking. Just be aware that chocolate chips will melt slightly, so they won’t look as crisp.
How far in advance can I make these?
You can bake the cookies up to 3 days ahead and store them undecorated in an airtight container. Decorate them the day you plan to serve them for the best look.
Pin This Recipe!

Adorable Black Cat Halloween Sugar Cookies: Easy Spooky Treat

These Adorable Black Cat Halloween Sugar Cookies are cute, a little spooky, and completely delicious. They require no fancy equipment and are perfect for Halloween parties.
- Prep Time: 45 minutes
- Cook Time: 10 minutes
- Total Time: 55 minutes
- Yield: 12 servings 1x
- Category: Dessert
- Cuisine: American
Ingredients
- 1 cup (226g) unsalted butter, softened
- 1 cup (200g) granulated sugar
- 1 large egg
- 1 teaspoon vanilla extract
- 2 cups (250g) all-purpose flour
- 1/4 cup (25g) black cocoa powder
- 1/2 teaspoon baking powder
- 1/4 teaspoon salt
- Candy eyes (about 24)
- Black decorating gel or royal icing
Instructions
- In a large bowl, cream the softened butter and granulated sugar together until light and fluffy—about 3 minutes with an electric mixer on medium speed. Scrape down the sides of the bowl, then add the egg and vanilla extract. Mix until combined.
- In a separate medium bowl, whisk together the flour, black cocoa powder, baking powder, and salt. Slowly add the dry ingredients to the wet mixture, mixing on low speed until just combined. Do not overmix.
- Divide the dough into two discs, wrap each in plastic wrap, and refrigerate for at least 30 minutes.
- Preheat oven to 350°F (175°C). Line two baking sheets with parchment paper.
- On a lightly floured surface, roll out one disc of dough to about 1/4-inch thickness. Use a sharp knife or pizza cutter to cut out simple cat shapes (a circle with two triangles on top for ears). Transfer to prepared baking sheets, spacing about 2 inches apart.
- Bake for 8-10 minutes. The edges should be set but the centers slightly underdone. Cool on the baking sheet for 5 minutes, then transfer to a wire rack to cool completely.
- Once completely cool, use black decorating gel to attach two candy eyes to each cookie. Draw whiskers and a mouth with the gel. Let set for about 15 minutes before serving.
Notes
Chill the dough for at least 30 minutes to prevent spreading. Black cocoa powder gives the deepest color; regular cocoa will result in grayish-brown cookies. The ears are fragile—if they break, use decorating gel to glue them back on.
Nutrition
- Serving Size: 1 cookie
- Calories: 280
- Sugar: 18
- Sodium: 120
- Fat: 14
- Saturated Fat: 8
- Carbohydrates: 36
- Fiber: 1
- Protein: 3
Keywords: Halloween cookies, black cat cookies, sugar cookies, spooky treats, easy Halloween dessert


