I burned this cake three times before I understood what it was actually asking for.
The first attempt was a disaster—dry, crumbly, and nowhere near the deep purple I imagined. The second time, I overcorrected with too much food coloring and ended up with something that looked like a science experiment gone wrong. Honestly, I almost gave up. But then I thought about my Virgo friend who loves precision, organization, and things that just *work*. And that’s when it clicked.
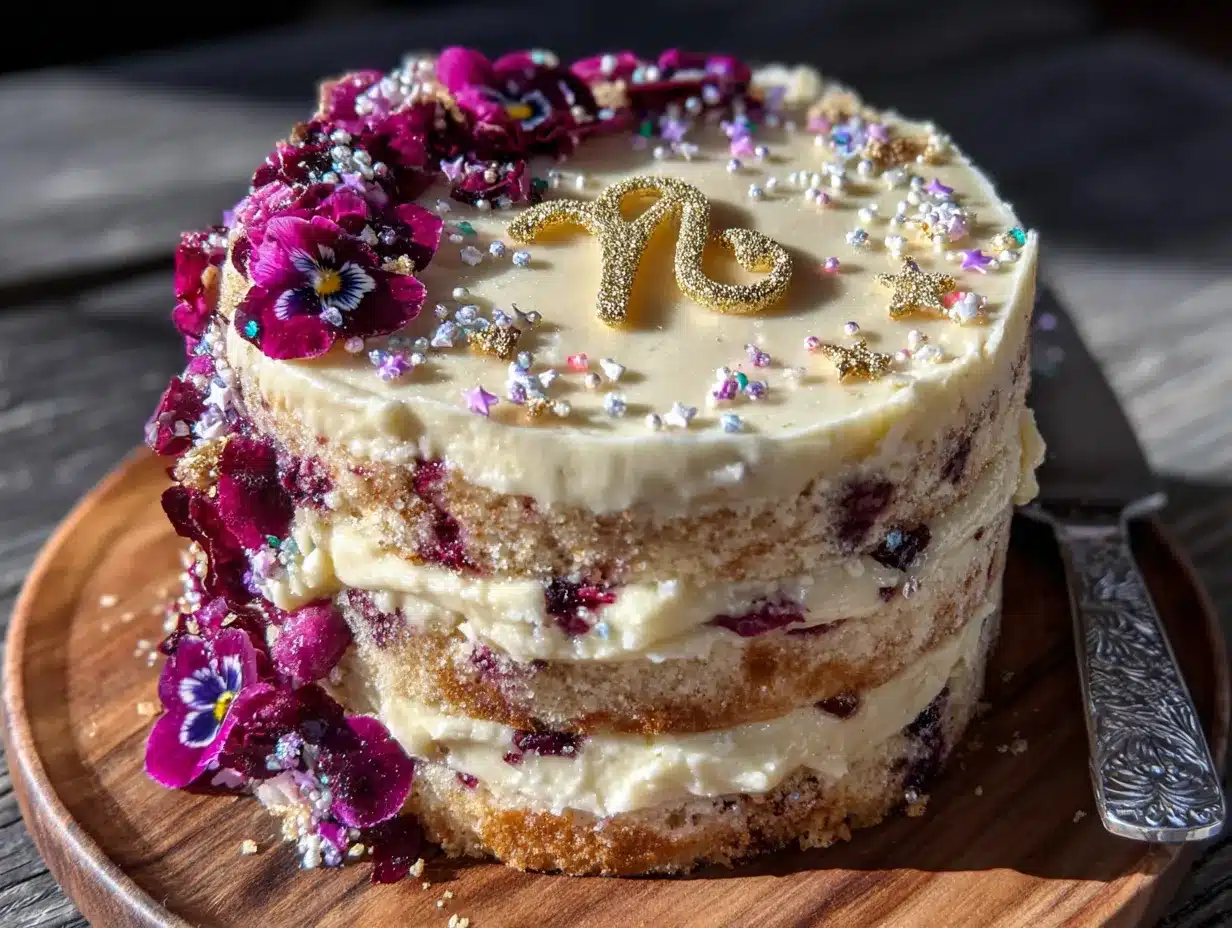
This Perfect Purple Velvet Virgo Zodiac Birthday Cake isn’t just another layer cake. It’s a cake that respects the methodical nature of Virgo energy while still bringing the drama and beauty of a celebration centerpiece. The purple velvet crumb is tender, the cream cheese frosting is silky, and the whole thing comes together with the kind of careful attention that makes a Virgo nod in approval.
I’m not a professional baker (not even close), but I’ve made this cake enough times now that I could probably do it in my sleep. And that’s the thing—it’s not about perfection from the start. It’s about learning what the recipe needs and giving it exactly that. This cake taught me patience, and now it’s one of my favorite things to bake for people I really care about.
Why You’ll Love This Recipe
This isn’t your average birthday cake recipe. It’s designed with intention, tested multiple times, and built to impress without causing you to pull your hair out.
- Perfect for Virgo Season: Whether it’s for a September birthday or just celebrating that earth sign energy, this cake feels intentional and thoughtful.
- Stunning Visual Impact: That deep purple color is a showstopper. It photographs beautifully and makes any celebration feel special.
- Moist and Tender Crumb: The buttermilk and vinegar combo creates a velvet texture that’s soft without being dense.
- Easy to Customize: You can adjust the shade of purple, swap the frosting, or add decorations that match the birthday person’s personality.
- No Fancy Equipment Needed: Just a mixer, some cake pans, and a little patience. I’ve made this in a tiny apartment kitchen and it worked perfectly.
I’ve tested this recipe with different brands of cocoa powder, various food colorings, and even a few frosting variations. What I’m sharing with you is the version that worked best every single time. It’s the kind of cake that makes people ask for the recipe before they finish their first slice.
What Ingredients You Will Need
This recipe uses simple, everyday ingredients to create something that feels special. The magic happens when these staples come together in just the right way.
For the Cake
- All-purpose flour – 2 ½ cups (315g). Spoon and level it for accuracy. Too much flour makes the cake dry.
- Granulated sugar – 1 ½ cups (300g). Adds sweetness and helps with structure.
- Unsweetened cocoa powder – 1 tablespoon (8g). Just enough for that subtle chocolate flavor without overpowering the color. I prefer Ghirardelli or Hershey’s Special Dark.
- Baking soda – 1 teaspoon. Helps the cake rise and creates that tender crumb.
- Salt – ½ teaspoon. Balances the sweetness.
- Vegetable oil – 1 cup (240ml). Keeps the cake incredibly moist. Canola or avocado oil works too.
- Buttermilk – 1 cup (240ml), room temperature. Reacts with the baking soda for a soft texture. If you don’t have buttermilk, add 1 tablespoon of lemon juice to regular milk and let it sit for 5 minutes.
- Large eggs – 2, room temperature. Room temperature eggs blend more evenly into the batter.
- White vinegar – 1 teaspoon. Reacts with the buttermilk for extra tenderness.
- Vanilla extract – 2 teaspoons. Pure vanilla makes a difference here.
- Purple food coloring – 1 to 2 tablespoons. Use gel food coloring for the best color without thinning the batter. I like Wilton or Americolor brand.
For the Cream Cheese Frosting
- Cream cheese – 16 oz (454g), softened. Full-fat brick cream cheese works best. Avoid the spreadable tub kind.
- Unsalted butter – ½ cup (113g), softened. Adds richness and stability.
- Powdered sugar – 4 cups (480g), sifted. Sifting prevents lumps.
- Vanilla extract – 2 teaspoons.
- Pinch of salt – Just a tiny one to cut the sweetness.
Optional Decorations
- Fresh edible flowers – Violas, pansies, or lavender for a zodiac-inspired look.
- Gold or silver sprinkles – Adds a touch of celestial glam.
- Star-shaped cookie cutters – For fondant or fruit decorations.
Equipment Needed
You don’t need a professional bakery setup for this cake. Here’s what I use every time:
- Two 9-inch round cake pans – I’ve used both metal and glass. Metal pans give more even browning.
- Electric hand mixer or stand mixer – Either works. A hand mixer is totally fine for this recipe.
- Mixing bowls – At least two large ones.
- Whisk and rubber spatula – For combining dry ingredients and scraping the bowl.
- Cooling rack – Essential for letting the cake layers cool completely before frosting.
- Offset spatula – Makes frosting so much easier, but a butter knife works in a pinch.
- Parchment paper – Cut rounds for the bottom of the pans to prevent sticking.
- Measuring cups and spoons – Accuracy matters, especially with the cocoa and baking soda.
If you don’t have a cooling rack, you can flip the cake layers onto a clean kitchen towel. It’s not ideal, but it works. And honestly, I’ve done it more times than I’d like to admit.
Preparation Method
Take your time with this one. Rushing is exactly what leads to dry cake or uneven layers. Trust me, I learned the hard way.
Step 1: Prep Your Pans and Preheat
Preheat your oven to 350°F (175°C). Grease two 9-inch round cake pans with butter or non-stick spray. Cut parchment paper rounds for the bottom and place them inside. Grease the parchment too. This extra step guarantees your cakes will release perfectly.
Step 2: Mix the Dry Ingredients
In a large bowl, whisk together the flour, sugar, cocoa powder, baking soda, and salt. Make sure there are no lumps. Cocoa powder can be stubborn, so take an extra minute to break up any clumps with your whisk.
Step 3: Combine the Wet Ingredients
In a separate bowl, whisk together the buttermilk, vegetable oil, eggs, vinegar, and vanilla extract. Whisk until the eggs are fully incorporated and the mixture looks smooth. The buttermilk should be room temperature—cold buttermilk can make the batter seize up.
Step 4: Bring It All Together
Pour the wet ingredients into the dry ingredients. Mix on low speed with your electric mixer until just combined. Scrape the sides and bottom of the bowl with your spatula. Now add the purple food coloring—start with 1 tablespoon and mix. Check the color. If you want a deeper purple, add more a teaspoon at a time. The batter should look vibrant because the color will fade slightly during baking.
Step 5: Divide and Bake
Divide the batter evenly between the two prepared pans. I use a kitchen scale for accuracy, but eyeballing works if you’re careful. Bake for 25 to 30 minutes. The cakes are done when a toothpick inserted in the center comes out clean or with a few moist crumbs. The edges will pull away slightly from the pan.
Step 6: Cool Completely
Let the cakes cool in the pans for 10 minutes. Then run a knife around the edges and turn them out onto a cooling rack. Peel off the parchment paper. Let them cool completely—this takes about an hour. Do not frost a warm cake. The frosting will melt and slide right off. I’ve done it. It’s heartbreaking.
Step 7: Make the Frosting
In a large bowl, beat the softened cream cheese and butter together until smooth and creamy—about 2 minutes. Add the vanilla and salt. Gradually add the sifted powdered sugar, one cup at a time, mixing on low speed. Once all the sugar is in, increase the speed to medium and beat for 2 more minutes until light and fluffy.
Step 8: Assemble the Cake
Place one cake layer on your serving plate. Spread about ¾ cup of frosting evenly on top. Place the second layer on top, making sure it’s level. Apply a thin layer of frosting all over the cake—this is the crumb coat. Refrigerate for 20 minutes. Then apply the final, thicker layer of frosting. Smooth it out with your offset spatula.
Step 9: Decorate
Add your edible flowers, sprinkles, or any zodiac-themed decorations. If you’re using fresh flowers, place them just before serving so they stay fresh.
Cooking Tips & Techniques
Here’s what I wish someone had told me before I started making velvet cakes:
- Room temperature ingredients matter. Cold buttermilk and eggs don’t emulsify as well. Set them out 30 minutes before you start.
- Don’t overmix the batter. Once the flour is incorporated, stop. Overmixing develops gluten and makes the cake tough.
- Use gel food coloring, not liquid. Liquid coloring adds too much extra liquid and can throw off the batter consistency. Gel gives you a rich color with just a tablespoon or two.
- Level your cake layers. If one layer is domed, use a serrated knife to slice off the top. Level layers stack evenly and look professional.
- Chill the cake before slicing. A cold cake cuts much cleaner. Pop it in the fridge for 30 minutes before serving for those perfect slices.
My biggest failure? I once forgot the vinegar entirely. The cake was dense and flat. That small amount of acid is crucial for reacting with the baking soda and creating the velvet texture. Don’t skip it.
Variations & Adaptations
This recipe is flexible. Here are a few ways to make it your own:
- Gluten-Free Version: Substitute the all-purpose flour with a 1:1 gluten-free baking blend. I’ve used Bob’s Red Mill with good results. Add ¼ teaspoon of xanthan gum if your blend doesn’t already include it.
- Dairy-Free Option: Use dairy-free buttermilk (add lemon juice to oat or almond milk) and vegan cream cheese. Miyoko’s brand works beautifully for the frosting.
- Different Color Themes: Swap purple for deep blue, pink, or even a gradient effect for other zodiac signs. A Sagittarius cake in fiery orange would be amazing.
- Cupcake Version: This batter makes about 24 cupcakes. Bake at 350°F for 18-20 minutes. Perfect for parties where you want individual servings.
- Add a Filling: Spread a layer of raspberry jam or lemon curd between the cake layers before frosting. The tartness complements the sweet cream cheese frosting.
I once made a lavender-infused version by adding 1 teaspoon of dried culinary lavender to the dry ingredients. It gave the cake a subtle floral note that paired beautifully with the purple color. Just don’t overdo it—lavender can get soapy fast.
Serving & Storage Suggestions
This cake is best served at room temperature. Take it out of the fridge about 20 minutes before you plan to slice it. The cream cheese frosting softens slightly and the cake becomes incredibly tender.
For presentation, I love adding a few fresh edible flowers on top and around the base of the cake. It gives it that zodiac-garden vibe that feels so fitting for a Virgo celebration. A few gold star sprinkles scattered on top add that celestial touch.
Pair this cake with a cup of Earl Grey tea, a latte, or even a glass of sparkling rosé for a grown-up birthday treat. If you’re serving it as part of a dessert spread, it goes beautifully alongside mini lemon blueberry cheesecakes for a colorful, crowd-pleasing combination.
Store leftover cake in an airtight container in the refrigerator for up to 5 days. The flavors actually deepen after a day or two. You can also freeze unfrosted cake layers wrapped tightly in plastic wrap for up to 3 months. Thaw overnight in the fridge before frosting.
To reheat a single slice, microwave it for about 10 seconds. It takes the chill off without melting the frosting. Honestly, I love this cake cold straight from the fridge too—the frosting gets firmer and almost cheesecake-like.
Nutritional Information & Benefits
This is a celebration cake, so it’s not exactly health food. But here’s what you’re working with per slice (assuming 12 servings):
- Calories: Approximately 480
- Fat: 28g
- Carbohydrates: 55g
- Protein: 6g
- Sugar: 42g
The buttermilk adds a small amount of calcium and probiotics. Cocoa powder contains antioxidants and a little magnesium. And honestly, there’s something to be said for the mental health benefits of baking something beautiful for someone you love.
If you’re watching your sugar intake, you can reduce the sugar in the frosting by ½ cup without affecting the texture too much. The cake itself needs the full amount for proper structure.
This recipe contains dairy, gluten, and eggs. For allergen-friendly versions, check the variations section above.
Conclusion
This Perfect Purple Velvet Virgo Zodiac Birthday Cake is more than just a dessert. It’s a way to show someone you see them—their attention to detail, their thoughtfulness, their quiet strength. The deep purple color feels regal and mysterious, while the tender crumb and creamy frosting deliver pure comfort.
I’ve made this cake for birthday parties, zodiac-themed gatherings, and even just because I wanted something beautiful to bake on a Sunday afternoon. Every single time, it gets the same reaction: wide eyes, a big smile, and the question, “Can I have the recipe?”
Now it’s your turn. Customize the decorations, play with the shade of purple, and make it your own. I’d love to hear how it turns out. Drop a comment below with your zodiac sign and what decorations you added. And if you’re looking for more recipe inspiration, check out our full recipe collection for more creative baking ideas.
Happy baking, and happy birthday to that special Virgo in your life!
Frequently Asked Questions
Can I use natural food coloring instead of gel?
Yes, but the color will be less vibrant. Natural purple from ube extract or blueberry powder gives a more muted lavender shade. Gel coloring gives you that bold, dramatic purple that really pops.
Why did my cake turn out dry?
Most likely overbaked or too much flour. Check your oven temperature with an oven thermometer. Also, spoon and level your flour instead of scooping directly from the bag. Too much flour is the number one cause of dry cake.
Can I make this cake ahead of time?
Absolutely. Bake the cake layers a day ahead, wrap them tightly in plastic wrap, and store at room temperature. Make the frosting the day of serving. Or freeze the unfrosted layers for up to 3 months.
How do I get that deep purple color without it looking artificial?
Start with a small amount of gel coloring and build up gradually. Mixing a touch of blue with your purple can create a more natural, berry-like shade. And remember, the color will fade slightly during baking, so make the batter a shade darker than you want the finished cake.
Can I use this recipe for other zodiac signs?
Definitely! Just change the food coloring to match the sign’s color palette. Red for Aries, green for Taurus, blue for Aquarius. The cake itself is neutral enough to work with any theme.
Pin This Recipe!
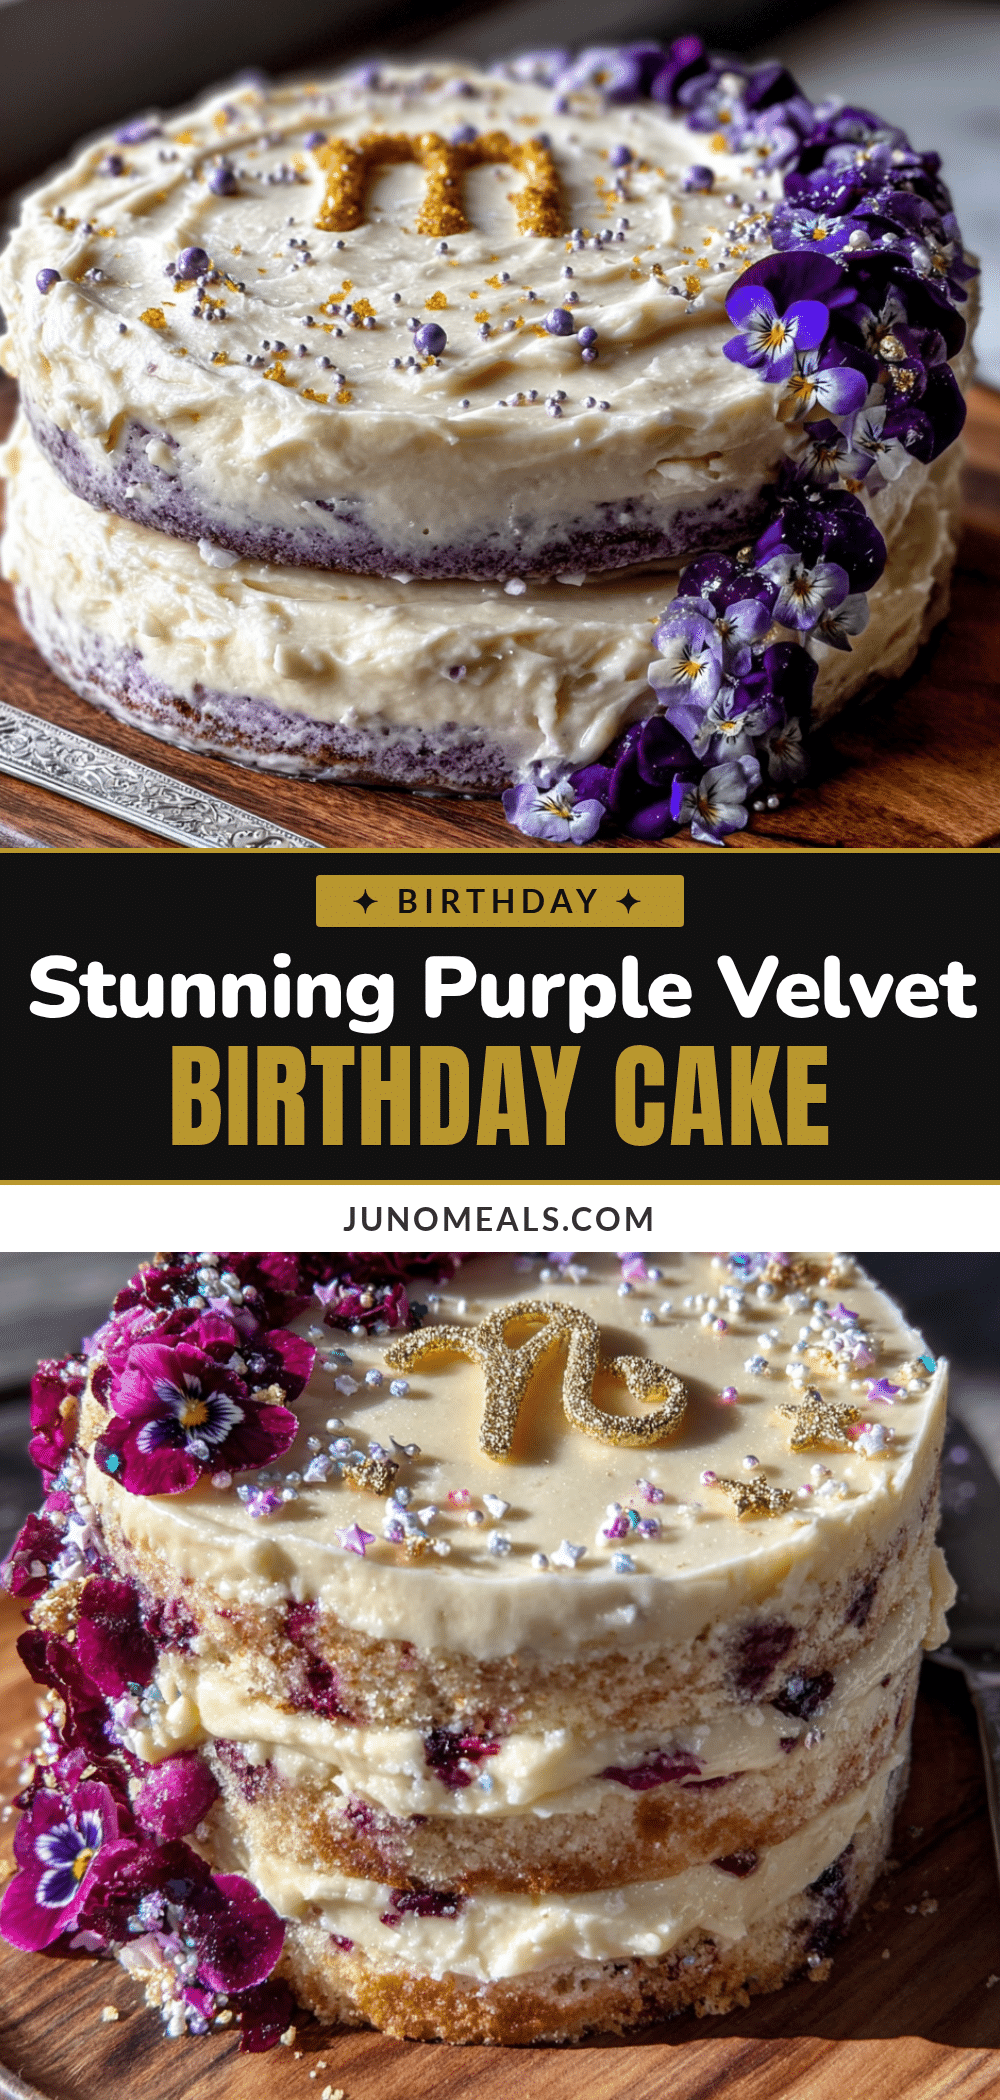
Perfect Purple Velvet Zodiac Birthday Cake Recipe
This Perfect Purple Velvet Virgo Zodiac Birthday Cake is a tender, moist velvet cake with a stunning deep purple color, paired with a silky cream cheese frosting. Designed with intention and tested multiple times, it’s a showstopper for any celebration.
- Prep Time: 30 minutes
- Cook Time: 30 minutes
- Total Time: 1 hour 30 minutes
- Yield: 12 servings 1x
- Category: Dessert
- Cuisine: American
Ingredients
- 2 ½ cups (315g) all-purpose flour
- 1 ½ cups (300g) granulated sugar
- 1 tablespoon (8g) unsweetened cocoa powder
- 1 teaspoon baking soda
- ½ teaspoon salt
- 1 cup (240ml) vegetable oil
- 1 cup (240ml) buttermilk, room temperature
- 2 large eggs, room temperature
- 1 teaspoon white vinegar
- 2 teaspoons vanilla extract
- 1 to 2 tablespoons purple gel food coloring
- 16 oz (454g) cream cheese, softened
- ½ cup (113g) unsalted butter, softened
- 4 cups (480g) powdered sugar, sifted
- 2 teaspoons vanilla extract
- Pinch of salt
- Optional: fresh edible flowers, gold or silver sprinkles, star-shaped cookie cutters
Instructions
- Preheat oven to 350°F (175°C). Grease two 9-inch round cake pans, line bottoms with parchment paper, and grease parchment.
- In a large bowl, whisk together flour, sugar, cocoa powder, baking soda, and salt until no lumps remain.
- In a separate bowl, whisk together buttermilk, vegetable oil, eggs, vinegar, and vanilla extract until smooth.
- Pour wet ingredients into dry ingredients. Mix on low speed until just combined. Scrape sides and bottom. Add purple food coloring, starting with 1 tablespoon, and mix until desired color is reached.
- Divide batter evenly between prepared pans. Bake for 25-30 minutes, until a toothpick inserted in center comes out clean or with a few moist crumbs.
- Let cakes cool in pans for 10 minutes, then turn out onto a cooling rack. Remove parchment and cool completely (about 1 hour).
- For frosting: Beat softened cream cheese and butter together until smooth (about 2 minutes). Add vanilla and salt. Gradually add sifted powdered sugar, one cup at a time, mixing on low. Increase speed to medium and beat for 2 minutes until fluffy.
- Place one cake layer on serving plate. Spread about ¾ cup frosting evenly on top. Place second layer on top. Apply a thin crumb coat of frosting all over. Refrigerate for 20 minutes. Then apply final thicker layer of frosting and smooth with offset spatula.
- Decorate with edible flowers, sprinkles, or zodiac-themed decorations just before serving.
Notes
Room temperature ingredients are crucial for proper emulsification. Do not overmix the batter. Use gel food coloring for best color. Level cake layers if domed. Chill cake before slicing for clean cuts. Store leftovers in refrigerator for up to 5 days. Unfrosted layers can be frozen for up to 3 months.
Nutrition
- Serving Size: 1 slice
- Calories: 480
- Sugar: 42
- Sodium: 320
- Fat: 28
- Saturated Fat: 12
- Carbohydrates: 55
- Fiber: 1
- Protein: 6
Keywords: purple velvet cake, zodiac cake, Virgo birthday cake, cream cheese frosting, velvet cake recipe