The way browned butter smells when it hits the mixing bowl — nutty, almost caramelized, like something between toasted hazelnuts and butterscotch — is honestly the whole reason I make this banana bread. Everything else, the ripe bananas, the soft crumb, the slightly crackly top, it all comes second to that first inhale when the hot butter meets the sugar. I didn’t set out to create a classic banana bread that would become my go-to. I set out to use up three sad, spotty bananas on my counter, and I just happened to have a stick of butter that I let go a little too far in the pan. That accidental moment, that almost-burnt butter, changed everything.
I’ve made a lot of banana bread over the years. The kind that’s too dense, the kind that’s too dry, the kind that tastes fine but doesn’t make you stop mid-bite to just… think about it. This one makes you stop. It’s not fancy, you know? It’s just good. Really, genuinely good in a way that feels like a secret you’re keeping from everyone else at the table. The browned butter adds this depth that plain butter just can’t touch, and somehow the bananas get even sweeter, more pronounced, like they finally have a worthy partner.
This classic banana bread with browned butter became the recipe I now make on repeat, and not just when bananas are going bad. I make it when I want something that feels like a hug in loaf form. I make it when I need a reliable dessert for a last-minute gathering. I make it when I just want my kitchen to smell like someone who really knows what they’re doing lives here. And honestly, that’s the whole point.
Why You’ll Love This Recipe
Let me tell you why this banana bread is different from every other recipe you’ve bookmarked. I’ve tested this version at least a dozen times, tweaking the butter temperature, the banana ripeness, the baking time, until it was exactly right. Here’s what makes it worth your time:
- Browned Butter Magic: That one extra step, browning the butter, transforms the entire loaf. It adds a nutty, toasty flavor that makes the banana taste richer and more complex. You’ll never go back to plain butter.
- Perfectly Moist, Not Dense: This bread strikes that ideal balance. It’s tender and soft without being gummy, and it stays moist for days (if it lasts that long).
- Simple Pantry Ingredients: You probably have everything already. Bananas, flour, sugar, eggs, butter. No weird extracts, no specialty flours, no trips to a fancy grocery store.
- Foolproof for Beginners: Even if you’ve never made banana bread before, this recipe works. I’ve included all the little cues and tips I learned the hard way so you don’t have to.
- Crowd-Pleaser Every Time: I’ve brought this to brunches, potlucks, and casual dinners. It disappears fast. Kids love it, adults sneak seconds, and someone always asks for the recipe.
This isn’t just another banana bread recipe. It’s the one where the browned butter does all the heavy lifting, where the texture is just right, and where every slice feels like a small victory. If you’ve ever had banana bread that was dry or boring, this is your redemption.
What Ingredients You Will Need
This recipe uses simple, honest ingredients that work together to create something truly special. The browned butter is the star, but every component plays a part in getting that perfect texture and flavor.
For the Banana Bread
- Unsalted butter: 1/2 cup (1 stick or 113 grams). You’ll be browning this, so use a light-colored pan to monitor the color change. I prefer unsalted to control the salt level.
- Ripe bananas: 3 medium, about 1 1/2 cups mashed (roughly 340 grams). The riper the better. Seriously, those brown-spotted, almost-black bananas are what you want. They’re sweeter and easier to mash.
- Granulated sugar: 3/4 cup (150 grams). Adds sweetness and helps create that tender crumb.
- Large egg: 1, at room temperature. A room-temperature egg blends more evenly into the batter, giving you a smoother texture.
- Vanilla extract: 1 teaspoon. Pure vanilla is best, but imitation works in a pinch. It rounds out the flavors beautifully.
- All-purpose flour: 1 1/2 cups (180 grams). Spoon and level it into your measuring cup. Scooping directly can pack the flour and make the bread dry.
- Baking soda: 1 teaspoon. This is your leavener. Make sure it’s fresh (not expired) for the best rise.
- Salt: 1/2 teaspoon. Balances the sweetness and enhances the banana and butter flavors. I use fine sea salt.
- Plain yogurt or sour cream: 1/4 cup (60 grams). This is my secret ingredient. It adds incredible moisture and a slight tang that plays off the browned butter. Full-fat is best, but low-fat works too.
Optional Mix-Ins
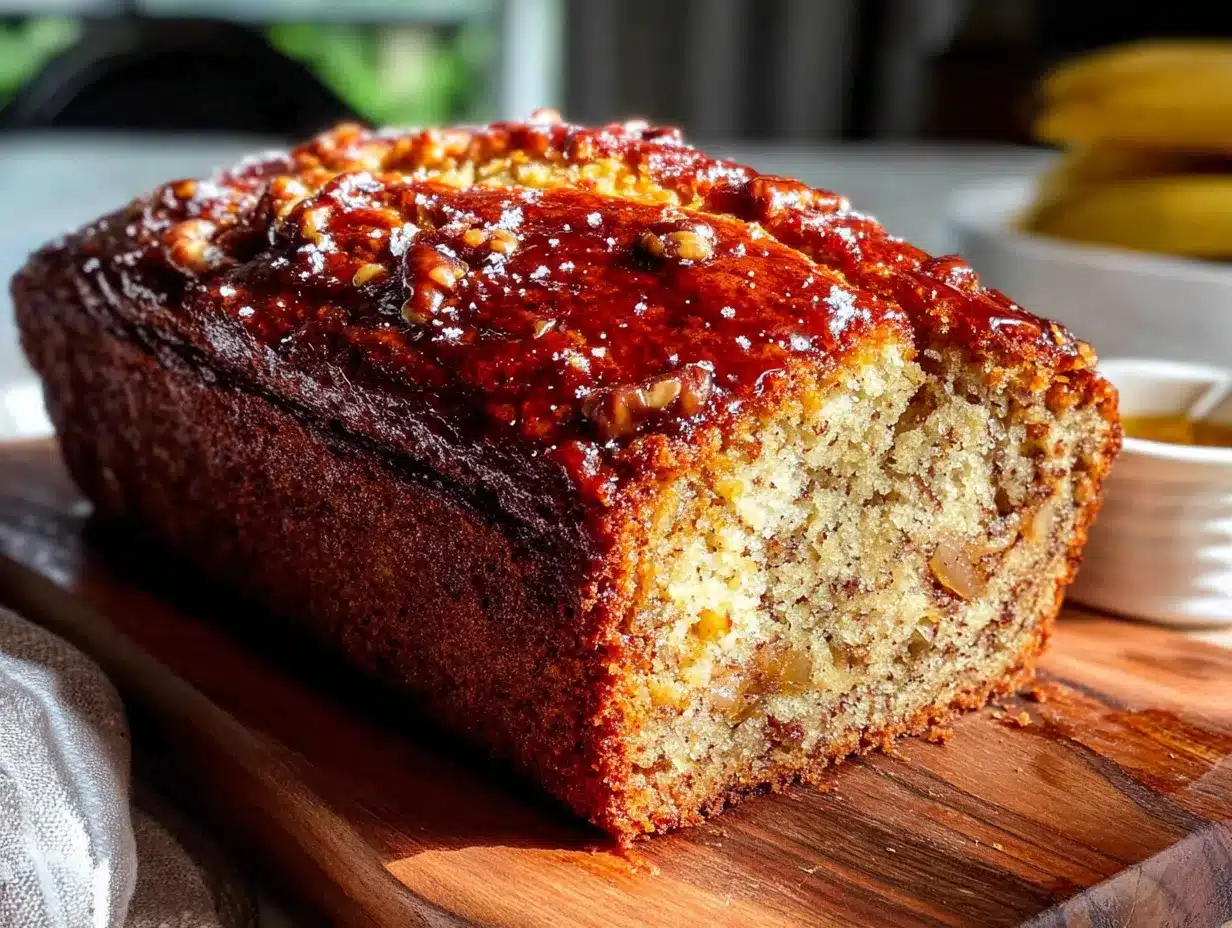
- Chopped walnuts or pecans: 1/2 cup (60 grams). Toasted for extra flavor. Adds a nice crunch.
- Chocolate chips: 1/2 cup (90 grams). Semi-sweet or dark are my favorites. They melt into little pockets of goodness.
Ingredient Tips from My Kitchen: I always use Land O’Lakes unsalted butter for browning because it has a consistent fat content. For yogurt, I’m partial to Fage or Stonyfield. If you’re out of yogurt, you can substitute buttermilk or even milk mixed with a teaspoon of lemon juice. Let it sit for 5 minutes before using.
Equipment Needed
You don’t need a fancy kitchen to make this bread. Here’s what I use every time:
- 9×5-inch loaf pan: This is the standard size. If you use an 8×4-inch pan, you’ll need to increase the baking time by 5-10 minutes. A metal pan gives the best browning, but glass or ceramic work too.
- Light-colored saucepan or skillet: Essential for browning the butter. A dark pan makes it hard to see the color change, and you risk burning it.
- Large mixing bowl: For mashing bananas and mixing the wet ingredients.
- Medium mixing bowl: For whisking the dry ingredients together.
- Whisk and wooden spoon or spatula: A whisk for the dry ingredients, a spatula for folding everything together gently.
- Parchment paper: Lining the pan makes removal effortless. You can also grease the pan well with butter or non-stick spray.
- Cooling rack: Lets air circulate around the loaf so it cools evenly and doesn’t get soggy on the bottom.
Budget-Friendly Tip: If you don’t have a loaf pan, you can bake this in an 8×8-inch square pan. Just reduce the baking time to about 30-35 minutes and check for doneness early. I’ve done this in a pinch, and it works great. Also, skip the parchment if you don’t have it — just grease the pan really well.
Preparation Method
Let’s get to the good part. This method is broken down into clear steps, with all the little cues I’ve learned from making this dozens of times. Take your time, and don’t rush the butter.
Step 1: Brown the Butter
Place the butter in your light-colored saucepan over medium heat. Let it melt completely, then keep cooking. Swirl the pan occasionally. You’ll see it start to foam, then the foam will subside. Small brown specks will appear at the bottom. This is the milk solids toasting — that’s where the flavor lives. Once the butter smells nutty and the specks are a warm amber color (about 4-6 minutes total), remove it from the heat immediately. Pour it into a heatproof bowl to stop the cooking process. Let it cool for about 10 minutes. Don’t skip this cooling step, or the hot butter will cook your egg.
Step 2: Preheat and Prep
Preheat your oven to 350°F (175°C). Position the rack in the center. Line your loaf pan with parchment paper, leaving some overhang on the long sides for easy lifting. Or just grease it well with butter.
Step 3: Mash the Bananas
In your large mixing bowl, mash the bananas with a fork or potato masher until mostly smooth. A few small lumps are fine — they add texture. You should have about 1 1/2 cups. If your bananas are very ripe, this will be easy. If they’re a bit firmer, just mash a little longer.
Step 4: Mix the Wet Ingredients
To the mashed bananas, add the cooled browned butter, granulated sugar, egg, vanilla extract, and yogurt (or sour cream). Whisk everything together until it’s smooth and well combined. The mixture should look glossy and smell incredible already.
Step 5: Combine the Dry Ingredients
In your medium bowl, whisk together the flour, baking soda, and salt. Make sure the baking soda is evenly distributed — clumps of it can leave a bitter taste in the final bread.
Step 6: Fold the Batter Together
Pour the dry ingredients into the wet ingredients. Use a rubber spatula to fold them together gently. Stir just until no streaks of flour remain. A few small lumps are okay. Overmixing will develop the gluten and make the bread tough. If you’re adding nuts or chocolate chips, fold them in at this point.
Step 7: Bake
Pour the batter into your prepared loaf pan and spread it into an even layer. Bake for 50-60 minutes, or until a toothpick inserted into the center comes out clean or with just a few moist crumbs. If the top is browning too quickly (around the 40-minute mark), tent the pan loosely with aluminum foil.
Sensory Cue: Your kitchen will smell like toasted nuts and caramelized bananas. The loaf will be golden brown on top and feel springy when you gently press the center. That’s how you know it’s done.
Step 8: Cool and Serve
Let the bread cool in the pan on a wire rack for about 15 minutes. Then lift it out using the parchment overhang and let it cool completely on the rack. Slicing it while it’s still warm is tempting, but it will be more tender and hold together better if you wait. I know, it’s hard.
Cooking Tips & Techniques
I’ve made every mistake you can imagine with banana bread. Here’s what I learned so you don’t have to repeat my failures.
The Biggest Mistake: Overmixing. I once mixed the batter like I was angry at it, and the bread came out tough and dense. The gluten develops quickly, so fold gently and stop as soon as the flour disappears. A few streaks are fine.
Brown Butter is a Process, Not a Panic. The first time I browned butter, I got scared and pulled it off too early. It barely had any flavor. The second time, I walked away and it burned. Watch it closely. The transition from perfect to burnt happens in seconds. Swirl the pan constantly in the last minute.
Banana Ripeness Matters. Green or yellow bananas without spots won’t give you the sweetness or moisture you need. If your bananas aren’t ripe enough, you can speed things up by baking them on a sheet pan at 300°F (150°C) for 15-20 minutes until they’re soft and the skins are black. Let them cool before mashing.
Room Temperature Ingredients. I know it’s annoying to wait, but a cold egg can seize the browned butter and make the batter lumpy. Set your egg out 30 minutes before starting. If you forget, place it in a bowl of warm water for 5 minutes.
Don’t Open the Oven. I know you want to check on it. Resist. Opening the oven door lets out heat and can cause the bread to sink in the middle. Wait until the 50-minute mark to start testing with a toothpick.
Variations & Adaptations
This recipe is a fantastic base for experimentation. Here are some of my favorite twists:
- Gluten-Free Version: Substitute the all-purpose flour with a good 1:1 gluten-free baking flour blend (I like King Arthur Measure for Measure). The texture will be slightly more tender, but it’s still delicious. Add 1/4 teaspoon of xanthan gum if your blend doesn’t include it.
- Vegan Adaptation: Replace the egg with a flax egg (1 tablespoon ground flaxseed mixed with 3 tablespoons water, let sit for 5 minutes). Use dairy-free yogurt or applesauce instead of regular yogurt. And use vegan butter for browning — just watch it closely as it can burn faster.
- Chocolate Swirl Banana Bread: After pouring the batter into the pan, drop spoonfuls of Nutella or melted chocolate on top. Use a knife to gently swirl it through. It looks beautiful and tastes like a dream.
- Spiced Brown Butter Banana Bread: Add 1 teaspoon of cinnamon, 1/2 teaspoon of nutmeg, and a pinch of cloves to the dry ingredients. It makes the bread taste like a cozy autumn morning.
- Streusel Topping: Mix 2 tablespoons of cold butter, 3 tablespoons of flour, 3 tablespoons of brown sugar, and a pinch of cinnamon. Sprinkle it over the batter before baking. It creates a crunchy, buttery crust.
I once made a version with browned butter and a swirl of lemon blueberry cheesecake filling on a whim. It was absurdly good. Don’t be afraid to experiment with your own crazy ideas.
Serving & Storage Suggestions
This banana bread is perfect in so many ways. Here’s how to make the most of it.
Serving: Serve it warm or at room temperature. A slice lightly toasted in a skillet with a pat of butter is next-level. It’s also fantastic with a drizzle of honey or a spread of cream cheese. For a dessert twist, serve it with a scoop of vanilla ice cream and a drizzle of caramel sauce.
Complementary Pairings: A hot cup of coffee or a tall glass of cold milk are the classic choices. For brunch, it pairs beautifully with scrambled eggs and fresh fruit. I’ve also served it alongside a simple fruit salad for a light, satisfying meal.
Storage: Wrap the cooled loaf tightly in plastic wrap or store it in an airtight container at room temperature. It will stay moist and delicious for up to 4 days. The flavor actually improves after the first day as the browned butter and banana meld together.
Freezing: This bread freezes beautifully. Wrap the whole loaf or individual slices tightly in plastic wrap, then place them in a freezer-safe bag. It will keep for up to 3 months. To thaw, leave it at room temperature for a few hours or pop a slice in the microwave for 20 seconds.
Reheating: For that fresh-baked taste, reheat slices in a 350°F (175°C) oven for 5-7 minutes, or in a toaster oven. The edges get slightly crisp while the center stays soft.
Nutritional Information & Benefits
Here’s the estimated nutritional breakdown for one slice (based on 10 slices, without mix-ins). Remember, this is an estimate and can vary based on specific ingredients and portion sizes.
| Nutrient | Amount Per Slice |
|---|---|
| Calories | 265 |
| Total Fat | 12g |
| Saturated Fat | 7g |
| Cholesterol | 45mg |
| Sodium | 210mg |
| Total Carbohydrates | 37g |
| Dietary Fiber | 2g |
| Sugars | 19g |
| Protein | 4g |
Health Highlights: Bananas are packed with potassium, which is great for heart health and muscle function. They also contain vitamin B6 and vitamin C. The yogurt adds a dose of calcium and probiotics. While this is a treat, using browned butter allows you to use less butter overall because the flavor is so concentrated. It’s a small win for your taste buds and your waistline.
Dietary Considerations: This recipe is vegetarian. It can be made gluten-free and vegan with the substitutions listed above. It contains dairy, eggs, and gluten (in the standard version).
Conclusion
This classic banana bread with browned butter is more than just a recipe. It’s the kind of thing that makes you feel like you’ve discovered something special, even though it’s simple and familiar. The browned butter adds a depth of flavor that feels almost luxurious, but the process is easy enough for a Tuesday afternoon. It’s forgiving, it’s reliable, and it always, always delivers.
I make this bread for myself on quiet weekends. I make it for friends when they need a pick-me-up. I make it for holidays and for no reason at all. And every single time, the first slice reminds me why I fell in love with baking in the first place. It’s not about perfection. It’s about creating something that tastes like warmth and care.
Now I want to hear from you. Have you tried browning butter for banana bread? What’s your favorite mix-in? Drop a comment below and let me know how it turned out. And if you loved this recipe, share it with a friend who needs a little comfort in loaf form. Happy baking!
Frequently Asked Questions
Can I use salted butter for browning?
Yes, you can. Just reduce the added salt in the recipe to 1/4 teaspoon. The salt in the butter will vary by brand, so taste the batter if you’re unsure.
Why did my banana bread sink in the middle?
This usually happens from overmixing the batter or opening the oven door too early. Overmixing develops too much gluten, and opening the oven lets out heat that the bread needs to set. It can also happen if your baking soda is old and not active enough.
Can I make this into muffins instead of a loaf?
Absolutely. Grease a 12-cup muffin tin and divide the batter evenly. Bake at 350°F (175°C) for 18-22 minutes, or until a toothpick comes out clean. The browned butter flavor works beautifully in muffin form.
How do I know when my bananas are ripe enough?
Look for bananas with lots of brown spots on the peel. The peel should be mostly yellow with significant browning, and the banana should feel soft when you squeeze it gently. If it smells strongly banana-y, it’s perfect.
Can I double this recipe?
Yes, this recipe doubles easily. Use two loaf pans and bake them side by side. You may need to rotate the pans halfway through baking for even cooking. The baking time should remain roughly the same.
Pin This Recipe!
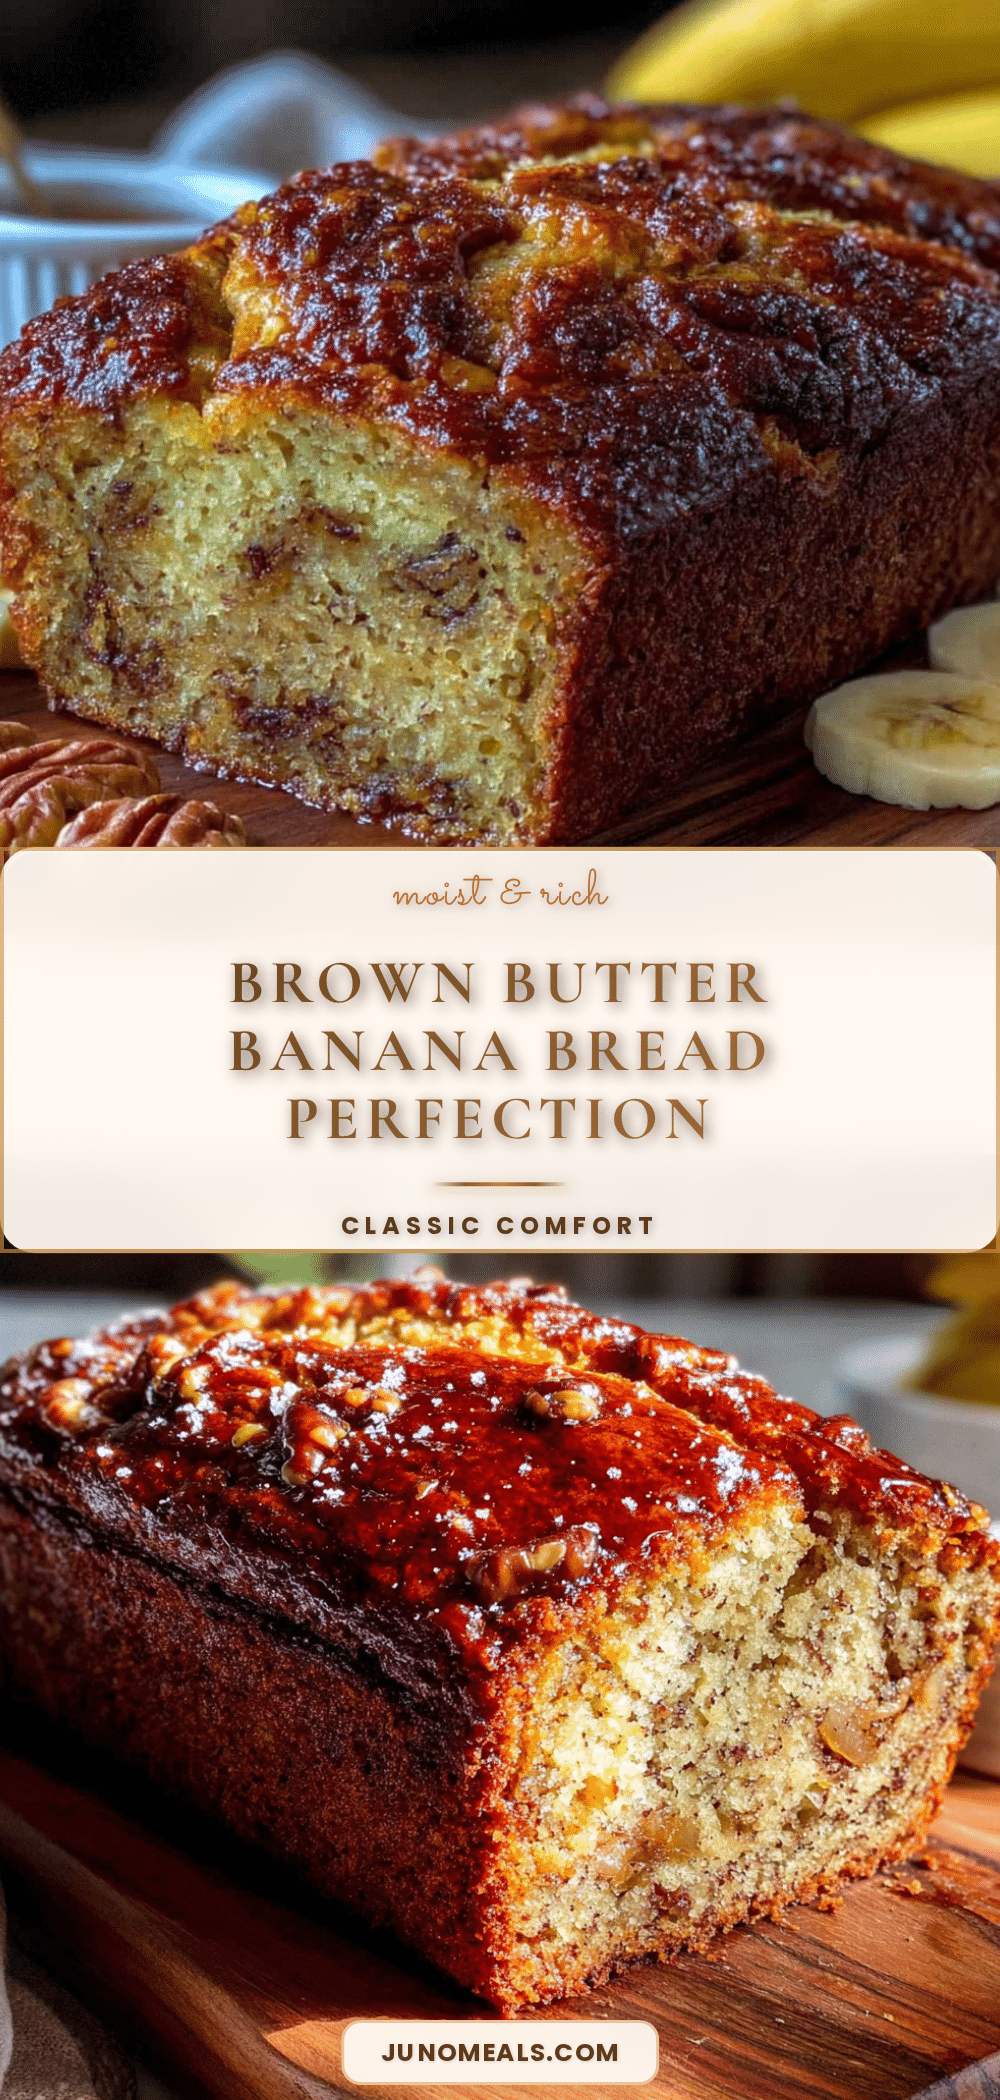
Easy Classic Banana Bread with Browned Butter (Best Recipe)
This banana bread uses browned butter for a nutty, caramelized depth that makes it incredibly moist and flavorful. It’s a simple, foolproof recipe that turns ripe bananas into a crowd-pleasing loaf.
- Prep Time: 15 minutes
- Cook Time: 55 minutes
- Total Time: 1 hour 10 minutes
- Yield: 10 servings 1x
- Category: Dessert
- Cuisine: American
Ingredients
- 1/2 cup (1 stick or 113 grams) unsalted butter
- 3 medium ripe bananas (about 1 1/2 cups mashed, roughly 340 grams)
- 3/4 cup (150 grams) granulated sugar
- 1 large egg, at room temperature
- 1 teaspoon vanilla extract
- 1 1/2 cups (180 grams) all-purpose flour
- 1 teaspoon baking soda
- 1/2 teaspoon salt
- 1/4 cup (60 grams) plain yogurt or sour cream
- 1/2 cup (60 grams) chopped walnuts or pecans (optional)
- 1/2 cup (90 grams) chocolate chips (optional)
Instructions
- Brown the butter: Place the butter in a light-colored saucepan over medium heat. Melt completely, then continue cooking, swirling occasionally, until it foams, the foam subsides, and small brown specks appear at the bottom. The butter should smell nutty and be a warm amber color (about 4-6 minutes). Remove from heat immediately and pour into a heatproof bowl to stop cooking. Let cool for about 10 minutes.
- Preheat oven to 350°F (175°C). Position rack in the center. Line a 9×5-inch loaf pan with parchment paper, leaving overhang on the long sides, or grease well with butter.
- In a large mixing bowl, mash the bananas with a fork or potato masher until mostly smooth (a few lumps are fine). You should have about 1 1/2 cups.
- To the mashed bananas, add the cooled browned butter, granulated sugar, egg, vanilla extract, and yogurt (or sour cream). Whisk until smooth and well combined.
- In a medium bowl, whisk together the flour, baking soda, and salt until evenly distributed.
- Pour the dry ingredients into the wet ingredients. Use a rubber spatula to fold gently until just combined (a few streaks of flour are okay). If using nuts or chocolate chips, fold them in now. Do not overmix.
- Pour the batter into the prepared loaf pan and spread evenly. Bake for 50-60 minutes, or until a toothpick inserted into the center comes out clean or with a few moist crumbs. If the top browns too quickly (around 40 minutes), tent loosely with aluminum foil.
- Let the bread cool in the pan on a wire rack for 15 minutes. Then lift it out using the parchment overhang and cool completely on the rack before slicing.
Notes
For best results, use very ripe bananas with brown spots. Room temperature ingredients blend more evenly. Do not overmix the batter to avoid a tough loaf. The flavor improves after the first day. Store wrapped at room temperature for up to 4 days, or freeze for up to 3 months.
Nutrition
- Serving Size: 1 slice
- Calories: 265
- Sugar: 19
- Sodium: 210
- Fat: 12
- Saturated Fat: 7
- Carbohydrates: 37
- Fiber: 2
- Protein: 4
Keywords: banana bread, browned butter, easy banana bread, classic banana bread, moist banana bread, best banana bread recipe


