I did not trust pumpkin hand pies. That’s the honest truth. For years, I thought they were a gimmick—dry crust, bland filling, and that weird moment where the pastry splits open in the oven and all the good stuff leaks out onto the baking sheet. I’d made plenty of pies in my day, but the idea of a portable, handheld version felt like a compromise I wasn’t willing to make. Then my sister showed up at a family gathering with a batch of these, and they had this delicate little spiderweb pattern painted on top with icing. I took one out of sheer politeness, expecting the same old story. That first bite changed my mind completely. The crust was flaky and buttery, the filling was rich and spiced just right, and the spiderweb design wasn’t just for show—it added a little sweetness that tied everything together. I asked for the recipe on the spot, and after a few rounds of tweaking (because I can’t leave well enough alone), I landed on this version. These Easy Spiderweb Pumpkin Hand Pies are the fall dessert I actually look forward to making. They’re not fussy, they don’t require a ton of special equipment, and they taste like autumn in a way that feels genuine, not forced. If you’ve been burned by disappointing hand pies before, I get it. But these might just change your mind too.
Why You’ll Love This Recipe
Let me tell you why these hand pies have earned a permanent spot in my fall baking rotation. I’ve tested this recipe more times than I care to admit, and each batch taught me something new about getting the texture and flavor just right.
- Quick & Easy: From start to finish, these come together in under 45 minutes. That’s faster than a traditional pumpkin pie, and you don’t have to wrestle with a full pie crust.
- Simple Ingredients: You likely have most of these in your pantry right now. No fancy extracts or hard-to-find spices—just good old-fashioned baking staples.
- Perfect for Fall Gatherings: These are ideal for Halloween parties, Thanksgiving dessert tables, or cozy weekend baking with the kids. They travel well, which is a huge plus.
- Crowd-Pleaser: I’ve served these to kids, adults, and even my picky uncle who “doesn’t do pumpkin.” Every single one disappeared within minutes.
- Unbelievably Delicious: The combo of a tender, buttery crust with that spiced pumpkin filling is next-level comfort food. And that spiderweb icing? It’s the kind of detail that makes people think you spent way more time than you actually did.
What makes this recipe different from the dozens of other pumpkin hand pie recipes out there is the technique. Instead of using a wet, heavy filling that soaks through the pastry, I use a slightly thickened pumpkin mixture that stays put. The crust stays crisp, the filling stays creamy, and the whole thing holds together beautifully. This isn’t just another version—it’s the version I’d serve to anyone who says they don’t like pumpkin desserts.
What Ingredients You Will Need
This recipe uses simple, wholesome ingredients to deliver bold flavor and satisfying texture without the fuss. Most of these are pantry staples, which makes these hand pies an easy last-minute treat.
- For the Filling:
- 1 cup (240g) pumpkin puree (not pumpkin pie filling—make sure it’s 100% pure pumpkin)
- 1/4 cup (50g) brown sugar, packed (adds depth and moisture)
- 1 large egg yolk (helps thicken the filling and adds richness)
- 1 teaspoon pumpkin pie spice (or a mix of cinnamon, nutmeg, ginger, and cloves)
- 1/2 teaspoon vanilla extract
- Pinch of salt (balances the sweetness)
- For the Pastry:
- 1 package (17.3 oz, 490g) frozen puff pastry sheets, thawed (I prefer Pepperidge Farm for consistent results, but any brand works)
- 1 large egg, beaten (for egg wash—gives that golden-brown finish)
- 1 tablespoon granulated sugar (for sprinkling on top)
- For the Spiderweb Icing:
- 1/2 cup (60g) powdered sugar
- 1–2 tablespoons milk (start with 1 tablespoon and add more as needed)
- 1/4 teaspoon vanilla extract
- 1 tablespoon unsweetened cocoa powder (for the dark spiderweb lines)
I recommend using Libby’s pumpkin puree for the best flavor and texture. It’s consistently thick and not watery, which is crucial for hand pies. If you’re using a different brand, you might need to drain any excess liquid by pressing the puree through a fine-mesh strainer.
For a gluten-free option, you can substitute the puff pastry with a gluten-free pie crust or puff pastry alternative. Just keep in mind that gluten-free pastry tends to be more delicate, so handle it gently.
If you don’t have pumpkin pie spice on hand, mix 1/2 teaspoon cinnamon, 1/4 teaspoon nutmeg, 1/8 teaspoon ginger, and a pinch of cloves. That’s pretty much the same thing.
Equipment Needed
You don’t need a ton of fancy equipment for these hand pies, which is part of why I love making them. Here’s what you’ll need:
- Baking sheet (a standard half-sheet pan works perfectly)
- Parchment paper (non-negotiable—prevents sticking and makes cleanup a breeze)
- Rolling pin (for gently rolling out the puff pastry)
- Sharp knife or pizza cutter (for cutting the pastry into squares)
- Small bowl (for mixing the filling and icing)
- Pastry brush (for applying the egg wash)
- Fork (for crimping the edges of the hand pies)
- Piping bag or small zip-top bag (for the spiderweb icing—a sandwich bag with the tip snipped off works great)
- Cooling rack (optional but helpful for even cooling)
I’ve made these with both a pizza cutter and a sharp knife, and honestly, a pizza cutter is faster and gives you cleaner edges. If you don’t have a pastry brush, you can use a paper towel to dab on the egg wash—it’s not as pretty, but it gets the job done.
Preparation Method
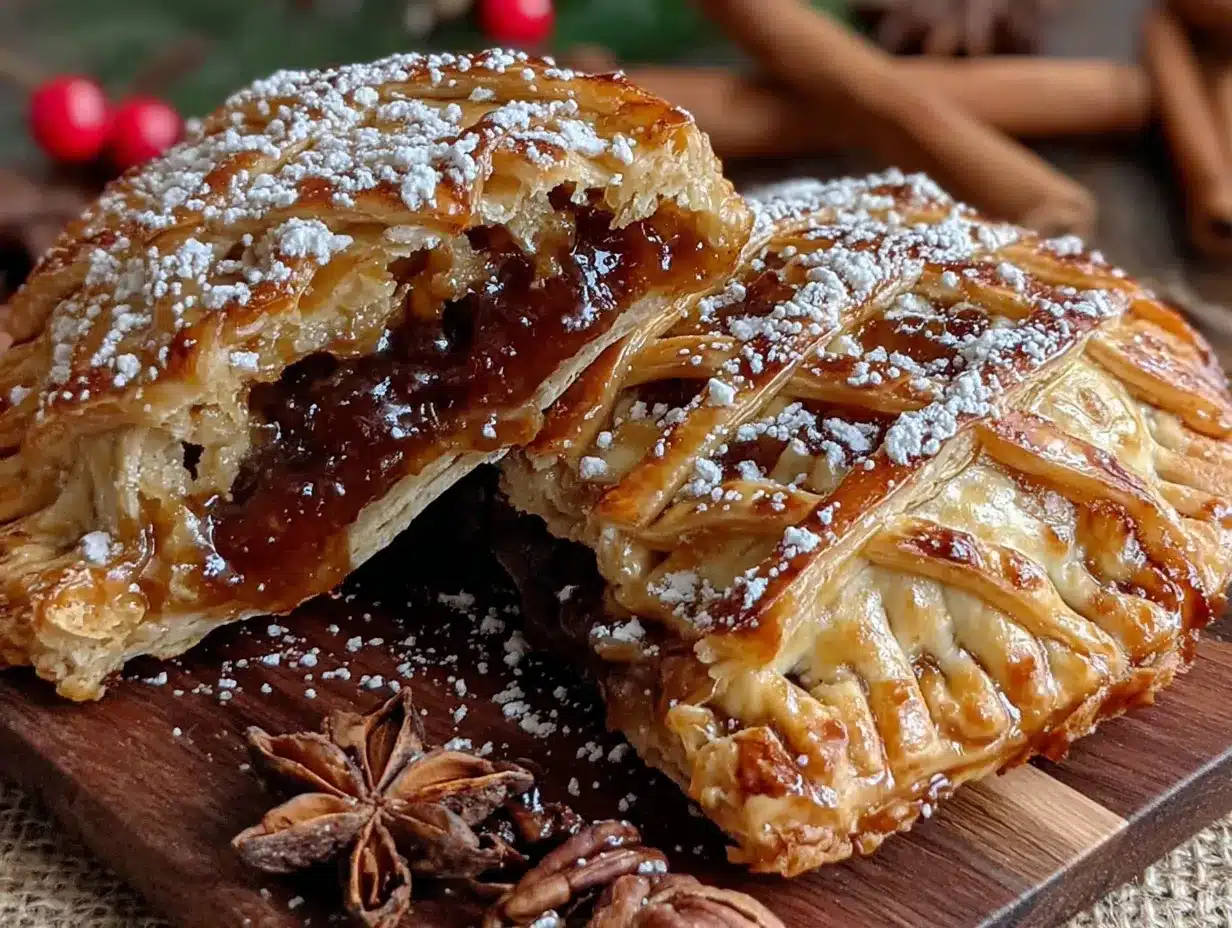
Let’s walk through this step by step. I’ll include all the little details I wish someone had told me the first time I made these.
- Preheat your oven to 400°F (200°C). Line a baking sheet with parchment paper and set it aside. Getting the oven hot before you start assembling is key—you want that immediate blast of heat to help the puff pastry rise.
- Make the filling. In a small bowl, combine 1 cup pumpkin puree, 1/4 cup packed brown sugar, 1 large egg yolk, 1 teaspoon pumpkin pie spice, 1/2 teaspoon vanilla extract, and a pinch of salt. Stir until everything is smooth and well combined. The mixture should be thick but spreadable—if it looks too runny, add another tablespoon of brown sugar or let it sit for a few minutes to thicken naturally.
- Prepare the puff pastry. Unfold the thawed puff pastry sheets on a lightly floured surface. Gently roll each sheet into a 12×12-inch square. Don’t press too hard—you just want to even out the thickness and smooth out any creases from the packaging. Cut each sheet into 4 equal squares (so you’ll have 8 squares total).
- Assemble the hand pies. Place about 1.5 tablespoons of the pumpkin filling in the center of 4 of the pastry squares. Spread it slightly, leaving at least a 1/2-inch border around the edges. Don’t overfill—I learned this the hard way when filling oozed out and made a mess on my baking sheet.
- Top and seal. Place the remaining 4 pastry squares on top of the filled ones. Press the edges firmly to seal, then use a fork to crimp the edges all around. This not only looks nice but also helps keep the filling inside. Cut 2 or 3 small slits on top of each hand pie to let steam escape—this prevents them from bursting open in the oven.
- Apply the egg wash. In a small bowl, beat 1 large egg with 1 tablespoon of water. Brush this mixture over the tops of the hand pies. Sprinkle a little granulated sugar on top for extra crunch and sparkle.
- Bake. Place the hand pies on the prepared baking sheet, leaving about 2 inches between each one. Bake for 18–22 minutes, or until the pastry is golden brown and puffed up. The filling should be bubbling slightly through the slits. Let them cool on the baking sheet for 5 minutes, then transfer to a cooling rack to cool completely before adding the icing.
- Make the spiderweb icing. While the hand pies cool, make the icing. In a small bowl, whisk together 1/2 cup powdered sugar, 1–2 tablespoons milk, and 1/4 teaspoon vanilla extract until smooth. The consistency should be thick but drizzling—like a thick glaze. Transfer about 2 tablespoons of this white icing to a separate small bowl and stir in 1 tablespoon cocoa powder to make the dark icing. If it’s too thick, add a few drops of milk.
- Decorate. Once the hand pies are completely cool, drizzle the white icing over each one in a thin, even layer. While the white icing is still wet, use the dark icing to create the spiderweb pattern. You can pipe small concentric circles with the dark icing, then drag a toothpick or skewer from the center outward to create the web effect. Or, for a simpler look, just drizzle both icings randomly—it still looks great.
- Let the icing set. Allow the hand pies to sit at room temperature for about 15–20 minutes so the icing firms up. Then they’re ready to serve!
Cooking Tips & Techniques
I’ve made plenty of mistakes with hand pies over the years, so let me save you some trouble. Here are the things I wish I’d known from the start.
Don’t overwork the puff pastry. Puff pastry is finicky—it gets tough if you handle it too much. Roll it gently, cut it cleanly, and try not to stretch it when you’re placing the top layer. If the pastry warms up too much, pop it in the fridge for 10 minutes before baking.
Watch your filling consistency. The biggest issue people run into is filling that’s too wet. If your pumpkin puree seems watery, spread it on a paper towel-lined plate for a few minutes to draw out excess moisture. This one step makes a huge difference in preventing soggy bottoms.
Temperature control is everything. Cold pastry + hot oven = flaky layers. Make sure your puff pastry is cold when it goes into the oven. If your kitchen is warm, refrigerate the assembled hand pies for 15 minutes before baking. This helps the butter in the pastry stay solid longer, which creates those beautiful flaky layers.
Don’t skip the egg wash. I know it’s an extra step, but the egg wash gives the pastry that gorgeous golden-brown color and helps the sugar stick. Without it, your hand pies will look pale and sad.
Let them cool completely. I’m guilty of rushing this step too. But if you add the icing while the hand pies are still warm, it will melt right off and turn into a sticky mess. Patience pays off here.
Variations & Adaptations
One of the best things about this recipe is how easy it is to change up. Here are a few variations I’ve tried and loved.
Vegan Version: Use a vegan puff pastry (many brands are accidentally vegan), substitute the egg yolk with 1 tablespoon of cornstarch mixed with 2 tablespoons of water, and use a plant-based milk for the icing. The texture will be slightly different, but the flavor is still great.
Spiced-Up Filling: If you like things a little more intense, add 1/4 teaspoon of cayenne pepper or a pinch of black pepper to the filling. The heat plays beautifully with the sweet pumpkin and warm spices. I tried this on a whim last fall and it was a hit at my Halloween party.
Apple-Pumpkin Combo: Mix 1/2 cup of finely diced apple (I prefer Granny Smith for tartness) into the pumpkin filling. It adds a nice texture contrast and a little extra sweetness. Just make sure the apple pieces are small enough that they don’t poke through the pastry.
Chocolate Drizzle: Instead of the spiderweb icing, drizzle melted dark chocolate over the cooled hand pies. It’s less decorative but equally delicious. I’ve done this when I was short on time, and nobody complained.
Savory Version: Skip the sugar and spices, and fill the pastry with a mixture of pumpkin puree, sautéed onions, sage, and shredded cheese. Bake as directed, and you’ve got a fantastic savory hand pie that’s perfect for lunch or a light dinner.
Serving & Storage Suggestions
These hand pies are best served at room temperature or slightly warm. If you want to reheat them, pop them in a 350°F (175°C) oven for 5–8 minutes—this brings back the flakiness without making the icing melt. Avoid the microwave unless you’re okay with soggy pastry.
For serving, I like to arrange them on a wooden board or a simple white platter. They look especially nice with a few fresh sage leaves or cinnamon sticks scattered around for a fall vibe. If you’re serving them at a party, consider pairing them with a side of vanilla ice cream or a dollop of whipped cream—the cold creaminess contrasts beautifully with the flaky pastry.
These also go great with a warm drink. A cup of spiced chai, apple cider, or a simple black coffee complements the pumpkin flavor perfectly. I’ve even served them alongside a batch of mini lemon blueberry cheesecakes for a dessert spread that covers all the bases—it’s a crowd-pleasing combo that works for any fall gathering.
Storage: Keep leftover hand pies in an airtight container at room temperature for up to 2 days. If you need to store them longer, refrigerate them for up to 5 days. The pastry will soften slightly in the fridge, but they’re still delicious.
Freezing: You can freeze the baked, undecorated hand pies for up to 3 months. Wrap each one individually in plastic wrap, then place them in a freezer bag. When you’re ready to serve, thaw them at room temperature, then add the icing. You can also freeze the assembled but unbaked hand pies—just freeze them on a baking sheet until solid, then transfer to a freezer bag. Bake from frozen, adding 3–5 minutes to the baking time.
One thing I’ve noticed is that the flavors actually deepen after a day or two. The spices meld together, and the pastry softens just enough to make the texture even more enjoyable. So don’t worry if you have leftovers—they’ll still be great.
Nutritional Information & Benefits
Here’s the approximate nutritional breakdown for one hand pie (based on 8 servings):
| Nutrient | Amount per Serving |
|---|---|
| Calories | 320 |
| Total Fat | 18g |
| Saturated Fat | 6g |
| Cholesterol | 35mg |
| Sodium | 210mg |
| Total Carbohydrates | 36g |
| Dietary Fiber | 2g |
| Sugars | 18g |
| Protein | 4g |
Pumpkin is packed with vitamin A, which supports eye health and immune function. It’s also a good source of fiber and potassium. The puff pastry isn’t exactly health food, but hey—everything in moderation, right? If you want to lighten things up, you can use a lower-fat pastry or reduce the sugar in the filling slightly.
These hand pies are vegetarian, and with a few swaps (vegan puff pastry and plant-based milk), they can easily be made vegan. They contain gluten, eggs, and dairy, so keep that in mind if you’re cooking for someone with allergies.
Conclusion
These Easy Spiderweb Pumpkin Hand Pies are the kind of recipe that makes you look forward to fall baking season. They’re fun to make, even more fun to decorate, and absolutely delicious to eat. Whether you’re making them for a Halloween party, a Thanksgiving dessert table, or just because you’re craving something cozy, they deliver every single time.
I love that this recipe doesn’t take itself too seriously. It’s forgiving, adaptable, and guaranteed to impress without requiring hours of work. That spiderweb pattern might look fancy, but honestly, it’s one of the easiest decorating tricks I know. And the best part? You can customize it however you want—spicier filling, different icing colors, or even a savory twist. The possibilities are endless.
If you make these, I’d love to hear how they turn out. Drop a comment below and let me know if you tried any variations, or share a photo of your spiderweb designs. And if you’re looking for more fall dessert inspiration, check out the full recipe collection on the site—there’s plenty more where this came from. Happy baking, and don’t forget to save room for seconds!
Frequently Asked Questions
Can I use pie crust instead of puff pastry?
Yes, you can definitely use pie crust. The texture will be more like a traditional pie rather than flaky layers, but it still works. Just roll the pie crust to about 1/8-inch thickness and proceed with the same assembly steps. Keep in mind that pie crust doesn’t puff up as much, so the hand pies will be a bit denser.
How do I prevent the filling from leaking out?
The key is not overfilling and making sure the edges are well sealed. Leave at least a 1/2-inch border around the filling, press the edges firmly with your fingers, then crimp with a fork. Also, don’t skip the steam vents on top—they release pressure so the pies don’t burst open in the oven.
Can I make these ahead of time?
Absolutely. You can assemble the hand pies (without the egg wash) up to a day in advance and keep them covered in the refrigerator. Add the egg wash right before baking. You can also bake them fully, cool them, and store them in an airtight container for up to 2 days. Add the icing just before serving for the best presentation.
What if I don’t have pumpkin pie spice?
No problem. Mix together 1/2 teaspoon cinnamon, 1/4 teaspoon nutmeg, 1/8 teaspoon ginger, and a pinch of cloves. That’s essentially pumpkin pie spice. If you’re missing one of these, just adjust the amounts of what you have—it’ll still taste great.
Can I freeze the unbaked hand pies?
Yes! Assemble the hand pies completely (including the egg wash), then freeze them on a baking sheet until solid. Transfer to a freezer bag and store for up to 3 months. When you’re ready to bake, place them directly from the freezer onto a parchment-lined baking sheet and add 3–5 minutes to the baking time. No need to thaw first.
Pin This Recipe!

Easy Spiderweb Pumpkin Hand Pies: Best Fall Dessert

These Easy Spiderweb Pumpkin Hand Pies are the fall dessert you’ll actually look forward to making. With a flaky, buttery crust and a rich, spiced pumpkin filling, topped with a delicate spiderweb icing, they’re perfect for Halloween parties, Thanksgiving dessert tables, or cozy weekend baking.
- Prep Time: 15 minutes
- Cook Time: 20 minutes
- Total Time: 35 minutes
- Yield: 8 servings 1x
- Category: Dessert
- Cuisine: American
Ingredients
- 1 cup (240g) pumpkin puree (not pumpkin pie filling)
- 1/4 cup (50g) brown sugar, packed
- 1 large egg yolk
- 1 teaspoon pumpkin pie spice
- 1/2 teaspoon vanilla extract
- Pinch of salt
- 1 package (17.3 oz, 490g) frozen puff pastry sheets, thawed
- 1 large egg, beaten (for egg wash)
- 1 tablespoon granulated sugar (for sprinkling)
- 1/2 cup (60g) powdered sugar
- 1–2 tablespoons milk
- 1/4 teaspoon vanilla extract
- 1 tablespoon unsweetened cocoa powder
Instructions
- Preheat your oven to 400°F (200°C). Line a baking sheet with parchment paper and set aside.
- Make the filling: In a small bowl, combine 1 cup pumpkin puree, 1/4 cup packed brown sugar, 1 large egg yolk, 1 teaspoon pumpkin pie spice, 1/2 teaspoon vanilla extract, and a pinch of salt. Stir until smooth and well combined.
- Prepare the puff pastry: Unfold the thawed puff pastry sheets on a lightly floured surface. Gently roll each sheet into a 12×12-inch square. Cut each sheet into 4 equal squares (8 squares total).
- Assemble the hand pies: Place about 1.5 tablespoons of the pumpkin filling in the center of 4 of the pastry squares. Spread slightly, leaving at least a 1/2-inch border.
- Top and seal: Place the remaining 4 pastry squares on top of the filled ones. Press edges firmly to seal, then use a fork to crimp the edges. Cut 2 or 3 small slits on top of each hand pie for steam vents.
- Apply the egg wash: In a small bowl, beat 1 large egg with 1 tablespoon of water. Brush over the tops of the hand pies. Sprinkle with granulated sugar.
- Bake: Place hand pies on the prepared baking sheet, leaving about 2 inches between each. Bake for 18–22 minutes, until golden brown and puffed. Let cool on the baking sheet for 5 minutes, then transfer to a cooling rack to cool completely.
- Make the spiderweb icing: In a small bowl, whisk together 1/2 cup powdered sugar, 1–2 tablespoons milk, and 1/4 teaspoon vanilla extract until smooth. Transfer about 2 tablespoons of this white icing to a separate bowl and stir in 1 tablespoon cocoa powder to make the dark icing.
- Decorate: Once hand pies are completely cool, drizzle the white icing over each in a thin, even layer. While still wet, use the dark icing to create a spiderweb pattern (pipe small concentric circles, then drag a toothpick from center outward).
- Let the icing set at room temperature for 15–20 minutes before serving.
Notes
Don’t overwork the puff pastry; keep it cold. If pumpkin puree seems watery, drain on paper towels. For best results, refrigerate assembled hand pies for 15 minutes before baking. Let cool completely before icing.
Nutrition
- Serving Size: 1 hand pie
- Calories: 320
- Sugar: 18
- Sodium: 210
- Fat: 18
- Saturated Fat: 6
- Carbohydrates: 36
- Fiber: 2
- Protein: 4
Keywords: pumpkin hand pies, spiderweb, fall dessert, Halloween, Thanksgiving, puff pastry, easy


