I ruined three pumpkin cake rolls before I figured out the secret to keeping them from cracking. The first one looked like a topographic map of the Grand Canyon. The second one was so dry it crumbled when I tried to roll it. The third one? Well, let’s just say the salted caramel filling turned into a puddle of sadness on the plate. I was this close to giving up on the whole idea. But something about the combination of warm pumpkin spice and that salty-sweet caramel kept pulling me back into the kitchen.
Honestly, I didn’t even grow up eating pumpkin rolls. My mom was more of a chocolate cake kind of baker. The first time I tasted one was at a friend’s Thanksgiving potluck, and I remember thinking, “This is good, but it could be so much better.” That’s when the idea of adding salted caramel popped into my head. I wanted that rich, buttery caramel to cut through the sweetness of the cream cheese filling. And I wanted the cake itself to be so tender and moist that rolling it felt almost effortless.
It took me six tries total—and a lot of patience—to get this Perfect Salted Caramel Pumpkin Cake Roll right. But now? I make it for every fall gathering, and people actually fight over the last slice. There’s just something about that first bite: the soft pumpkin cake, the creamy filling, and that little hit of salt that makes your taste buds sit up and pay attention. It’s not fancy or complicated once you know the tricks. It’s just honest, homemade goodness that tastes like autumn on a plate.
If you have ever been intimidated by the idea of rolling a cake, trust me, I get it. But this recipe is built for real people in real kitchens. You don’t need a fancy stand mixer or a pastry degree. You just need a good pan, a clean kitchen towel, and a little bit of faith. Let me show you how it is done.
Why You Will Love This Recipe
This isn’t just another pumpkin dessert that disappears after Thanksgiving. This Perfect Salted Caramel Pumpkin Cake Roll is the kind of recipe that makes you look like a baking hero with way less effort than people think. I have tested this version more times than I care to admit, and every single tweak was made with one goal: making it foolproof for home bakers.
- Quick & Easy: From start to finish, this cake comes together in about 45 minutes of active time. The hardest part is waiting for it to chill.
- Simple Ingredients: You probably already have most of what you need in your pantry right now. No weird specialty items or expensive extracts.
- Perfect for Fall Gatherings: Whether it is Thanksgiving, a Friendsgiving potluck, or just a cozy Sunday dinner, this cake roll steals the show every single time.
- Crowd-Pleaser: I have served this to kids, grandparents, and picky eaters. The plate always comes back empty.
- Unbelievably Delicious: The combination of spiced pumpkin cake, tangy cream cheese filling, and that ribbon of salted caramel is pure magic. It is the kind of dessert that makes people close their eyes while they eat it.
What makes this recipe different from all the others out there? Two things: the texture and the caramel. Most pumpkin rolls end up dry or dense because the batter gets overmixed or the cake gets overbaked. I am going to show you exactly how to avoid both. And the salted caramel? I am not talking about store-bought sauce dumped on top. We are making a simple, silky caramel that gets swirled right into the filling and drizzled over the finished roll. It adds that little bit of salt that makes the whole thing sing.
This is comfort food at its finest. It is the dessert you bring when you want to impress people without stressing yourself out. And honestly? It tastes even better the next day, which makes it perfect for making ahead.
What Ingredients You Will Need
Every ingredient in this recipe plays a specific role, and none of them are complicated. Here is what you will need to gather before you start baking.
For the Pumpkin Cake:
- 3 large eggs, room temperature (this matters for the fluffiest texture)
- 1 cup granulated sugar (200 grams, adds sweetness and structure)
- 2/3 cup pumpkin puree (160 grams, not pumpkin pie filling—make sure it is 100% pure pumpkin)
- 1 teaspoon vanilla extract
- 3/4 cup all-purpose flour (95 grams, spooned and leveled)
- 1 teaspoon baking powder
- 1 teaspoon pumpkin pie spice (or make your own with cinnamon, nutmeg, ginger, and cloves)
- 1/2 teaspoon ground cinnamon
- 1/4 teaspoon salt
- Powdered sugar, for dusting the towel (this is non-negotiable—do not skip it)
For the Salted Caramel Sauce:
- 1/2 cup granulated sugar (100 grams)
- 2 tablespoons unsalted butter, cut into pieces (28 grams)
- 1/4 cup heavy cream (60 ml, warmed slightly)
- 1/2 teaspoon flaky sea salt (plus more for finishing)
For the Cream Cheese Filling:
- 8 ounces cream cheese, softened (226 grams, full-fat works best here)
- 1/4 cup unsalted butter, softened (57 grams)
- 1 cup powdered sugar (120 grams, sifted if lumpy)
- 1 teaspoon vanilla extract
- 3 tablespoons salted caramel sauce (from the batch you just made)
I recommend using Libby’s canned pumpkin puree for consistent results. Some store brands are more watery and can throw off the texture. For the caramel, use a good-quality butter like Kerrygold if you can—it makes a noticeable difference in richness. And please, do not skip the flaky sea salt on top. That final sprinkle is what makes this a salted caramel pumpkin cake roll, and it balances the sweetness perfectly.
If you need a dairy-free option, you can substitute the butter with a vegan butter stick and use a dairy-free cream cheese alternative. Just know the texture of the filling will be slightly softer. For a gluten-free version, swap the all-purpose flour with a 1:1 gluten-free baking blend that contains xanthan gum.
Equipment Needed
You do not need a bakery-level kitchen for this recipe. Here is what you will actually use:
- 10×15-inch jelly roll pan (also called a half-sheet pan—this is the standard size for cake rolls)
- Parchment paper (not wax paper, it will stick)
- Electric hand mixer or stand mixer (you can whisk by hand, but your arm will get tired)
- Clean kitchen towel (a thin cotton one works best—avoid terry cloth)
- Small saucepan for the caramel (light-colored metal helps you see the color change)
- Rubber spatula
- Wire rack for cooling
- Sifter or fine-mesh strainer for dusting powdered sugar
- Sharp knife for slicing clean pieces
If you do not have a jelly roll pan, you can use a 9×13-inch baking dish, but the cake will be thicker and harder to roll. The baking time will also change slightly. I have tried both, and the 10×15 pan really is the sweet spot for getting that thin, flexible cake layer. Budget-friendly pans from Nordic Ware or Wilton work great and cost under $20.
Preparation Method
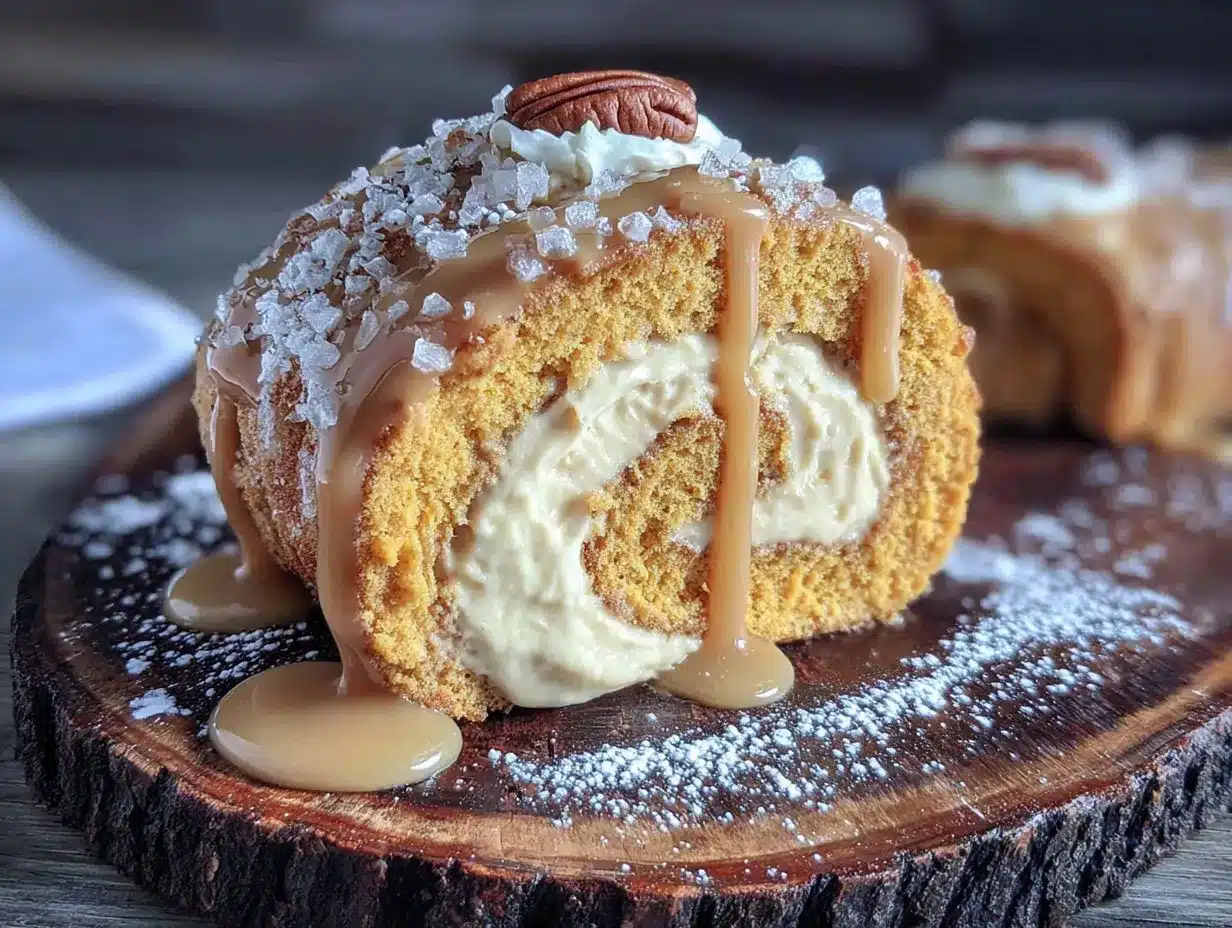
Let me walk you through this step by step. I have made this cake roll more times than I can count, so I am going to tell you exactly what to look for at each stage.
Step 1: Preheat and Prepare the Pan
Preheat your oven to 350°F (175°C). Line your 10×15-inch jelly roll pan with parchment paper, leaving a little overhang on the long sides. Lightly spray the parchment with nonstick cooking spray. This extra step ensures the cake releases cleanly.
Step 2: Make the Pumpkin Cake Batter
In a large mixing bowl, beat the eggs with an electric mixer on medium speed for about 1 minute until they are foamy and slightly thickened. Gradually add the granulated sugar and continue beating for another 2 minutes until the mixture is pale and thick. This step creates the structure that will hold your cake together without making it tough.
Add the pumpkin puree and vanilla extract, then beat on low until just combined. In a separate small bowl, whisk together the flour, baking powder, pumpkin pie spice, cinnamon, and salt. Add the dry ingredients to the wet mixture in two additions, mixing on low speed after each until just incorporated. Do not overmix here—stop as soon as you cannot see any more streaks of flour. Overmixing develops gluten and makes the cake tough, which leads to cracking when you roll it.
Step 3: Bake the Cake
Spread the batter evenly into the prepared pan using an offset spatula or the back of a spoon. It will be a thin layer—that is exactly what you want. Bake for 12 to 14 minutes. The cake is done when it springs back lightly when touched in the center and the edges just start to pull away from the pan. Do not overbake it. A dry cake will crack. I have learned this the hard way.
Step 4: The Rolling Trick
While the cake is baking, lay your clean kitchen towel flat on the counter and dust it generously with powdered sugar. As soon as the cake comes out of the oven, run a knife around the edges to loosen it. Invert the cake onto the sugared towel, then carefully peel off the parchment paper. Starting at one of the short ends, roll the cake and towel together into a tight log. Let it cool completely in this rolled position, seam-side down. This is the secret to training the cake to hold its shape without cracking later.
Step 5: Make the Salted Caramel Sauce
While the cake cools, make the caramel. Place the granulated sugar in a small saucepan over medium heat. Stir constantly with a rubber spatula or wooden spoon. The sugar will clump first, then melt into a golden amber liquid. This takes about 5 to 7 minutes. Do not walk away—caramel can burn in seconds. Once the sugar is completely melted and reaches a deep amber color, remove it from the heat and immediately whisk in the butter pieces. The mixture will bubble up, so be careful. Slowly drizzle in the warm heavy cream while whisking constantly. Stir in the flaky sea salt. Let the caramel cool for about 10 minutes. It will thicken as it cools.
Step 6: Prepare the Cream Cheese Filling
In a medium bowl, beat the softened cream cheese and butter together until smooth and creamy. Add the powdered sugar and vanilla extract, then beat until fluffy. Fold in 3 tablespoons of the cooled salted caramel sauce. Taste it. Adjust the salt or sweetness if you want.
Step 7: Assemble the Cake Roll
Once the cake is completely cool, carefully unroll it. It will want to curl back a little—that is normal. Spread the cream cheese filling evenly over the entire surface, leaving a 1/2-inch border around the edges. Re-roll the cake tightly, this time without the towel. Wrap the roll in plastic wrap and refrigerate for at least 2 hours, or overnight. Chilling is essential for clean slices.
Step 8: Finish and Serve
Before serving, trim the ends for a clean look. Drizzle the remaining salted caramel sauce over the top and sprinkle with a little extra flaky sea salt. Slice with a sharp knife, wiping the blade clean between cuts for picture-perfect pieces.
Cooking Tips & Techniques
I have made every mistake in the book with this recipe, so let me save you the trouble. The biggest issue most people face is cracking. Here is what I have learned: temperature is everything. If your cake is overbaked, it will crack. If you let it cool completely before rolling it in the towel, it will crack. The roll must happen while the cake is still warm from the oven. That initial roll in the towel is what trains the cake to bend without breaking.
Another mistake I made early on was using cold cream cheese in the filling. Cold cream cheese creates lumpy filling that tears the delicate cake when you spread it. Let your cream cheese sit on the counter for at least an hour before you start. If you are in a rush, cut it into small cubes and microwave it for 10-second intervals until soft but not melted.
For the caramel, patience is your best friend. I used to crank up the heat to speed things up, and I ended up with burnt sugar more times than I want to admit. Keep the heat on medium, stir constantly, and trust the process. The caramel will look like it is never going to melt, then suddenly it will turn into liquid gold. That is when you act fast.
One more thing: when you spread the filling, leave a border. If you take the filling all the way to the edges, it will squeeze out when you roll the cake and make a mess. A little border gives the filling room to spread naturally without escaping.
If you are making this for a special occasion, make it a day ahead. The flavors actually get better overnight, and the cake slices more cleanly when it is fully chilled. I always make mine the night before Thanksgiving, and it is one less thing to worry about on the big day.
Variations & Adaptations
One of the best things about this recipe is how easy it is to change up. Here are a few variations I have tried and loved:
1. Chocolate Pumpkin Roll
Replace 2 tablespoons of the all-purpose flour with unsweetened cocoa powder. The chocolate and pumpkin combination is surprisingly good, and it looks gorgeous with the cream cheese filling. I made this version for a Halloween party last year and it disappeared faster than the candy bowl.
2. Maple Pecan Twist
Add 1/2 cup of finely chopped toasted pecans to the cream cheese filling. Swap the vanilla extract in the filling for maple extract. Drizzle the finished roll with maple syrup instead of caramel. This version tastes like a stack of pancakes in cake form, and it is perfect for brunch.
3. Gluten-Free Version
Use a 1:1 gluten-free baking blend that contains xanthan gum. I have tested this with Bob’s Red Mill 1:1 Baking Flour and it worked beautifully. The texture is slightly more delicate, so be extra gentle when rolling. Let the cake cool completely before handling.
4. Lower Sugar Option
Reduce the sugar in the cake to 3/4 cup and use a sugar substitute like monk fruit sweetener in the filling. The caramel will still need real sugar for proper texture, but you can use a sugar-free caramel sauce if you prefer. The cake will be slightly less tender, but it still rolls well.
I personally love the maple pecan version for fall brunches. The crunch of the pecans adds a nice contrast to the soft cake and creamy filling. Just make sure you toast the pecans first—it brings out their natural oils and makes them taste nuttier.
Serving & Storage Suggestions
This cake roll is best served chilled, straight from the refrigerator. The filling firms up beautifully when cold, which makes for clean, Instagram-worthy slices. Let the cake sit at room temperature for about 5 minutes before slicing if you want a slightly softer filling. Use a sharp serrated knife and wipe it clean between each cut for the neatest slices.
For presentation, I like to arrange the slices on a wooden board with a dusting of cinnamon and a few fresh cranberries scattered around. It looks festive without being fussy. If you are serving this at a holiday dinner, a dollop of whipped cream on the side never hurts.
Storage is simple. Wrap the uncut roll tightly in plastic wrap and keep it in the refrigerator for up to 4 days. The flavors actually deepen over the first 24 hours. I have also frozen this cake roll successfully. Wrap it in plastic wrap, then a layer of aluminum foil, and freeze for up to 2 months. Thaw it in the refrigerator overnight before serving. Drizzle the caramel sauce on top after thawing, not before.
Leftover slices can be stored in an airtight container in the fridge for up to 3 days. They are delicious cold, but you can also microwave a slice for about 15 seconds if you want a warm, melty experience. Just be careful not to overheat it or the filling will turn runny.
Nutritional Information & Benefits
Here is the estimated nutritional breakdown for one slice of this Perfect Salted Caramel Pumpkin Cake Roll (based on 10 slices):
| Nutrient | Amount Per Slice |
|---|---|
| Calories | 320 |
| Total Fat | 16g |
| Saturated Fat | 9g |
| Cholesterol | 95mg |
| Sodium | 260mg |
| Total Carbohydrates | 42g |
| Dietary Fiber | 1g |
| Sugars | 33g |
| Protein | 5g |
Pumpkin is packed with vitamin A, which supports eye health and immune function. It also provides a good dose of fiber and antioxidants. The cream cheese filling adds calcium and protein, while the eggs contribute high-quality protein and essential amino acids. This is not a health food, but it is a dessert made with real ingredients that offer some nutritional value beyond empty calories.
If you are watching your sugar intake, you can reduce the caramel drizzle on top or skip it entirely. The cake and filling are sweet enough on their own. For a lower-fat option, use reduced-fat cream cheese, though the texture will be slightly less rich.
This recipe contains dairy, eggs, and gluten. If you have allergies, please check the variations section above for suitable substitutions.
Conclusion
This Perfect Salted Caramel Pumpkin Cake Roll is the kind of dessert that makes people think you spent hours in the kitchen when you really just followed a few simple steps. It is forgiving enough for beginners and impressive enough for experienced bakers. The combination of tender pumpkin cake, tangy cream cheese filling, and that ribbon of salted caramel is honestly unforgettable.
I have made this cake for Thanksgiving dinners, fall brunches, and even just because it was a rainy Saturday and I needed something cozy. Every single time, it delivers. The best part? You can customize it to fit your taste, your dietary needs, or whatever ingredients you have on hand. That is what real home cooking is all about.
If you give this recipe a try, I would love to hear how it turns out. Leave a comment below and let me know if you added your own twist. Did you go with the chocolate version? The maple pecan? Or did you stick with the original? Share your photos and tag me—I cannot wait to see your beautiful cake rolls. Happy baking, friends!
Frequently Asked Questions
1. Why did my pumpkin cake roll crack when I rolled it?
Cracking usually happens for one of three reasons: the cake was overbaked, it cooled too much before the initial roll in the towel, or the filling was too thick. Make sure you roll the cake while it is still warm, and do not bake it longer than 14 minutes. If the cake feels dry to the touch when it comes out of the oven, it is already overdone.
2. Can I use store-bought caramel sauce instead of making my own?
You absolutely can, but the flavor will not be the same. Homemade salted caramel has a deeper, more complex taste and lets you control the salt level. If you are short on time, look for a high-quality jarred caramel sauce and stir in a pinch of flaky sea salt before using it.
3. How do I get clean slices without smearing the filling?
Chill the cake roll for at least 2 hours before slicing. Use a sharp serrated knife and wipe the blade clean with a damp paper towel between each cut. If you want perfect edges, trim the very ends off before slicing the rest of the roll.
4. Can I make this recipe without a jelly roll pan?
Yes, but the results will vary. A 9×13-inch pan will give you a thicker cake that is harder to roll without cracking. If you use a different pan, keep a close eye on the baking time and start checking for doneness at the 10-minute mark. The cake should be just set and springy to the touch.
5. How far in advance can I make this cake roll?
You can make this cake roll up to 2 days ahead of time and keep it wrapped in the refrigerator. It actually tastes better after the flavors have had time to meld. For longer storage, freeze the un-sliced roll for up to 2 months. Thaw it overnight in the fridge before serving.
If you loved this recipe, you might also enjoy our mini lemon blueberry cheesecakes for another show-stopping dessert that is perfect for parties. And for more seasonal baking inspiration, browse our full collection of recipes.
Pin This Recipe!
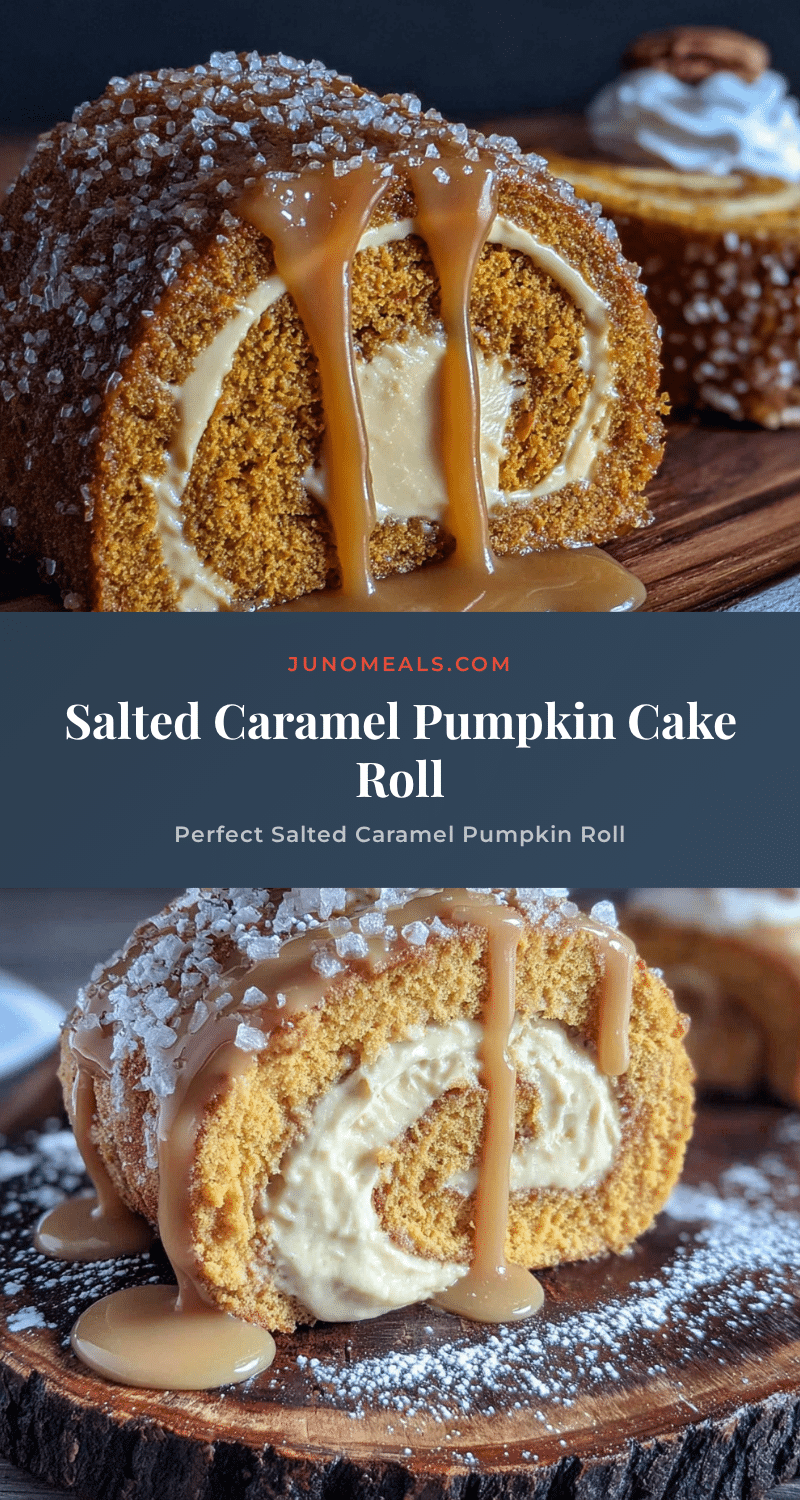
Perfect Salted Caramel Pumpkin Cake Roll
A tender pumpkin cake rolled with a tangy cream cheese filling and swirled with homemade salted caramel. This foolproof recipe is perfect for fall gatherings and tastes even better the next day.
- Prep Time: 45 minutes
- Cook Time: 14 minutes
- Total Time: 2 hours 59 minutes (includes chilling)
- Yield: 10 servings 1x
- Category: Dessert
- Cuisine: American
Ingredients
- 3 large eggs, room temperature
- 1 cup granulated sugar (200 grams)
- 2/3 cup pumpkin puree (160 grams, not pumpkin pie filling)
- 1 teaspoon vanilla extract
- 3/4 cup all-purpose flour (95 grams, spooned and leveled)
- 1 teaspoon baking powder
- 1 teaspoon pumpkin pie spice
- 1/2 teaspoon ground cinnamon
- 1/4 teaspoon salt
- Powdered sugar, for dusting the towel
- 1/2 cup granulated sugar (100 grams, for caramel)
- 2 tablespoons unsalted butter, cut into pieces (28 grams)
- 1/4 cup heavy cream (60 ml, warmed slightly)
- 1/2 teaspoon flaky sea salt (plus more for finishing)
- 8 ounces cream cheese, softened (226 grams)
- 1/4 cup unsalted butter, softened (57 grams)
- 1 cup powdered sugar (120 grams, sifted if lumpy)
- 1 teaspoon vanilla extract
- 3 tablespoons salted caramel sauce (from the batch you just made)
Instructions
- Preheat oven to 350°F (175°C). Line a 10×15-inch jelly roll pan with parchment paper, leaving overhang on the long sides. Lightly spray the parchment with nonstick cooking spray.
- In a large mixing bowl, beat the eggs with an electric mixer on medium speed for about 1 minute until foamy and slightly thickened. Gradually add the granulated sugar and continue beating for another 2 minutes until pale and thick.
- Add the pumpkin puree and vanilla extract, then beat on low until just combined.
- In a separate small bowl, whisk together the flour, baking powder, pumpkin pie spice, cinnamon, and salt. Add the dry ingredients to the wet mixture in two additions, mixing on low speed after each until just incorporated. Do not overmix.
- Spread the batter evenly into the prepared pan. Bake for 12 to 14 minutes, until the cake springs back when touched in the center and the edges just start to pull away from the pan.
- While the cake is baking, lay a clean kitchen towel flat on the counter and dust it generously with powdered sugar. As soon as the cake comes out of the oven, run a knife around the edges to loosen it. Invert the cake onto the sugared towel, then carefully peel off the parchment paper. Starting at one of the short ends, roll the cake and towel together into a tight log. Let it cool completely in this rolled position, seam-side down.
- While the cake cools, make the salted caramel sauce. Place the granulated sugar in a small saucepan over medium heat. Stir constantly until the sugar melts into a deep amber color, about 5 to 7 minutes. Remove from heat and immediately whisk in the butter pieces. Slowly drizzle in the warm heavy cream while whisking constantly. Stir in the flaky sea salt. Let cool for about 10 minutes.
- In a medium bowl, beat the softened cream cheese and butter together until smooth and creamy. Add the powdered sugar and vanilla extract, then beat until fluffy. Fold in 3 tablespoons of the cooled salted caramel sauce.
- Once the cake is completely cool, carefully unroll it. Spread the cream cheese filling evenly over the entire surface, leaving a 1/2-inch border around the edges. Re-roll the cake tightly, this time without the towel. Wrap the roll in plastic wrap and refrigerate for at least 2 hours, or overnight.
- Before serving, trim the ends for a clean look. Drizzle the remaining salted caramel sauce over the top and sprinkle with a little extra flaky sea salt. Slice with a sharp knife, wiping the blade clean between cuts.
Notes
Roll the cake while it is still warm to prevent cracking. Use room temperature cream cheese for a smooth filling. For best results, make the cake roll a day ahead and refrigerate overnight. The caramel sauce can be made ahead and stored in the refrigerator.
Nutrition
- Serving Size: 1 slice
- Calories: 320
- Sugar: 33
- Sodium: 260
- Fat: 16
- Saturated Fat: 9
- Carbohydrates: 42
- Fiber: 1
- Protein: 5
Keywords: pumpkin cake roll, salted caramel, pumpkin dessert, fall dessert, Thanksgiving dessert, cream cheese filling


