The first time I packed a ham and cheese slider in a lunchbox, I fully expected it to come back uneaten. Soggy bread, lukewarm meat, sad cheese—I had seen it happen a hundred times with other sandwiches. But I was desperate. My kid had gone through a phase where everything I packed came home untouched, and I needed something—anything—that might actually get eaten. So I threw a few sliders together, wrapped them tight, and hoped for the best.
That afternoon, the lunchbox came back empty. Not just empty—clean. No crusts left behind, no suspicious nibbles. Just crumbs. And a sticky note from my kid that said “More please.”
That was the moment I stopped being a skeptic. I became a believer in the power of a well-made, make-ahead ham and cheese slider. These little sandwiches are not just convenient—they are a lunchbox miracle. They hold up beautifully, taste great cold or at room temperature, and somehow manage to stay soft without turning into a mushy mess. Honestly, I thought the whole “make-ahead lunch” thing was overhyped until I tried these.
Now, I make a batch every Sunday. They save my sanity on busy mornings, and they actually make my kids happy. If you have ever doubted that a pre-made sandwich could be this good, I get it. But trust me on this one.
Why You Will Love This Recipe
Let me tell you why these Easy Make-Ahead Ham and Cheese Sliders for Lunchboxes have become a non-negotiable in my weekly meal prep routine. I have tested this recipe more times than I can count, tweaking the bread-to-filling ratio, the butter glaze, and the wrapping method until everything was just right. Here is what makes them stand out:
- Quick & Easy: You can assemble a whole batch in under 15 minutes. No cooking required—just layer, brush, wrap, and go. Perfect for Sunday meal prep or a last-minute weekday scramble.
- Simple Ingredients: No fancy grocery trips needed. You probably already have everything in your kitchen right now. Hawaiian rolls, deli ham, cheese slices, butter, and a few pantry staples.
- Perfect for Lunchboxes: These sliders are designed to travel. They stay soft, hold their shape, and taste delicious even after hours in a lunchbox. No reheating required.
- Crowd-Pleaser: Kids love them. Adults love them. Even picky eaters who usually turn their noses up at sandwiches will happily devour these.
- Unbelievably Delicious: The secret is in the butter glaze. A simple brush of melted butter with a touch of mustard and poppy seeds transforms these humble sliders into something irresistible. The first time I made them, I ate three before they even made it into the lunchboxes.
What makes this recipe different from the rest? It is the balance of flavors and textures. The soft, slightly sweet Hawaiian roll, the salty ham, the creamy cheese, and the savory butter glaze come together in perfect harmony. Plus, the make-ahead method actually improves the texture—the flavors meld together overnight, creating a sandwich that tastes even better the next day.
This is not just another slider recipe. It is the one that will make your mornings easier, your kids happier, and your lunch packing routine actually enjoyable. And honestly, that is worth trying.
What Ingredients You Will Need
This recipe uses simple, wholesome ingredients that come together to create something truly special. The beauty of these sliders is that you probably already have most of these items in your kitchen. Here is everything you need:
For the Sliders
- 1 package (12 count) Hawaiian sweet rolls — These are the foundation of the recipe. The soft, slightly sweet texture holds up perfectly in lunchboxes. I recommend King’s Hawaiian or any brand you find in the bakery section. (Do not substitute with regular dinner rolls—the sweetness is key.)
- 1 pound thinly sliced deli ham — Look for good quality ham from the deli counter. Honey ham, smoked ham, or black forest ham all work beautifully. Avoid pre-packaged lunch meat if possible—it is usually too thin and can make the sliders soggy.
- 8 slices Swiss cheese — Swiss cheese melts beautifully and has a mild, nutty flavor that pairs perfectly with ham. You can also use provolone, mozzarella, or cheddar if you prefer.
For the Butter Glaze

- 1/2 cup unsalted butter, melted — Salted butter works too, but reduce the added salt in the seasoning. I prefer unsalted so I can control the sodium level.
- 2 tablespoons Dijon mustard — This adds a tangy kick that cuts through the richness of the ham and cheese. Yellow mustard or honey mustard are good alternatives.
- 2 tablespoons poppy seeds — These add a lovely crunch and visual appeal. If you do not have poppy seeds, you can skip them or substitute with sesame seeds.
- 1 tablespoon Worcestershire sauce — This adds depth and umami flavor. Do not skip it—it makes a big difference.
- 1 teaspoon garlic powder — For a subtle savory note. Onion powder works too.
- 1/2 teaspoon salt — Only if using unsalted butter. Adjust to taste.
- 1/4 teaspoon black pepper — Freshly ground is best.
Pro tip: For the best texture, make sure your ham is thinly sliced but not paper-thin. You want enough substance that each bite has a satisfying chew. I usually ask the deli counter to slice it on setting 3 or 4.
Substitution note: Need a dairy-free option? Use vegan butter and dairy-free cheese slices. The texture will be slightly different, but the flavor is still great. For a gluten-free version, use gluten-free Hawaiian rolls or your favorite gluten-free slider buns.
Equipment Needed
You do not need any fancy equipment for this recipe. Here is what you will need:
- 9×13 inch baking dish or rimmed baking sheet — This is where you will assemble and bake the sliders. A glass or ceramic dish works best for even heat distribution.
- Sharp knife or serrated knife — For cutting the rolls in half horizontally. A serrated knife works best to avoid squishing the soft bread.
- Small bowl — For mixing the butter glaze.
- Pastry brush — For brushing the glaze over the rolls. A silicone brush is easy to clean and works perfectly.
- Aluminum foil or plastic wrap — For covering the sliders during baking or storage.
- Parchment paper — Optional, but makes cleanup much easier.
If you do not have a pastry brush, you can use a spoon to drizzle the glaze evenly over the rolls. It works just as well. And if you do not have a 9×13 dish, a large cast iron skillet or even a cookie sheet with sides will do the job.
Preparation Method
Follow these steps carefully, and you will have perfect make-ahead ham and cheese sliders every single time. I have included all the little details that make a difference—the things I learned through trial and error so you do not have to make the same mistakes.
- Preheat your oven to 350°F (175°C). If you are making these for later, you can skip the preheating step and just assemble the sliders for storage. But if you plan to bake them right away, get the oven going first.
- Prepare the baking dish. Line your 9×13 inch baking dish with parchment paper or lightly grease it with butter or cooking spray. This prevents sticking and makes cleanup a breeze.
- Slice the Hawaiian rolls in half horizontally. Keep the rolls connected—do not separate them into individual rolls. Using a serrated knife, carefully cut through the entire slab of rolls to create a top half and a bottom half. Place the bottom half in the prepared baking dish. (Tip: If the rolls are stuck together, you can gently separate them and reassemble them in the dish. Just make sure they fit snugly.)
- Layer the ham. Arrange half of the ham slices evenly over the bottom half of the rolls. Make sure to cover the entire surface so every bite has ham. I like to slightly overlap the slices for even distribution.
- Add the cheese. Place the Swiss cheese slices over the ham. If the slices are large, you can cut them in half to fit better. The cheese should cover the ham completely—this helps hold everything together.
- Add the remaining ham. Layer the rest of the ham slices over the cheese. Again, make sure it is evenly distributed. This double layer of ham ensures every slider is packed with flavor.
- Place the top half of the rolls over the filling. Gently press down to secure everything in place. The rolls should fit snugly in the dish.
- Make the butter glaze. In a small bowl, combine the melted butter, Dijon mustard, poppy seeds, Worcestershire sauce, garlic powder, salt, and black pepper. Whisk until well combined. The mixture should be smooth and aromatic.
- Brush the glaze over the rolls. Using a pastry brush, generously brush the butter mixture over the tops of the rolls. Make sure every roll gets coated. The glaze will soak into the bread as it bakes, creating a golden, flavorful crust. Do not be shy—use all of the glaze.
- Let the sliders rest for 10 minutes. This allows the glaze to soak into the bread slightly. If you are baking immediately, proceed to the next step. If you are making these ahead, cover the dish tightly with plastic wrap or aluminum foil and refrigerate for up to 24 hours.
- Bake the sliders. Place the dish in the preheated oven and bake for 12-15 minutes, or until the cheese is melted and the tops are golden brown. The butter glaze will bubble and create a beautiful, shiny crust. (If baking from cold, add 5 minutes to the baking time.)
- Cool before slicing. Remove the sliders from the oven and let them cool in the pan for 5-10 minutes. This allows the cheese to set slightly, making them easier to cut. Use a sharp knife to cut along the seams of the rolls to separate them into individual sliders.
- Pack for lunchboxes. Let the sliders cool completely before packing. Wrap each slider individually in parchment paper or plastic wrap, then place in lunchboxes. They are ready to go!
Sensory cues: When the sliders are done, you should smell the warm butter, ham, and cheese. The tops should be golden brown and slightly crispy to the touch. If you gently press a slider, it should feel firm but springy. The cheese should be fully melted and oozing slightly from the edges.
Cooking Tips & Techniques
After making these sliders more times than I care to admit (and failing a few times along the way), I have learned some tricks that make all the difference. Here are my best tips:
- Do not overbake. The biggest mistake I made was leaving the sliders in the oven too long. They go from perfectly golden to dry and hard very quickly. Start checking at 12 minutes. The tops should be golden, and the cheese should be melted but not bubbling out everywhere.
- Let them rest. I know it is tempting to dig in right away, but letting the sliders rest for 5-10 minutes after baking is crucial. The cheese needs time to set, or everything will slide apart when you try to cut them. Trust me—I learned this the hard way.
- Use room temperature butter for the glaze. If your butter is too hot, it will cook the mustard and Worcestershire sauce, altering the flavor. Let the melted butter cool slightly before mixing in the other ingredients.
- Do not skip the Worcestershire sauce. It adds a depth of flavor that takes these sliders from good to incredible. If you do not have it, you can use soy sauce or a splash of balsamic vinegar as a substitute.
- Wrap individually for best results. When packing for lunchboxes, wrap each slider separately in parchment paper or plastic wrap. This prevents them from sticking together and keeps them fresh. I usually wrap them in parchment paper and secure with a piece of tape or a sticker.
- Make a double batch. These sliders freeze beautifully, so I always make two batches at once. One goes in the fridge for the week, and the other goes in the freezer for later. It saves so much time.
One of my biggest failures? I once forgot to add the cheese. I assembled the entire batch, brushed the glaze, baked them, and only realized when I bit into one that it was just ham and bread. My kids still ate them, but they were not nearly as good. Double-check your layers before baking!
Variations & Adaptations
One of the best things about this recipe is how versatile it is. Here are some of my favorite variations:
- Turkey and Swiss: Swap the ham for thinly sliced turkey breast. It is a lighter option that works just as well. I make these when I want a change from ham, and they are always a hit.
- Italian Style: Use salami, pepperoni, and provolone cheese. Add a layer of roasted red peppers or banana peppers for extra flavor. Brush the tops with garlic butter and sprinkle with Italian seasoning. These are perfect for a lunchbox twist on an Italian sub.
- Veggie Lover’s: Skip the meat and load up with roasted vegetables like zucchini, bell peppers, and mushrooms. Add fresh spinach and a slice of mozzarella. These are great for Meatless Monday or for vegetarian family members.
- Spicy Southwest: Use pepper jack cheese and add a layer of sliced jalapeños or chipotle peppers. Brush the tops with a mixture of melted butter and hot sauce. These pack a nice kick.
- Breakfast Sliders: Layer scrambled eggs, cooked bacon or sausage, and cheddar cheese. These are perfect for a hearty breakfast on the go. I make them for busy school mornings when we need something substantial.
My personal favorite variation? The Hawaiian BBQ version. I swap the Dijon mustard for BBQ sauce in the glaze and add a layer of caramelized onions. It is sweet, smoky, and absolutely irresistible. My kids fight over the last one every time.
Serving & Storage Suggestions
These sliders are incredibly versatile when it comes to serving and storage. Here is everything you need to know:
Serving Temperature: These sliders taste great warm, at room temperature, or even cold. For lunchboxes, I usually serve them at room temperature. They do not need to be reheated, which makes them perfect for on-the-go eating.
Presentation: If you are serving these for a party or gathering, arrange them on a platter with a small bowl of extra Dijon mustard or honey mustard for dipping. Garnish with fresh parsley or chives for a pop of color.
Complementary Dishes: These sliders pair beautifully with a simple side salad, fresh fruit, or crunchy vegetable sticks. For a more substantial meal, serve them with tomato soup or a bowl of chili. They also go great with mini lemon blueberry cheesecakes for dessert—a perfect lunchbox combo!
Storage Instructions: Store leftover sliders in an airtight container in the refrigerator for up to 4 days. To freeze, wrap each slider individually in plastic wrap, then place them in a freezer-safe bag or container. They will keep for up to 3 months.
Reheating Tips: To reheat, place the sliders on a baking sheet and warm them in a 350°F oven for 5-7 minutes. You can also microwave them for 20-30 seconds, but the bread will be softer. For frozen sliders, thaw them in the refrigerator overnight before reheating.
Flavor Development: Here is a secret—these sliders actually taste better the next day. The flavors meld together overnight, creating a more cohesive and delicious sandwich. So do not be afraid to make them a day ahead. In fact, I recommend it.
Nutritional Information & Benefits
Here is the approximate nutritional information for one slider (based on the recipe as written):
| Nutrient | Amount per Slider |
|---|---|
| Calories | 280 |
| Total Fat | 16g |
| Saturated Fat | 9g |
| Cholesterol | 55mg |
| Sodium | 720mg |
| Total Carbohydrates | 22g |
| Dietary Fiber | 1g |
| Sugars | 6g |
| Protein | 14g |
Health Benefits: Ham is a good source of protein, which helps keep kids full and focused throughout the school day. Swiss cheese provides calcium for strong bones and teeth. The butter glaze, while indulgent, adds healthy fats that support brain function. Plus, the portion-controlled size of these sliders makes them a great option for balanced eating.
Dietary Considerations: This recipe contains gluten, dairy, and eggs. For a gluten-free version, use gluten-free Hawaiian rolls. For a dairy-free version, use vegan butter and dairy-free cheese. Always check your ingredient labels for potential allergens.
My Personal Take: I love that these sliders give me control over what my kids are eating. I can choose high-quality ham, lower-sodium cheese, and adjust the butter glaze to my liking. They are a far cry from the processed, preservative-filled lunchbox options at the grocery store.
Conclusion
These Easy Make-Ahead Ham and Cheese Sliders for Lunchboxes have genuinely changed my mornings. No more scrambling to pack lunches, no more sad, soggy sandwiches coming home uneaten. Just happy kids and a few extra minutes of peace in the morning.
What I love most about this recipe is how customizable it is. You can switch up the meats, cheeses, and glazes to keep things interesting. My kids never get bored because I am always trying new combinations. And because they are so easy to make ahead, I never feel like I am stuck in a lunch-packing rut.
I would love to hear how these sliders work for your family. Do you have a favorite variation? A tip for making them even better? Drop a comment below and share your experience. And if you try this recipe, tag me in your photos—I love seeing your creations!
For more lunchbox-friendly recipes and meal prep ideas, check out our full collection of recipes. Happy packing, friends!
Frequently Asked Questions
Can I make these sliders without baking them?
Yes, absolutely! You can assemble the sliders, brush them with the glaze, and store them in the refrigerator without baking. When you are ready to eat, simply bake them as directed. This is a great option if you want to prep them the night before and bake them fresh in the morning.
How long do these sliders stay fresh in the fridge?
These sliders will stay fresh in the refrigerator for up to 4 days when stored in an airtight container. They actually taste better on the second day as the flavors meld together. Just make sure they are completely cooled before storing to prevent condensation.
Can I freeze these sliders?
Yes, these sliders freeze beautifully. Wrap each slider individually in plastic wrap, then place them in a freezer-safe bag or container. They will keep for up to 3 months. To thaw, transfer them to the refrigerator overnight. You can reheat them in the oven or microwave.
What is the best bread to use for these sliders?
Hawaiian sweet rolls are the best choice for these sliders. Their soft, slightly sweet texture holds up perfectly in lunchboxes and pairs beautifully with the savory ham and cheese. If you cannot find Hawaiian rolls, you can use other soft slider buns, but the flavor will be slightly different.
How do I prevent the sliders from getting soggy?
To prevent sogginess, make sure your ham is not too wet. Pat it dry with a paper towel if needed. Also, let the sliders cool completely before wrapping and storing. Finally, do not over-brush the glaze—you want a light, even coating, not a soaking.
Pin This Recipe!
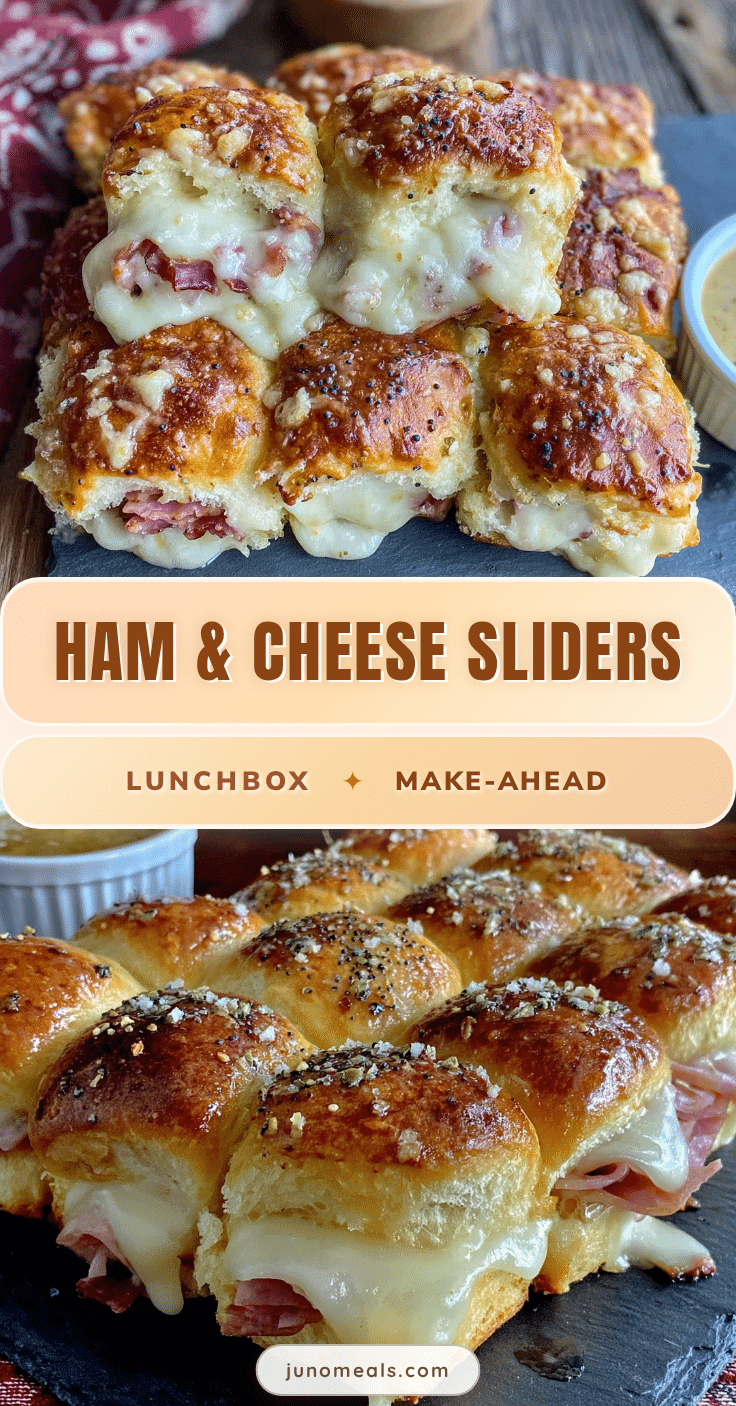
Easy Make-Ahead Ham & Cheese Sliders for Lunchboxes

These make-ahead ham and cheese sliders are a lunchbox miracle—they stay soft, hold their shape, and taste delicious even after hours in a lunchbox. Perfect for busy mornings, they are quick to assemble and packed with flavor from a savory butter glaze.
- Prep Time: 15 minutes
- Cook Time: 15 minutes
- Total Time: 30 minutes
- Yield: 12 sliders 1x
- Category: Main Course
- Cuisine: American
Ingredients
- 1 package (12 count) Hawaiian sweet rolls
- 1 pound thinly sliced deli ham
- 8 slices Swiss cheese
- 1/2 cup unsalted butter, melted
- 2 tablespoons Dijon mustard
- 2 tablespoons poppy seeds
- 1 tablespoon Worcestershire sauce
- 1 teaspoon garlic powder
- 1/2 teaspoon salt (if using unsalted butter)
- 1/4 teaspoon black pepper
Instructions
- Preheat your oven to 350°F (175°C).
- Line a 9×13 inch baking dish with parchment paper or lightly grease it with butter or cooking spray.
- Slice the Hawaiian rolls in half horizontally, keeping them connected. Place the bottom half in the prepared baking dish.
- Arrange half of the ham slices evenly over the bottom half of the rolls.
- Place the Swiss cheese slices over the ham, covering it completely.
- Layer the remaining ham slices over the cheese.
- Place the top half of the rolls over the filling and gently press down.
- In a small bowl, combine melted butter, Dijon mustard, poppy seeds, Worcestershire sauce, garlic powder, salt, and black pepper. Whisk until well combined.
- Brush the butter glaze generously over the tops of the rolls, using all of the glaze.
- Let the sliders rest for 10 minutes to allow the glaze to soak in.
- Bake for 12-15 minutes, or until the cheese is melted and the tops are golden brown.
- Remove from the oven and let cool in the pan for 5-10 minutes before slicing along the seams into individual sliders.
- Let cool completely before packing for lunchboxes. Wrap each slider individually in parchment paper or plastic wrap.
Notes
For best results, use thinly sliced deli ham (not paper-thin) and let the sliders rest after baking to allow the cheese to set. These sliders taste even better the next day as flavors meld. To freeze, wrap individually and store for up to 3 months. For a dairy-free version, use vegan butter and dairy-free cheese. For gluten-free, use gluten-free Hawaiian rolls.
Nutrition
- Serving Size: 1 slider
- Calories: 280
- Sugar: 6
- Sodium: 720
- Fat: 16
- Saturated Fat: 9
- Carbohydrates: 22
- Fiber: 1
- Protein: 14
Keywords: ham and cheese sliders, make-ahead lunch, lunchbox sandwiches, easy meal prep, kid-friendly lunch


