For a while, I just accepted that pumpkin snacks weren’t going to taste both truly comforting and convenient. I’d stumble through countless recipes that either took forever or ended up too dry or crumbly to enjoy. The craving was there—a chewy, flavorful pumpkin treat that could satisfy that autumn itch without demanding hours in the kitchen or turning into a sticky mess. I remember one chilly afternoon, stirring a pot of lukewarm pumpkin puree, wondering if this craving was simply going to be one of those elusive seasonal things you quietly settle for rather than actually get to enjoy.
It wasn’t about pumpkin spice hype or flash-in-the-pan trends. It was about a snack that felt like a little piece of fall you could grab on the go, something wholesome enough to hold you over but indulgent enough to feel like a treat. And honestly, I never thought a no-bake granola bar would fit the bill either—too often they’re crumbly or overly sweet, or worse, completely flavorless.
That quiet moment in the kitchen led me down a slow path of tweaking and tasting, balancing pumpkin with oats and just enough sweetness to keep it chewy and satisfying. The discovery didn’t feel like a big breakthrough—more like a gentle nod to the fact that sometimes the best snacks come from patience and a few simple staples. So when these easy no-bake pumpkin granola bars finally came together, it was less about a big reveal and more about a quiet nod to a craving finally met. They stuck around because they hit that chewy, comforting note every single time without fuss or frills.
Why You’ll Love This Recipe
After making these easy no-bake pumpkin granola bars several times, I can say they truly stand out for a few reasons that make them a staple in my autumn snack rotation:
- Quick & Easy: These bars come together in just 15 minutes, no oven needed—perfect for rushed mornings or last-minute snack cravings.
- Simple Ingredients: You probably already have most of what you need in your pantry, from rolled oats to pumpkin puree and just a touch of honey or maple syrup.
- Perfect for Autumn Snacking: They’re the ideal chewy snack to pack in lunchboxes or enjoy alongside a warm cup of tea on crisp fall afternoons.
- Crowd-Pleaser: Kids, adults, and even those who usually skip pumpkin-flavored treats have all given these bars thumbs-up—they’re that good.
- Unbelievably Delicious: The texture is chewy but not sticky, with a subtle pumpkin flavor that’s balanced by warm spices and a hint of sweetness.
What really sets this recipe apart is the balance of moisture and flavor. I learned that blending a bit of nut butter into the mix helps bind everything without needing syrup overload, and a dash of cinnamon and nutmeg rounds out the pumpkin without overpowering it. It’s comfort food in a bar, reimagined for busy days and easy snacking.
Honestly, these bars feel like a little secret I’m happy to share—snacks that are nourishing and cozy without needing to bake or fuss. They’re just the kind of recipe that quietly makes autumn afternoons a bit sweeter.
What Ingredients You Will Need
This recipe uses simple, wholesome ingredients to deliver bold fall flavor and a satisfying chewy texture without much fuss. Most of these are pantry staples, making it easy to whip up a batch whenever the pumpkin craving strikes.
- Rolled Oats (2 cups / 180 g) – The base for chewiness; I prefer old-fashioned oats for the best texture.
- Pumpkin Puree (1 cup / 240 ml) – Use canned or homemade; just make sure it’s plain pumpkin and not pumpkin pie filling.
- Nut Butter (1/2 cup / 120 g) – Creamy almond or peanut butter works well to bind and add richness (try Justin’s or Smucker’s Natural).
- Honey or Maple Syrup (1/3 cup / 80 ml) – Adds natural sweetness and stickiness; maple syrup gives a nice depth for autumn vibes.
- Ground Cinnamon (1 tsp) – Essential for that warm pumpkin spice note.
- Ground Nutmeg (1/4 tsp) – Just a pinch to round out the spices.
- Vanilla Extract (1 tsp) – For subtle sweetness and aroma.
- Salt (1/4 tsp) – Balances sweetness and enhances flavors.
- Mini Chocolate Chips or Dried Cranberries (optional, 1/2 cup / 85 g) – Adds a fun twist; I like to add these for occasional batches.
If you want a gluten-free option, make sure your oats are certified gluten-free. For dairy-free, nut butters are naturally good, and maple syrup keeps things vegan-friendly. In the summer, I sometimes swap pumpkin puree for mashed ripe bananas, but pumpkin’s flavor really brings this into autumn territory.
Equipment Needed
- Mixing Bowl: A medium bowl for combining ingredients works fine; nothing fancy needed.
- Measuring Cups and Spoons: Accuracy helps, especially with the spices and wet ingredients.
- Spatula or Wooden Spoon: For mixing everything together thoroughly.
- 8×8-inch Baking Pan or Square Dish: For pressing the granola mixture evenly; lined with parchment paper for easy removal.
- Refrigerator Space: To chill and set the bars for at least an hour.
No special appliances like food processors or mixers required, which I appreciate on busy days. If you don’t have parchment paper, lightly greasing the pan works in a pinch, but the bars are easier to cut and lift when the paper is used. I’ve tried silicone mats too, but parchment is my go-to—it keeps things simple and clean.
Preparation Method
- Prepare Your Pan: Line an 8×8-inch (20×20 cm) square baking pan with parchment paper, leaving some overhang for easy bar removal. This usually takes 2 minutes.
- Mix Wet Ingredients: In a medium bowl, combine 1 cup (240 ml) pumpkin puree, 1/2 cup (120 g) nut butter, 1/3 cup (80 ml) honey or maple syrup, and 1 tsp vanilla extract. Stir until smooth and fully blended, about 2-3 minutes. You’ll notice the mix thickening nicely here.
- Add Spices and Salt: Sprinkle in 1 tsp ground cinnamon, 1/4 tsp ground nutmeg, and 1/4 tsp salt. Stir to combine. The fragrance at this stage is quietly comforting—warm and inviting.
- Fold in Rolled Oats: Add 2 cups (180 g) rolled oats to the wet mixture. Use a spatula to fold everything together until the oats are evenly coated. It will look sticky and dense but not runny. This takes about 3-4 minutes—don’t rush; you want every oat touched by the pumpkin mixture.
- Optional Add-ins: Stir in 1/2 cup (85 g) mini chocolate chips or dried cranberries if you’re using them. These add a lovely surprise of texture and flavor in every bite.
- Press Into Pan: Transfer the mixture to the prepared pan. Use the back of a spoon or your hands (lightly wet to avoid sticking) to press the mixture evenly and firmly into the pan. This step is key for bars that hold together well. Take your time—2-3 minutes here is worth it.
- Chill and Set: Place the pan in the refrigerator and chill for at least 1 hour. This helps the bars firm up and become chewy but not too soft.
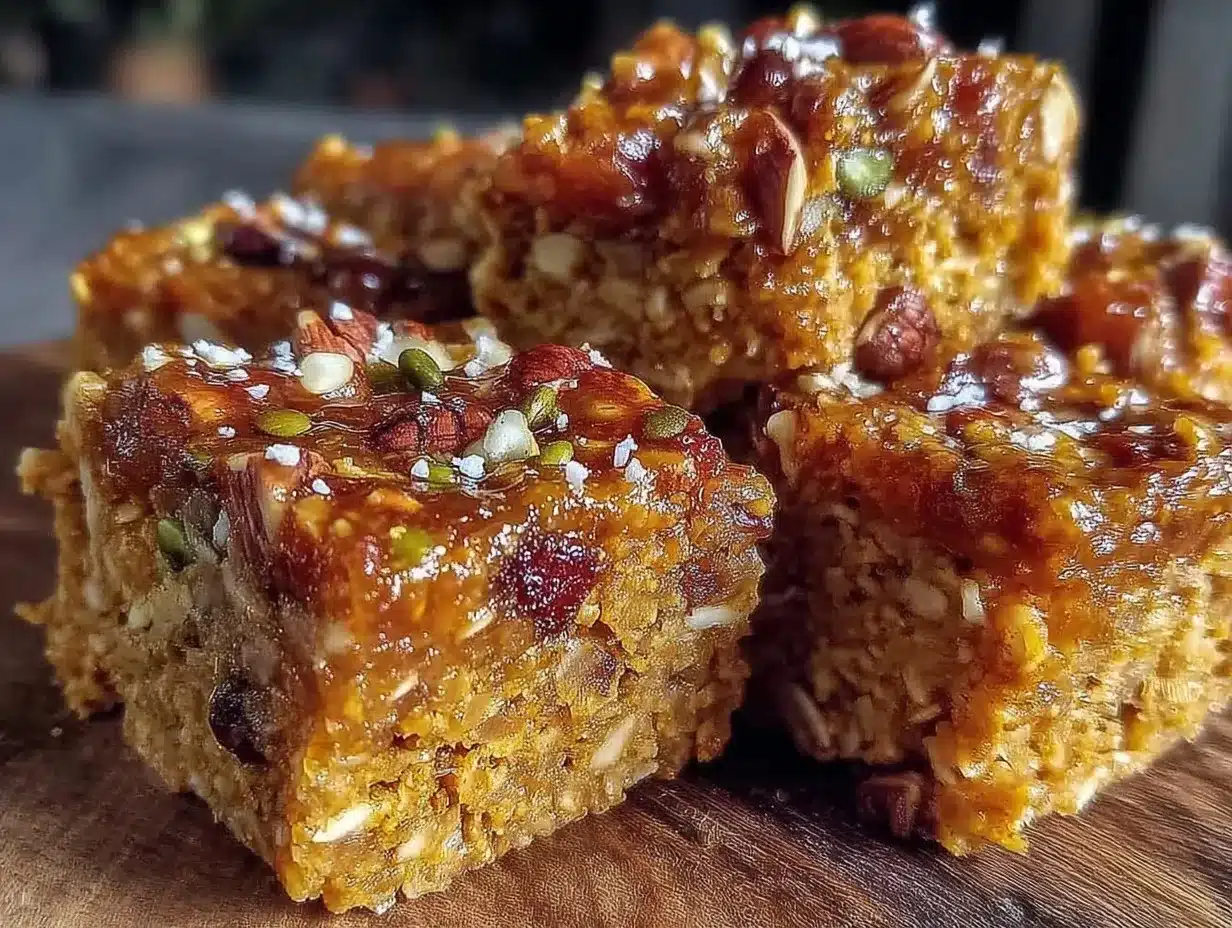
- Cut and Serve: Once set, lift the mixture out using the parchment overhang. Cut into 10-12 bars with a sharp knife. Keep refrigerated until ready to eat for the best texture.
If the bars seem too sticky when cutting, let them chill a bit longer. If too dry, a small splash of nut butter mixed in next time can help. I’ve found pressing firmly and chilling overnight makes the best bars, so if you can plan ahead, it’s worth it.
Cooking Tips & Techniques
Making no-bake pumpkin granola bars sounds straightforward, but a few lessons learned make all the difference. One time, I tried to skip the chilling step—big mistake. The bars were crumbly and didn’t hold shape. Chilling is non-negotiable for that chewy texture.
Another tip: use creamy nut butter for binding. Chunky varieties can make the mix uneven and harder to press. Also, don’t skimp on the pressing step. I’ve pressed lightly before and ended up with bars that fell apart in the first bite.
When measuring oats, packing them down can throw off the ratio, so fluff them before measuring to keep the texture just right. If you want to multitask, prepare the wet mix in the morning and stir in oats just before pressing and chilling in the evening.
Trial and error also taught me that a touch of salt balances the sweetness and brings out pumpkin’s natural flavor. Skipping it makes the bars taste flat. Lastly, if your pumpkin puree is watery, drain it slightly or cook it down for a few minutes to avoid soggy bars.
Variations & Adaptations
These easy no-bake pumpkin granola bars are flexible, so you can adjust them to your taste or dietary needs:
- Gluten-Free: Use certified gluten-free oats and double-check all add-ins for hidden gluten.
- Vegan-Friendly: Swap honey for maple syrup and use your favorite plant-based nut butter.
- Flavor Boost: Add a pinch of ground ginger or cloves for extra warmth, or fold in chopped toasted pecans or walnuts for crunch.
- Different Sweeteners: Agave nectar or brown rice syrup can replace honey or maple syrup for a slightly different sweetness and texture.
- Chocolate Lovers: Increase mini chocolate chips or drizzle melted dark chocolate over bars after chilling for a decadent twist.
Personally, I once mixed in dried cherries and a handful of toasted pumpkin seeds for a chewy-crunchy combo that was surprisingly addictive. If you want to try different method styles, these bars can also be lightly warmed to soften before eating, almost like a pumpkin granola cookie without baking.
Serving & Storage Suggestions
These bars are best served cold or at room temperature. I like to enjoy them straight from the fridge on crisp mornings or as an afternoon pick-me-up alongside a steaming mug of chai tea or coffee. They pair well with simple yogurt or sliced apples for a fuller snack.
Store leftover bars in an airtight container in the refrigerator for up to one week. For longer storage, wrap bars individually and freeze them; they thaw quickly at room temperature or can be popped in the microwave for 10-15 seconds for a soft, chewy treat.
The flavors actually deepen after a day or two in the fridge—the spices mingle with the pumpkin and nut butter, making each bite more complex. Just avoid leaving them out at room temperature too long, as they can get a bit sticky and lose that chewy structure.
Nutritional Information & Benefits
Each granola bar is roughly 150-170 calories depending on size and add-ins. They offer a modest amount of protein and fiber thanks to the oats and nut butter, making them a more nourishing choice than typical store-bought granola bars loaded with sugar.
Pumpkin puree is rich in vitamin A and antioxidants, which support eye health and immune function—perfect for autumn wellness. The natural sweeteners keep added sugars moderate, and you control the quality of ingredients, which is always a win.
These bars are naturally gluten-free (with the right oats), dairy-free, and can be made vegan, making them accessible to many dietary needs. I appreciate having a snack that feels both indulgent and health-conscious, especially on busy days when I want something quick but meaningful.
Conclusion
These easy no-bake pumpkin granola bars quietly fill a gap I didn’t know was so persistent—a chewy, flavorful autumn snack that’s simple to make and easy to love. Their balance of pumpkin, oats, and warm spices hits that comfort-food spot without fuss or fake sweetness.
Feel free to tweak the spices or add your favorite nuts and dried fruits to make them your own. Honestly, I keep coming back to this recipe because it fits my busy life while bringing a little seasonal joy with every bite.
If you’ve enjoyed other treats like the mini lemon blueberry cheesecakes, these bars offer a more down-to-earth, grab-and-go flavor that suits a different kind of craving. They remind me that sometimes, the simplest recipes become the most cherished.
So, when you have a moment, give these bars a try. You might find they quietly become your go-to autumn snack too.
FAQs
Can I use canned pumpkin pie filling instead of plain pumpkin puree?
It’s best to use plain pumpkin puree, not pie filling, because pie filling contains added sugar and spices that can affect flavor and texture.
How long do these granola bars last in the fridge?
Stored in an airtight container, they keep well for up to one week in the refrigerator.
Can I bake these bars instead of no-baking?
This recipe is designed for no-bake preparation. Baking may dry them out and change the chewy texture.
What nut butters work best?
Creamy almond or peanut butter are great choices. Avoid chunky nut butters as they can make the bars harder to press together.
Are these bars kid-friendly?
Yes, most kids enjoy these bars because of their chewy texture and mild sweetness. You can adjust add-ins to suit their tastes.
Pin This Recipe!
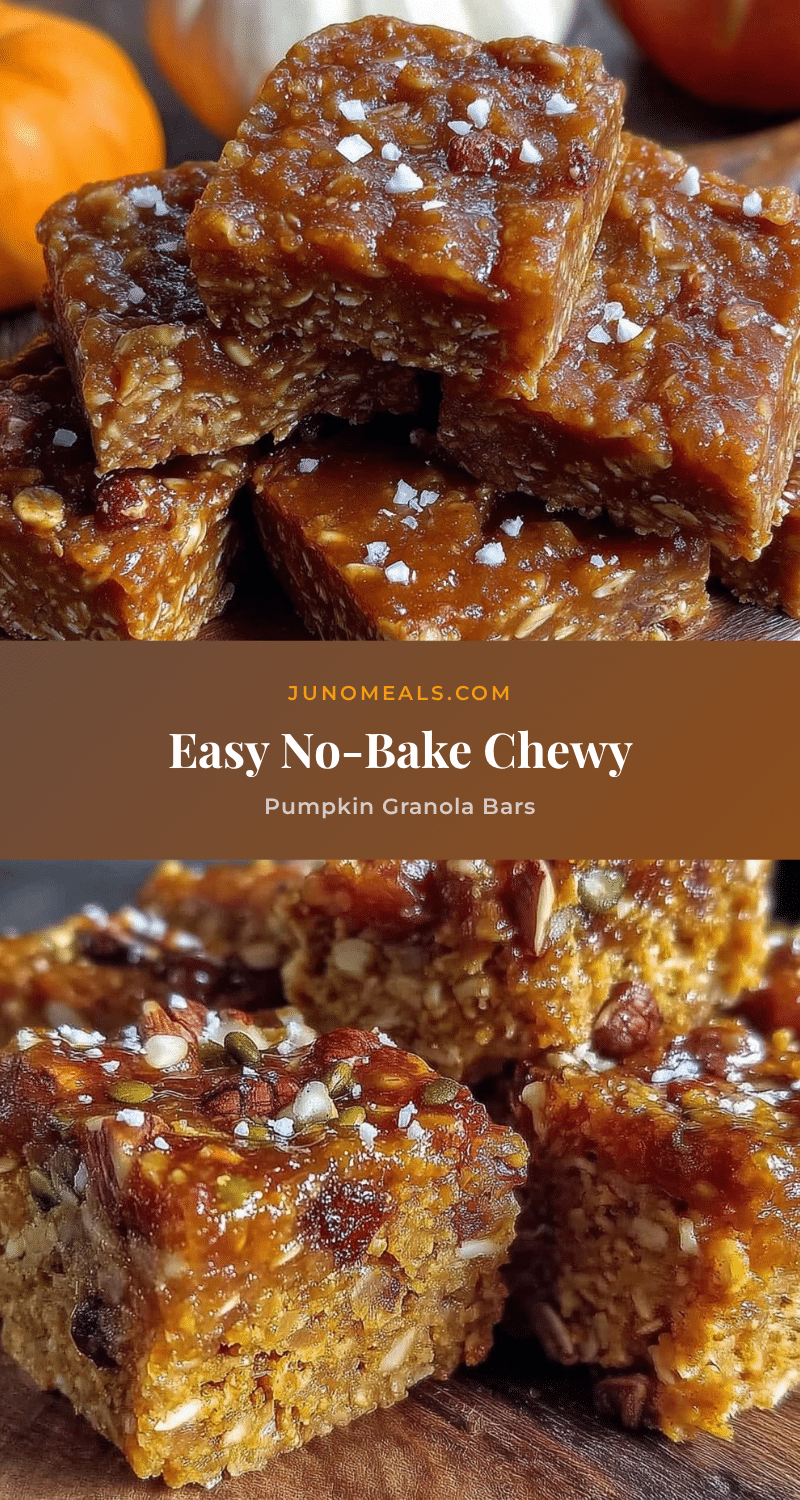
Easy No-Bake Pumpkin Granola Bars
These easy no-bake pumpkin granola bars are a chewy, flavorful autumn snack made with simple pantry staples, perfect for quick and wholesome snacking without baking.
- Prep Time: 10 minutes
- Cook Time: 0 minutes
- Total Time: 1 hour 10 minutes
- Yield: 10-12 bars 1x
- Category: Snack
- Cuisine: American
Ingredients
- 2 cups (180 g) rolled oats (old-fashioned preferred)
- 1 cup (240 ml) pumpkin puree (plain, not pie filling)
- 1/2 cup (120 g) creamy almond or peanut butter
- 1/3 cup (80 ml) honey or maple syrup
- 1 tsp ground cinnamon
- 1/4 tsp ground nutmeg
- 1 tsp vanilla extract
- 1/4 tsp salt
- 1/2 cup (85 g) mini chocolate chips or dried cranberries (optional)
Instructions
- Line an 8×8-inch (20×20 cm) square baking pan with parchment paper, leaving some overhang for easy bar removal.
- In a medium bowl, combine pumpkin puree, nut butter, honey or maple syrup, and vanilla extract. Stir until smooth and fully blended, about 2-3 minutes.
- Sprinkle in ground cinnamon, ground nutmeg, and salt. Stir to combine.
- Add rolled oats to the wet mixture. Fold everything together until the oats are evenly coated, about 3-4 minutes.
- If using, stir in mini chocolate chips or dried cranberries.
- Transfer the mixture to the prepared pan. Press the mixture evenly and firmly into the pan using the back of a spoon or lightly wet hands.
- Place the pan in the refrigerator and chill for at least 1 hour to set.
- Once set, lift the mixture out using the parchment overhang and cut into 10-12 bars. Keep refrigerated until ready to eat.
Notes
Use creamy nut butter for best binding; avoid chunky varieties. Chilling is essential for chewy texture. Press mixture firmly into pan to prevent crumbly bars. If bars are too sticky when cutting, chill longer. For gluten-free, use certified gluten-free oats. Optional add-ins like chocolate chips or dried cranberries add texture and flavor.
Nutrition
- Serving Size: 1 bar (if cut into 1
- Calories: 160
- Sugar: 8
- Sodium: 90
- Fat: 8
- Saturated Fat: 1
- Carbohydrates: 20
- Fiber: 3
- Protein: 4
Keywords: pumpkin granola bars, no-bake snack, autumn snack, chewy granola bars, pumpkin recipe, healthy snack, gluten-free snack, vegan snack option


