Introduction
That crisp rustle of tissue paper layered with the faint scent of pumpkin spice still takes me back to a chilly October morning in my childhood kitchen. I was perched on the counter, fingers sticky with glue dots and scraps of orange and black paper, crafting little lunchbox treat bags that would bring a bit of magic to my classmates’ day. The dim light filtered through the window, casting long shadows that seemed to dance like mischievous ghosts along the walls. I remember the thrill of sneaking in a tiny candy, a homemade spider-shaped cookie, and a little note that said “Happy Haunting!” into each bag — not because I was aiming for perfection, but because the chaos of cutting, gluing, and decorating was pure joy itself.
Fast forward to now, and this tradition has grown into one of my favorite seasonal rituals. These festive Halloween-themed lunchbox treat bags are more than just snacks; they’re tiny parcels of delight crafted with care and bursting with spooky charm. Honestly, it’s that mix of nostalgia and creativity that keeps me coming back to this recipe year after year. You know, the kind of recipe where you can feel the warmth of the season in every detail, from the crunch of the treats to the whimsy of the decorations. It’s not about being perfect but about making memories — and maybe sneaking an extra cookie when no one’s looking.
These treat bags aren’t just fun for kids; they’re a little celebration you can share with friends, family, or even co-workers who need a mid-afternoon pick-me-up. And if you’re anything like me, once you start, you’ll find yourself thinking of new ways to personalize each one, making every bite a reminder of why Halloween is such a special time. That’s the quiet charm of this recipe — it’s simple, a bit messy, and utterly rewarding.
Why You’ll Love This Recipe
Having made these Halloween-themed treat bags for years, I can honestly say they bring a unique blend of fun and flavor that’s hard to beat. Here’s why they stand out:
- Quick & Easy: You can pull these together in under 30 minutes, which is perfect when you’re juggling costumes, school projects, and pumpkin carving.
- Simple Ingredients: No need for fancy or hard-to-find items. Most of the goodies come straight from your pantry or local store, making this approachable even for last-minute plans.
- Perfect for Any Occasion: Beyond Halloween lunchboxes, they’re great for spooky-themed parties, classroom treats, or even as a charming trick-or-treat alternative.
- Crowd-Pleaser: Kids, adults, and even the pickiest eaters tend to love the mix of sweet, salty, and crunchy snacks included.
- Unbelievably Delicious: The homemade spider cookies and mini caramel popcorn add a comforting, nostalgic touch that feels like a warm seasonal hug.
This isn’t just another treat bag recipe — it’s the one where I tweak the balance of flavors and textures until it feels just right. For example, blending a bit of cinnamon into the cookie dough adds a subtle warmth that’s perfect for fall. Plus, the little touches like hand-drawn spooky faces on the bags (yes, even if they look a bit wonky) make each one special. It’s a recipe that’s as much about the joyful process as it is about the tasty results. For those who want to try a sweet bite after lunch, you might also enjoy the mini lemon blueberry cheesecakes — a refreshing contrast to these autumnal treats.
What Ingredients You Will Need
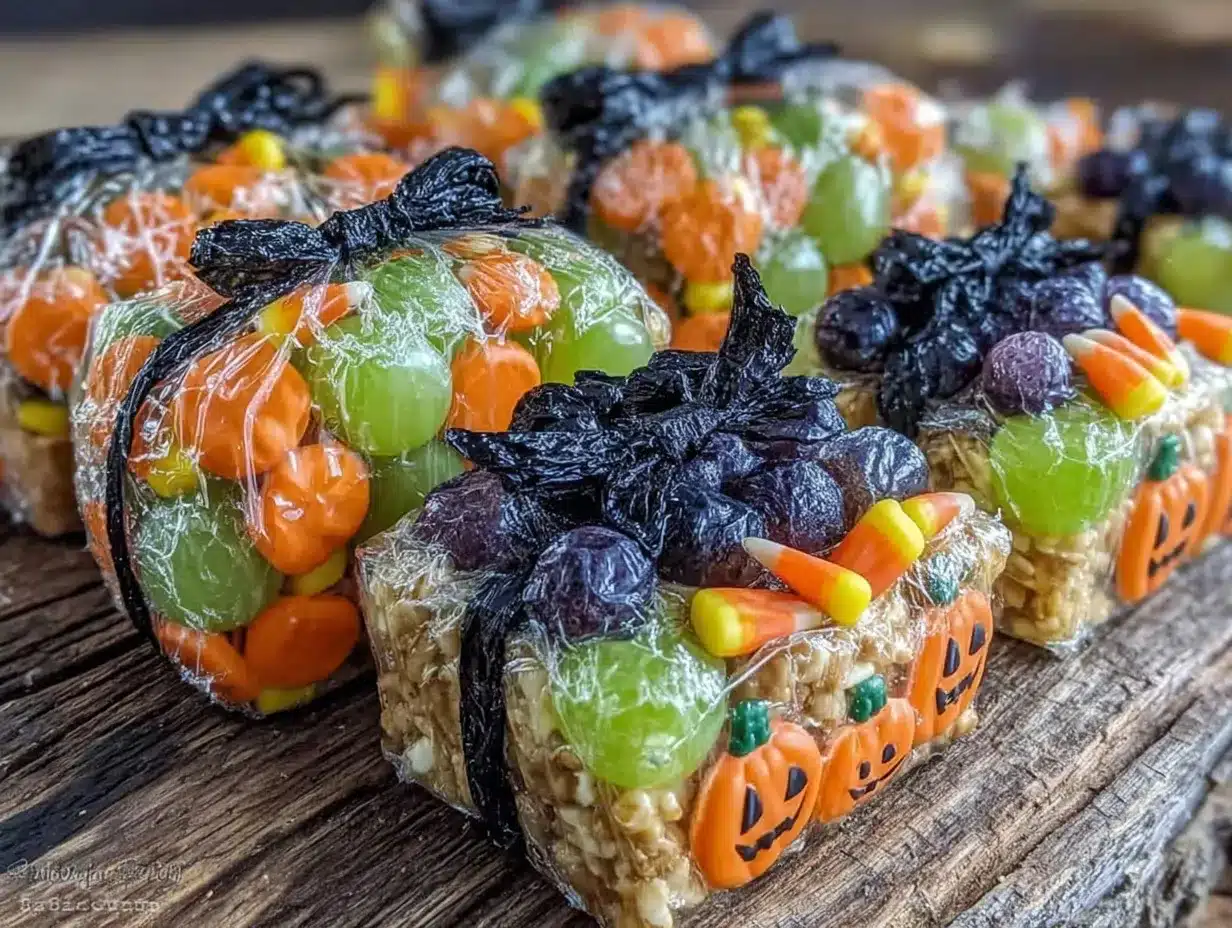
These festive Halloween-themed lunchbox treat bags use simple, wholesome ingredients to deliver fun and flavor without fuss. Most of these are pantry staples and easy to swap out depending on your preferences or what you have on hand.
- For the Treat Bags:
- Small paper lunch bags or clear cellophane treat bags (orange, black, or white preferred for the spooky vibe)
- Tissue paper in Halloween colors (orange, black, purple)
- Washable markers or stickers with Halloween themes (pumpkins, ghosts, spiders)
- Twine or ribbon (black and orange striped works great)
- For the Snacks:
- Mini caramel popcorn (store-bought or homemade for that buttery crunch)
- Spider-shaped sugar cookies (see preparation for quick recipe)
- Halloween candy mix – small chocolates, gummy worms, candy corns (choose favorites or allergy-friendly options)
- Roasted pumpkin seeds, lightly salted (adds a nice savory contrast)
- Mini pretzels (twisted shapes look eerily perfect)
- Optional Extras:
- Edible googly eyes (fun for decorating cookies)
- Orange and black sprinkle mix for cookies
- Small notes or tags with spooky puns or messages
For the best results, I recommend using quality mini caramel popcorn like Angie’s Boomchickapop for that perfect balance of sweet and salty. If you want to keep it gluten-free, swap the pretzels for rice crackers or gluten-free pretzels. And if fresh pumpkin seeds aren’t available, lightly toasted sunflower seeds make a great substitute. These ingredients let you customize your treat bags easily, whether you’re shopping the fall farmers market or grabbing last-minute supplies from the store.
Equipment Needed
Putting together these festive treat bags doesn’t require fancy tools — just a few kitchen basics and some crafty supplies:
- A small mixing bowl (for cookie dough or mixing seeds)
- Baking sheet lined with parchment paper (for baking the spider cookies)
- Measuring cups and spoons (precision helps with cookie texture)
- Rolling pin (or a clean bottle if you don’t have one handy)
- Cooling rack (to set the cookies before decorating)
- Scissors (for trimming tissue paper and ribbon)
- Glue dots or double-sided tape (to secure decorations on bags)
- Permanent markers or gel pens (for drawing faces or adding details)
If you don’t have a rolling pin, honestly, a sturdy glass bottle works just as well — I’ve done it more times than I can count. For those who like to keep things simple, using pre-made cookies and popcorn can cut down on cleanup. And a pair of sharp scissors will make trimming tissue paper a breeze, so don’t skimp on that!
Preparation Method
- Make the Spider Cookies (approx. 30 minutes):
- Preheat your oven to 350°F (175°C).
- In a bowl, combine 1 cup (125g) all-purpose flour, 1/2 teaspoon baking powder, and a pinch of cinnamon.
- In another bowl, cream together 1/4 cup (60g) softened unsalted butter with 1/3 cup (65g) sugar until light and fluffy.
- Add 1/2 teaspoon vanilla extract and 1 egg yolk to the butter mixture, then slowly mix in the dry ingredients.
- Roll the dough into small balls, then flatten slightly onto a parchment-lined baking sheet.
- Use small pretzel sticks or black licorice cut into pieces for spider legs, pressing them gently into the dough.
- Bake for 10-12 minutes or until edges are lightly golden.
- Let cool completely on a wire rack before adding edible googly eyes or sprinkles if desired.
- Prepare the Treat Bags (approx. 15 minutes):
- Cut tissue paper into squares large enough to fill the bags with a bit of overhang.
- Place a layer of tissue paper inside each lunch bag or cellophane bag.
- Fill the bags with a handful of mini caramel popcorn, 1-2 spider cookies, a small serving of candy mix, roasted pumpkin seeds, and mini pretzels.
- Add a small handwritten note or sticker for a personal touch.
- Fold the top of the bag down and tie securely with twine or ribbon.
- Draw spooky faces or designs on the bags with markers, or stick on Halloween-themed stickers.
- Final Touches:
- Double-check that bags are sealed tightly to keep treats fresh.
- Arrange the treat bags in lunchboxes or baskets for distribution.
- Store any extras in an airtight container to maintain crispness.
When I make these, I try to bake the cookies in the morning, then assemble the treat bags right before packing lunch. That way, the cookies stay fresh and the popcorn stays crispy. If you notice the pretzels getting soft, a quick re-toast in the oven for 3-4 minutes at 300°F (150°C) brings them back to life.
Cooking Tips & Techniques
Making these treat bags is straightforward, but a few tips from my own trials can help you get them just right:
- Don’t overmix cookie dough: Mixing too much can make the cookies tough. Stir just until the flour disappears.
- Use parchment paper for baking: This prevents sticking and helps cookies bake evenly.
- Customize your candy mix: Pick candy that won’t melt easily if the bags sit in lunchboxes for a few hours.
- Keep decorations simple: Sometimes less is more. A few well-placed spooky stickers or a quirky face drawn with marker can be more charming than elaborate designs.
- Multitask during baking: While cookies bake, prepare your tissue papers and snacks to save time.
- Use airtight storage: If you’re making treat bags ahead of time, store cookies separately to avoid sogginess and add them just before packing.
I once tried a fancy royal icing spider web on the cookies, but honestly, the extra complexity wasn’t worth the stress — the simple versions always win for taste and kid-approval. Also, if you’re making these for a classroom, double-check for allergies before adding nuts or certain candies.
Variations & Adaptations
These treat bags are super flexible, so you can tweak them to suit different tastes and needs:
- Dietary Adaptations: Use gluten-free flour for cookies to accommodate gluten intolerance. Swap candies for dried fruit for a healthier twist.
- Seasonal Flavors: Add mini candy canes or peppermint bark for a Christmas-themed twist later in the year.
- Savory Version: Replace sweet snacks with cheese crackers, mini sandwiches, and savory roasted nuts for a non-sweet option.
- Creative Presentation: Use small clear jars or boxes instead of bags for a different look and easier transport.
- Personal Touch: I once included a tiny pumpkin-shaped eraser and a Halloween joke card in each bag — it was a hit with the kids!
For those interested in experimenting with other fun recipes for parties or special occasions, you might find inspiration browsing through the recipe collection on this site — lots of treats that pair nicely with these Halloween bags.
Serving & Storage Suggestions
These treat bags are best enjoyed fresh but can be stored carefully for a few days:
- Serving: Perfect straight from the lunchbox or at a party platter. The cookies taste great at room temperature, and the popcorn keeps its crunch best when eaten within the first day.
- Storage: Keep cookies in an airtight container at room temperature for up to 3 days. Store caramel popcorn separately in a sealed bag to prevent moisture softening.
- Freezing: Cookies freeze well if wrapped tightly; thaw at room temperature before packing.
- Reheating: If pretzels or popcorn lose their crisp, a brief 3-minute toast in a preheated 300°F (150°C) oven refreshes their texture.
- Flavor Development: The cinnamon in the cookies deepens overnight, making them even tastier the next day.
When serving, pairing these spooky treat bags with warm apple cider or a simple hot chocolate makes for an extra cozy autumn lunch or snack.
Nutritional Information & Benefits
This recipe offers a comforting balance of sweet and salty snacks with some nutritional perks from the pumpkin seeds and homemade cookies:
- Approximately 250-300 calories per treat bag (depending on portion sizes)
- Contains healthy fats from pumpkin seeds, which are rich in magnesium and zinc
- Moderate sugar content, mostly from natural sources in the cookies and popcorn
- Gluten-free options available by swapping flours and snacks
- Potential allergens include wheat, nuts (if added), and dairy; substitutions can be made for allergies
From a wellness point of view, these treat bags are a fun way to share seasonal joy without going overboard. The homemade elements ensure you know exactly what’s inside, which is always comforting. Plus, making these treats can be a mindful activity — a little creative break in a hectic day.
Conclusion
These festive Halloween-themed lunchbox treat bags are a simple, joyful way to spread a little spooky cheer. They combine easy-to-find ingredients with playful presentation, making them a hit for kids and adults alike. What I love most is how they invite creativity and personal touches — no two bags ever end up quite the same.
Feel free to tweak the snacks or decorations to match your family’s tastes or any dietary needs. After all, the best recipes are the ones you make your own. If you give these a try, I’d love to hear how you customize your spooky treat bags or any fun stories that come with them. Here’s to a Halloween filled with laughter, delicious bites, and just the right amount of mischief!
FAQs
- Can I make the treat bags ahead of time? Yes, but it’s best to store cookies and popcorn separately and assemble the bags on the day you plan to serve them.
- What if my kids have nut allergies? Skip any nuts or nut-based candies and replace with seeds or dried fruit.
- Are the spider cookies difficult to make? Not at all! The recipe is straightforward and perfect for baking with kids.
- Can I use store-bought cookies? Absolutely, especially if you’re short on time. Just look for festive shapes or decorate plain cookies yourself.
- What’s a good alternative to caramel popcorn? Cheese puffs or popcorn seasoned with a pinch of cinnamon and sugar can be a tasty substitute.
Pin This Recipe!
Festive Halloween-Themed Lunchbox Treat Bags
These festive Halloween-themed lunchbox treat bags are a simple, joyful way to spread a little spooky cheer with a mix of sweet, salty, and crunchy snacks, perfect for kids and adults alike.
- Prep Time: 15 minutes
- Cook Time: 12 minutes
- Total Time: 27 minutes
- Yield: 6 treat bags
- Category: Snack
- Cuisine: American
Ingredients
- Small paper lunch bags or clear cellophane treat bags (orange, black, or white preferred)
- Tissue paper in Halloween colors (orange, black, purple)
- Washable markers or stickers with Halloween themes (pumpkins, ghosts, spiders)
- Twine or ribbon (black and orange striped works great)
- Mini caramel popcorn (store-bought or homemade)
- Spider-shaped sugar cookies (see preparation for recipe)
- Halloween candy mix – small chocolates, gummy worms, candy corns
- Roasted pumpkin seeds, lightly salted
- Mini pretzels (twisted shapes)
- Optional: Edible googly eyes
- Optional: Orange and black sprinkle mix for cookies
- Optional: Small notes or tags with spooky puns or messages
Instructions
- Make the Spider Cookies (approx. 30 minutes):
- Preheat your oven to 350°F (175°C).
- In a bowl, combine 1 cup (125g) all-purpose flour, 1/2 teaspoon baking powder, and a pinch of cinnamon.
- In another bowl, cream together 1/4 cup (60g) softened unsalted butter with 1/3 cup (65g) sugar until light and fluffy.
- Add 1/2 teaspoon vanilla extract and 1 egg yolk to the butter mixture, then slowly mix in the dry ingredients.
- Roll the dough into small balls, then flatten slightly onto a parchment-lined baking sheet.
- Use small pretzel sticks or black licorice cut into pieces for spider legs, pressing them gently into the dough.
- Bake for 10-12 minutes or until edges are lightly golden.
- Let cool completely on a wire rack before adding edible googly eyes or sprinkles if desired.
- Prepare the Treat Bags (approx. 15 minutes):
- Cut tissue paper into squares large enough to fill the bags with a bit of overhang.
- Place a layer of tissue paper inside each lunch bag or cellophane bag.
- Fill the bags with a handful of mini caramel popcorn, 1-2 spider cookies, a small serving of candy mix, roasted pumpkin seeds, and mini pretzels.
- Add a small handwritten note or sticker for a personal touch.
- Fold the top of the bag down and tie securely with twine or ribbon.
- Draw spooky faces or designs on the bags with markers, or stick on Halloween-themed stickers.
- Final Touches:
- Double-check that bags are sealed tightly to keep treats fresh.
- Arrange the treat bags in lunchboxes or baskets for distribution.
- Store any extras in an airtight container to maintain crispness.
Notes
Do not overmix cookie dough to avoid tough cookies. Use parchment paper for even baking. Customize candy mix to avoid melting candies. Store cookies and popcorn separately if making ahead. Re-toast pretzels or popcorn at 300°F for 3-4 minutes to refresh crispness. Gluten-free flour and snacks can be used for dietary needs.
Nutrition
- Serving Size: One treat bag
- Calories: 275
- Sugar: 20
- Sodium: 150
- Fat: 12
- Saturated Fat: 5
- Carbohydrates: 38
- Fiber: 2
- Protein: 3
Keywords: Halloween, treat bags, lunchbox snacks, spider cookies, caramel popcorn, festive snacks, kids treats, party snacks


