Let me tell you, the sight of colorful little compartments filled with perfectly portioned snacks and treats is enough to make any mom’s heart swell — and the smell of fresh-cut veggies paired with savory meats and cheeses? Honestly, it’s a lunchtime game changer. The first time I put together these healthy homemade Lunchables kids love, I was instantly hooked. It was one of those moments where you pause, take a deep breath, and just smile because you know you’re onto something truly special for your lunchbox routine.
Years ago, when I was knee-high to a grasshopper, Lunchables were a rare treat, but now as a parent, I found myself wanting to recreate that excitement without the added preservatives and mystery ingredients. I stumbled onto this idea during a rainy weekend, trying to keep the kids entertained and fed with something fun yet wholesome. My family couldn’t stop sneaking them off the counter before school (and I can’t really blame them). It’s dangerously easy to make, packed with pure, nostalgic comfort, and perfect for school lunches, road trips, or even a quick snack attack at home.
You know what? This recipe brightens up your Pinterest lunchbox board with minimal fuss, giving you that peace of mind that your kids are eating something nourishing and tasty. I’ve tested this recipe multiple times—in the name of research, of course—and it’s become a staple for family gatherings, gifting, and just everyday life. If you’re looking for a fresh twist on classic Lunchables, you’re going to want to bookmark this one.
Why You’ll Love This Recipe
Honestly, this recipe ticks all the right boxes for busy parents and kids alike. It’s been kid-tested, mom-approved, and even got a thumbs up from my picky eater nephew. Here’s what makes these healthy homemade Lunchables kids love stand out:
- Quick & Easy: Comes together in under 15 minutes—perfect for hectic school mornings or last-minute lunch preps.
- Simple Ingredients: No fancy shopping trips—most items are pantry or fridge staples you probably already have.
- Perfect for School Lunches: Compact, balanced, and mess-free, these are lunchbox heroes for busy school days.
- Crowd-Pleaser: Always gets rave reviews from kids and adults alike, making snack time a treat not a chore.
- Unbelievably Delicious: The combo of fresh veggies, savory meats, and creamy cheeses hits the comfort-food spot without guilt.
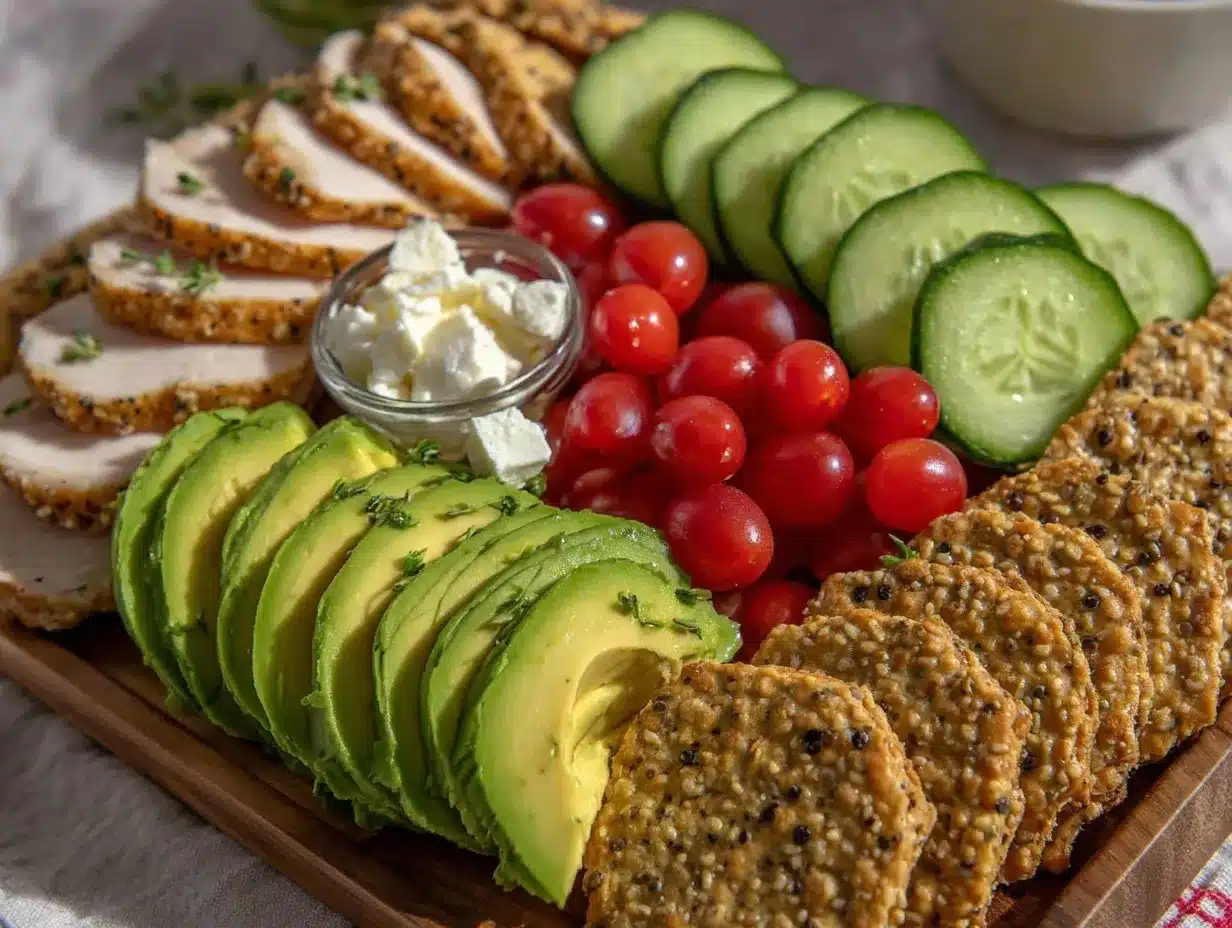
What really sets this recipe apart is the balance—it’s not just random snacks tossed together. Whether it’s the way the sliced turkey pairs with tangy cheddar or how the crisp cucumber bites add that fresh crunch, this isn’t just another lunchbox filler. It’s thoughtfully crafted to give kids the variety and flavor they crave, with none of the junk. Plus, the little homemade touch of a honey-mustard dip? Game changer!
This recipe isn’t just good—it’s the kind that makes you close your eyes after the first bite and smile. It’s comfort food reimagined—healthier, faster, but with the same soul-soothing satisfaction. Whether you’re aiming to impress teachers during parent visits or just want your kids to look forward to lunchtime, these homemade Lunchables are your new secret weapon.
What Ingredients You Will Need
This recipe uses simple, wholesome ingredients to deliver bold flavor and satisfying texture without the fuss. Most are pantry or fridge staples, and you can mix and match depending on what your kids like or what’s fresh that week.
- For the Protein:
- Thinly sliced turkey breast or chicken breast (about 4 oz / 115 g) – I prefer nitrate-free, organic options for best flavor and health
- Hard-boiled eggs, peeled and sliced (optional, 1-2 eggs)
- For the Cheese:
- Sharp cheddar cheese, sliced or cubed (2 oz / 56 g)
- String cheese sticks (1-2 sticks) for fun finger food
- For the Veggies & Fruits:
- Seedless cucumber slices (1/2 cup / 75 g) – adds refreshing crunch
- Baby carrots or carrot sticks (1/2 cup / 60 g)
- Grape or cherry tomatoes (1/4 cup / 40 g), halved
- Fresh apple slices (1/2 cup / 60 g), lightly tossed in lemon juice to prevent browning
- Seedless green grapes (optional, 1/4 cup / 40 g)
- For the Crackers & Dips:
- Whole grain crackers (about 10-12 pieces) – I recommend brands like Triscuit or simple homemade crackers if you want less sodium
- Honey-mustard dip (2 tablespoons) – made by mixing 1 tablespoon Dijon mustard with 1 tablespoon honey
- Extras (Optional):
- Olives (5-6 pieces, pitted)
- Hummus (2 tablespoons) as a dip alternative
If you want to swap for dietary needs, almond flour crackers or gluten-free options work wonderfully. For dairy-free, use plant-based cheese slices and hummus instead of the honey-mustard dip. The key is fresh, wholesome components that your kids recognize and enjoy.
Equipment Needed
- A sharp kitchen knife for slicing meats, cheese, and fruits neatly—makes a big difference in presentation!
- Cutting board (preferably separate ones for meat and produce to avoid cross-contamination)
- Small mixing bowl to whip up the honey-mustard dip quickly
- Lunchbox or bento-style containers with compartments to keep items separated and fresh
- Optional: Egg slicer if you’re including hard-boiled eggs (saves time and looks neat)
I’ve tried plastic lunchboxes with removable dividers and silicone snack cups, both work well to keep everything tidy. Honestly, even a simple container with small silicone muffin liners can do the trick. Budget-friendly options are great here because the magic is in the ingredients and assembly, not fancy gear. Just keep your knives sharp and your containers leak-proof!
Preparation Method
- Prepare the protein: If using hard-boiled eggs, start by boiling them for about 10 minutes, then cool under cold water before peeling. Slice eggs evenly using a knife or egg slicer. Thinly slice turkey or chicken breast into bite-sized pieces. (Time: 15 minutes total if boiling eggs)
- Slice the cheese: Cut your cheddar cheese into thin slices or small cubes about 1/2 inch (1.25 cm) in size. Peel string cheese if using sticks. (Tip: room temperature cheese slices easier to cut cleanly.)
- Wash and prep produce: Rinse cucumber, grape tomatoes, carrots, apples, and grapes thoroughly. Slice cucumber into thin rounds (about 1/4 inch / 0.6 cm thick). Halve cherry tomatoes. Cut apples into thin wedges and toss lightly with lemon juice to avoid browning. (Time: 5-7 minutes)
- Mix the honey-mustard dip: Combine 1 tablespoon Dijon mustard with 1 tablespoon honey in a small bowl. Stir until smooth. Taste and adjust sweetness or tanginess to your liking. (Optional: add a pinch of paprika for a smoky twist.)
- Assemble the lunchables: In your lunchbox compartments, arrange the turkey slices, cheese cubes, crackers, and veggies separately. Add the dip in a small container or silicone cup to keep it contained. Make sure nothing is overcrowded to maintain freshness and prevent sogginess. (Time: 5 minutes)
Pro tip: When slicing, keep everything about the same size so kids can easily pick up bites. Also, packing the lunchable the night before helps the flavors meld together nicely, but keep the dip separate until lunchtime to avoid sogginess.
Cooking Tips & Techniques
Even though this recipe doesn’t require cooking beyond boiling eggs, some handy tips make the whole process smoother and the lunchables tastier:
- Sharp knife is your best friend: It prevents crushing delicate crackers or squishing veggies. I learned the hard way that a dull knife turns cucumber slices into sad mush!
- Prep ingredients the night before: Saves precious morning minutes and lets flavors mellow.
- Keep wet and dry foods separate: Use silicone cups or small containers for dips and juicy fruits to prevent crackers from getting soggy.
- Choose firm, fresh produce: Crunchy carrots and crisp cucumbers add texture contrast that kids love.
- Balance flavors: Include a mix of savory, sweet, and tangy elements to keep it interesting—like pairing sharp cheddar with sweet apple slices.
- Watch portion sizes: Kids vary in appetite, so tailor quantities accordingly to avoid waste but ensure satisfaction.
I once tried adding too many crackers and ended up with a lunchbox explosion (crumbs everywhere!). Now, I stick to about 10-12 crackers and it’s just right for little hands. Also, reheating is out of the question here—these are best enjoyed fresh and cold.
Variations & Adaptations
This recipe is flexible, so you can easily tweak it to suit your family’s tastes or dietary needs. Here are some ideas I’ve tried or heard from fellow parents:
- Vegetarian version: Swap deli meats with hummus, sliced avocado, or nut butter packets. Add extra cheese or roasted chickpeas for protein.
- Seasonal fruit swaps: In summer, use fresh berries or peach slices instead of apples and grapes for a juicy, colorful twist.
- Low-carb option: Replace crackers with celery sticks or cheese crisps to cut down on carbs while keeping crunch.
- Flavor boosts: Add a sprinkle of everything bagel seasoning to cream cheese for a tasty spread alternative. Or try a yogurt-based ranch dip instead of honey-mustard.
- Allergen-friendly: For nut allergies, avoid peanut butter and use seed butters or sunflower seed spreads. Choose gluten-free crackers or veggie sticks instead.
One variation I love is adding mini turkey meatballs alongside the usual slices—kids adore the bite-sized meat, and it feels like a fun upgrade. Feel free to get creative and let your kids help pick out ingredients—they’re more likely to eat what they helped make!
Serving & Storage Suggestions
Serve these healthy homemade Lunchables chilled or at room temperature. They’re perfect straight from the fridge but also hold up well if packed early in the morning or even the night before. Presentation counts here—using colorful containers or adding a fun note helps make lunchtime feel special.
Pair these lunchables with a small water bottle, a fruit smoothie, or a thermos of soup for a complete meal. They also work great as a snack platter during after-school activities or picnics.
For storage, keep the lunchables refrigerated until ready to eat. If prepping in advance, store dips separately and assemble crackers just before serving to keep them crisp. Leftovers can be stored in airtight containers in the fridge for up to 2 days, but fresh is definitely best.
When reheating is necessary (for the eggs or meatballs), remove crackers and veggies first to prevent sogginess. Flavors actually deepen a bit when chilled overnight, so these can be a handy make-ahead option.
Nutritional Information & Benefits
Each homemade Lunchable serving provides approximately:
| Calories | 350-400 kcal |
|---|---|
| Protein | 20-25 g |
| Carbohydrates | 25-30 g |
| Fat | 12-15 g (mostly healthy fats) |
| Fiber | 4-6 g |
Key benefits come from fresh, whole ingredients: lean protein supports growth and energy, fresh veggies contribute fiber and vitamins, and whole grain crackers offer sustained fuel without sugar crashes. This recipe is naturally gluten-free if you pick gluten-free crackers, and dairy-free options are easy to swap in.
From a wellness perspective, it’s a wholesome alternative to store-bought Lunchables loaded with additives. I feel good knowing my kids are eating a balanced meal that tastes good and fuels their busy school day.
Conclusion
If you’re hunting for a lunchbox solution that’s healthy, delicious, and kid-approved, these healthy homemade Lunchables kids love are a total win. They’re quick to put together, packed with flavor and nutrients, and flexible enough to suit any tastes or dietary needs. Honestly, I love how they bring a bit of joy and variety to the school lunch routine—no more boring sandwiches or last-minute scrambling.
Feel free to customize the ingredients or add your own personal flair. I’d love to hear how you make these your own! Drop a comment below sharing your favorite combos or tips, and don’t forget to share this recipe with fellow parents looking for easy, healthy lunch ideas. Remember, a happy lunchbox makes for a happy kid—and that, my friends, is pure magic.
Frequently Asked Questions
Can I make these lunchables ahead of time?
Yes! You can prep most ingredients the night before, but keep crackers and dips separate until just before serving to stay fresh and crunchy.
What if my child has a nut allergy?
Simply avoid nut butters and opt for seed butters or hummus. Choose gluten-free crackers or veggie sticks as safe alternatives.
Are these lunchables suitable for picky eaters?
Absolutely! The recipe is fully customizable—try different cheeses, fruits, or dips to find what your child loves most.
Can I freeze any parts of this lunch?
Hard-boiled eggs and cooked meats freeze well, but fresh veggies, crackers, and dips are best fresh and should not be frozen.
How do I keep the apple slices from browning?
Toss apple slices lightly in lemon juice or a mixture of water and a splash of vinegar right after cutting to prevent browning until lunchtime.
Pin This Recipe!
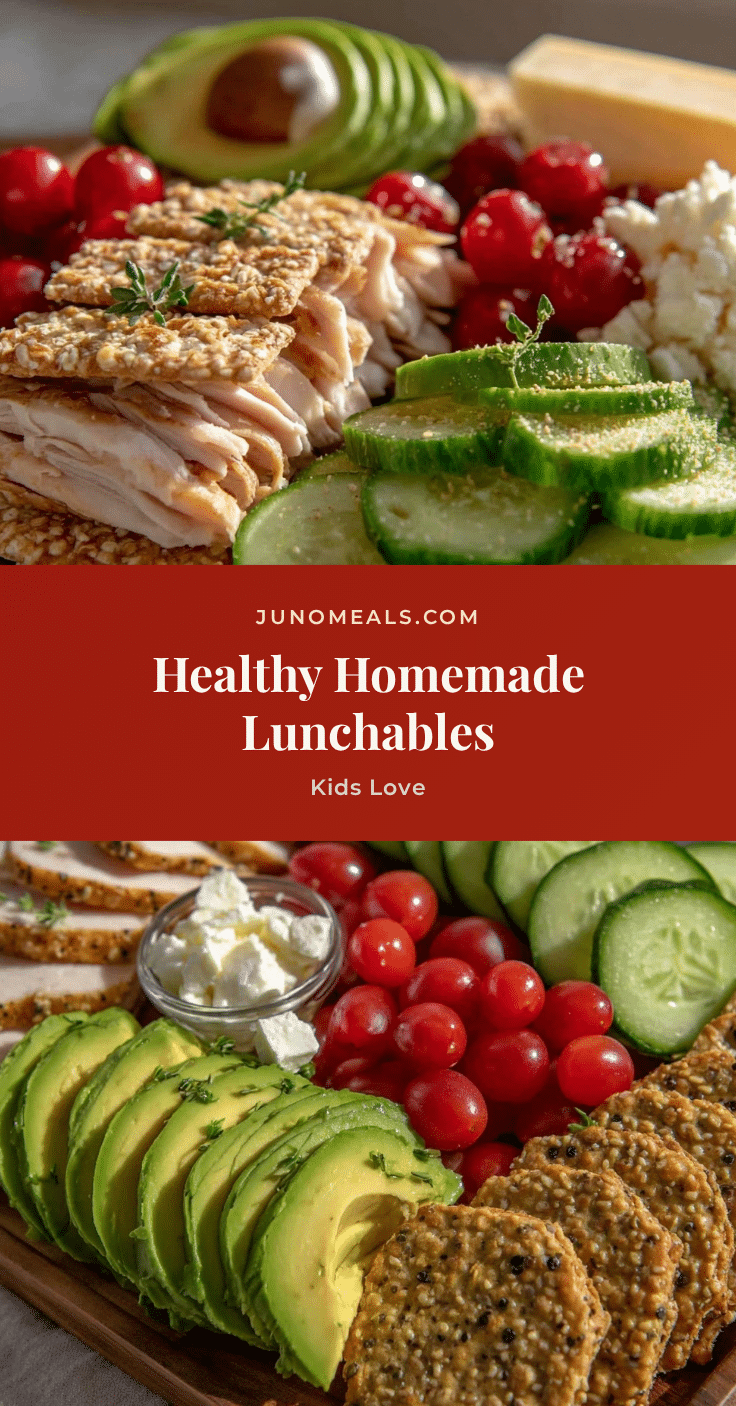
Healthy Homemade Lunchables Kids Love Easy 5-Step Recipe for School Lunches
A quick and easy recipe for healthy homemade Lunchables that kids love, perfect for school lunches, road trips, or snacks. Packed with fresh veggies, savory meats, cheeses, and a honey-mustard dip, this recipe is kid-tested and mom-approved.
- Prep Time: 10 minutes
- Cook Time: 10 minutes (if boiling eggs)
- Total Time: 20 minutes
- Yield: 1 serving 1x
- Category: Lunch
- Cuisine: American
Ingredients
- 4 oz (115 g) thinly sliced turkey breast or chicken breast (preferably nitrate-free, organic)
- 1–2 hard-boiled eggs, peeled and sliced (optional)
- 2 oz (56 g) sharp cheddar cheese, sliced or cubed
- 1–2 string cheese sticks
- 1/2 cup (75 g) seedless cucumber slices
- 1/2 cup (60 g) baby carrots or carrot sticks
- 1/4 cup (40 g) grape or cherry tomatoes, halved
- 1/2 cup (60 g) fresh apple slices, lightly tossed in lemon juice
- 1/4 cup (40 g) seedless green grapes (optional)
- 10–12 whole grain crackers (e.g., Triscuit or homemade)
- 2 tablespoons honey-mustard dip (1 tablespoon Dijon mustard mixed with 1 tablespoon honey)
- 5–6 pitted olives (optional)
- 2 tablespoons hummus (optional, as dip alternative)
Instructions
- Prepare the protein: Boil eggs for about 10 minutes if using, cool under cold water, peel, and slice evenly. Thinly slice turkey or chicken breast into bite-sized pieces. (15 minutes if boiling eggs)
- Slice the cheese: Cut cheddar cheese into thin slices or small cubes about 1/2 inch in size. Peel string cheese sticks if using.
- Wash and prep produce: Rinse cucumber, grape tomatoes, carrots, apples, and grapes thoroughly. Slice cucumber into thin rounds about 1/4 inch thick. Halve cherry tomatoes. Cut apples into thin wedges and toss lightly with lemon juice to prevent browning. (5-7 minutes)
- Mix the honey-mustard dip: Combine 1 tablespoon Dijon mustard with 1 tablespoon honey in a small bowl. Stir until smooth. Adjust sweetness or tanginess to taste. Optionally add a pinch of paprika.
- Assemble the lunchables: Arrange turkey slices, cheese cubes, crackers, and veggies separately in lunchbox compartments. Add dip in a small container or silicone cup to keep contained. Avoid overcrowding to maintain freshness and prevent sogginess. (5 minutes)
Notes
Keep crackers and dips separate until serving to prevent sogginess. Prep ingredients the night before to save time. Use lemon juice on apple slices to prevent browning. Use sharp knives for neat slicing. Customize ingredients to suit dietary needs and preferences.
Nutrition
- Serving Size: One lunchbox serving
- Calories: 350400
- Fat: 1215
- Carbohydrates: 2530
- Fiber: 46
- Protein: 2025
Keywords: healthy lunchables, homemade lunchables, kids lunch, school lunch ideas, easy lunch recipe, kid-friendly lunch, nutritious lunchbox