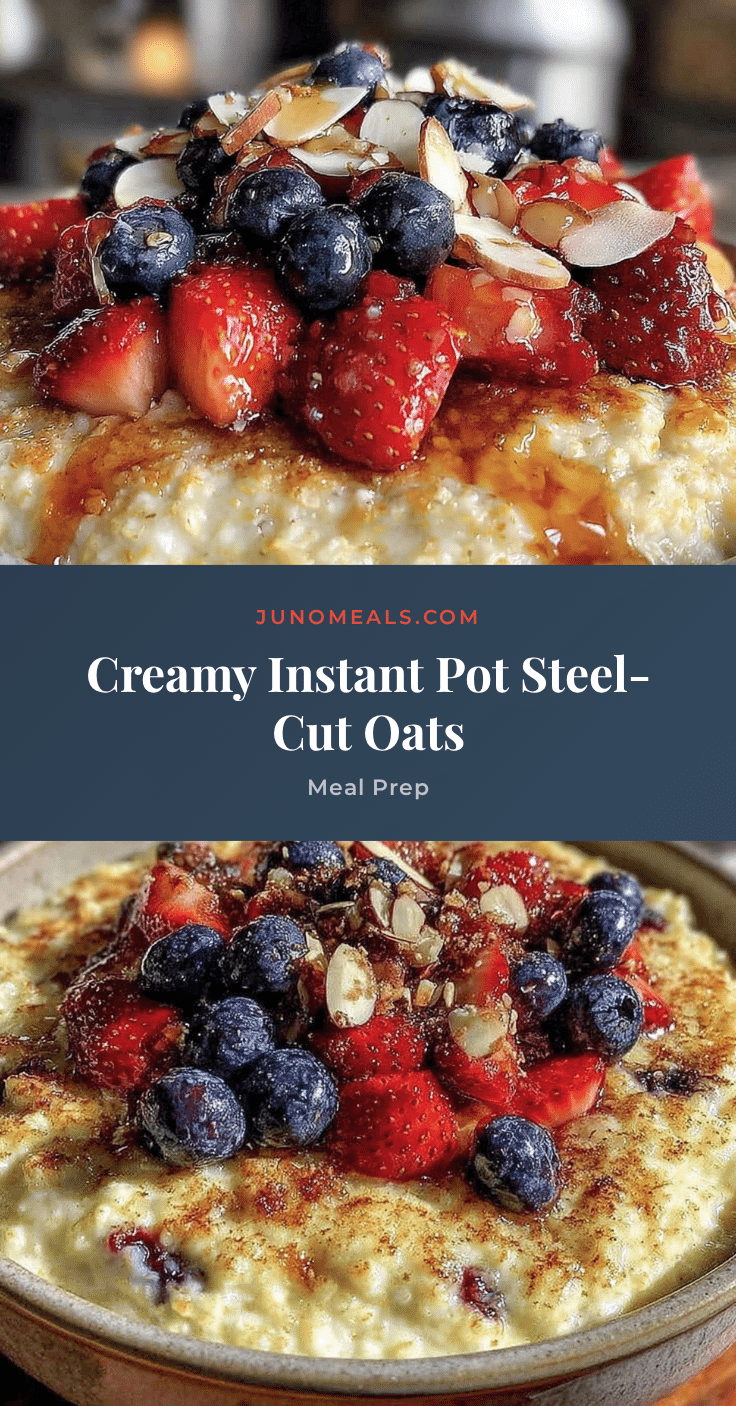
Let me tell you, the smell of steel-cut oats slowly cooking in the Instant Pot, mingled with warm hints of cinnamon and vanilla, is one of those comforting scents that just wraps you up like a cozy blanket. The first time I made this creamy Instant Pot steel-cut oats meal prep, I was instantly hooked—it was the kind of moment where you pause, take a deep breath, and just smile because you know you’re onto something truly special. When I was knee-high to a grasshopper, my grandma used to make oatmeal from scratch, but it was always a bit of a slow process, and honestly, I never thought I’d find a way to get that same rich, creamy texture without standing over the stove for ages. Years ago, stumbling upon this Instant Pot method felt like a small kitchen miracle.
My family couldn’t stop sneaking spoonfuls off the counter while I was still packing the meal prep containers (and I can’t really blame them). It’s dangerously easy to make, and it gives pure, nostalgic comfort for busy mornings. Whether you’re looking for a sweet treat for your kids, a quick breakfast for those hectic workdays, or something to brighten up your Pinterest breakfast board, this recipe fits the bill. After testing it over and over in the name of research, of course, it’s become a staple for our family gatherings and weekday routines alike. Honestly, it feels like a warm hug in a bowl—and you’re going to want to bookmark this one.
Why You’ll Love This Recipe
This creamy Instant Pot steel-cut oats meal prep recipe isn’t just another oatmeal dish—it’s a game-changer for breakfast lovers who crave convenience without sacrificing flavor or texture. I’ve tried countless oatmeal recipes, but this one stands out because it nails that perfect creamy consistency every single time.
- Quick & Easy: Comes together in just about 30 minutes, freeing up your morning for other things.
- Simple Ingredients: No fancy or hard-to-find items here—just staples you likely have in your pantry.
- Perfect for Meal Prep: Makes enough for 5 days of breakfasts, saving you precious time during the week.
- Crowd-Pleaser: Both kids and adults rave about the texture and gentle sweetness.
- Unbelievably Delicious: The creamy texture rivals stove-top oats but without the constant stirring—thank goodness!
What makes this recipe different? It’s all about the pressure cooking time and the ratio of oats to liquid, plus a little trick I picked up—adding a splash of cream or coconut milk for that extra velvety finish. Whether you’re a seasoned pro or just getting started with steel-cut oats, this method delivers consistent results that feel like breakfast made by a chef. It’s the kind of recipe that makes you close your eyes after the first bite, savoring every mouthful.
What Ingredients You Will Need
This recipe uses simple, wholesome ingredients to deliver bold flavor and that satisfying creamy texture without any fuss. Most are pantry staples, and you can easily swap a few to suit your dietary preferences.
- Steel-cut oats (1 cup / 160g) – Look for a good-quality brand like Bob’s Red Mill for a chewy, nutty bite.
- Water (3 cups / 720ml) – The base liquid; using filtered water helps keep flavors clean.
- Milk (1 cup / 240ml) – I prefer whole milk for creaminess, but almond, oat, or coconut milk work great for dairy-free options.
- Salt (½ teaspoon) – Just enough to enhance the oats’ natural flavor.
- Maple syrup (2 tablespoons) – Adds natural sweetness; you can substitute honey or agave nectar.
- Vanilla extract (1 teaspoon) – For that warm, inviting aroma.
- Cinnamon (1 teaspoon, ground) – A cozy spice that pairs perfectly with oats.
- Butter (1 tablespoon, optional) – Adds richness and silky texture; swap for coconut oil or leave out for vegan versions.
- Nuts and fruit toppings (optional) – Chopped walnuts, sliced bananas, fresh berries, or dried cranberries to customize your bowls.
Pro tip: If you’re using frozen fruit for toppings, add them fresh or thawed after reheating your oats to keep textures intact. For a dairy-free version, I recommend using unsweetened almond or coconut milk—both add a lovely subtle flavor that complements the oats.
Equipment Needed
- Instant Pot or electric pressure cooker: The star of the show for quick, hands-off cooking.
- Measuring cups and spoons: For accurate ingredient amounts (precision matters here!).
- Wooden spoon or silicone spatula: To stir the oats gently after cooking.
- Heatproof containers or jars: For storing your meal-prepped oats—glass works best to keep flavors fresh.
If you don’t have an Instant Pot, a regular pressure cooker will also do the trick, but cooking times may vary. For budget-friendly options, check out basic models that have a “porridge” or “multigrain” setting, which simplifies the process. Keeping your Instant Pot’s sealing ring clean is key to avoiding any steam leaks—trust me, I learned that one the hard way!
Preparation Method

- Rinse the oats: Start by giving 1 cup (160g) of steel-cut oats a quick rinse under cold water. This removes any dust and prevents clumping. (About 1 minute.)
- Add liquids and spices to the Instant Pot: Pour in 3 cups (720ml) water, 1 cup (240ml) milk of choice, ½ teaspoon salt, 1 teaspoon ground cinnamon, and 1 teaspoon vanilla extract. Stir gently to combine. (About 2 minutes.)
- Mix in the oats: Add the rinsed oats to the pot and give everything a quick stir to make sure oats are evenly submerged. (About 1 minute.)
- Set the Instant Pot: Close the lid securely and set the valve to sealing. Select the “Pressure Cook” or “Manual” setting and set the timer for 10 minutes on high pressure. (Prep time done!)
- Natural release: When the cooking cycle finishes, let the pressure release naturally for 10 minutes. After that, carefully switch the valve to venting to release any remaining pressure. (Patience pays off here!)
- Stir and finish: Open the lid and stir in 1 tablespoon butter and 2 tablespoons maple syrup while the oats are hot. This step adds creaminess and sweetness. (Taste and adjust sweetness if needed.)
- Portion and cool: Spoon the oats into meal prep containers for 5 days. Let cool slightly before sealing and refrigerating. (About 10 minutes.)
If the oatmeal looks too thick after resting, just stir in a splash of milk to loosen it up before serving. The oats will thicken as they cool, which is totally normal and delightful for spooning straight from the fridge or reheating.
Cooking Tips & Techniques
Cooking steel-cut oats in the Instant Pot is honestly a game changer, but a few tips can make your life even easier. First, don’t skip rinsing the oats—it helps prevent that starchy foam from clogging your pot’s valve. Also, make sure to seal the lid properly before pressure cooking; I’ve had a few false starts when the lid wasn’t tightened enough.
One thing I learned the hard way is to use the natural pressure release method instead of quick release. Quick releasing can leave your oats undercooked or watery, and nobody wants that. I usually multi-task during the 10-minute natural release—perfect time for a quick shower or to prep your toppings.
Stirring in a fat like butter or coconut oil after cooking is key to achieving that creamy, luscious texture. It’s like the oats suddenly go from good to “oh wow” with just a little richness. If you want to cut down on sugar, try using mashed banana or unsweetened applesauce instead of maple syrup for a natural sweetness boost.
Variations & Adaptations
- Vegan & Dairy-Free: Swap out regular milk and butter for coconut or almond milk and coconut oil. The flavor is subtly different but just as creamy.
- Protein Boost: Stir in a scoop of your favorite protein powder or swirl in Greek yogurt after reheating for extra staying power.
- Seasonal Flavors: Add pumpkin puree and pumpkin pie spice in fall, or mix in fresh berries and a drizzle of honey during summer mornings.
- Slow Cooker Version: If you don’t have an Instant Pot, cook oats on low for 6-8 hours overnight. Just be sure to adjust liquid ratios slightly.
- Spiced Up: Add cardamom, nutmeg, or even a pinch of cayenne for a warming twist that wakes up your taste buds.
One of my personal favorites is stirring in peanut butter and sliced bananas right before serving—it’s like a cozy breakfast dessert. Give it a try and see how you like to make this creamy Instant Pot steel-cut oats meal prep your own.
Serving & Storage Suggestions
This oatmeal tastes best warm but also holds up well chilled. For serving, top with fresh fruit, nuts, or a spoonful of nut butter. A sprinkle of chia seeds or flax meal adds a nice crunch and extra nutrients. Pair it with a cup of hot coffee or herbal tea to round out your morning.
Store your prepared oats in airtight containers in the fridge for up to 5 days. When ready to eat, reheat in the microwave for 1-2 minutes, stirring halfway through. If the oats have thickened too much, add a splash of milk or water to loosen the texture. You’ll find the flavors deepen and mellow as they sit, making leftovers even more satisfying.
If you want to freeze portioned oats, they do freeze well for up to 3 months. Just thaw overnight in the fridge and reheat gently on the stove or microwave.
Nutritional Information & Benefits
A typical serving of this creamy Instant Pot steel-cut oats meal prep (about 1 cup cooked) provides roughly 250 calories, 5 grams of protein, 4 grams of fiber, and a good dose of complex carbohydrates for sustained energy. Steel-cut oats are a whole grain powerhouse rich in beta-glucan, a type of soluble fiber that supports heart health and helps keep you feeling full.
Adding milk or dairy alternatives contributes calcium and vitamin D, while cinnamon offers anti-inflammatory properties. This recipe is naturally gluten-free if you choose certified gluten-free oats, and it’s easy to customize for low-sugar or vegan diets. It’s a wholesome way to start your day on a nourishing note.
Conclusion
If you’re searching for a creamy, comforting breakfast that’s ready in a flash and keeps well for busy mornings, this creamy Instant Pot steel-cut oats meal prep is exactly what you need. It’s easy to customize, packed with wholesome ingredients, and, honestly, it’s just downright delicious. I love how it brings a little warmth and calm to my hectic weekday routine.
Give it a try, tweak it to your tastes, and don’t be shy about sharing how you make it your own. Drop a comment below if you have any questions or your own favorite toppings—because breakfast is always better when it’s shared. Here’s to many cozy mornings ahead!
FAQs About Creamy Instant Pot Steel-Cut Oats Meal Prep
How long do steel-cut oats last in the fridge?
Stored in an airtight container, cooked steel-cut oats last about 4 to 5 days in the refrigerator.
Can I use quick oats instead of steel-cut oats in this recipe?
Quick oats cook much faster and have a different texture, so this recipe isn’t ideal for them. For creamy texture, stick to steel-cut oats.
Is it possible to make this recipe gluten-free?
Yes! Just use certified gluten-free steel-cut oats to avoid cross-contamination.
Can I add fruit during cooking?
It’s better to add fresh or dried fruit after cooking to keep the oats creamy and avoid mushiness.
What if my Instant Pot doesn’t have a manual setting?
Use the “porridge” or “multigrain” setting if available, or check your model’s instructions for pressure cooking steel-cut oats.
Pin This Recipe!
Creamy Instant Pot Steel-Cut Oats Meal Prep Easy 5-Day Breakfast Recipe

A creamy, comforting steel-cut oats recipe made quickly in the Instant Pot, perfect for meal prepping 5 days of breakfasts with a rich, velvety texture and warm cinnamon and vanilla flavors.
- Prep Time: 5 minutes
- Cook Time: 20 minutes
- Total Time: 25 minutes
- Yield: 5 servings 1x
- Category: Breakfast
- Cuisine: American
Ingredients
- 1 cup (160g) steel-cut oats
- 3 cups (720ml) water
- 1 cup (240ml) milk (whole milk preferred, or almond, oat, or coconut milk for dairy-free)
- ½ teaspoon salt
- 2 tablespoons maple syrup (or honey/agave nectar)
- 1 teaspoon vanilla extract
- 1 teaspoon ground cinnamon
- 1 tablespoon butter (optional, or coconut oil for vegan)
- Nuts and fruit toppings (optional: chopped walnuts, sliced bananas, fresh berries, dried cranberries)
Instructions
- Rinse 1 cup (160g) steel-cut oats under cold water to remove dust and prevent clumping (about 1 minute).
- Add 3 cups (720ml) water, 1 cup (240ml) milk, ½ teaspoon salt, 1 teaspoon ground cinnamon, and 1 teaspoon vanilla extract to the Instant Pot. Stir gently to combine (about 2 minutes).
- Add the rinsed oats to the pot and stir to ensure oats are evenly submerged (about 1 minute).
- Close the Instant Pot lid securely and set the valve to sealing. Select ‘Pressure Cook’ or ‘Manual’ and set timer for 10 minutes on high pressure.
- Allow the pressure to release naturally for 10 minutes after cooking, then carefully switch the valve to venting to release any remaining pressure.
- Open the lid and stir in 1 tablespoon butter and 2 tablespoons maple syrup while oats are hot. Adjust sweetness if needed.
- Spoon oats into meal prep containers for 5 days. Let cool slightly before sealing and refrigerating (about 10 minutes).
- If oats are too thick after resting, stir in a splash of milk to loosen before serving.
Notes
Rinse oats before cooking to prevent starchy foam clogging the valve. Use natural pressure release for best texture. Stir in butter or coconut oil after cooking for creaminess. Add toppings fresh after reheating. For dairy-free, use almond or coconut milk and coconut oil. Oats thicken as they cool; add milk to loosen if needed.
Nutrition
- Serving Size: About 1 cup cooked o
- Calories: 250
- Sugar: 6
- Sodium: 150
- Fat: 5
- Saturated Fat: 2
- Carbohydrates: 45
- Fiber: 4
- Protein: 5
Keywords: Instant Pot, steel-cut oats, meal prep, breakfast, creamy oats, easy oatmeal, healthy breakfast, gluten-free, dairy-free option