Let me tell you, the smell of toasted marshmallows mingling with melted chocolate and graham crackers is enough to make anyone’s mouth water—and that’s exactly what a cozy s’mores bar DIY dessert station brings to your house. The first time I set up this s’mores spread for a chilly autumn evening, I was instantly hooked. It was the kind of moment where you pause, take a deep breath, and just smile because you know you’re onto something truly special. Years ago, when I was knee-high to a grasshopper, my grandma would roast marshmallows over a tiny campfire in her backyard. Those memories of sticky fingers and warm laughter made this DIY dessert station feel like pure, nostalgic comfort.
Honestly, my family couldn’t stop sneaking those gooey treats off the table (and I can’t really blame them). Whether you’re planning a casual get-together, a fun night with the kids, or a sweet highlight for your next potluck, this cozy s’mores bar DIY dessert station is dangerously easy to set up and endlessly satisfying. You know what makes it extra special? The chance to customize each bite exactly how you like it—no boring, one-size-fits-all s’more here. After testing this recipe multiple times in the name of research, of course, it’s become a staple for family gatherings, gifting, and those moments when you just need a warm hug from the inside out. Trust me, you’re going to want to bookmark this one.
Why You’ll Love This Cozy S’mores Bar DIY Dessert Station
After many cozy evenings spent around this s’mores bar, here’s why I think you’ll love it just as much as I do:
- Quick & Easy: Comes together in under 20 minutes, perfect for last-minute dessert cravings or a spontaneous treat.
- Simple Ingredients: No fancy grocery trips needed; most of these goodies are pantry staples or easily found in any store.
- Perfect for Any Occasion: Ideal for birthday parties, family movie nights, cozy fall gatherings, or even impromptu celebrations.
- Crowd-Pleaser: Always gets rave reviews from kids and adults alike—there’s just something magical about letting everyone build their own s’mores masterpiece.
- Unbelievably Delicious: The combination of crunchy graham crackers, melty chocolate, and pillowy marshmallows is comfort food at its finest.
This isn’t just any s’mores setup, either. I’ve added little twists like different chocolate types (hello, salted caramel!) and fun toppings that take it beyond your typical campfire snack. Plus, the freedom to mix and match means every bite feels like a mini dessert adventure. Honestly, it’s the kind of treat that makes you close your eyes after the first bite and smile. Whether you want to impress guests with minimal effort or just treat yourself to a cozy night in, this dessert station hits all the right notes.
What Ingredients You Will Need
This cozy s’mores bar DIY dessert station uses simple, wholesome ingredients to deliver bold flavor and satisfying texture without the fuss. Most are pantry staples, and you can easily swap to suit your taste or dietary needs.
- Graham Crackers: The classic s’mores base. I recommend Honey Maid for the best texture and sweetness.
- Marshmallows: Large, fluffy ones roast beautifully. You can also include mini marshmallows for topping variety.
- Chocolate Bars: Milk chocolate is traditional, but dark chocolate or even flavored bars like salted caramel or mint add a fun twist.
- Peanut Butter Cups: For a nutty variation that melts just right.
- Fruit Slices: Strawberries or banana slices add a fresh, sweet contrast (great for summer or spring setups).
- Nut Toppings: Chopped almonds, pecans, or hazelnuts for crunch.
- Optional Extras:
- Caramel sauce or chocolate syrup (for drizzling)
- Sea salt flakes
- Shredded coconut
- Crushed cookies or pretzels for extra crunch
If you want a gluten-free version, swap the graham crackers for gluten-free crackers or crisp rice cakes. Dairy-free chocolate and marshmallows are also easy to find these days. This flexibility makes the cozy s’mores bar DIY dessert station perfect for almost any dietary preference.
Equipment Needed
- Serving Platters or Trays: To lay out your ingredients attractively. Wooden boards add rustic charm, but any flat surface works.
- Small Bowls: For holding toppings like nuts, fruit, and sauces.
- Toasting Tools: A tabletop s’mores maker or a small tabletop fire pit is ideal. If you don’t have those, a kitchen torch or even the oven broiler can work in a pinch.
- Skewers or Long Forks: For roasting marshmallows safely.
- Napkins and Plates: Because let’s face it, s’mores can get sticky.
If you’re on a budget, you can easily repurpose what you have—like using a baking sheet under the broiler for toasting or wooden skewers from the craft store. I personally like investing in a small tabletop s’mores grill; it’s super fun and makes the whole experience feel special. Just remember to keep your equipment clean and dry between uses to keep everything tasting fresh.
Preparation Method
- Gather and Arrange Ingredients (10 minutes): Lay out your graham crackers, chocolate bars, marshmallows, and any toppings on serving trays or platters. Make sure everything is within easy reach for guests to customize their s’mores.
- Set Up Your Toasting Station (5 minutes): If using a tabletop s’mores maker or fire pit, set it up on a stable, heat-safe surface. For kitchen torch or oven broiler methods, prepare those areas safely and have skewers ready.
- Toast the Marshmallows (2-3 minutes per batch): Use skewers to toast marshmallows over your heat source. Look for a golden brown exterior with a soft, gooey inside. If you see them catching fire, just blow gently to extinguish flames—charred spots can add a smoky flavor if you like.
- Assemble Your S’mores: Layer a square of chocolate on a graham cracker, add your toasted marshmallow on top, and then sandwich with another graham cracker. Press gently to melt the chocolate slightly.
- Add Toppings and Customize: Sprinkle nuts, drizzle caramel, or add fruit slices as desired. This is where the magic happens—feel free to get creative!
- Serve Immediately: S’mores are best enjoyed warm when the chocolate is melty and marshmallows are gooey. Have plates and napkins ready for your guests.
Quick tip: If you’re using the oven broiler to toast marshmallows, keep a close eye—they can go from golden to burnt in seconds. Also, prepping all your toppings before lighting the fire saves time and keeps the flow smooth. I like to have a little trash bowl nearby for used skewers or marshmallow bits. Trust me, it makes cleanup way easier.
Cooking Tips & Techniques
Getting that perfect s’more is part art, part patience. Here’s what I’ve learned from many cozy nights testing this setup:
- Marshmallow Toasting: Hold your marshmallow a few inches above the flame or heat source. Rotate slowly for even browning without burning. If you prefer a smoky char, let it catch fire briefly—then blow it out gently.
- Chocolate Choices: Use good quality bars that melt smoothly. Avoid overly thick or super dark chocolates if you want that classic creamy melt.
- Timing: Assemble s’mores right after toasting. The marshmallow’s heat melts the chocolate perfectly. If you wait too long, it cools and gets sticky but firm.
- Multitasking: If you have a crowd, designate one or two people to manage roasting, while others build their s’mores. Keeps things moving and fun.
- Cleanup: Line your serving area with parchment paper or easy-clean mats. Marshmallow drips can get messy fast.
One time, I left a marshmallow near the flame too long, and it turned into a charcoal ball. It was funny, but definitely not tasty! Now I keep a close watch and practice patience—slow and steady wins the s’mores race.
Variations & Adaptations
One of the best things about a cozy s’mores bar DIY dessert station is how easy it is to customize. Here are some variations I’ve tried and loved:
- Dietary-Friendly: Use gluten-free graham crackers and dairy-free chocolate and marshmallows for a safe, delicious treat.
- Seasonal Flavors: In fall, add pumpkin spice marshmallows or cinnamon-dusted chocolate pieces. In summer, fresh berries or sliced peaches make a refreshing twist.
- Flavor Twists: Swap the classic chocolate for Nutella, peanut butter cups, or white chocolate chips. Add a sprinkle of sea salt for a sweet-salty combo.
- Cooking Methods: If you don’t have a toasting station, try roasting marshmallows over a backyard fire pit or even under your oven broiler (watch closely!).
- Personal Favorite: I once tried adding a tiny smear of raspberry jam inside the s’more before toasting. It was unexpectedly delicious and added a nice tangy contrast to the sweetness.
Feel free to mix and match based on what you have on hand or what flavors you enjoy most. That’s the beauty of this DIY dessert station—it’s all about your ultimate indulgence.
Serving & Storage Suggestions
Serve your s’mores warm and gooey for that perfect melty texture. They’re fantastic alongside a hot cup of cocoa, coffee, or even a chilled glass of milk. For a festive touch, sprinkle a little extra chopped nuts or a dusting of powdered sugar on top before serving.
Leftovers? While s’mores are best fresh, you can store assembled ones wrapped tightly in plastic wrap or in an airtight container at room temperature for up to 24 hours. Avoid refrigeration as it can make the graham crackers soggy. To reheat, pop them in the microwave for 10-15 seconds or briefly under the broiler—just watch carefully to avoid burning.
Over time, the flavors meld beautifully if you cover and let them sit for a few hours, but the marshmallow won’t stay as gooey. For the best experience, enjoy immediately, but knowing you can save a little for later is always comforting.
Nutritional Information & Benefits
This cozy s’mores bar DIY dessert station is a treat, so enjoy it in moderation. Here’s a rough idea of the nutrition for one classic s’more (one serving):
| Nutrient | Amount |
|---|---|
| Calories | 200-250 kcal |
| Fat | 8-12 g |
| Sugar | 18-22 g |
| Protein | 2-3 g |
Key ingredients like graham crackers and chocolate provide quick energy, while nuts or fruit toppings add some fiber and nutrients. If you’re watching allergens, watch out for gluten in graham crackers and dairy in chocolate and marshmallows—there are plenty of allergen-friendly alternatives available.
From my wellness perspective, sharing this dessert station with family and friends encourages bonding and joy—sometimes, that’s just as important as the nutrition. Go ahead and savor every sweet, gooey bite.
Conclusion
In the end, this cozy s’mores bar DIY dessert station is worth every sticky, melty moment. It’s an easy, fun way to bring everyone together around a shared love of simple, nostalgic treats. Customize it your way, add your favorite flavors, and let the good times roll.
I love this recipe because it turns dessert into an experience—one that’s relaxed, interactive, and packed with smiles. If you give it a try, let me know how you set up your s’mores bar and what combos were your favorite. Don’t be shy—share your stories, photos, and tweaks in the comments below. Here’s to cozy nights and sweet indulgences!
FAQs About the Cozy S’mores Bar DIY Dessert Station
Can I make this s’mores bar indoors?
Absolutely! Using a kitchen torch, oven broiler, or electric s’mores maker makes indoor toasting easy and safe. Just keep a close eye on the marshmallows.
What’s the best way to prevent marshmallows from catching fire?
Hold the marshmallow a few inches above the heat source and rotate slowly. If it catches fire, blow gently to extinguish flames—it adds a nice smoky flavor when done right.
Are there good vegan options for this dessert station?
Yes! Look for vegan marshmallows, dairy-free chocolate, and gluten-free or vegan graham crackers. The toppings can all be customized as well.
How do I keep the chocolate from melting too fast?
Assemble s’mores right after toasting the marshmallows to let the heat melt the chocolate just enough. If it melts too fast, keep the ingredients cool until ready to serve.
Can kids safely participate in making these s’mores?
Definitely, with adult supervision. Kids love assembling their own s’mores, but the toasting should be done by or closely supervised by adults for safety.
Pin This Recipe!
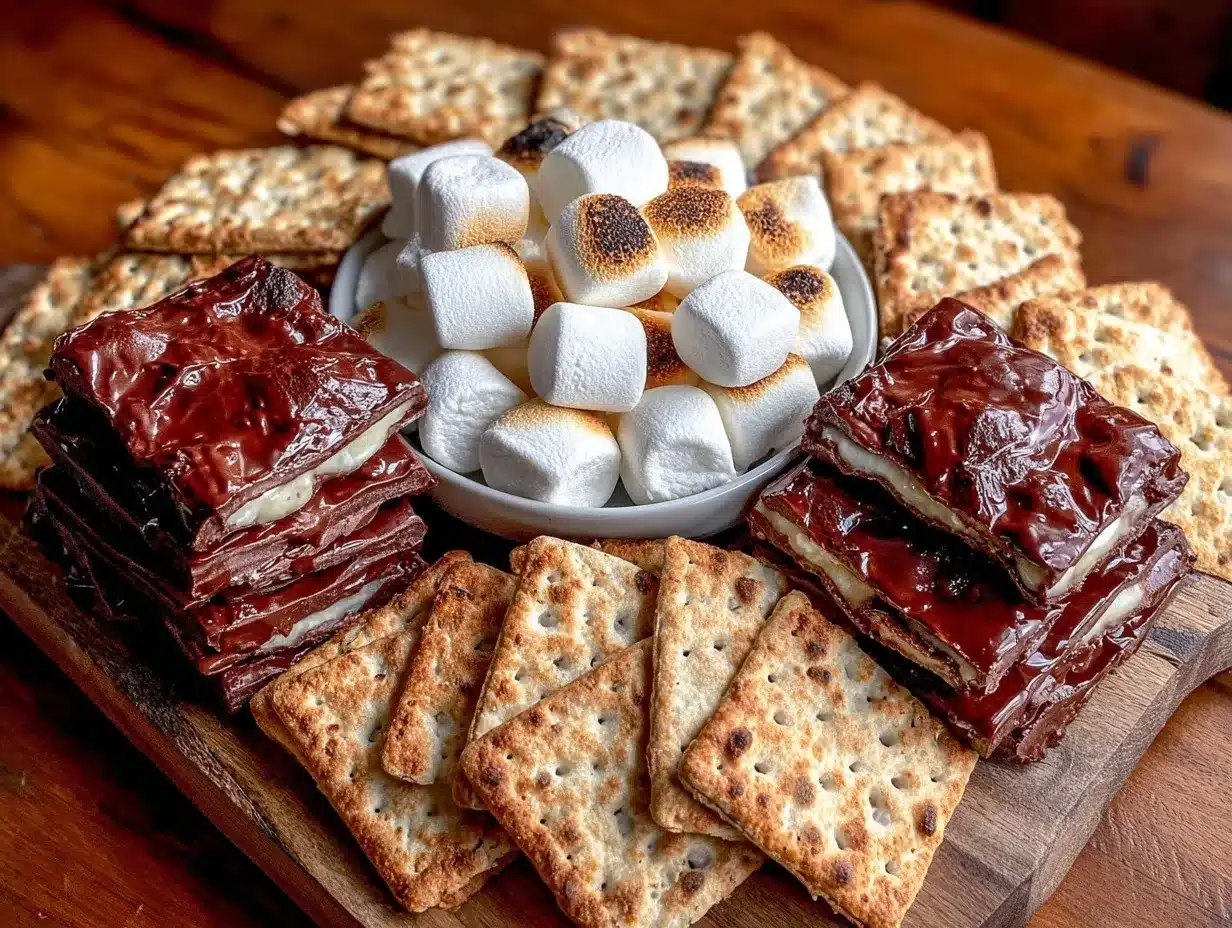
Cozy S’mores Bar DIY Dessert Station

A fun and easy DIY dessert station featuring customizable s’mores with toasted marshmallows, melted chocolate, and graham crackers. Perfect for family gatherings, parties, or cozy nights in.
- Prep Time: 10 minutes
- Cook Time: 10 minutes
- Total Time: 20 minutes
- Yield: 1 s’more per serving (adjust quantity based on guests)
- Category: Dessert
- Cuisine: American
Ingredients
- Graham crackers (Honey Maid recommended)
- Large marshmallows
- Mini marshmallows (optional)
- Chocolate bars (milk chocolate, dark chocolate, salted caramel, mint, etc.)
- Peanut butter cups (optional)
- Fruit slices (strawberries, banana slices)
- Nut toppings (chopped almonds, pecans, hazelnuts)
- Caramel sauce or chocolate syrup (optional, for drizzling)
- Sea salt flakes (optional)
- Shredded coconut (optional)
- Crushed cookies or pretzels (optional)
Instructions
- Gather and arrange ingredients on serving trays or platters, making sure everything is within easy reach for guests to customize their s’mores.
- Set up your toasting station using a tabletop s’mores maker, fire pit, kitchen torch, or oven broiler on a stable, heat-safe surface.
- Toast marshmallows using skewers over your heat source until golden brown and gooey inside, rotating slowly for even browning.
- Assemble s’mores by layering a square of chocolate on a graham cracker, adding the toasted marshmallow on top, then sandwiching with another graham cracker. Press gently to slightly melt the chocolate.
- Add toppings such as nuts, caramel drizzle, or fruit slices as desired.
- Serve immediately while warm and gooey.
Notes
If using the oven broiler, watch marshmallows closely to prevent burning. Prepare all toppings before toasting to keep the process smooth. For gluten-free or dairy-free versions, substitute graham crackers and chocolate accordingly. Assemble s’mores immediately after toasting for best melty texture. Keep a trash bowl nearby for easy cleanup.
Nutrition
- Serving Size: One classic s’more (
- Calories: 200250
- Sugar: 1822
- Fat: 812
- Protein: 23
Keywords: s’mores, dessert station, DIY dessert, toasted marshmallows, chocolate, graham crackers, family dessert, party dessert, easy dessert