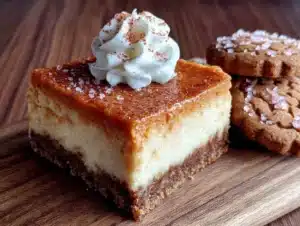
There used to be a tiny bakery tucked between a vintage bookstore and a dry cleaner on the corner of Elm and Maple in my old neighborhood. It was called The Gilded Spoon, and they made these pumpkin pie cheesecake bars that I still dream about. When they closed their doors two summers ago—a rent hike, I heard through the grapevine—I honestly felt a little lost. That first autumn without them, I tried every pumpkin dessert I could find, and nothing came close to the creamy, spiced perfection of those bars with their impossibly crunchy gingersnap crust.
After twelve tries—twelve, people—and one particularly disastrous batch that turned into pumpkin soup in my oven, I finally cracked the code. The secret, as it turns out, was in the layering and the crust. You can’t just press crumbs into a pan and hope for the best. There’s a technique to getting that crust to hold its own against the creamy cheesecake and the silky pumpkin pie layer on top. I burned my fingers testing it, I won’t lie, but the result was worth every minor kitchen mishap.
These bars are the reason I look forward to sweater weather. They’re the thing I bring to every Friendsgiving, the dessert that people text me about in July asking if I can make an off-season batch. And now, after all that trial and error, I’m finally sharing the exact method. Maybe you’ve been there—chasing a taste from a place that no longer exists, trying to convince yourself that store-bought will do the trick. Trust me, it won’t. But this recipe will.
Why You’ll Love This Recipe
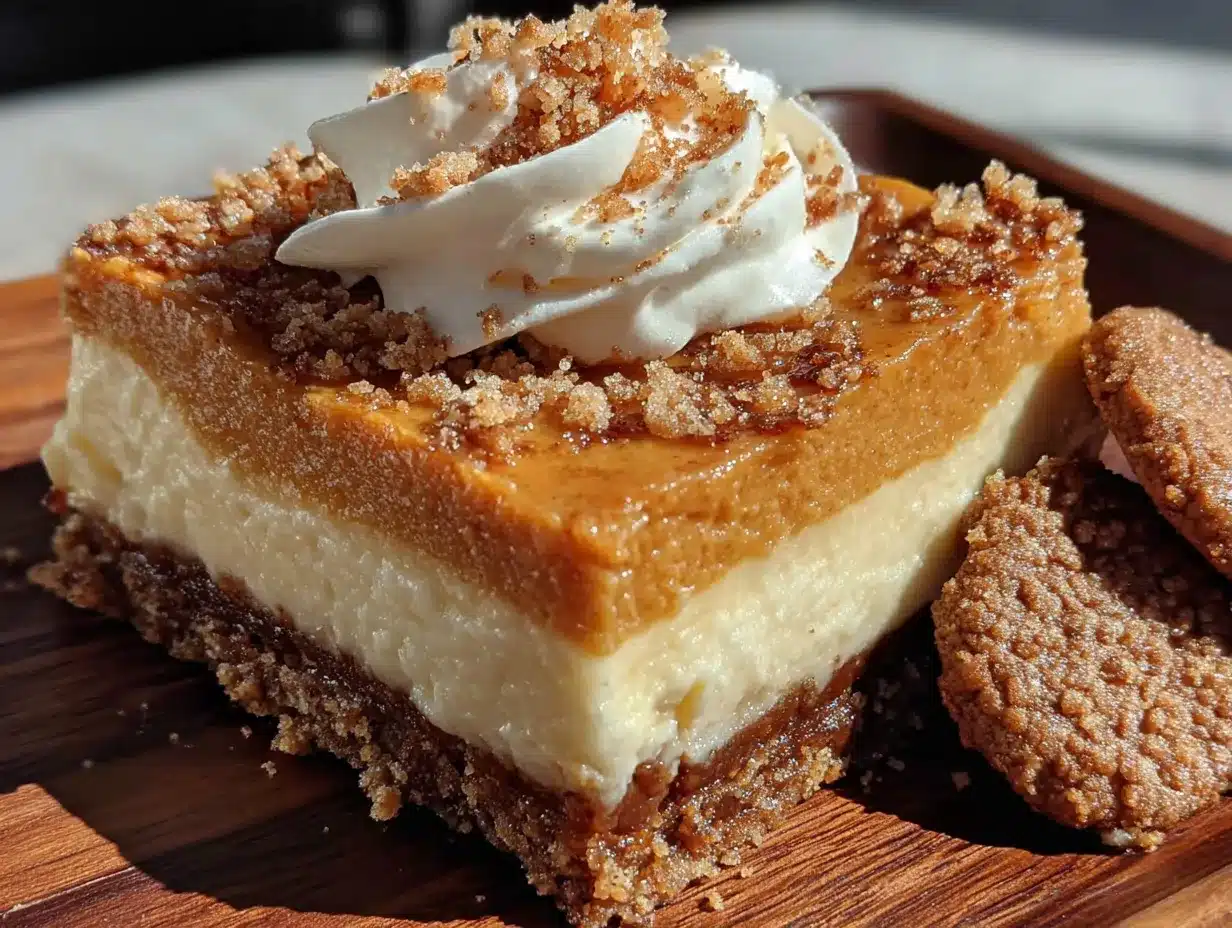
Let me tell you why these bars have become my most-requested fall dessert. First off, they solve the great pumpkin vs. cheesecake debate by giving you both in one perfect bite. No more choosing between a slice of pie or a slice of cheesecake at Thanksgiving dinner—you get the best of both worlds in a portable, bar-shaped package.
- No Water Bath Needed : Unlike traditional cheesecake, these bars bake up perfectly without a fussy water bath. No cracked tops, no soggy crusts, no stress.
- Make-Ahead Friendly : These bars actually taste better after a day in the fridge. The flavors meld together, and the texture becomes incredibly smooth. Perfect for holiday prep.
- Gingersnap Crust Magic : The spicy, molasses-rich gingersnap crust isn’t just a vessel—it’s a flavor powerhouse that complements the creamy filling in a way a graham cracker crust just can’t.
- Crowd-Pleasing Portions : Bars are so much easier to serve than a whole pie. No awkward slicing, no crumbling edges. Just neat, beautiful squares that everyone loves.
- That First Bite Reaction : I’m not kidding when I say people close their eyes after the first bite. The combination of tangy cheesecake, spiced pumpkin, and that crunchy, buttery crust is pure comfort food magic.
What makes these different from every other pumpkin cheesecake bar recipe out there? It’s the technique. Most recipes just dump everything together, but I’ve learned that pre-baking the crust, using room-temperature ingredients, and layering the cheesecake and pumpkin mixtures just right makes all the difference. This isn’t just another version—it’s the one I spent a whole autumn perfecting, and it shows in every single bite.
What Ingredients You Will Need
This recipe uses simple, wholesome ingredients that come together to create something truly special. Most of these are pantry staples, especially if you do a lot of fall baking. The key is using good-quality ingredients where it counts—like real butter and fresh spices.
For the Gingersnap Crust
- 2 cups (200g) gingersnap cookie crumbs — About 7 ounces of cookies. I prefer Nabisco brand for their consistent texture and bold ginger flavor. Pulse them in a food processor until you have fine crumbs, no big chunks.
- 1/4 cup (50g) granulated sugar — Just a touch of sweetness to balance the spicy cookies.
- 6 tablespoons (85g) unsalted butter, melted — Use real butter here, not margarine. It makes the crust hold together better and adds richness.
- 1/4 teaspoon salt — A pinch of salt enhances all the warm spices in the crust.
For the Cheesecake Layer
- 16 ounces (452g) cream cheese, softened — Full-fat is non-negotiable here. Low-fat cream cheese has too much water and can make the bars runny. Let it sit on the counter for at least an hour before starting.
- 1/2 cup (100g) granulated sugar — Just enough sweetness without overpowering the tangy cream cheese.
- 2 large eggs, room temperature — Cold eggs can seize up the cream cheese mixture. If you’re in a hurry, place them in a bowl of warm water for 5 minutes.
- 1 teaspoon vanilla extract — Pure vanilla extract, not imitation. It makes a real difference in the final flavor.
- 1 tablespoon all-purpose flour — This little bit of flour helps stabilize the cheesecake and prevent cracking.
For the Pumpkin Pie Layer
- 1 cup (245g) pumpkin puree — Not pumpkin pie filling! Make sure you grab 100% pure pumpkin puree. Libby’s is my go-to for consistent results.
- 1/2 cup (100g) packed light brown sugar — Brown sugar adds a deeper, molasses-like sweetness that pairs beautifully with the pumpkin.
- 1 large egg, room temperature — Same tip as above—warm it up first.
- 1 teaspoon vanilla extract — For warmth and depth.
- 1 teaspoon pumpkin pie spice — Or make your own blend: 1/2 teaspoon cinnamon, 1/4 teaspoon ginger, 1/8 teaspoon nutmeg, 1/8 teaspoon cloves.
- 1/2 teaspoon ground cinnamon — Extra cinnamon because you can never have too much.
- 2 tablespoons all-purpose flour — Helps thicken the pumpkin layer so it sets up properly.
Equipment Needed
You don’t need a professional pastry kitchen to make these bars, but having the right tools makes the process smoother. Here’s what you’ll need:
- 9×9-inch square baking pan — Glass or metal both work, but metal gives you slightly crispier edges on the crust. If you only have an 8×8 pan, the bars will be a bit thicker and need an extra 5-7 minutes of baking time.
- Parchment paper — Non-negotiable for easy removal. You’ll want two long strips crossed in the pan like a sling so you can lift the whole block out cleanly.
- Food processor — For crushing the gingersnaps into fine crumbs. A rolling pin and a zip-top bag work in a pinch, but the processor gives you a more consistent texture.
- Electric hand mixer or stand mixer — Cream cheese needs to be beaten until smooth and fluffy. A whisk and some elbow grease can work, but your arm will thank you for using a mixer.
- Medium and large mixing bowls — For the different layers.
- Spatula — A rubber spatula for scraping down the bowl and spreading the batter evenly.
- Measuring cups and spoons — Accurate measurements matter in baking more than in cooking.
I learned the hard way that skipping the parchment paper leads to a messy extraction. The first time I made these, I just greased the pan and ended up with a crumbled mess. Now I always use the parchment sling method—it’s a game-changer.
Preparation Method
- Preheat and Prep — Preheat your oven to 350°F (175°C). Line your 9×9 baking pan with two crossed strips of parchment paper, leaving about 2 inches of overhang on each side. This will be your lifting sling later. Lightly grease the parchment with butter or non-stick spray.
- Make the Crust — In your food processor, pulse the gingersnap cookies until they become fine crumbs. You should have about 2 cups. Transfer to a medium bowl, add the sugar and salt, and stir to combine. Pour in the melted butter and mix with a fork until all the crumbs are evenly moistened. The mixture should look like wet sand and hold together when you squeeze a handful.
- Press and Bake the Crust — Dump the crumb mixture into your prepared pan. Use the bottom of a measuring cup or a flat-bottomed glass to press it down firmly and evenly. I mean really press—you want a tight, compact layer. Bake for 10 minutes, then remove from the oven and let it cool slightly while you make the fillings. Keep the oven on.
- Start the Cheesecake Layer — In a large bowl, beat the softened cream cheese with an electric mixer on medium speed until smooth and creamy, about 2 minutes. Scrape down the sides and bottom of the bowl. Add the sugar and beat for another 2 minutes until light and fluffy. Add the eggs one at a time, beating on low speed after each addition just until combined. Overmixing at this stage can incorporate too much air and cause cracks. Stir in the vanilla and flour until just combined. Set aside.
- Make the Pumpkin Layer — In a separate medium bowl, whisk together the pumpkin puree, brown sugar, egg, vanilla, pumpkin pie spice, cinnamon, and flour until smooth. Make sure there are no lumps of brown sugar—break them up with the back of your whisk.
- Layer the Fillings — Spread the cheesecake mixture evenly over the pre-baked crust. Use a spatula to smooth it out to the edges. Then, carefully spoon the pumpkin mixture over the cheesecake layer. Use the back of a spoon or a small offset spatula to spread it evenly. Don’t worry if they mix slightly at the edges—that creates a nice marbled effect.
- Bake to Perfection — Place the pan in the preheated oven and bake for 35-40 minutes. The edges should look set and slightly puffed, but the center will still jiggle slightly when you gently shake the pan. That’s exactly what you want—it will continue to set as it cools. A toothpick inserted near the center should come out with just a few moist crumbs, not wet batter.
- Cool Completely — Place the pan on a wire rack and let it cool to room temperature, about 1-2 hours. Then, cover loosely with plastic wrap and refrigerate for at least 4 hours, or overnight. This is the hardest part—waiting—but it’s crucial for clean slices. The bars need time to fully set and develop their flavor.
- Slice and Serve — Once fully chilled, use the parchment sling to lift the entire block out of the pan. Place it on a cutting board and use a sharp knife to slice into 16 even bars. Wipe the knife clean between cuts for the neatest edges. If you want extra-clean slices, dip the knife in hot water and dry it before each cut.
Cooking Tips & Techniques
After that dozen failed attempts, I learned a few things the hard way. Let me save you the trouble.
Room temperature ingredients are not optional. I know, I know—you’re in a hurry and you think cold cream cheese will be fine. It won’t. Cold cream cheese creates lumps that never fully smooth out, and cold eggs can cause the mixture to curdle. Set everything out on the counter an hour before you start baking. Your future self will thank you.
Don’t overbake. This is the number one mistake I made in my early attempts. Cheesecake continues to cook from residual heat after it comes out of the oven. If you wait until the center is completely firm, you’ll end up with dry, cracked bars. Pull them when the center still has a slight jiggle—about the size of a quarter—and they’ll set up perfectly in the fridge.
Press that crust like you mean it. A loose crust crumbles when you try to cut the bars. I use the bottom of a measuring cup and really lean into it. Some people even use the bottom of a glass and press until their arm gets tired. That’s the right amount of pressure.
Let them chill overnight if you can. Four hours is the minimum, but overnight is where the magic happens. The flavors meld, the texture becomes silky smooth, and the bars slice like a dream. I’ve made these the morning of a party and regretted not starting the day before.
Use a sharp knife for clean cuts. Run it under hot water, dry it off, then slice. Wipe and repeat between each cut. It takes an extra minute but gives you those beautiful, bakery-style edges that make people think you bought them somewhere fancy.
Variations & Adaptations
These bars are wonderfully adaptable. Here are some variations I’ve tried and loved:
Gluten-Free Version — Use gluten-free gingersnap cookies for the crust (I’ve had great results with the Mi-Del brand). Substitute the all-purpose flour in both fillings with a 1:1 gluten-free baking flour blend. The texture is slightly more delicate but still delicious.
Dairy-Free Adaptation — This one takes a bit more work, but it’s doable. Use dairy-free cream cheese (Kite Hill or Violife work well) and substitute the butter in the crust with melted coconut oil or a plant-based butter. The texture won’t be quite as rich, but the flavor is still spot-on.
Maple Pecan Twist — Add 1/4 cup of maple syrup to the pumpkin layer and reduce the brown sugar by 2 tablespoons. Sprinkle 1/2 cup of chopped pecans over the top before baking for a crunchy, nutty finish. The maple and pumpkin combo is pure autumn heaven.
Chocolate Lover’s Version — Swap the gingersnap crust for a chocolate cookie crust (Oreo crumbs work great). Add 1/4 cup of melted dark chocolate to the cheesecake layer. The chocolate and pumpkin pairing is surprisingly good—trust me on this one.
Mini Bar Bites — Use a mini muffin tin lined with paper liners for bite-sized versions. Press about a tablespoon of crust into each cup, then fill with the cheesecake and pumpkin mixtures. Bake for 15-18 minutes. Perfect for parties or holiday cookie trays.
Serving & Storage Suggestions
These bars are best served cold, straight from the fridge. The texture is firm but creamy, and the flavors are more pronounced when they’re not at room temperature. I like to let them sit out for about 5 minutes before serving—just enough to take the chill off without losing that perfect texture.
For presentation, I dust the tops with a light sprinkle of cinnamon or a tiny dollop of whipped cream. A drizzle of caramel sauce over the top takes them to another level, especially if you’re serving them for a special occasion. They look gorgeous on a dessert platter alongside other fall treats like apple cider donuts or pecan pie bars.
Storage Instructions: Store the bars in an airtight container in the refrigerator for up to 5 days. Layer them between sheets of parchment paper so they don’t stick together. I’ve never had a batch last that long, but theoretically, they’ll keep.
Freezer Instructions: These freeze beautifully! Wrap individual bars tightly in plastic wrap, then place them in a freezer-safe bag or container. They’ll keep for up to 3 months. To thaw, transfer to the refrigerator overnight. The texture remains remarkably close to fresh.
One thing I’ve noticed—the flavors actually get better on day two. The spices mellow and meld together, and the cheesecake becomes even creamier. If you can resist eating them all on day one, you’re in for a treat.
Nutritional Information & Benefits
Here’s the honest truth: these are a treat, not a health food. But that doesn’t mean they’re without merit. Each bar (based on 16 servings) contains approximately:
- Calories: 285
- Fat: 18g
- Carbohydrates: 28g
- Protein: 5g
- Fiber: 1g
- Sugar: 18g
Pumpkin is a nutritional powerhouse—it’s loaded with vitamin A for eye health, fiber for digestion, and antioxidants that support your immune system. The ginger in the crust has anti-inflammatory properties, and the cinnamon helps regulate blood sugar. So while these bars are definitely an indulgence, they’re not empty calories.
For those with dietary restrictions, this recipe contains gluten (from the gingersnap cookies and flour), dairy (cream cheese and butter), and eggs. I’ve included substitution options above for gluten-free and dairy-free versions, but I haven’t tested an egg-free version that works well.
My personal perspective? Life is too short to skip dessert. These bars are part of what makes fall so special, and sharing them with people you love is good for the soul. Everything in moderation, including moderation.
Conclusion
These cozy pumpkin pie cheesecake bars with gingersnap crust are more than just a dessert—they’re a little piece of autumn you can hold in your hands. They’re the taste of crisp mornings, cozy sweaters, and gathering around the table with people you love. After all those failed attempts chasing the memory of that little bakery, I can honestly say this recipe is even better than the original.
I’d love to hear how these turn out for you! Did you add your own twist? Did your family fight over the last bar? Drop a comment below and let me know. And if you’re feeling generous, share a photo—tag me so I can see your beautiful creation. There’s nothing that makes my day like seeing someone else fall in love with a recipe I poured my heart into.
So go ahead, preheat that oven, and make some memories. These bars are worth every single step. Happy baking, friends!
Frequently Asked Questions
Can I use pumpkin pie filling instead of pumpkin puree?
No, don’t do it! Pumpkin pie filling is already sweetened and spiced, so it will throw off the entire balance of the recipe. Stick with 100% pure pumpkin puree for the best results. Your taste buds will thank you.
Why did my cheesecake layer crack?
This usually happens from overbaking or overmixing. Make sure you pull the bars when the center still has a slight jiggle. Also, be gentle when mixing in the eggs—too much air creates cracks as the cheesecake bakes and then cools.
Can I make these bars in a different size pan?
Absolutely! A 9×13 pan will give you thinner bars and you’ll need to reduce the baking time to about 25-30 minutes. An 8×8 pan will give you thicker bars and you’ll need to add 5-7 minutes. Just keep an eye on them and use the jiggle test.
How far in advance can I make these?
You can make them up to 3 days ahead and keep them in the refrigerator. They actually taste better on day two! You can also freeze them for up to 3 months—just wrap them well and thaw overnight in the fridge.
Can I use homemade gingersnaps for the crust?
Yes, and they’ll be even better! Just make sure your homemade cookies are crisp, not soft. Soft cookies won’t create that crunchy, stable crust you’re looking for. If your homemade cookies are on the softer side, bake them at 300°F for 10 minutes to dry them out before crushing.
Pin This Recipe!
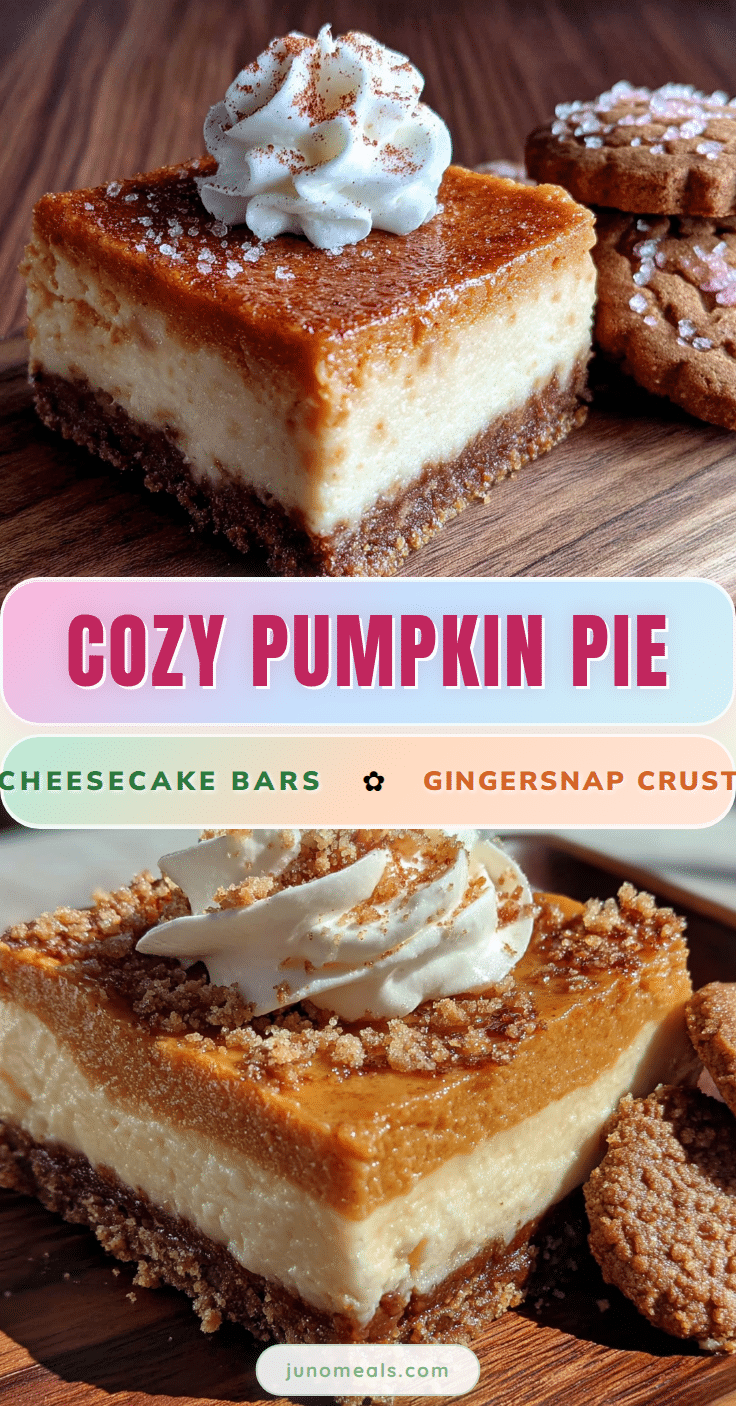
Cozy Pumpkin Pie Cheesecake Bars with Gingersnap Crust
These pumpkin pie cheesecake bars feature a crunchy gingersnap crust, a creamy cheesecake layer, and a silky pumpkin pie topping. No water bath needed, they are make-ahead friendly and perfect for fall gatherings.
- Prep Time: 30 minutes
- Cook Time: 40 minutes
- Total Time: 5 hours (includes cooling and chilling)
- Yield: 16 bars 1x
- Category: Dessert
- Cuisine: American
Ingredients
- 2 cups (200g) gingersnap cookie crumbs (about 7 oz cookies)
- 1/4 cup (50g) granulated sugar
- 6 tablespoons (85g) unsalted butter, melted
- 1/4 teaspoon salt
- 16 ounces (452g) cream cheese, softened
- 1/2 cup (100g) granulated sugar
- 2 large eggs, room temperature
- 1 teaspoon vanilla extract
- 1 tablespoon all-purpose flour
- 1 cup (245g) pumpkin puree (not pumpkin pie filling)
- 1/2 cup (100g) packed light brown sugar
- 1 large egg, room temperature
- 1 teaspoon vanilla extract
- 1 teaspoon pumpkin pie spice
- 1/2 teaspoon ground cinnamon
- 2 tablespoons all-purpose flour
Instructions
- Preheat oven to 350°F (175°C). Line a 9×9-inch baking pan with two crossed strips of parchment paper, leaving about 2 inches of overhang on each side. Lightly grease the parchment with butter or non-stick spray.
- Make the crust: In a food processor, pulse gingersnap cookies until fine crumbs (about 2 cups). Transfer to a medium bowl, add 1/4 cup sugar and 1/4 teaspoon salt, and stir. Pour in 6 tablespoons melted butter and mix with a fork until all crumbs are evenly moistened (like wet sand).
- Press the crumb mixture firmly and evenly into the prepared pan using the bottom of a measuring cup or glass. Bake for 10 minutes, then remove from oven and let cool slightly. Keep the oven on.
- Make the cheesecake layer: In a large bowl, beat softened cream cheese with an electric mixer on medium speed until smooth and creamy, about 2 minutes. Scrape down sides. Add 1/2 cup sugar and beat for another 2 minutes until light and fluffy. Add eggs one at a time, beating on low after each just until combined. Stir in 1 teaspoon vanilla and 1 tablespoon flour until just combined. Set aside.
- Make the pumpkin layer: In a separate medium bowl, whisk together pumpkin puree, brown sugar, 1 egg, 1 teaspoon vanilla, pumpkin pie spice, cinnamon, and 2 tablespoons flour until smooth.
- Spread the cheesecake mixture evenly over the pre-baked crust. Carefully spoon the pumpkin mixture over the cheesecake layer and spread evenly (slight mixing at edges creates a marbled effect).
- Bake for 35-40 minutes. Edges should be set and slightly puffed, but center will still jiggle slightly when shaken. A toothpick near the center should come out with a few moist crumbs, not wet batter.
- Place pan on a wire rack and cool to room temperature, about 1-2 hours. Cover loosely with plastic wrap and refrigerate for at least 4 hours, or overnight.
- Once fully chilled, use the parchment sling to lift the entire block out of the pan. Place on a cutting board and slice into 16 even bars with a sharp knife, wiping the knife clean between cuts.
Notes
Room temperature ingredients are crucial for a smooth texture. Do not overbake; the center should still jiggle slightly when done. For clean slices, chill overnight and use a sharp knife wiped clean between cuts. The bars can be stored in the refrigerator for up to 5 days or frozen for up to 3 months.
Nutrition
- Serving Size: 1 bar
- Calories: 285
- Sugar: 18
- Sodium: 220
- Fat: 18
- Saturated Fat: 10
- Carbohydrates: 28
- Fiber: 1
- Protein: 5
Keywords: pumpkin cheesecake bars, gingersnap crust, fall dessert, Thanksgiving dessert, pumpkin pie bars, cheesecake bars, no water bath cheesecake