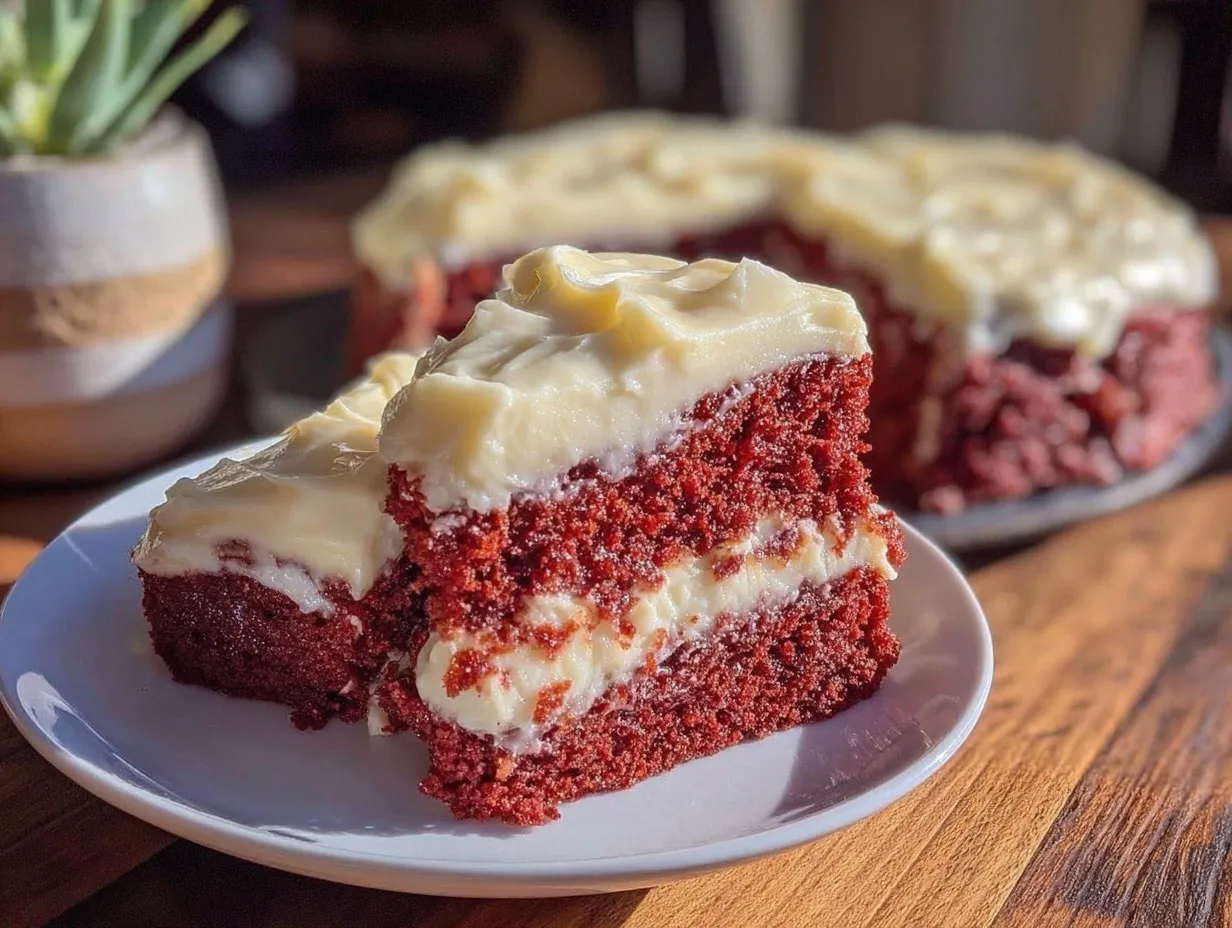
“Are you sure this is going to work?” my friend asked skeptically as I carefully spooned the bright red batter into the pans. Honestly, I wasn’t entirely sure myself. I had envisioned a striking red velvet flag cake—layered just right with cream cheese frosting stripes—but this was my first time attempting such a visually bold design. The kitchen was a mess, the timer ticking down, and my nerves buzzing. Yet, when I finally sliced into the cake, revealing those perfect red-and-white stripes, the room filled with quiet awe. It was a little victory, a moment of pure comfort after a long, chaotic week.
This perfect red velvet flag cake with cream cheese frosting isn’t just about stunning looks; it’s about that feeling of accomplishment and the joy of sharing something memorable. The smooth, tangy frosting paired with the tender, cocoa-spiced cake has me reaching for seconds every time. Most importantly, it’s approachable—even if you don’t consider yourself a baker. I’m sharing this recipe because it stuck with me, a sweet reminder that sometimes the simplest ingredients and a bit of patience can turn into something extraordinary.
So, if you’ve been craving a show-stopping dessert that’s both nostalgic and fresh, this cake might just become your new go-to. Let’s unpack what makes this recipe stand out and why it’s perfect for your next celebration or cozy weekend baking session.
Why You’ll Love This Recipe
After making this red velvet flag cake multiple times (I’m not kidding, it’s been a weekly obsession for a while!), I can confidently say it’s a winner for so many reasons. Here’s what makes it stand out:
- Quick & Easy: From mixing to frosting, it comes together in under 1.5 hours—ideal for busy weeknights or last-minute dessert emergencies.
- Simple Ingredients: No need for fancy baking supplies or hard-to-find items. You probably have everything in your pantry and fridge right now.
- Perfect for Special Occasions: The flag design makes it a festive centerpiece for holidays, birthdays, or even patriotic celebrations.
- Crowd-Pleaser: Kids and adults alike rave about the moist crumb and luscious cream cheese frosting—trust me, it rarely lasts more than a day.
- Unbelievably Delicious: The subtle cocoa undertones in the red velvet cake perfectly balance with the tangy, creamy frosting—comfort food, but with a classy twist.
This isn’t just any red velvet cake. The technique of layering and frosting creates that striking flag effect without complicated piping or decorating skills. Plus, I tweak the frosting slightly to be a bit lighter and more spreadable than traditional versions. It’s a recipe that invites you to feel proud of your baking, even if you’re more of a casual cook.
And let’s be honest—there’s something quietly satisfying about cutting into a cake that looks like a work of art but tastes like your favorite childhood treat. This recipe has that magic, and I hope you find the same joy in making it.
What Ingredients You Will Need
This recipe uses simple, wholesome ingredients to deliver bold flavor and that signature red velvet texture, all without fuss. Most of these are pantry staples, making it easy to whip up whenever the mood strikes.
- For the Cake Batter:
- All-purpose flour, 2 ½ cups (312 g) – provides a tender crumb; I like King Arthur for consistent results
- Cocoa powder, 2 tablespoons (unsweetened) – gives that subtle chocolate hint
- Baking soda, 1 teaspoon – helps the cake rise
- Salt, ½ teaspoon – balances sweetness and enhances flavor
- Granulated sugar, 1 ¾ cups (350 g) – for sweetness and structure
- Vegetable oil, 1 cup (240 ml) – keeps the cake moist; feel free to swap for light olive oil
- Buttermilk, 1 cup (240 ml) – adds tang and tenderizes; if you’re out, mix 1 cup milk with 1 tablespoon lemon juice as a substitute
- Large eggs, 2 (room temperature) – for structure and richness
- Vanilla extract, 1 teaspoon – depth of flavor
- Red food coloring, 2 tablespoons – the star of the show; gel-based works best for vibrant color without thinning the batter
- Distilled white vinegar, 1 teaspoon – reacts with baking soda for lift and tender crumb
- For the Cream Cheese Frosting:
- Cream cheese, 16 oz (450 g), softened – I prefer Philadelphia brand for smoothness
- Unsalted butter, ½ cup (115 g), softened – adds richness
- Powdered sugar, 4 cups (480 g) – for sweetness and smooth texture
- Vanilla extract, 1 teaspoon – enhances flavor
- Pinch of salt – balances sweetness
Feel free to swap the all-purpose flour for a gluten-free blend if needed. For a dairy-free option, almond milk and vegan cream cheese can work, though the texture will shift slightly. The red food coloring is key to that classic red velvet look—don’t skimp here, or the flag effect won’t pop.
Equipment Needed
- Two 9-inch (23 cm) round cake pans – I find non-stick pans help with clean release, but greasing and lining with parchment works just fine.
- Mixing bowls – at least two, for dry and wet ingredients.
- Electric mixer or stand mixer – makes frosting smooth and cake batter well blended; a hand whisk works but takes more effort.
- Measuring cups and spoons – precision matters for baking success.
- Rubber spatula – essential for folding and scraping batter.
- Cooling racks – helps cakes cool evenly and prevents sogginess.
- Offset spatula or butter knife – for smooth frosting application.
- Sharp serrated knife – to level cake layers if needed.
If you don’t have two cake pans, you can bake one layer at a time but expect longer baking times. Personally, I keep my pans well-seasoned and avoid metal utensils to preserve the non-stick surface—makes cleanup less of a chore. For budget-friendly alternatives, silicone baking mats can substitute parchment paper for lining.
Preparation Method
- Prepare the pans: Preheat your oven to 350°F (175°C). Grease two 9-inch cake pans and line the bottoms with parchment paper. This helps the layers release cleanly after baking. Set aside.
- Mix dry ingredients: In a large bowl, sift together 2 ½ cups (312 g) all-purpose flour, 2 tablespoons cocoa powder, 1 teaspoon baking soda, and ½ teaspoon salt. This step ensures even distribution and a light cake crumb. Set aside.
- Combine wet ingredients: In another bowl, whisk 1 ¾ cups (350 g) sugar and 1 cup (240 ml) vegetable oil until smooth. Add 2 large eggs, one at a time, beating well after each addition. Stir in 1 teaspoon vanilla extract and 1 teaspoon distilled white vinegar.
- Add color and buttermilk: Mix in 2 tablespoons red food coloring thoroughly until the batter is uniformly bright red. Then alternate adding the dry ingredients and 1 cup (240 ml) buttermilk, starting and ending with dry ingredients. Mix gently but completely—overmixing can make the cake tough.
- Pour and bake: Divide the batter evenly between the prepared pans. Tap them gently on the counter to release air bubbles. Bake for 30-35 minutes, or until a toothpick inserted near the center comes out clean. Oven times vary, so start checking at 28 minutes.
- Cool the cakes: Let the cakes cool in their pans for 10 minutes, then turn out onto cooling racks. Allow to cool completely before frosting; if you frost warm cake, the frosting will melt and slide off.
- Make the cream cheese frosting: Beat 16 oz (450 g) softened cream cheese and ½ cup (115 g) softened unsalted butter together until smooth and fluffy. Gradually add 4 cups (480 g) powdered sugar, mixing on low speed to avoid a sugar cloud. Stir in 1 teaspoon vanilla extract and a pinch of salt. Taste and adjust sweetness if needed.
- Assemble the flag cake: Level the cake layers with a serrated knife if domed. Place one layer on your serving plate. Spread an even layer of frosting (about ½ cup) over the top. Add the second cake layer and frost the entire cake with a thin crumb coat. Chill for 15 minutes.
- Create the flag design: Using the remaining frosting, pipe or spread stripes across the cake surface to mimic the American flag’s stripes. For the “stars” section, you can use a small square of cake or frosting tinted with a bit of blue food coloring. It’s a fun, festive touch that’s surprisingly easy to pull off.
Tip: If your frosting feels too soft while decorating, pop it in the fridge for 10 minutes to firm up. For a smooth finish, dip your spatula in hot water and dry it before smoothing the frosting.
Cooking Tips & Techniques
There are a few things I’ve learned from making this cake more times than I can count. First off, patience is your best friend—don’t rush cooling or frosting steps. The cake layers need to be completely cool to avoid a frosting meltdown.
When mixing the batter, fold in the flour gently to keep the crumb tender. Overmixing develops gluten and leads to a dense cake, which you definitely don’t want here.
One trick I use is to level the cake layers with a serrated knife or cake leveler to create neat, even layers—this makes that flag effect sharp and clean.
For frosting, always use room temperature cream cheese and butter. This prevents lumps and makes spreading much easier. If you’ve ever had frosting split or get grainy, it’s usually because the ingredients were too cold or mixed too fast.
Multitasking tip: While cakes bake, clean up your mixing bowls and prep your frosting ingredients. This little habit saves time and reduces kitchen chaos.
Variations & Adaptations
- Gluten-Free Version: Swap the all-purpose flour for a 1:1 gluten-free baking flour blend. I’ve tried Bob’s Red Mill with success; just be sure to check your cocoa powder is gluten-free too.
- Vegan Adaptation: Use flax eggs (1 tablespoon flaxseed meal + 3 tablespoons water per egg), dairy-free cream cheese, and plant-based butter. Almond or oat milk works well for the buttermilk substitute.
- Flavor Twists: Add a teaspoon of espresso powder to the batter for a deeper chocolate flavor or sprinkle chopped pecans between layers for texture.
- Alternative Frosting: If you want something lighter, try a whipped cream cheese frosting by folding whipped cream into the cream cheese mixture—less sweet but still tangy and smooth.
Personally, I once experimented with a mini version of this cake for a summer picnic, similar to the mini lemon blueberry cheesecakes I love making. It was a hit and a great way to serve individual portions without fuss.
Serving & Storage Suggestions
This cake is best served at room temperature to enjoy the full creaminess of the frosting and softness of the cake. I like to slice it into even squares and serve with a simple cup of coffee or a glass of cold milk—classic combo.
If you want to make it ahead, store it covered tightly in the refrigerator for up to 3 days. Let it sit at room temperature for about 30 minutes before slicing to soften the frosting. For longer storage, the cake freezes well. Wrap it tightly in plastic wrap and foil, then thaw overnight in the fridge.
Over time, the flavors meld and the cake becomes even more moist, so leftovers (if you’re lucky!) taste fantastic the next day.
Nutritional Information & Benefits
Per slice (based on 12 servings), this cake has approximately 350 calories, 18g fat, 45g carbohydrates, and 3g protein. The cream cheese frosting provides calcium and vitamin A from the dairy.
Red velvet cake typically contains moderate sugar and fat, so it’s best enjoyed as an occasional treat. Using buttermilk adds a bit of tang and moisture without extra fat, and the cocoa powder contributes antioxidants.
For those mindful of allergens, this recipe contains dairy, eggs, and gluten (unless adapted). I appreciate that this cake strikes a balance between indulgence and homemade quality—comfort food that doesn’t feel overwhelming.
Conclusion
This perfect red velvet flag cake with cream cheese frosting has become one of my favorite recipes to make when I want to impress without stress. It’s approachable, delicious, and visually stunning—a rare combo! Whether you’re baking for a holiday, a birthday, or just because, it offers that extra bit of joy in every bite.
Feel free to tweak the frosting sweetness or try one of the variations to make it your own. I love how this cake invites creativity while delivering consistent results, even for less experienced bakers.
If you try it, I’d love to hear how it turns out! Share your versions or questions in the comments below—and maybe even pair it with another favorite from the collection of recipes to round out your celebration.
Happy baking—and may your kitchen be filled with the warmth and sweetness this cake brings!
FAQs
Can I make this red velvet cake ahead of time?
Yes! You can bake the cake layers up to two days in advance and store them wrapped tightly in the fridge. Assemble and frost the day you plan to serve for the best texture.
What’s the best way to get vibrant red color without artificial dyes?
Gel food coloring provides the most vibrant and consistent red without watering down the batter. Natural alternatives like beet juice can work but may alter flavor and color intensity.
How do I prevent the cream cheese frosting from being too runny?
Make sure your cream cheese and butter are softened but not melted. Beat them together thoroughly before adding powdered sugar gradually. If frosting is still soft, chill it for 10-15 minutes before using.
Can I use this frosting on other cakes?
Absolutely! This cream cheese frosting pairs beautifully with chocolate, carrot, or spice cakes, adding a tangy sweetness that complements many flavors.
Is there a way to make this cake dairy-free?
Yes, substitute dairy-free cream cheese and butter alternatives. Use plant-based milk mixed with lemon juice for the buttermilk substitute. The texture will be slightly different but still tasty.
Pin This Recipe!
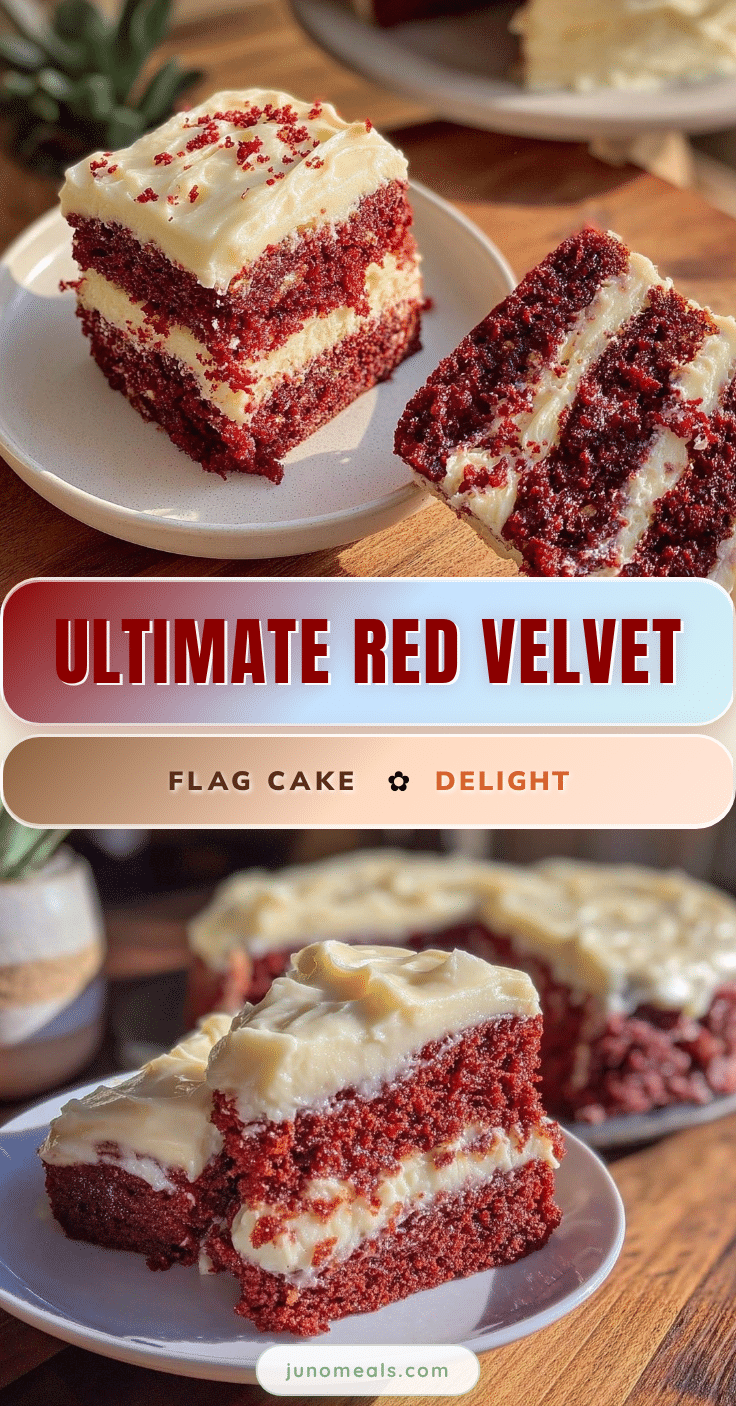
Perfect Red Velvet Flag Cake Recipe Easy Homemade Cream Cheese Frosting Tutorial
A visually stunning red velvet flag cake layered with smooth, tangy cream cheese frosting. This easy recipe delivers a moist, cocoa-spiced cake perfect for celebrations or cozy baking sessions.
- Prep Time: 20 minutes
- Cook Time: 30-35 minutes
- Total Time: 1 hour 15 minutes
- Yield: 12 servings 1x
- Category: Dessert
- Cuisine: American
Ingredients
- 2 ½ cups (312 g) all-purpose flour
- 2 tablespoons unsweetened cocoa powder
- 1 teaspoon baking soda
- ½ teaspoon salt
- 1 ¾ cups (350 g) granulated sugar
- 1 cup (240 ml) vegetable oil
- 1 cup (240 ml) buttermilk (or 1 cup milk + 1 tablespoon lemon juice)
- 2 large eggs, room temperature
- 1 teaspoon vanilla extract
- 2 tablespoons red food coloring (gel-based recommended)
- 1 teaspoon distilled white vinegar
- 16 oz (450 g) cream cheese, softened
- ½ cup (115 g) unsalted butter, softened
- 4 cups (480 g) powdered sugar
- 1 teaspoon vanilla extract (for frosting)
- Pinch of salt (for frosting)
Instructions
- Preheat oven to 350°F (175°C). Grease two 9-inch cake pans and line bottoms with parchment paper.
- In a large bowl, sift together flour, cocoa powder, baking soda, and salt. Set aside.
- In another bowl, whisk sugar and vegetable oil until smooth. Add eggs one at a time, beating well after each. Stir in vanilla extract and vinegar.
- Mix in red food coloring until batter is bright red. Alternate adding dry ingredients and buttermilk, starting and ending with dry ingredients. Mix gently but completely.
- Divide batter evenly between pans. Tap pans to release air bubbles. Bake 30-35 minutes or until toothpick comes out clean. Start checking at 28 minutes.
- Cool cakes in pans for 10 minutes, then turn out onto cooling racks. Cool completely before frosting.
- Beat cream cheese and butter until smooth and fluffy. Gradually add powdered sugar on low speed. Stir in vanilla extract and salt. Adjust sweetness if needed.
- Level cake layers if domed. Place one layer on serving plate and spread about ½ cup frosting evenly on top.
- Add second layer and frost entire cake with a thin crumb coat. Chill for 15 minutes.
- Use remaining frosting to pipe or spread stripes to mimic the American flag. For stars section, use a small square of cake or frosting tinted with blue food coloring.
Notes
Use gel-based red food coloring for vibrant color. Ensure cakes are completely cool before frosting to prevent melting. Chill frosting if too soft while decorating. Level cake layers for a clean flag effect. For gluten-free, swap flour with gluten-free blend. For vegan, use flax eggs, dairy-free cream cheese, and plant-based butter.
Nutrition
- Serving Size: 1 slice (1/12th of c
- Calories: 350
- Sugar: 32
- Sodium: 280
- Fat: 18
- Saturated Fat: 7
- Carbohydrates: 45
- Fiber: 1
- Protein: 3
Keywords: red velvet cake, cream cheese frosting, flag cake, patriotic dessert, easy cake recipe, homemade frosting, celebration cake