“You really think seven layers can fit in that tiny little cup?” my friend Sarah asked, raising an eyebrow as I carefully spooned the last layer into the mini plastic cup. It was game night, and honestly, I was just trying to make snacking easier without the usual mess of a big dip bowl and endless chips scattered everywhere. I’ve always been a fan of seven layer dip, but it’s the kind of dish that invites chaos—double-dipping, crowding around one bowl, and inevitably, some poor chip breaking mid-dunk.
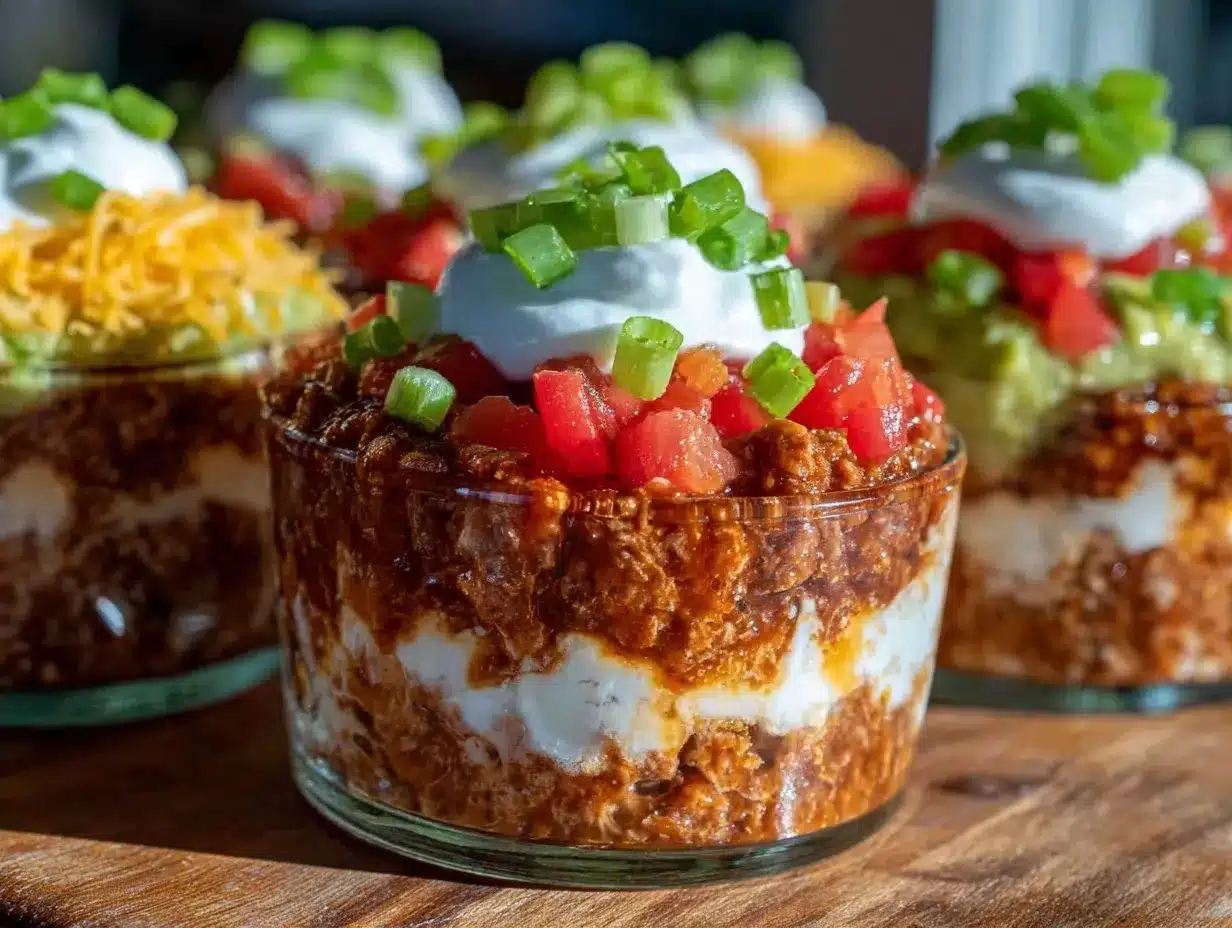
That night, I was determined to find a better way. So instead of the usual spread, I grabbed some mini cups and started layering everything—refried beans, guacamole, salsa, sour cream, shredded cheese, chopped olives, and green onions—in neat little stacks. The skepticism was thick, but once people started grabbing those easy-to-hold dip cups, I noticed everyone was actually mingling more and less worried about making a mess. Plus, it was fun to see who could guess each layer without looking.
This Easy Seven Layer Dip Cups recipe stuck around because it took a classic party favorite and made it portable and fuss-free. No more awkward balancing acts between plates and drinks. It’s the kind of snack that feels casual and special all at once—perfect for crowd-pleasing snacking whether you’re hosting a laid-back gathering or just want something tasty on hand. Honestly, those little cups have saved many a party for me, and I’m betting they’ll do the same for you.
Why You’ll Love This Recipe
This Easy Seven Layer Dip Cups recipe has been tested and tweaked through countless social gatherings, and here’s why it keeps coming back:
- Quick & Easy: Assembles in about 15 minutes, saving you prep time for more important things—like chatting with guests.
- Simple Ingredients: Pantry staples and fresh basics you probably already have on hand, with no mystery components.
- Perfect for Entertaining: Great for potlucks, casual get-togethers, or even a last-minute snack spread.
- Crowd-Pleaser: Kids and adults alike love the combo of creamy, tangy, and savory layers all in one bite.
- Mess-Free Snacking: Individual servings mean no fighting over the dip bowl or accidental double-dips.
What sets this recipe apart is the way it balances ease and flavor without sacrificing that classic seven layer dip vibe. The sour cream layer is lightly seasoned with lime and taco spices for a subtle kick, instead of just plain cream. I also like to use a mix of sharp cheddar and Monterey Jack cheeses for a richer melt and texture. Plus, the presentation is a total win—these cups look inviting and instantly festive on any snack table.
From my experience, these dip cups aren’t just appetizers; they turn into conversation starters. There’s something about handing out individual portions that feels thoughtful and clever without being complicated. So whether you’re hosting a casual game night or an impromptu gathering, these cups deliver every time.
What Ingredients You Will Need
This recipe uses simple, wholesome ingredients to deliver bold flavor and satisfying texture without the fuss. Most of these are pantry staples or fresh basics, and many can be swapped easily if needed.
- Refried Beans: About 1 cup (250g), canned or homemade; look for low-sodium if you want to control salt.
- Guacamole: 1 cup (240g), freshly made or store-bought (choose one with chunky avocado for texture).
- Salsa: ¾ cup (180g), medium-spiced works best; chunky varieties add nice bite.
- Sour Cream: 1 cup (240g), mixed with 1 tablespoon lime juice and ½ teaspoon taco seasoning for extra zing.
- Shredded Cheese: 1 cup (100g), a blend of sharp cheddar and Monterey Jack (I like Kraft for consistent melting).
- Black Olives: ½ cup (70g), sliced thin for garnish.
- Green Onions: 3-4 stalks, finely chopped fresh for a mild onion crunch.
Optional Additions: You can add diced tomatoes, jalapeños, or chopped cilantro if you want to customize the layers. For a lighter version, swap sour cream with Greek yogurt or use reduced-fat cheese.
For a gluten-free twist, all ingredients here are naturally gluten-free, but double-check salsa and taco seasoning labels if you’re strict.
If fresh guacamole isn’t an option, mashed avocado with a splash of lime and salt works great too.
Equipment Needed
- Mini clear plastic or glass cups (2–3 oz / 60–90 ml size) – these make layering easy and visually appealing.
- Spoon or small spatula – for spreading and layering evenly.
- Mixing bowls – at least two, one for sour cream mix, one for guacamole if making fresh.
- Measuring cups and spoons – ensure accuracy, especially for seasoning.
- Optional: piping bag or zip-top bag with corner snipped for neater layering of sour cream and guacamole.
I’ve tried layering with forks and knives, but a small spoon or spatula gives the cleanest edges. If you don’t have mini cups, small ramekins or even muffin liners can substitute, but cups keep it portable and mess-free. For parties on a budget, reusable plastic cups work well and clean up easily.
Preparation Method
- Prepare the sour cream layer: In a small bowl, mix 1 cup (240g) sour cream with 1 tablespoon fresh lime juice and ½ teaspoon taco seasoning. Stir until combined and smooth. This adds a subtle zest that brightens the dip. About 5 minutes.
- Set up your workspace: Arrange mini cups on a tray or cutting board. Have each ingredient ready to go in separate bowls for easy layering.
- Layer the refried beans: Spoon about 2 tablespoons (30g) of refried beans into the bottom of each cup. Press gently to spread evenly, creating a firm base. Look for a smooth, even layer with no gaps.
- Add the guacamole: Next, add 2 tablespoons (30g) of guacamole on top of the beans. Use the back of your spoon to smooth it out carefully without mixing into the beans below.
- Layer the salsa: Spoon 1 tablespoon (15g) of salsa over the guacamole, spreading to cover the surface.
- Apply the sour cream mixture: Using a spoon or piping bag, add 2 tablespoons (30g) of the sour cream mixture on top of the salsa. Smooth gently for an even finish.
- Sprinkle shredded cheese: Evenly distribute 1 tablespoon (10g) of shredded cheese over each cup, creating a colorful middle layer.
- Garnish: Top with a few slices of black olives and a sprinkle of chopped green onions.
- Chill: Refrigerate the cups for at least 30 minutes before serving. This helps the layers set and flavors meld together.
Pro Tip: If you want to speed things up, assemble the dip cups up to 6 hours ahead and keep chilled. Just add fresh green onions last minute for a pop of freshness. Also, if the refried beans seem too thick, stir in a teaspoon of water or lime juice to loosen slightly for easier spreading.
Cooking Tips & Techniques
Layering is key to this recipe’s success, so here are a few tricks I’ve learned over time:
- Use chilled ingredients: It helps keep layers distinct and prevents mixing.
- Don’t overfill the cups: Leave about half an inch (1 cm) at the top to avoid spills when serving.
- Layer gently: Press down lightly on each layer but don’t mash; you want clear separation for that satisfying look and bite.
- Season the sour cream: Plain sour cream can be a bit dull, so the lime and taco seasoning make a big difference in flavor.
- Chill before serving: This isn’t just for convenience; the flavors blend better when rested, and the dip firms up for easier handling.
One time, I tried to rush and serve immediately, and the layers ran together into a brownish mush—lesson learned! Also, if you’re prepping for a crowd, I usually assemble the refried beans and guacamole layers in advance, then top off with fresh salsa and cheese just before guests arrive.
The timing works well if you’re juggling other dishes—like my crowd-favorite mini lemon blueberry cheesecakes—because these dip cups require minimal last-minute fuss.
Variations & Adaptations
This recipe is super flexible, so feel free to make it your own!
- Vegetarian and Vegan: Use vegan sour cream and cheese substitutes. Swap refried beans for black bean hummus if preferred.
- Spicy Kick: Add diced jalapeños to the salsa layer or mix hot sauce into the guacamole for extra heat.
- Seasonal Twist: In warmer months, replace salsa with fresh pico de gallo or mango salsa for a fruity touch.
- Protein Boost: Add cooked, crumbled chorizo or seasoned ground beef between the beans and guacamole layers for a heartier snack.
- Low-Carb Option: Skip the beans and add extra guacamole or a layer of chopped roasted veggies.
One variation I tried was layering in some chopped roasted corn and black beans between the guacamole and salsa—it added a fun texture and a little sweetness that surprised everyone. Feel free to experiment, just keep the layers fairly even to maintain that signature seven-layer look.
Serving & Storage Suggestions
Serve these dip cups chilled or slightly chilled for the best flavor and texture. They’re perfect finger foods—no plates or forks needed, which means less cleanup (always a win).
Pair with sturdy tortilla chips, pita chips, or even crunchy veggie sticks like jicama or cucumber slices for a fresh contrast. For drinks, a cold beer or sparkling water with lime complements the zesty layers nicely.
Store leftover dip cups covered in the refrigerator for up to 3 days. The layers may soften a bit over time, but flavors deepen and meld, making for a tasty next-day snack. To reheat, just let sit at room temperature for 10 minutes—these are best cold, though.
If you want to prep ahead for a gathering, assemble the cups but keep garnishes like olives and green onions separate until serving to keep them fresh and crisp.
Nutritional Information & Benefits
Each dip cup (approximately 2.5 oz / 70 g) offers a balanced mix of protein, fiber, and healthy fats. Refried beans and guacamole provide plant-based protein and fiber, which help keep you full, while the cheese adds calcium and a satisfying creaminess.
The lime juice and fresh green onions add a dose of vitamin C and antioxidants. This recipe is naturally gluten-free and can be made dairy-free with simple swaps, making it accessible for many dietary needs.
From a wellness perspective, it’s a snack that feels indulgent but doesn’t leave you reaching for the antacids later. Plus, the portion control of individual cups helps avoid over-snacking—a nice bonus when you want to enjoy the party without the guilt.
Conclusion
These Easy Seven Layer Dip Cups have become my go-to snack solution when hosting because they bring all the classic flavors of seven layer dip in a neat, no-fuss package. They’re quick to make, easy to serve, and always a hit, whether it’s a casual weeknight hangout or a bigger celebration.
Feel free to mix and match ingredients based on what you love or have on hand—this recipe invites personalization without complicating the process. I’ve found myself coming back to this one time and again, usually with a batch chilling in the fridge ready to impress friends or satisfy a craving.
Give these dip cups a try and let me know how you customize them! There’s something satisfying about seeing those layers pile up in a tiny cup that just makes snacking feel a little more special.
Frequently Asked Questions
Can I make these dip cups ahead of time?
Yes! Assemble the cups up to 6 hours in advance and keep them covered in the refrigerator. Add garnishes like green onions or olives just before serving for freshness.
What can I use if I don’t have mini cups?
Small ramekins, clear plastic shot glasses, or even muffin liners can work as alternatives. Just make sure the size is manageable for individual servings.
Is this recipe gluten-free?
Absolutely. All ingredients used are naturally gluten-free. Just double-check the labels on your salsa and taco seasoning to be certain.
Can I make a vegan version?
Yes, substitute dairy ingredients with vegan sour cream and cheese alternatives. Use a plant-based refried bean if desired.
How can I keep the layers from mixing together?
Use chilled ingredients and layer gently without pressing too hard. Chilling the cups after assembling also helps layers set firmly.
Pin This Recipe!
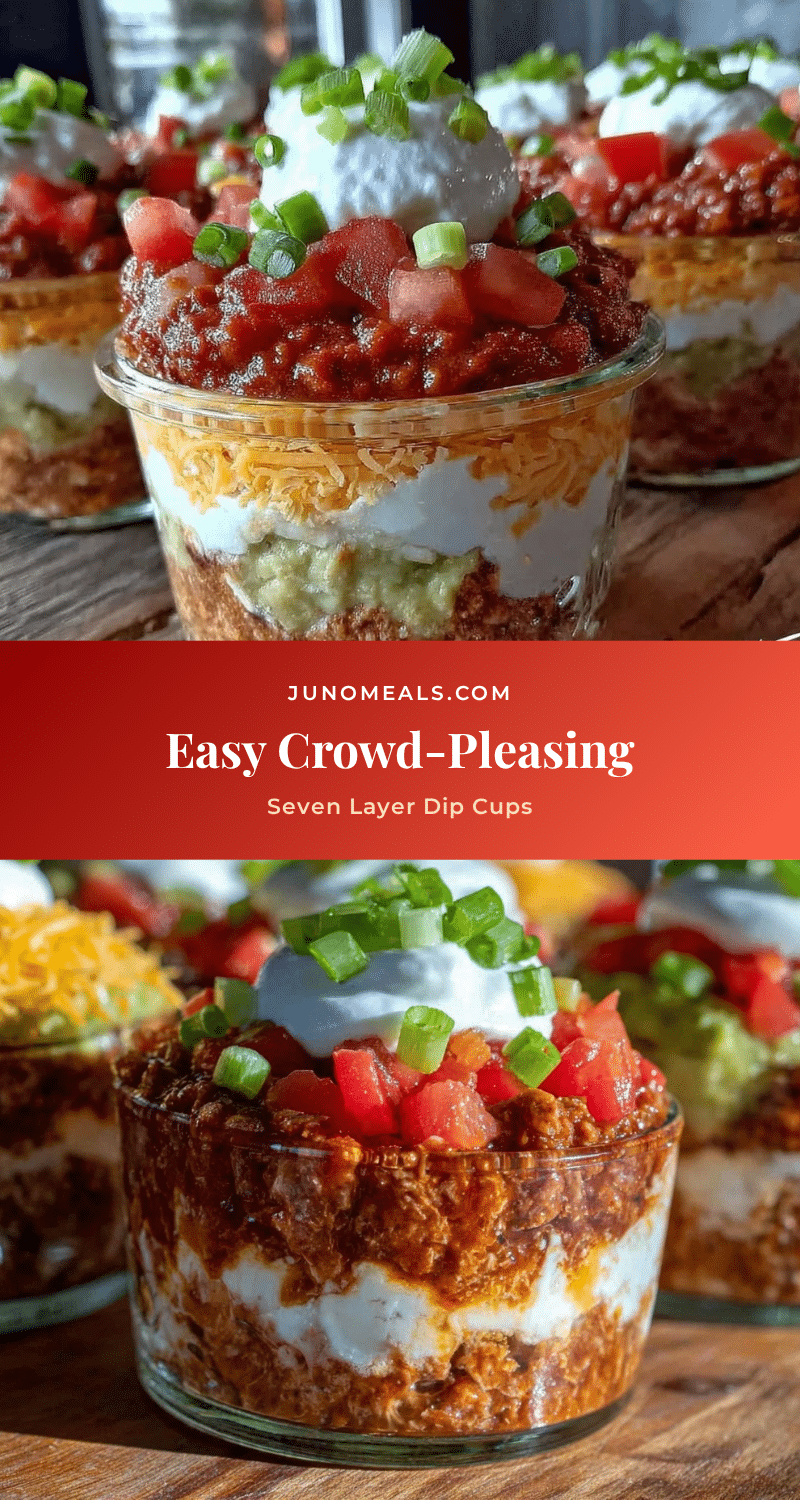
Easy Seven Layer Dip Cups Recipe for Perfect Crowd-Pleasing Snacks

This recipe transforms the classic seven layer dip into portable, mess-free individual servings perfect for parties and casual gatherings. Layers of refried beans, guacamole, salsa, sour cream, cheese, olives, and green onions come together in mini cups for easy snacking.
- Prep Time: 15 minutes
- Cook Time: 0 minutes
- Total Time: 45 minutes
- Yield: 12 servings 1x
- Category: Appetizer
- Cuisine: American
Ingredients
- 1 cup (250g) refried beans, canned or homemade, low-sodium preferred
- 1 cup (240g) guacamole, freshly made or store-bought with chunky avocado
- ¾ cup (180g) medium-spiced salsa, chunky variety preferred
- 1 cup (240g) sour cream mixed with 1 tablespoon lime juice and ½ teaspoon taco seasoning
- 1 cup (100g) shredded cheese blend of sharp cheddar and Monterey Jack
- ½ cup (70g) black olives, sliced thin
- 3–4 stalks green onions, finely chopped fresh
Instructions
- Prepare the sour cream layer by mixing 1 cup sour cream with 1 tablespoon fresh lime juice and ½ teaspoon taco seasoning until smooth (about 5 minutes).
- Arrange mini cups on a tray or cutting board and have each ingredient ready in separate bowls for layering.
- Spoon about 2 tablespoons (30g) of refried beans into the bottom of each cup and press gently to spread evenly.
- Add 2 tablespoons (30g) of guacamole on top of the beans and smooth carefully without mixing layers.
- Spoon 1 tablespoon (15g) of salsa over the guacamole, spreading to cover the surface.
- Add 2 tablespoons (30g) of the sour cream mixture on top of the salsa and smooth gently.
- Sprinkle 1 tablespoon (10g) of shredded cheese evenly over each cup.
- Garnish with a few slices of black olives and a sprinkle of chopped green onions.
- Refrigerate the cups for at least 30 minutes before serving to let layers set and flavors meld.
Notes
Use chilled ingredients to keep layers distinct. Do not overfill cups; leave about ½ inch at the top to avoid spills. Assemble up to 6 hours ahead and keep chilled. Add fresh green onions last minute for freshness. If refried beans are too thick, stir in a teaspoon of water or lime juice to loosen.
Nutrition
- Serving Size: Approximately 2.5 oz
- Calories: 120
- Sugar: 2
- Sodium: 210
- Fat: 7
- Saturated Fat: 3.5
- Carbohydrates: 10
- Fiber: 3
- Protein: 5
Keywords: seven layer dip, dip cups, party snacks, easy appetizers, crowd-pleaser, game night snacks, portable dip