Introduction
“Are you sure this is no-bake?” my friend asked, eyeing the luscious, glossy cherry topping glistening under the kitchen light. Honestly, I had my doubts too when I first stumbled onto this creamy no-bake cherry cheesecake delight recipe. It wasn’t some fancy chef’s creation but rather a happy accident during a chaotic weeknight when I realized the oven was out of commission. I needed something sweet, quick, and fuss-free — no time to wait for the oven to preheat or the usual baking drama.
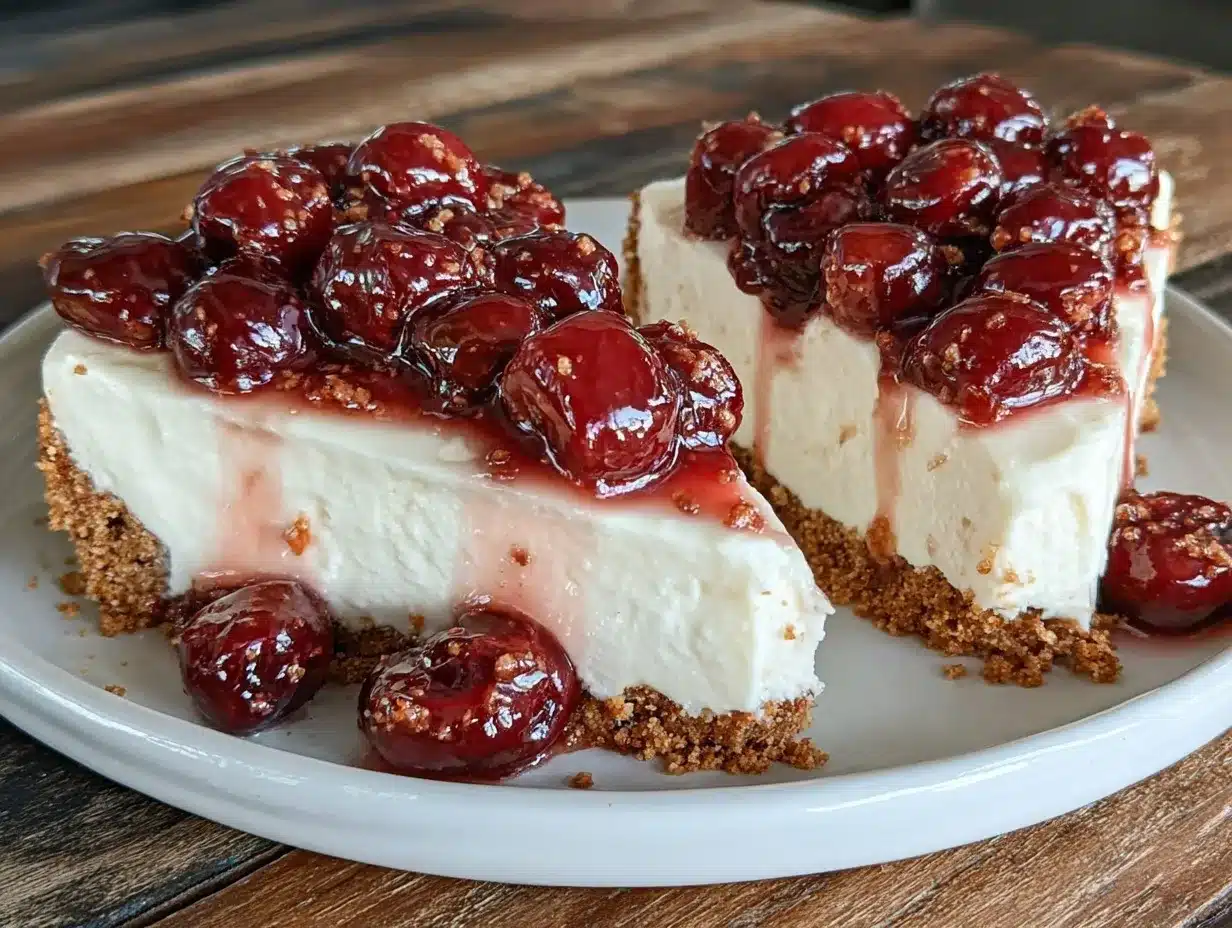
The first time I mixed together the silky cream cheese filling with a simple graham cracker crust and topped it with bright, tangy cherries, I wasn’t expecting much. But as I took that first spoonful, the creamy richness paired with the fresh cherry burst made me pause. It felt like comfort food and celebration all in one bite. Since then, I’ve made this recipe so often that it’s become my go-to for last-minute guests or when I just want a sweet treat without the kitchen heat.
It’s funny how something that started as a “just get it done” dessert turned into a staple, especially when I want to whip up a chilled dessert without the hassle. The balance of tart cherries and smooth cheesecake feels like a little moment of indulgence, but without the stress. That’s why the creamy no-bake cherry cheesecake delight has stuck around in my recipe box — it’s reliable, delicious, and honestly, a little slice of joy on a plate.
Why You’ll Love This Recipe
- Quick & Easy: Ready in under 30 minutes—ideal for busy evenings or unexpected guests.
- Simple Ingredients: Uses pantry staples and a few fresh cherries to keep things uncomplicated.
- Perfect for Any Occasion: Whether it’s a cozy family dinner or a casual brunch, this cheesecake fits right in.
- Crowd-Pleaser: Friends and family always ask for this creamy no-bake cherry cheesecake delight again and again.
- Unbelievably Delicious: The creamy texture with that cherry tang is a next-level dessert experience—comfort food without the oven hassle.
This isn’t just another cheesecake recipe. The secret is in the smooth, whipped filling that feels lighter than traditional baked cheesecakes, and the cherry topping that’s fresh but with a hint of sweetness. It’s a balance that makes every bite melt in your mouth. Plus, the no-bake method means no oven worries, perfect for hot days or when you’re juggling too many things at once.
Honestly, after testing this several times (and yes, tweaking the cherry topping just a bit each time), I’m convinced this creamy no-bake cherry cheesecake delight is the recipe you’ll reach for when you want dessert that’s both fuss-free and feels special. It’s the kind of treat that makes you close your eyes and savor that first bite — simple, sweet, and satisfying.
What Ingredients You Will Need
This recipe uses simple, wholesome ingredients to deliver bold flavor and a satisfying texture without any fuss. Most of these are pantry staples, and fresh or frozen cherries work just fine depending on the season.
- For the crust:
- 1 ½ cups graham cracker crumbs (about 10 full sheets, crushed finely)
- 5 tablespoons unsalted butter, melted (adds richness and helps bind the crust)
- 2 tablespoons granulated sugar (balances the buttery crust)
- For the creamy filling:
- 16 ounces (450g) cream cheese, softened (I prefer Philadelphia for creaminess)
- ½ cup powdered sugar (for smooth sweetness)
- 1 teaspoon pure vanilla extract (adds depth)
- 1 cup heavy whipping cream, cold (whipped to stiff peaks for that fluffy texture)
- For the cherry topping:
- 1 ½ cups fresh or frozen cherries, pitted (fresh in summer, frozen otherwise)
- ¼ cup granulated sugar (adjust based on cherry sweetness)
- 1 tablespoon lemon juice (brightens the cherry flavor)
- 1 teaspoon cornstarch mixed with 1 tablespoon cold water (to thicken the cherry sauce)
Ingredient tips: If you want a gluten-free version, swap graham crackers with almond flour or gluten-free cookie crumbs. For a dairy-free twist, use coconut cream instead of heavy cream and dairy-free cream cheese alternatives. The cherry topping can be swapped for other berries or even peach slices depending on your mood.
Equipment Needed
- 9-inch (23 cm) springform pan or pie dish (springform makes serving easier)
- Mixing bowls (preferably one large for the filling and one medium for the crust)
- Electric mixer or stand mixer with whisk attachment (for whipping cream and smooth filling)
- Saucepan (to cook down the cherry topping)
- Rubber spatula (for folding and scraping down bowls)
- Measuring cups and spoons (accuracy matters for texture)
If you don’t have a springform pan, a regular pie dish works but be extra gentle when serving. I’ve made this recipe many times using a hand mixer—just make sure to whip the cream until stiff peaks form for the best texture. For the cherry sauce, a non-stick pan helps prevent burning and makes cleanup easier.
Preparation Method
- Prepare the crust (10 minutes):
- Combine graham cracker crumbs, melted butter, and sugar in a bowl. Mix until the crumbs are evenly coated with butter and hold together when pressed.
- Press the mixture firmly into the bottom of your 9-inch springform pan or pie dish, forming an even layer. Use the back of a spoon or a flat-bottomed glass for smoothness.
- Place the crust in the refrigerator to chill while you make the filling.
- Make the creamy filling (15 minutes):
- In a large bowl, beat the softened cream cheese with powdered sugar and vanilla extract until smooth and creamy using an electric mixer.
- In a separate chilled bowl, whip the heavy cream until it forms stiff peaks. To test, lift the whisk—if the cream holds its shape firmly, it’s ready.
- Gently fold the whipped cream into the cream cheese mixture using a rubber spatula. Use slow, sweeping motions to keep it light and airy.
- Cook the cherry topping (10 minutes):
- In a saucepan over medium heat, combine cherries, sugar, and lemon juice. Stir occasionally until the sugar dissolves and cherries start releasing juice.
- Mix cornstarch with cold water to make a slurry, then slowly stir into the cherry mixture.
- Cook for another 2-3 minutes until the topping thickens and becomes glossy. Remove from heat and let cool to room temperature.
- Assemble the cheesecake (5 minutes):
- Pour or spoon the creamy filling over the chilled crust and smooth the top evenly.
- Spread the cooled cherry topping gently over the filling.
- Cover the pan with plastic wrap and chill in the refrigerator for at least 4 hours or overnight to set properly.
- Serving notes:
- Before serving, run a warm knife around the pan edges for clean slices. Slice carefully and serve chilled.
- If the cherry topping sets too firmly in the fridge, let it sit at room temperature for 10 minutes before slicing.
Cooking Tips & Techniques
Getting the perfect creamy no-bake cherry cheesecake delight is all about texture and timing. Here are some tips I’ve picked up over the many times I’ve made this:
- Softened cream cheese: Make sure your cream cheese is properly softened to avoid lumps in the filling. A quick 20-30 seconds in the microwave (not hot, just softened) helps if you’re in a rush.
- Whip cream perfectly: Cold heavy cream whips better, so chill your bowl and whisk if you can. Over-whipping can turn cream grainy, so watch carefully for stiff peaks.
- Folding technique: Use a gentle folding motion to keep the filling light. Stirring too vigorously deflates the whipped cream and makes the texture dense.
- Cherry topping consistency: Don’t skip the cornstarch—it thickens the topping so it doesn’t run all over the filling. If you want it looser, reduce the cornstarch but expect a softer topping.
- Chill time: Patience pays off here. The cheesecake needs at least 4 hours to firm up properly. When in doubt, overnight is better.
I once tried rushing the chilling step because guests arrived early—a mistake. The filling was too soft and the slices fell apart. Lesson learned: plan ahead when you can, or have some dessert spoons ready for a deliciously messy treat!
Variations & Adaptations
This creamy no-bake cherry cheesecake delight is versatile and welcoming to tweaks. Here are some ideas I’ve tried or considered:
- Berry swap: Swap cherries for a mixed berry compote with blueberries, raspberries, and strawberries for a colorful twist. Just adjust sugar to taste.
- Chocolate crust: Use crushed chocolate cookies or Oreos instead of graham crackers for a richer base.
- Low-sugar option: Use a sugar substitute like erythritol in both crust and filling to lower sugar content without sacrificing sweetness.
- Vegan version: Use vegan cream cheese and coconut cream instead of dairy, and a vegan cookie crust. The texture changes slightly but still delicious.
- Mini cheesecakes: Make individual portions in ramekins or muffin tins lined with cupcake liners, perfect for parties or portion control. Similar to the mini lemon blueberry cheesecakes recipe I love for gatherings.
Personally, I tried adding a splash of almond extract to the filling once—surprisingly, it added a nice nutty depth without overpowering the cherries. Feel free to experiment and make it your own.
Serving & Storage Suggestions
This cheesecake is best served chilled straight from the fridge. The creamy texture and fresh cherry topping are at their peak when cool and firm. For presentation, garnish with a few whole cherries or a mint sprig for a pop of color.
Pair it with a hot cup of coffee or a light dessert wine for an effortless dessert experience. It also pairs nicely with simple whipped cream or a drizzle of dark chocolate sauce if you’re feeling indulgent.
To store, cover the cheesecake tightly with plastic wrap or keep it in an airtight container in the refrigerator. It stays fresh for up to 4 days. You can freeze it for up to 1 month, but thaw overnight in the fridge before serving for the best texture.
Reheating isn’t recommended since it’s a no-bake cheesecake, but letting it sit at room temperature for 10-15 minutes before slicing helps soften the filling slightly and enhances flavor.
Flavors tend to meld and deepen after a day, so if you’re planning ahead, making it a day early can be a delicious way to prep for a dinner party or special occasion. For more dessert ideas that come together quickly and taste fantastic, you might want to check out other recipes on the site.
Nutritional Information & Benefits
Per serving (based on 12 servings): approximately 320 calories, 24g fat, 20g carbohydrates, and 4g protein.
The creamy no-bake cherry cheesecake delight provides a good source of calcium from cream cheese and heavy cream. Cherries add antioxidants and vitamin C, contributing to immune health and inflammation reduction.
While this dessert is indulgent, it’s made with real ingredients, no artificial additives, and can be adapted for gluten-free or lower-sugar diets. Keep in mind it contains dairy and gluten (unless substituted), so adjust accordingly for allergies.
From a wellness perspective, treating yourself to a dessert like this in moderation offers a satisfying way to enjoy sweet flavors without feeling deprived. The recipe balances creamy richness with fresh fruit, making it a little lighter than traditional baked cheesecakes.
Conclusion
The creamy no-bake cherry cheesecake delight isn’t just a dessert; it’s a little moment of calm and sweetness that fits into busy days or special occasions with ease. Its smooth filling and vibrant cherry topping deliver that perfect balance of flavor and texture without the oven stress.
I love how it’s customizable and forgiving, letting you swap ingredients or make mini versions for guests or family. Most of all, it’s the kind of recipe that feels like a treat but doesn’t overwhelm your kitchen or your time.
If you try this recipe, I’d love to hear how you make it your own—maybe with a twist or your favorite topping. Sharing those little adaptations is what keeps recipes alive and exciting, don’t you think? So go ahead, whip up this creamy no-bake cherry cheesecake delight and enjoy every creamy, fruity bite!
FAQs
Can I use frozen cherries for the topping?
Yes! Frozen cherries work great—just thaw them before cooking and drain any excess liquid to avoid a watery topping.
How long does the cheesecake need to chill?
At least 4 hours, but overnight chilling is best for firm slices and flavor development.
Can I make this cheesecake gluten-free?
Absolutely. Swap the graham cracker crumbs for gluten-free cookie crumbs or almond flour to keep the crust gluten-free.
Is it possible to make this recipe dairy-free?
Yes, using vegan cream cheese and coconut cream instead of dairy products works well, though the texture may be slightly different.
What’s the best way to serve this cheesecake?
Serve chilled with a few fresh cherries on top and optional whipped cream. Pair it with coffee or dessert wine for a lovely presentation.
Pin This Recipe!
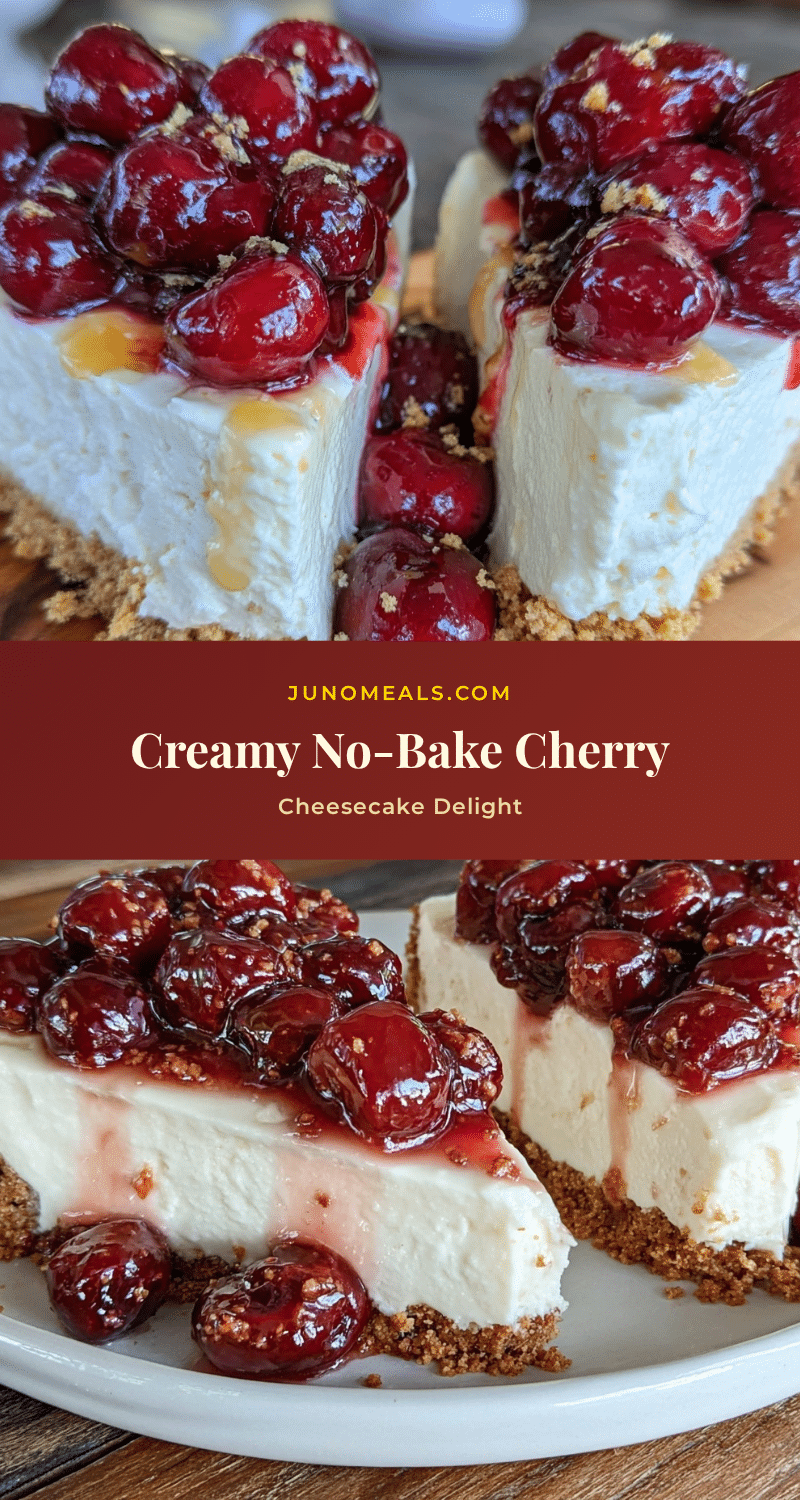
Creamy No-Bake Cherry Cheesecake Delight
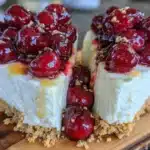
A quick and easy no-bake cherry cheesecake with a creamy filling, graham cracker crust, and a fresh cherry topping. Perfect for any occasion and ready in under 30 minutes.
- Prep Time: 15 minutes
- Cook Time: 10 minutes
- Total Time: 4 hours 25 minutes
- Yield: 12 servings 1x
- Category: Dessert
- Cuisine: American
Ingredients
- 1 ½ cups graham cracker crumbs (about 10 full sheets, crushed finely)
- 5 tablespoons unsalted butter, melted
- 2 tablespoons granulated sugar
- 16 ounces (450g) cream cheese, softened
- ½ cup powdered sugar
- 1 teaspoon pure vanilla extract
- 1 cup heavy whipping cream, cold
- 1 ½ cups fresh or frozen cherries, pitted
- ¼ cup granulated sugar
- 1 tablespoon lemon juice
- 1 teaspoon cornstarch mixed with 1 tablespoon cold water
Instructions
- Prepare the crust: Combine graham cracker crumbs, melted butter, and sugar in a bowl. Mix until the crumbs are evenly coated and hold together when pressed.
- Press the mixture firmly into the bottom of a 9-inch springform pan or pie dish, forming an even layer. Chill in the refrigerator.
- Make the creamy filling: Beat softened cream cheese with powdered sugar and vanilla extract until smooth.
- Whip the cold heavy cream until stiff peaks form.
- Gently fold whipped cream into the cream cheese mixture using a rubber spatula.
- Cook the cherry topping: In a saucepan over medium heat, combine cherries, sugar, and lemon juice. Stir until sugar dissolves and cherries release juice.
- Mix cornstarch with cold water and stir into cherry mixture. Cook 2-3 minutes until thickened and glossy. Cool to room temperature.
- Assemble the cheesecake: Pour creamy filling over chilled crust and smooth the top.
- Spread cooled cherry topping evenly over the filling.
- Cover with plastic wrap and chill in refrigerator for at least 4 hours or overnight.
- Before serving, run a warm knife around pan edges for clean slices. Serve chilled.
Notes
[‘Use softened cream cheese to avoid lumps.’, ‘Chill heavy cream and bowl before whipping for best results.’, ‘Fold whipped cream gently to keep filling light and airy.’, ‘Do not skip cornstarch in cherry topping to prevent runniness.’, ‘Chill cheesecake at least 4 hours or overnight for best texture.’, ‘If cherry topping is too firm after chilling, let sit at room temperature 10 minutes before slicing.’, ‘Frozen cherries can be used; thaw and drain excess liquid before cooking.’, ‘For gluten-free, substitute graham crackers with almond flour or gluten-free cookie crumbs.’, ‘For dairy-free, use vegan cream cheese and coconut cream.’]
Nutrition
- Serving Size: 1 slice (1/12th of c
- Calories: 320
- Fat: 24
- Carbohydrates: 20
- Protein: 4
Keywords: no-bake cheesecake, cherry cheesecake, easy dessert, quick dessert, creamy cheesecake, no oven dessert, summer dessert