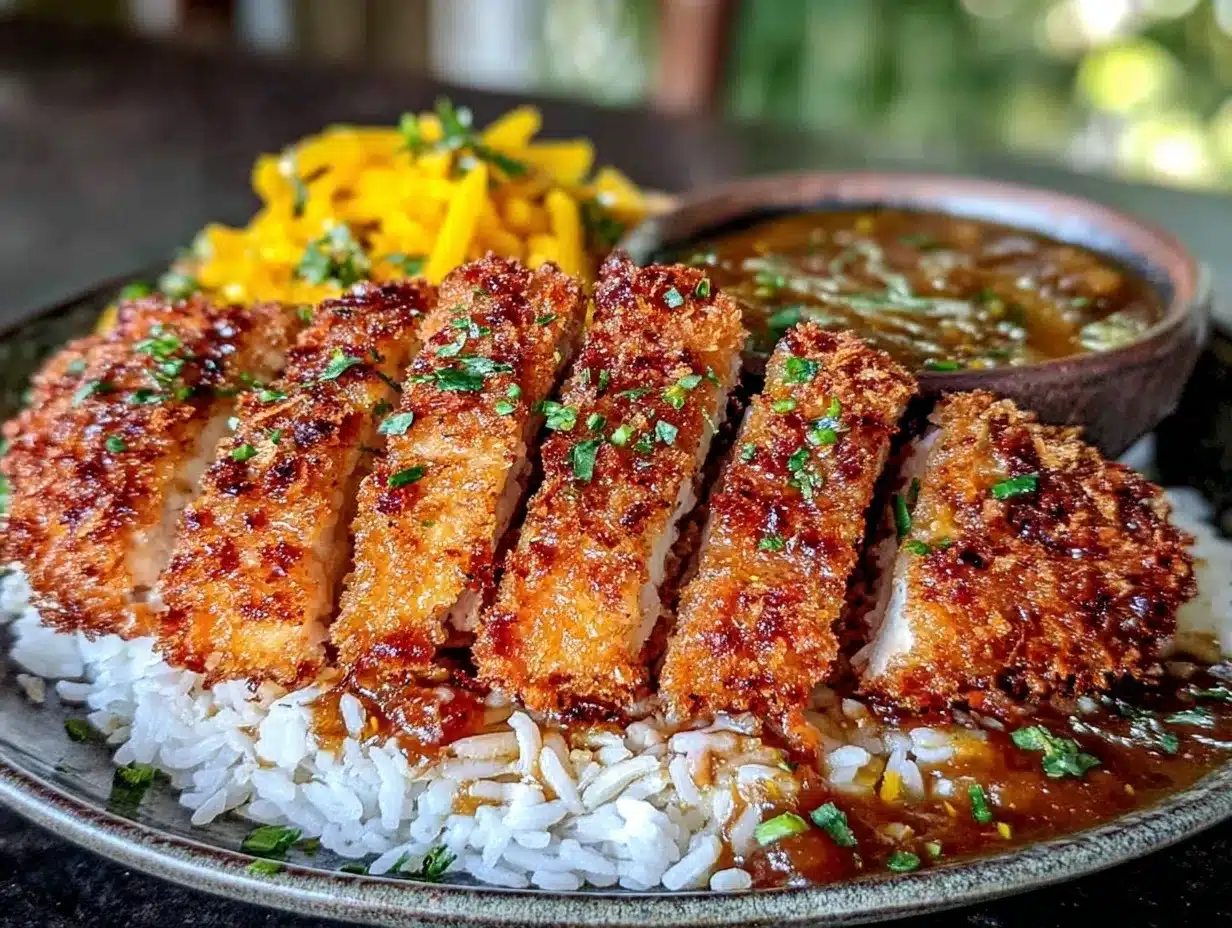
Let me tell you, the moment that golden, crispy chicken katsu hits the plate, and the thick, fragrant curry sauce pools around it, your senses instantly perk up. The smell alone — a warm mix of spices, sweet onions, and a slight tang — is enough to make anyone’s mouth water. The first time I made this Crispy Japanese Chicken Katsu Curry, I was honestly blown away. I still remember that pause, just after the first bite, where I took a deep breath and smiled because I knew I’d stumbled onto something really special.
Years ago, when I was knee-high to a grasshopper, my grandma used to make a simple Japanese curry that everyone in the family adored. But this recipe? It’s a step up — the kind that brings that nostalgic comfort food feeling but with a crisp, satisfying crunch and a sauce so rich and savory you can’t resist licking the plate. My family couldn’t stop sneaking the chicken off the cooling rack (and I can’t really blame them). Honestly, this Crispy Japanese Chicken Katsu Curry has become a staple for our family gatherings and cozy weeknights alike.
You know what makes this recipe a winner? It’s dangerously easy to pull off, yet the flavors feel like you spent hours in the kitchen. Whether you’re looking to impress guests, whip up a sweet treat for your kids, or brighten up your Pinterest recipe board, this chicken katsu curry ticks all the boxes. After testing it multiple times (in the name of research, of course), I can say it’s not just a meal — it’s pure, nostalgic comfort in every bite. You’re going to want to bookmark this one, trust me.
Why You’ll Love This Crispy Japanese Chicken Katsu Curry Recipe
When it comes to making a show-stopping Japanese chicken katsu curry at home, I’ve spent plenty of time in the kitchen perfecting the balance of crispy chicken and that rich, savory sauce. Here’s why this recipe stands out:
- Quick & Easy: Ready in under 45 minutes — perfect for busy weeknights or last-minute dinner plans.
- Simple Ingredients: No need for exotic ingredients; you probably have most of these pantry staples on hand already.
- Perfect for Family Dinners: This recipe is loved by both kids and adults — a real crowd-pleaser at the table.
- Unbelievably Delicious: The crispy panko coating contrasts beautifully with the silky, deeply flavored curry sauce.
- Authentic Yet Homemade: The sauce uses a simple roux combined with classic Japanese curry spices, making it both approachable and tasty.
What sets this Crispy Japanese Chicken Katsu Curry apart is the perfectly balanced seasoning in the curry sauce — it’s not too sweet, not too spicy, just enough to complement that crunchy chicken. Plus, the chicken breast stays juicy inside thanks to a quick brine and proper frying technique. This isn’t just another katsu curry recipe; it’s the best version I’ve found, and honestly, it’s the one that’ll make you close your eyes after the first bite. It’s comforting food with soul, made simple.
What Ingredients You Will Need
This Crispy Japanese Chicken Katsu Curry uses simple, wholesome ingredients that come together to deliver bold flavor and satisfying texture without fuss. Most of these are pantry staples or easy to find at any grocery store.
- For the Chicken Katsu:
- 2 large boneless, skinless chicken breasts (about 1 lb / 450 g), pounded to even thickness
- Salt and pepper, to taste
- 1 cup (120 g) all-purpose flour
- 2 large eggs, beaten (room temperature)
- 1 ½ cups (150 g) panko breadcrumbs (I recommend Japanese brand panko for best crunch)
- Vegetable oil, for frying (canola or peanut oil work great for high heat)
- For the Curry Sauce:
- 2 tbsp unsalted butter (adds richness)
- 1 large onion, finely chopped
- 2 cloves garlic, minced
- 1 tbsp grated fresh ginger
- 2 tbsp all-purpose flour
- 3 cups (720 ml) chicken broth (low sodium preferred)
- 2 tbsp soy sauce
- 1 tbsp ketchup (balances the flavors)
- 1 tbsp Worcestershire sauce (adds depth)
- 1 tsp curry powder (mild or medium heat, depending on preference)
- 1 tsp garam masala (optional, for warmth and aroma)
- Salt and pepper, to taste
- To Serve:
- Steamed Japanese short-grain rice, cooked (about 2 cups / 360 g cooked)
- Pickled ginger or Japanese pickles (optional, for contrast)
For substitutions, you can swap the chicken breasts for pork cutlets if preferred. Gluten-free flour and panko are also available if you want to make this recipe gluten-free. Using homemade chicken broth amps up the flavor, but store-bought works just fine too.
Equipment Needed
- Heavy-bottomed frying pan or deep skillet for frying the chicken
- Medium saucepan for the curry sauce
- Meat mallet or rolling pin (to pound chicken breasts evenly)
- Mixing bowls for breading stations (flour, egg wash, panko)
- Wire rack or paper towels for draining fried chicken
- Sharp knife and cutting board for prep
If you don’t have a meat mallet, a heavy pan or rolling pin works just fine for pounding the chicken evenly. For frying, I prefer a deep skillet over a shallow pan to avoid oil splatter — and a thermometer helps keep the oil at the right temperature (about 350°F / 175°C). If you don’t have one, just test with a small breadcrumb first; it should sizzle immediately but not burn.
Preparation Method
- Prep the Chicken: Start by trimming any excess fat from the chicken breasts. Place each breast between two sheets of plastic wrap and gently pound with a meat mallet or rolling pin until about ½ inch (1.25 cm) thick. This ensures even cooking and tender results. Season both sides lightly with salt and pepper.
- Set Up Breading Stations: In one shallow bowl, place the all-purpose flour. In a second bowl, beat the eggs until smooth. In the third bowl, pour the panko breadcrumbs.
- Bread the Chicken: Dredge each chicken breast first in flour, shaking off the excess. Next, dip into the beaten eggs, allowing any extra to drip off. Finally, coat thoroughly with panko, pressing gently to adhere. Place the breaded chicken on a plate and let rest for 10 minutes to help the coating stick better.
- Make the Curry Sauce: While the chicken rests, melt 2 tbsp butter in a medium saucepan over medium heat. Add the chopped onion and cook for about 7-8 minutes until soft and golden, stirring occasionally. Stir in garlic and ginger, cooking for another 1-2 minutes until fragrant.
- Create the Roux: Sprinkle 2 tbsp flour over the onions and stir constantly for 1-2 minutes to cook out the raw flour taste. Gradually whisk in the chicken broth, stirring to prevent lumps. Add soy sauce, ketchup, Worcestershire sauce, curry powder, and garam masala (if using). Simmer gently for 15 minutes, stirring occasionally, until thickened and glossy. Taste and adjust salt or seasonings as needed.
- Fry the Chicken: Heat about ½ inch (1.25 cm) of vegetable oil in a heavy skillet over medium-high heat until shimmering and around 350°F (175°C). Carefully lower the breaded chicken into the hot oil. Fry for 3-4 minutes per side, or until golden brown and cooked through (internal temperature should reach 165°F / 74°C). Remove and drain on a wire rack or paper towels.
- Serve: Slice the chicken katsu into strips. Spoon steamed rice onto plates, arrange the sliced katsu alongside or over the rice, and generously ladle the rich curry sauce on top. Garnish with pickled ginger or Japanese pickles if desired.
Pro tip: Don’t overcrowd the pan when frying — cook in batches if necessary to keep that oil temperature steady for maximum crispiness.
Cooking Tips & Techniques
Let’s face it, nothing ruins a chicken katsu curry like soggy coating or a bland sauce. Here are some insider tips I’ve picked up after many kitchen trials:
- Pounding the Chicken Evenly: This keeps the chicken cooking uniformly, preventing dry edges and underdone centers.
- Resting the Breaded Chicken: Letting it sit for 10 minutes before frying helps the panko stick better and reduces the risk of it falling off during cooking.
- Oil Temperature Control: Use a thermometer if possible. Too hot, and the coating burns before the chicken cooks; too cool, and the breading absorbs oil, becoming greasy and soggy.
- Make the Roux Slowly: Cooking the flour in butter and onions before adding broth avoids lumps and gives the sauce that beautiful thick texture.
- Season Gradually: Taste your curry sauce as it simmers and adjust the soy sauce or ketchup — sometimes a little extra tang or salt makes all the difference.
- Multitasking: While the sauce simmers, you can prep rice or bread the chicken to save time and keep the workflow smooth.
From personal experience, skipping the resting step or rushing the frying process are the most common mistakes. Patience here really pays off with texture and flavor.
Variations & Adaptations
Want to mix things up? Here are some tasty variations I’ve tried (and loved):
- Protein Swap: Use pork loin cutlets for a classic tonkatsu curry, or go plant-based with crispy tofu cutlets for a vegetarian twist.
- Spice Level: Add a pinch of cayenne or chili powder to the curry sauce if you like a little heat, or omit the garam masala for milder flavor.
- Gluten-Free Version: Substitute all-purpose flour with rice flour or chickpea flour, and use gluten-free panko breadcrumbs. Double-check soy sauce is gluten-free.
- Seasonal Veggies: Stir in steamed carrots, peas, or potatoes into the curry sauce for extra heartiness and color.
- Air Fryer Friendly: For a lighter version, air fry the breaded chicken at 400°F (205°C) for 12-15 minutes, flipping halfway through. It still gets wonderfully crispy!
One of my favorite personal tweaks is adding a splash of apple juice or grated apple to the curry sauce for a subtle sweetness that balances the spices beautifully — it’s unexpected, but trust me, it works.
Serving & Storage Suggestions
This Crispy Japanese Chicken Katsu Curry is best served hot — the crunch of the chicken and silky sauce don’t hang around well if left to cool. I like to plate it with fluffy steamed Japanese rice and a side of tangy pickled ginger for contrast.
Leftovers store well in an airtight container in the refrigerator for up to 3 days. To reheat, gently warm the curry sauce in a saucepan over low heat, while reheating the chicken in a 350°F (175°C) oven for 8-10 minutes to bring back some crispness. Microwave reheating tends to soften the breading, so oven or air fryer is best.
If you want to freeze the chicken katsu, do so without the sauce. Wrap tightly and freeze for up to 1 month. Thaw in the fridge overnight and reheat in the oven. The curry sauce freezes well separately — thaw and warm it gently on the stove.
One last tip: the flavors of the curry sauce deepen and mellow if you make it a day ahead. So, if you plan ahead, you might find this recipe tastes even better the next day — perfect for meal prep or entertaining.
Nutritional Information & Benefits
Estimated per serving (serves 4): approximately 550 calories, 30g protein, 45g carbohydrates, and 20g fat.
This dish offers a balanced meal with lean protein from chicken breast and complex carbs from rice. The curry sauce includes antioxidants from onions, garlic, and ginger, which support digestion and immunity. Opting for homemade chicken broth reduces sodium compared to store-bought varieties. Using panko breadcrumbs contributes to a lighter, crispier coating with less oil absorption than traditional breadcrumbs.
For those watching carbs, swap white rice for cauliflower rice to lighten the meal. This recipe is naturally gluten-free if you choose the appropriate ingredients and is free from nuts and dairy (except butter, which can be substituted).
Conclusion
Honestly, this Crispy Japanese Chicken Katsu Curry recipe is a keeper — it blends crispy, juicy chicken with a rich, savory sauce that hits all the right comfort food notes. It’s easy enough for weeknights but special enough to impress friends and family. I love how customizable it is, letting you tweak spice levels or swap proteins to suit your mood.
Give it a try and make it your own. Feel free to leave a comment sharing your favorite variations or any tips you discover along the way. Seriously, once you taste that crispy chicken with warm curry sauce, you’re going to want to make it again and again. Happy cooking!
FAQs About Crispy Japanese Chicken Katsu Curry
What cut of chicken works best for chicken katsu?
Boneless, skinless chicken breasts are ideal because they can be easily pounded to an even thickness, ensuring quick, even cooking and tender results.
Can I make the curry sauce without curry powder?
While curry powder adds essential flavor, you can substitute with a mix of turmeric, cumin, and coriander in a pinch, but the authentic taste won’t be quite the same.
How do I keep the chicken katsu crispy after frying?
Drain the fried chicken on a wire rack rather than paper towels to avoid sogginess, and serve immediately or reheat in the oven to maintain crispness.
Is it possible to bake the chicken instead of frying?
Yes! Coat the chicken as usual and bake at 425°F (220°C) for about 20 minutes, flipping halfway, until golden and cooked through.
What can I serve with chicken katsu curry?
Steamed Japanese rice is classic, but it also pairs well with simple salads, steamed veggies, or pickled sides like ginger or daikon for added texture and brightness.
Pin This Recipe!
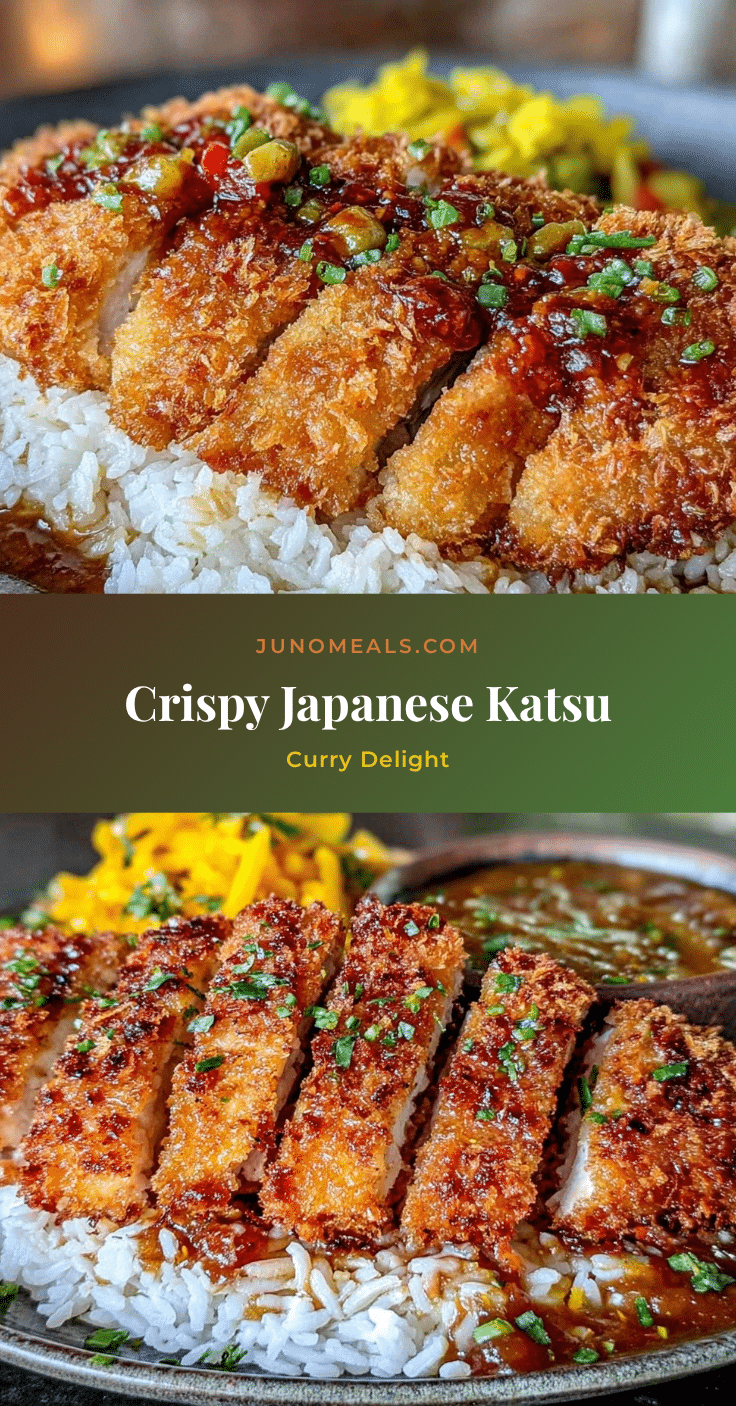
Crispy Japanese Chicken Katsu Curry

A deliciously crispy chicken katsu served with a rich, savory Japanese curry sauce, perfect for family dinners and cozy weeknights.
- Prep Time: 15 minutes
- Cook Time: 30 minutes
- Total Time: 45 minutes
- Yield: 4 servings 1x
- Category: Main Course
- Cuisine: Japanese
Ingredients
- 2 large boneless, skinless chicken breasts (about 1 lb / 450 g), pounded to even thickness
- Salt and pepper, to taste
- 1 cup (120 g) all-purpose flour
- 2 large eggs, beaten (room temperature)
- 1 ½ cups (150 g) panko breadcrumbs (Japanese brand recommended)
- Vegetable oil (canola or peanut), for frying
- 2 tbsp unsalted butter
- 1 large onion, finely chopped
- 2 cloves garlic, minced
- 1 tbsp grated fresh ginger
- 2 tbsp all-purpose flour
- 3 cups (720 ml) chicken broth (low sodium preferred)
- 2 tbsp soy sauce
- 1 tbsp ketchup
- 1 tbsp Worcestershire sauce
- 1 tsp curry powder
- 1 tsp garam masala (optional)
- Salt and pepper, to taste
- Steamed Japanese short-grain rice, cooked (about 2 cups / 360 g cooked)
- Pickled ginger or Japanese pickles (optional)
Instructions
- Trim any excess fat from the chicken breasts. Place each breast between two sheets of plastic wrap and gently pound with a meat mallet or rolling pin until about ½ inch (1.25 cm) thick. Season both sides lightly with salt and pepper.
- Set up breading stations: place flour in one shallow bowl, beaten eggs in a second bowl, and panko breadcrumbs in a third bowl.
- Dredge each chicken breast first in flour, shaking off excess. Dip into beaten eggs, allowing extra to drip off. Coat thoroughly with panko, pressing gently to adhere. Place breaded chicken on a plate and let rest for 10 minutes.
- Make the curry sauce: melt butter in a medium saucepan over medium heat. Add chopped onion and cook for 7-8 minutes until soft and golden, stirring occasionally. Add garlic and ginger, cooking for 1-2 minutes until fragrant.
- Sprinkle flour over onions and stir constantly for 1-2 minutes. Gradually whisk in chicken broth, stirring to prevent lumps. Add soy sauce, ketchup, Worcestershire sauce, curry powder, and garam masala (if using). Simmer gently for 15 minutes until thickened. Adjust salt and seasonings to taste.
- Heat about ½ inch (1.25 cm) vegetable oil in a heavy skillet over medium-high heat until shimmering and about 350°F (175°C). Fry breaded chicken for 3-4 minutes per side until golden brown and cooked through (internal temperature 165°F / 74°C). Drain on a wire rack or paper towels.
- Slice chicken katsu into strips. Serve with steamed rice and ladle curry sauce on top. Garnish with pickled ginger or Japanese pickles if desired.
Notes
Do not overcrowd the pan when frying to maintain oil temperature and crispiness. Let breaded chicken rest for 10 minutes before frying to help coating stick. Use a thermometer to keep oil at 350°F (175°C). The curry sauce tastes better if made a day ahead. For gluten-free, substitute flour and panko with gluten-free versions and check soy sauce ingredients.
Nutrition
- Serving Size: 1 serving (1/4 of re
- Calories: 550
- Sugar: 6
- Sodium: 600
- Fat: 20
- Saturated Fat: 6
- Carbohydrates: 45
- Fiber: 3
- Protein: 30
Keywords: chicken katsu, Japanese curry, crispy chicken, katsu curry, homemade curry sauce, Japanese comfort food