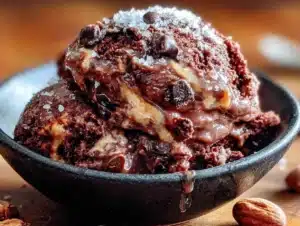
The neighborhood potluck was in six hours and I’d completely forgotten. Everyone else would be bringing their signature dishes—Debbie’s legendary seven-layer dip, Marcus’s brisket that he smokes for fourteen hours, Linda’s chocolate cake that takes a full afternoon to decorate. I had a half-empty jar of peanut butter, some chocolate protein powder I’d bought on a whim, and a freezer full of frozen bananas. Honestly, I almost just grabbed a bag of chips and called it a day. But something made me stop and look at those bananas. I mean, I’d seen the recipes online—you know the ones. “Nice cream” they call it. I figured, what’s the worst that could happen? It’s just blended frozen bananas, right?
So I threw the bananas in my food processor, added a scoop of that protein powder, a big spoonful of peanut butter, and a splash of milk. I blended it, scraped down the sides, blended it again. It looked… okay. Tasted pretty good straight out of the processor—like a soft-serve situation. I poured it into a loaf pan, stuck it in the freezer, and prayed. The potluck was at six. At 5:45, I pulled out my creation, let it sit for five minutes, scooped it into a pretty bowl, and ran out the door. Let me tell you, I was nervous. I mean, a frozen banana experiment against a fourteen-hour brisket? I didn’t stand a chance.
But here’s the thing—that creamy, chocolate-peanut butter concoction was gone in twenty minutes. People kept coming back for seconds. Debbie asked for the recipe. Marcus, who is not exactly a health-food guy, asked if I’d made it myself. I just smiled and said yes, which was technically true. It was a happy accident, honestly. And that’s why I keep making it. Not because I wanted to win a potluck—but because it proved that something simple, thrown together in a panic, could be genuinely, unexpectedly amazing. Maybe you’ve been there, staring into your fridge with no plan and a deadline. This is the recipe that saves you.
Why You’ll Love This Recipe
Let me tell you why this creamy high-protein chocolate peanut butter ice cream has become my absolute go-to. I’ve tested this recipe more times than I can count, tweaking the ratios, trying different protein powders, even experimenting with various peanut butters. This version? It’s the one. It’s the one that my family fights over, that my friends request for birthdays, that I actually feel good about eating for breakfast. No joke.
- Quick & Easy: Comes together in under 10 minutes of active prep time. No ice cream maker required. No endless churning. Just a blender or food processor and a freezer.
- Simple Ingredients: You likely already have everything in your kitchen right now. Frozen bananas, peanut butter, chocolate protein powder, milk—that’s it. No weird stabilizers, no expensive extracts.
- Perfect for Post-Workout: This isn’t just dessert—it’s a legitimate post-gym treat. Packed with protein from the powder and peanut butter, plus natural sugars from the bananas for quick energy replenishment.
- Crowd-Pleaser: I’ve served this to kids, bodybuilders, grandparents, and picky eaters. Everyone loves it. The texture is so creamy and rich that no one believes it’s “healthy.”
- Unbelievably Delicious: The flavor combo is next-level comfort food. It’s like a frozen Reese’s cup, but better. Creamier. More satisfying. And you don’t crash afterward.
What makes this recipe different from all the others out there? It’s the texture. Most healthy ice creams turn into an icy, crystallized mess after a night in the freezer. Not this one. The frozen bananas create an incredibly smooth, scoopable base that stays creamy even after days in the freezer. The peanut butter adds richness and a slight savory note that balances the sweetness perfectly. And the chocolate protein powder? It melts right in, no chalky aftertaste. I’ve tried at least a dozen different protein powders in this recipe, and I can tell you which ones work and which ones don’t. This recipe is tested, approved, and perfected. It’s comfort food reimagined—healthier, faster, but with the same soul-soothing satisfaction.
What Ingredients You Will Need
This recipe uses simple, wholesome ingredients to deliver bold flavor and satisfying texture without the fuss. Most of these are pantry staples, which is exactly what you want when a craving hits at 9 PM on a Tuesday.
- Frozen Bananas (3 large, very ripe, peeled and sliced before freezing): This is the backbone of the entire recipe. The riper the bananas, the sweeter your ice cream will be—no added sugar needed. I always freeze my bananas when they’re covered in brown spots. That’s peak sweetness. (Pro tip: peel them first, slice them into coins, and freeze in a single layer on a baking sheet before transferring to a bag. No more frozen banana bricks.)
- Creamy Peanut Butter (¼ cup, natural or regular): Adds richness, protein, and that unmistakable flavor. I prefer a natural peanut butter with just peanuts and salt—the oil separation is annoying but the flavor is cleaner. If you use a sweetened peanut butter, you might want to reduce or skip any additional sweetener. (I’ve used almond butter and cashew butter too, and they work great—just slightly different flavor profiles.)
- Chocolate Protein Powder (2 scoops, about 60g): This is where quality matters. I’ve tested this recipe with at least a dozen different protein powders. My personal favorite is Orgain Simple Chocolate—it blends smoothly without any chalkiness. Whey protein works well, but plant-based blends can be hit or miss. Avoid anything with stevia or monk fruit if you don’t like that artificial sweetener aftertaste. (If you’re using an unflavored protein powder, add 2 tablespoons of unsweetened cocoa powder for the chocolate flavor.)
- Unsweetened Almond Milk (¼ cup, plus more if needed): Helps the blender get everything moving. You can use any milk you like—dairy, oat, soy, coconut. Oat milk adds a bit more creaminess, while coconut milk gives a subtle tropical note. Start with less and add more as needed. The goal is a thick, soft-serve consistency, not a thin liquid.
- Optional: Dark Chocolate Chips (2 tablespoons): For texture and little pockets of melted chocolate. I use Lily’s stevia-sweetened chips to keep it lower in sugar, but any dark chocolate chips work. (Sometimes I skip these and it’s still amazing.)
- Optional: Pinch of Sea Salt: A tiny sprinkle on top right before serving elevates the flavors dramatically. Salt + chocolate + peanut butter is a holy trinity, honestly.
- Optional: Vanilla Extract (½ teaspoon): Adds depth and rounds out the flavors. Completely optional, but I always add it.
For the best results, use very ripe bananas—the kind that are almost too brown to eat. That natural sweetness is what allows us to skip the processed sugar entirely. And don’t skip the freezing step! Fresh bananas will give you a smoothie, not ice cream. Trust me on this one—I learned the hard way.
Equipment Needed
You don’t need a fancy ice cream maker for this recipe. In fact, you probably already have everything you need. Here’s what I use:
- Food Processor or High-Speed Blender: A food processor works best because it can handle the thick, frozen banana mixture without getting stuck. I use my Cuisinart 14-cup food processor and it powers through like a champ. A high-speed blender like a Vitamix or Blendtec also works, but you’ll need to use the tamper to push the mixture down. (Regular blenders? They’ll struggle. I’ve burned out a motor trying. Stick with a food processor if you can.)
- Loaf Pan or Freezer-Safe Container: For freezing the ice cream into a scoopable block. A standard 9×5 loaf pan works perfectly. Glass or metal both work fine. I prefer glass because I can see how it’s setting up.
- Spatula: For scraping down the sides of the food processor and for transferring the soft-serve mixture to the pan. A silicone spatula is ideal—it won’t scratch your pan and it gets every last bit.
- Measuring Cups and Spoons: For accuracy. I know, I know—I said this recipe is forgiving. It is. But measuring the peanut butter and protein powder ensures consistent results every time.
- Ice Cream Scoop: A good scoop makes serving so much easier, especially when the ice cream is fully frozen. A spring-loaded scoop is worth the investment.
If you don’t have a food processor, you can try using a high-speed blender. Just be prepared to stop and scrape frequently. And if you’re really in a pinch, you can mash the frozen bananas by hand with a fork—it’ll be more like a chunky frozen pudding, but it still tastes amazing. I’ve done it. No judgment here.
Preparation Method
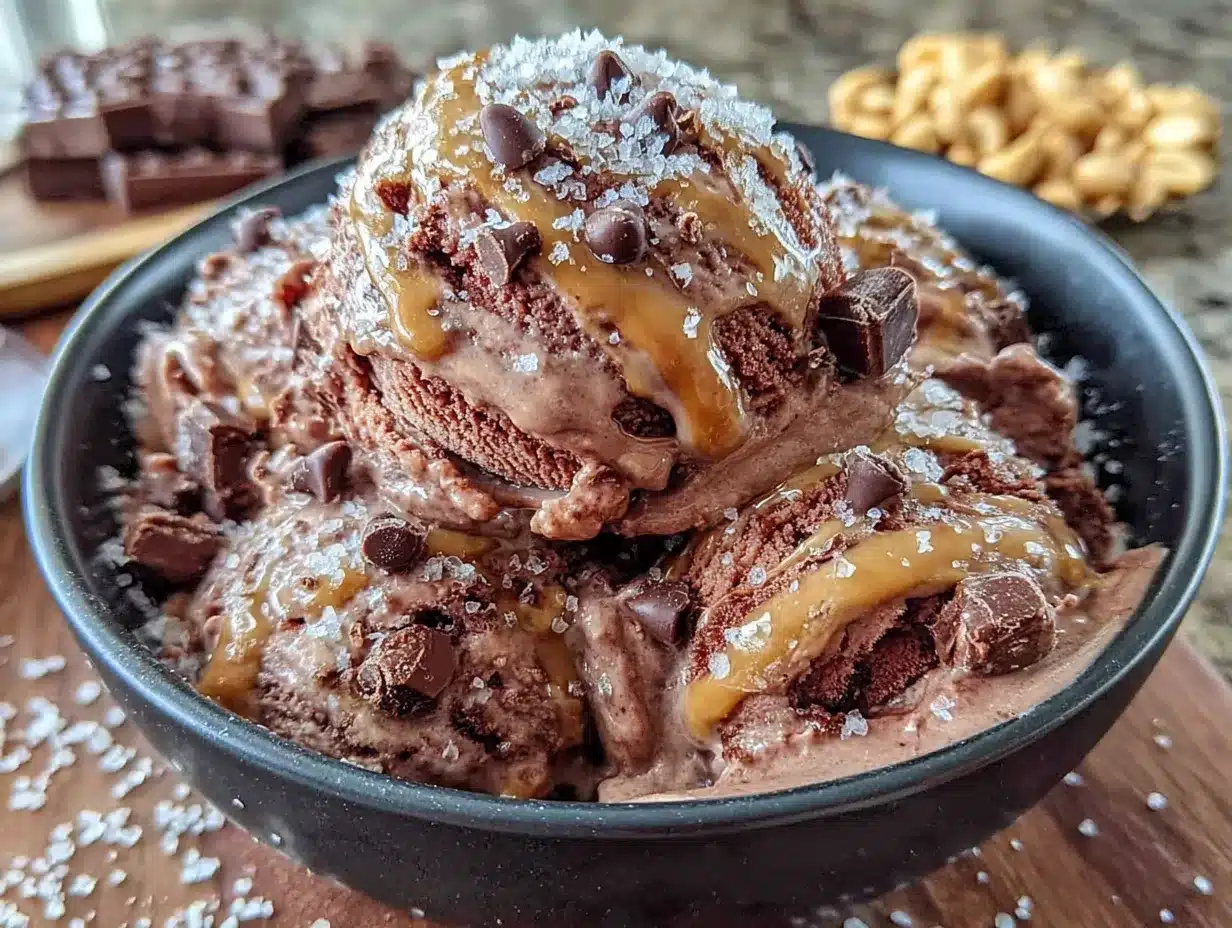
Making this creamy high-protein chocolate peanut butter ice cream is almost embarrassingly easy. Here’s exactly how I do it:
- Prep your bananas. This is a make-ahead step, but it’s crucial. Peel 3 very ripe bananas, slice them into ½-inch coins, and lay them in a single layer on a parchment-lined baking sheet. Freeze for at least 4 hours, preferably overnight. (I keep a bag of pre-sliced frozen bananas in my freezer at all times. It makes this recipe a 2-minute prep instead of a 4-hour one.)
- Combine ingredients in the food processor. Add the frozen banana slices, ¼ cup creamy peanut butter, 2 scoops chocolate protein powder, and ¼ cup unsweetened almond milk to the bowl of your food processor. Don’t add the chocolate chips yet—those go in at the end.
- Blend until smooth. Start the food processor and let it run. At first, it will look like a crumbly mess—honestly, it looks like something went wrong. Don’t panic. Stop and scrape down the sides with your spatula, then process again. Repeat this process 3-4 times. After about 2-3 minutes, the mixture will suddenly transform into a smooth, creamy, soft-serve consistency. It’s like magic. (If it’s too thick and the processor is struggling, add another tablespoon of almond milk. If it’s too thin, add a few more frozen banana slices.)
- Add the chocolate chips (optional). Once the mixture is smooth and creamy, add 2 tablespoons of dark chocolate chips. Pulse 3-4 times just to distribute them. You want little chunks throughout, not a completely smooth puree.
- Transfer to a loaf pan. Use your spatula to scrape every last bit of the mixture into a 9×5 loaf pan. Smooth the top with the spatula. If you’re feeling fancy, you can swirl in an extra tablespoon of peanut butter on top.
- Freeze until firm. Cover the pan with plastic wrap or a lid and freeze for at least 4 hours, preferably overnight. This is the hard part—waiting. But trust me, it’s worth it.
- Serve with a sprinkle of sea salt. When you’re ready to eat, let the ice cream sit at room temperature for 5-10 minutes to soften slightly. This makes scooping much easier. Scoop into bowls, sprinkle with a pinch of flaky sea salt, and enjoy immediately.
The texture should be smooth, creamy, and scoopable—not icy or crystallized. If your ice cream turns out icy, it usually means the bananas weren’t ripe enough or the mixture was too thin when you froze it. Next time, use browner bananas and add less milk.
Cooking Tips & Techniques
I’ve made this recipe more times than I can count, and I’ve learned a few things along the way. Here are my best tips for getting perfect results every time:
The banana ripeness is non-negotiable. I cannot stress this enough. Green or even yellow bananas with no spots will give you ice cream that tastes like… frozen green bananas. Not great. You want bananas that are covered in brown spots, almost on the verge of being too soft to eat. That’s when their sugar content is at its peak. (I once made this with barely-ripe bananas because that’s all I had, and the result was a sad, slightly bitter, icy mess. Learn from my mistakes.)
Don’t rush the blending process. The mixture will go through an awkward phase where it looks like crumbly, dry banana bits. That’s normal. Keep processing, keep scraping, and be patient. It will suddenly come together into a smooth, creamy texture. This usually takes about 2-3 minutes in a food processor. If you’re using a blender, you’ll need to use the tamper to push the mixture down repeatedly.
Let it soften before scooping. Fresh from the freezer, this ice cream is rock hard. I mean, really hard. Let it sit on the counter for 5-10 minutes before you try to scoop it. This makes a huge difference. (I’ve definitely tried to scoop it straight from the freezer and ended up with a bent spoon and a broken wrist. Okay, not broken, but you get the point.)
Use a wet scoop. Run your ice cream scoop under hot water before scooping. It glides right through the ice cream like butter. This is one of those small tricks that makes a big difference.
Double the batch. Seriously. This recipe disappears fast. I always make a double batch and keep one loaf pan in the freezer for emergencies. (What counts as an emergency? A bad day, a good day, a Tuesday, a sudden craving at 10 PM. You know.)
Variations & Adaptations
One of the best things about this recipe is how endlessly customizable it is. Here are some of my favorite variations:
- Vegan & Dairy-Free: This recipe is already vegan if you use a plant-based protein powder and plant-based milk. I use Orgain Simple Chocolate (pea protein) and almond milk, and it’s completely dairy-free. (My vegan friends love this recipe. They always ask for the leftovers, which never exist.)
- Lower-Fat Version: Use powdered peanut butter (like PB2) instead of regular peanut butter. Reconstitute 2 tablespoons of powder with 1 tablespoon of water, then add it to the food processor. The flavor is slightly less rich, but it’s still delicious and much lower in fat.
- Mint Chocolate Chip: Add ¼ teaspoon of peppermint extract and swap the chocolate chips for sugar-free chocolate chips. It tastes exactly like a Thin Mint. (I accidentally discovered this variation when I grabbed the wrong extract. Best mistake ever.)
- Cookie Dough: After blending, fold in ¼ cup of edible cookie dough chunks. (I have a recipe for high-protein edible cookie dough that works perfectly here. It adds texture and makes it feel extra indulgent.)
- Berry Swirl: Swirl in ¼ cup of sugar-free strawberry jam or warmed frozen berries before freezing. The tartness of the berries cuts through the richness of the chocolate and peanut butter beautifully.
- Extra Chocolate: Add 1 tablespoon of unsweetened cocoa powder along with the protein powder for an even more intense chocolate flavor. This is for the true chocolate lovers out there.
- Nut-Free: Use sunflower seed butter or WowButter instead of peanut butter. The flavor is slightly different, but it’s still creamy and delicious. (My nephew has a nut allergy, so I’ve tested this version extensively. It works.)
Serving & Storage Suggestions
This creamy high-protein chocolate peanut butter ice cream is best served slightly softened, about 5-10 minutes out of the freezer. I like to scoop it into small bowls—it’s rich, so a little goes a long way. A sprinkle of flaky sea salt on top is my non-negotiable finishing touch. It brings out the chocolate and peanut butter flavors in a way that’s honestly addictive.
For presentation, you can’t go wrong with a drizzle of warm peanut butter or melted dark chocolate on top. A few fresh raspberries or sliced strawberries add a pop of color and a tart contrast. If you’re feeling extra fancy, a dollop of whipped coconut cream takes it over the top.
Storage: Keep the ice cream in a tightly covered container in the freezer for up to 2 weeks. After that, the texture starts to get icy. (In my house, it never lasts that long. It’s usually gone within 3 days.) To prevent ice crystals from forming, press a piece of plastic wrap directly onto the surface of the ice cream before sealing the container. This creates a barrier that keeps the texture smooth.
Reheating/Softening: If the ice cream is too hard to scoop, microwave the container for 10-15 seconds, or let it sit at room temperature for 10-15 minutes. You can also run your scoop under hot water before digging in. (I’ve also been known to eat it straight from the freezer like a popsicle. No regrets.)
Flavor Development: The flavors actually meld and deepen after a day or two in the freezer. The peanut butter becomes more pronounced, and the chocolate flavor gets richer. So if you can resist eating it all on day one, day two is even better.
Nutritional Information & Benefits
Here’s the nutritional breakdown for one serving (about ½ cup, using natural peanut butter and unsweetened almond milk):
- Calories: Approximately 220-250
- Protein: 15-18 grams
- Carbohydrates: 28-32 grams
- Fiber: 5-7 grams
- Fat: 8-10 grams
- Sugar: 12-15 grams (all natural from bananas)
This ice cream is a fantastic source of protein, thanks to the protein powder and peanut butter. It’s also rich in potassium from the bananas, which is great for muscle recovery after a workout. The peanut butter provides healthy monounsaturated fats that keep you full and satisfied. And because it’s sweetened entirely by bananas, there’s no added sugar—just natural sweetness.
This recipe is naturally gluten-free, dairy-free (with plant-based ingredients), and vegan. It’s also relatively low in calories compared to traditional ice cream, making it a great option for anyone watching their calorie intake without sacrificing flavor. The fiber content from the bananas and peanut butter also supports healthy digestion.
One thing I love about this recipe is that it feels like a treat but fuels your body at the same time. It’s the kind of dessert you can feel good about eating—and that’s a rare thing.
Conclusion
So there you have it—my creamy high-protein chocolate peanut butter ice cream that started as a panic-induced potluck experiment and became a staple in my kitchen. It’s proof that you don’t need fancy equipment, exotic ingredients, or hours of free time to make something genuinely delicious. Sometimes the best recipes come from looking at what you have and just going for it.
I love this recipe because it’s forgiving, flexible, and always delivers. It’s the dessert that makes you feel good—not just because it tastes amazing, but because you know exactly what’s in it. No weird additives, no hidden sugars, just real food that happens to taste like a treat. That’s my kind of cooking.
Now it’s your turn. Give this recipe a try, and don’t be afraid to make it your own. Swap the peanut butter for almond butter. Add a swirl of caramel. Throw in some chopped nuts. The beauty of this recipe is that it works with whatever you have. And when you make it, come back and tell me about it. I’d love to hear how it turned out, what variations you tried, and whether it saved you from a potluck panic too. Drop a comment below, share your photos, and let’s keep this conversation going. Happy scooping!
Frequently Asked Questions
Can I make this without a food processor?
Yes, but it’s trickier. A high-speed blender like a Vitamix works if you use the tamper to push the mixture down. A regular blender will likely struggle—the mixture is too thick. If you don’t have either, you can mash the frozen bananas by hand with a fork, then stir in the other ingredients. The texture will be more like a frozen pudding, but the flavor is still amazing.
Why is my ice cream icy instead of creamy?
This usually happens for one of two reasons: your bananas weren’t ripe enough, or your mixture was too thin when you froze it. Use very ripe bananas with plenty of brown spots—they have more natural sugar and less water. Also, make sure you’re not adding too much milk. Start with ¼ cup and only add more if the processor is struggling.
Can I use a different protein powder?
Absolutely. I’ve tested this recipe with whey, pea protein, brown rice protein, and collagen. Whey protein gives the creamiest texture. Plant-based blends can work, but some have a chalky aftertaste. Avoid anything with artificial sweeteners if you don’t like that flavor. If your protein powder is unsweetened, add 1-2 tablespoons of maple syrup or honey to balance the flavor.
How long does this ice cream keep in the freezer?
It’s best within the first week, but it will keep for up to 2 weeks if stored properly. Press a piece of plastic wrap directly onto the surface of the ice cream before sealing the container to prevent ice crystals. After 2 weeks, the texture starts to get icy and the flavor fades slightly. (In my experience, it never lasts that long anyway.)
Can I make this into popsicles?
Yes! This recipe works beautifully as popsicles. After blending, pour the mixture into popsicle molds and freeze for at least 6 hours. The texture is creamier than traditional popsicles, almost like a frozen mousse. My kids love these in the summer. Just make sure to leave a little room at the top for expansion.
Pin This Recipe!
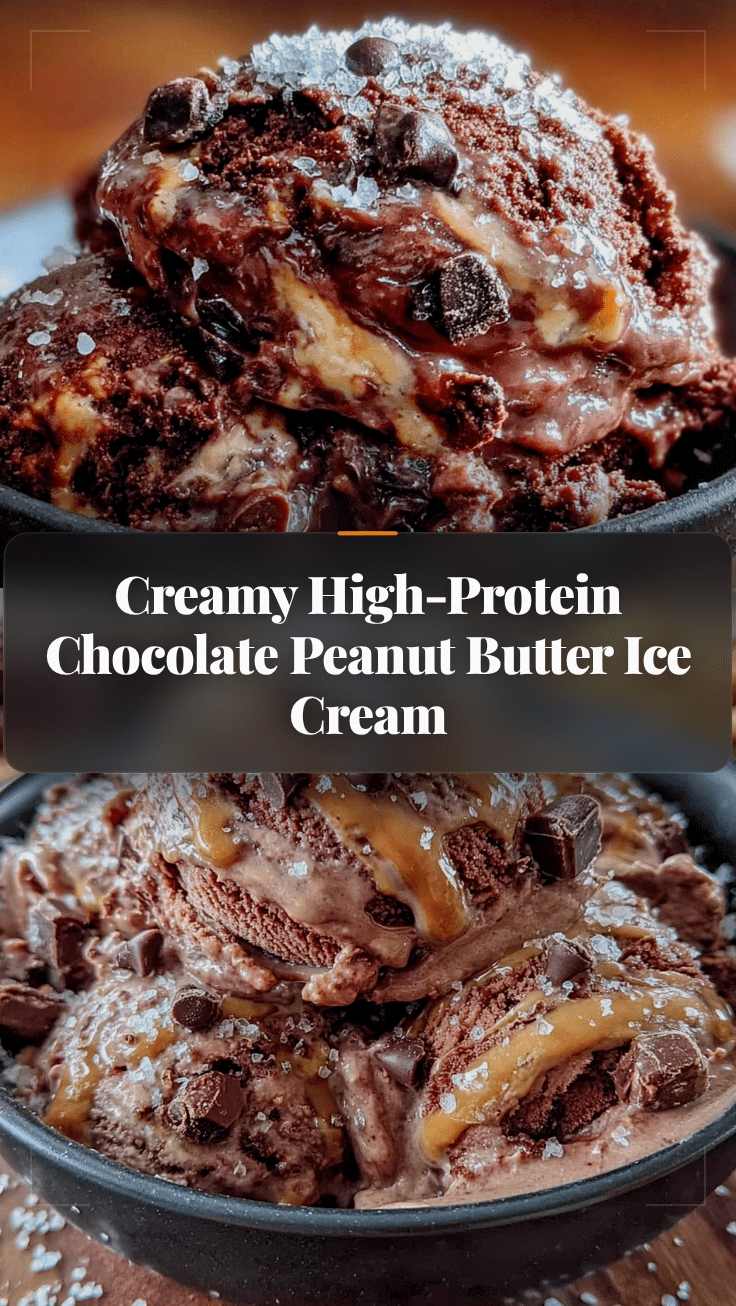
Creamy High-Protein Chocolate Peanut Butter Ice Cream
This creamy, high-protein chocolate peanut butter ice cream is made with frozen bananas, peanut butter, and chocolate protein powder. It’s a quick, easy, and healthy dessert that tastes like a frozen Reese’s cup.
- Prep Time: 10 minutes
- Cook Time: 0 minutes
- Total Time: 4 hours 10 minutes (including freezing time)
- Yield: 4 servings 1x
- Category: Dessert
- Cuisine: American
Ingredients
- 3 large very ripe bananas, peeled and sliced into ½-inch coins, frozen
- ¼ cup creamy peanut butter (natural or regular)
- 2 scoops (about 60g) chocolate protein powder
- ¼ cup unsweetened almond milk, plus more if needed
- 2 tablespoons dark chocolate chips (optional)
- Pinch of sea salt (optional, for serving)
- ½ teaspoon vanilla extract (optional)
Instructions
- Peel 3 very ripe bananas, slice them into ½-inch coins, and lay them in a single layer on a parchment-lined baking sheet. Freeze for at least 4 hours, preferably overnight.
- Add the frozen banana slices, ¼ cup creamy peanut butter, 2 scoops chocolate protein powder, and ¼ cup unsweetened almond milk to the bowl of a food processor.
- Blend until smooth, stopping to scrape down the sides as needed. The mixture will look crumbly at first but will transform into a smooth, creamy soft-serve consistency after about 2-3 minutes. If too thick, add another tablespoon of almond milk; if too thin, add a few more frozen banana slices.
- If using, add 2 tablespoons of dark chocolate chips and pulse 3-4 times to distribute.
- Transfer the mixture to a 9×5 loaf pan and smooth the top with a spatula.
- Cover the pan with plastic wrap or a lid and freeze for at least 4 hours, preferably overnight.
- When ready to serve, let the ice cream sit at room temperature for 5-10 minutes to soften slightly. Scoop into bowls, sprinkle with a pinch of flaky sea salt if desired, and enjoy immediately.
Notes
Use very ripe bananas (covered in brown spots) for natural sweetness. If the ice cream turns icy, the bananas weren’t ripe enough or the mixture was too thin. Let the ice cream soften for 5-10 minutes before scooping. For best texture, press plastic wrap directly onto the surface before freezing to prevent ice crystals.
Nutrition
- Serving Size: ½ cup
- Calories: 235
- Sugar: 14
- Sodium: 150
- Fat: 9
- Saturated Fat: 2
- Carbohydrates: 30
- Fiber: 6
- Protein: 16
Keywords: high-protein ice cream, chocolate peanut butter ice cream, healthy ice cream, banana ice cream, no-churn ice cream, vegan ice cream, gluten-free ice cream