I’m not supposed to play favorites with recipes, but let’s be honest—we all do it. There’s always that one dish that gets pulled out for birthdays, for bad days, for Tuesday nights when you just need everyone at the table to stop complaining and eat something that actually makes them happy. For us, that dish is this Smoked Gouda Baked Mac and Cheese.
The funny thing is, this recipe started as a total accident. I was standing in the grocery store aisle, staring at the cheese section, completely out of ideas. My youngest had just declared that regular mac and cheese was “boring” (his words, not mine), and my oldest had been on a smoked food kick ever since we tried brisket at a neighborhood cookout. I grabbed a block of smoked Gouda on a whim, honestly not sure if it would work. I mean, smoked cheese in mac and cheese? It felt risky.
I got home, shredded that Gouda alongside some sharp cheddar, and threw together a quick béchamel while the pasta boiled. The kitchen smelled incredible—like a cozy campfire mixed with Sunday dinner. When I pulled that baking dish out of the oven, golden and bubbling, I knew I had stumbled onto something special. The first bite was quiet. Then my husband said, “Don’t ever lose this recipe.” And the kids? They asked for seconds before they even finished their first serving. That’s when you know you’ve got a keeper.
Maybe you’ve been there—staring at a block of cheese you weren’t sure about, wondering if it would work. Trust me on this one. This Smoked Gouda Baked Mac and Cheese is the kind of recipe that turns a regular weeknight into something that feels like a celebration. And the best part? It won’t break your budget.
Why You’ll Love This Recipe
This isn’t just another mac and cheese recipe that promises the world and delivers a bland, gluey mess. I’ve tested this version more times than I can count, tweaking the cheese ratio, adjusting the bake time, and figuring out exactly how to get that perfect creamy-meets-crispy texture. Here’s why this one actually delivers:
- Budget-Friendly Comfort: Smoked Gouda adds incredible flavor without needing a fancy cheese board. A little goes a long way, and paired with affordable sharp cheddar, you get that rich, smoky taste without spending a fortune.
- Kid-Approved, Parent-Approved: My kids devour this, and I’ve had neighbors text me for the recipe after their own picky eaters cleaned their plates. The smoky flavor is subtle enough for little ones but complex enough for adults to appreciate.
- Perfect for Busy Weeknights: You can have this on the table in about 45 minutes, and most of that is hands-off baking time. It’s the kind of meal that feels like you spent hours on it when really, you just let the oven do the work.
- Leftovers That Actually Reheat Well: How many times have you made mac and cheese only to have it turn into a dry, sad mess the next day? This version holds up beautifully, thanks to the extra moisture in the sauce and the right cheese-to-pasta ratio.
- Crowd-Pleaser for Every Occasion: I’ve brought this to potlucks, served it at Thanksgiving as a side dish, and made it for lazy Sunday dinners. It disappears every single time.
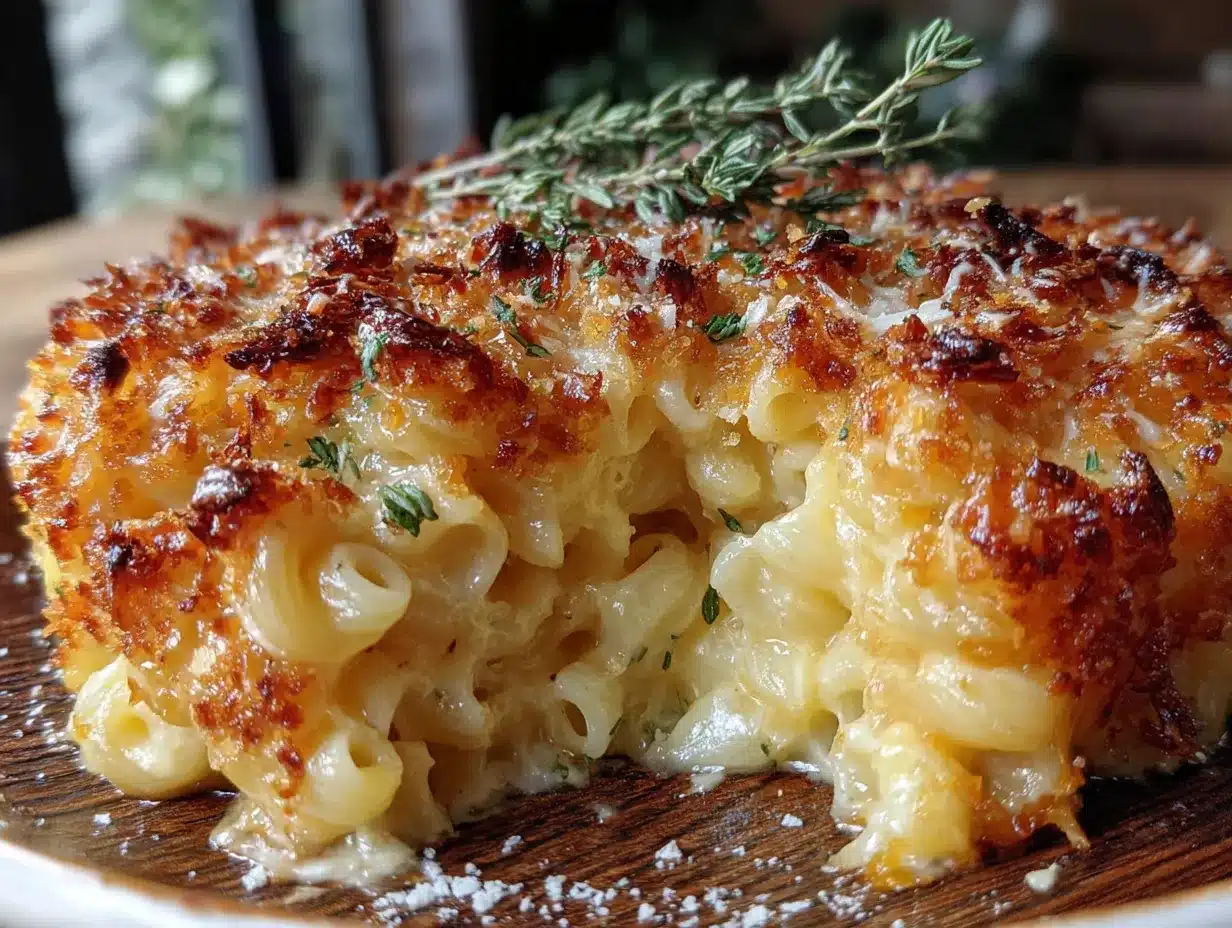
What makes this recipe different from the dozens of other mac and cheese recipes out there is the combination of cheeses and the technique. I use a blend of smoked Gouda for that deep, woodsy flavor and sharp cheddar for the classic tangy creaminess. The panko topping adds that irresistible crunch that contrasts perfectly with the silky sauce underneath. It’s comfort food, but it’s comfort food that has a little something extra—a warmth that lingers on your tongue and makes you want to take another bite before you’ve even swallowed the first one.
Honestly, this is the kind of recipe that makes you close your eyes after the first bite. It’s soul-soothing, family-friendly, and simple enough that you’ll find yourself making it on repeat.
What Ingredients You Will Need
This recipe uses simple, everyday ingredients that come together to create something truly special. Most of these are pantry staples, and the ones that aren’t are easy to find at any grocery store without breaking the bank.
For the Pasta
- 1 pound (450g) elbow macaroni — or any short pasta like cavatappi, shells, or rotini. I prefer cavatappi because the ridges hold onto the sauce better, but elbows work great too.
- Salt — for the pasta water. Don’t skip this; it’s your first chance to season the pasta from the inside out.
For the Cheese Sauce
- 4 tablespoons (56g) unsalted butter — I use unsalted so I can control the salt level. If you only have salted butter, just reduce the added salt by about ¼ teaspoon.
- ¼ cup (31g) all-purpose flour — this thickens the sauce. For a gluten-free version, you can use a 1:1 gluten-free flour blend.
- 3 cups (710ml) whole milk — whole milk gives the creamiest sauce. You can use 2% in a pinch, but avoid skim milk; the sauce won’t be as rich.
- 1 cup (240ml) heavy cream — this adds that luxurious texture. If you’re watching calories, you can substitute with an additional cup of whole milk, but the sauce will be thinner.
- 2 cups (226g) sharp cheddar cheese, shredded — I recommend shredding your own cheese from a block. Pre-shredded cheese has anti-caking agents that prevent it from melting smoothly.
- 2 cups (226g) smoked Gouda cheese, shredded — look for a block of smoked Gouda in the specialty cheese section. The rind is edible but I usually remove it before shredding.
- ½ teaspoon garlic powder — adds a subtle savory note without overpowering the cheese.
- ½ teaspoon mustard powder — this is my secret ingredient. It doesn’t make the mac and cheese taste like mustard; it just enhances the cheesy flavor.
- ½ teaspoon salt — adjust to taste, especially depending on how salty your cheese is.
- ¼ teaspoon black pepper — freshly ground is best.
- Pinch of cayenne pepper (optional) — just a tiny pinch adds warmth without heat. Great for adults, and the kids won’t notice it.
For the Topping
- 1 cup (120g) panko breadcrumbs — these give the best crunchy texture. Regular breadcrumbs work too, but panko stays crispier.
- 2 tablespoons (28g) unsalted butter, melted — helps the breadcrumbs brown and adds richness.
- ¼ cup (28g) grated Parmesan cheese — adds a salty, nutty flavor to the topping. Pecorino Romano works great too.
- Optional: ¼ teaspoon smoked paprika — for extra color and a hint of smokiness on top.
Ingredient Tips from My Kitchen: I’ve found that buying cheese blocks and shredding them yourself makes a huge difference in the final texture. Pre-shredded cheese just doesn’t melt the same way. Also, if you can’t find smoked Gouda, you can substitute with regular Gouda plus a few drops of liquid smoke, but honestly, the real thing is worth seeking out. I usually find it at my local grocery store in the deli section for about the same price as a good cheddar.
Equipment Needed
You don’t need any fancy equipment for this recipe, which is part of why I love it. Here’s what you’ll need:
- Large pot (6-8 quart) — for boiling the pasta. Make sure it’s big enough that the pasta has room to move around.
- Medium saucepan — for making the cheese sauce. A heavy-bottomed pan works best to prevent scorching.
- 9×13-inch baking dish — this is the standard size that fits the full recipe. An 8×8 dish works if you want a thicker mac and cheese, but you’ll need to increase the bake time by about 5-10 minutes.
- Whisk — essential for a smooth, lump-free béchamel sauce. A silicone whisk is great because it won’t scratch your pans.
- Box grater or food processor with shredding disc — for shredding your cheese. I use a box grater because it’s easier to clean, but the food processor is faster if you’re making a big batch.
- Wooden spoon or silicone spatula — for stirring the sauce and combining everything.
- Mixing bowl — for combining the topping ingredients.
- Measuring cups and spoons — accuracy matters in this recipe, especially for the flour and milk.
- Colander — for draining the pasta.
Budget-Friendly Tip: If you don’t have a 9×13 dish, you can use two 8×8 dishes or even a cast-iron skillet. Just keep an eye on the bake time and adjust as needed. I’ve also made this in individual ramekins for a fun presentation—perfect for a dinner party or when you want to make the kids feel special.
Preparation Method
Let me walk you through this step by step. I’ve made this recipe dozens of times, and I’ve learned a few tricks along the way that make the process smoother and the results better.
Step 1: Preheat and Prep
Preheat your oven to 375°F (190°C). While the oven is heating up, fill your large pot with water and bring it to a boil. Add a generous tablespoon of salt to the water—it should taste like the sea. This is your first chance to season the pasta.
Step 2: Cook the Pasta
Add the elbow macaroni to the boiling water and cook according to package directions until al dente. For most brands, that’s about 7-8 minutes. Here’s the key: undercook the pasta by about 1 minute. It will continue cooking in the oven, and you don’t want mushy mac and cheese. Drain the pasta in a colander, but don’t rinse it. Rinsing removes the starch that helps the sauce cling to the pasta. Toss the drained pasta with a tiny drizzle of olive oil to prevent sticking while you make the sauce.
Step 3: Start the Cheese Sauce
While the pasta is cooking, melt the 4 tablespoons of butter in a medium saucepan over medium heat. Once the butter is fully melted and starting to bubble, add the flour. Whisk constantly for about 1-2 minutes until the mixture is smooth and golden. This is called a roux, and cooking it for a minute gets rid of that raw flour taste. You’ll notice it smells a bit nutty when it’s ready.
Step 4: Add the Milk and Cream
Slowly pour in the milk and heavy cream while whisking constantly. I mean constantly—if you stop whisking, you’ll get lumps. Keep whisking until the mixture is smooth and starts to thicken, about 3-5 minutes. You’ll know it’s ready when it coats the back of a spoon and doesn’t immediately run off. If you drag your finger across the spoon, the line should hold.
Step 5: Add the Cheese and Seasonings
Reduce the heat to low. Add the shredded cheddar and smoked Gouda cheese in handfuls, stirring gently until each addition is fully melted before adding the next. This gradual addition prevents the sauce from breaking or becoming grainy. Once all the cheese is melted, stir in the garlic powder, mustard powder, salt, black pepper, and the pinch of cayenne if you’re using it. Taste the sauce and adjust the seasoning—it should be slightly saltier than you think because it will be diluted by the pasta.
Step 6: Combine Pasta and Sauce
Add the drained pasta to the pot with the cheese sauce. Gently fold everything together with a wooden spoon or silicone spatula until every piece of pasta is coated in that glorious, creamy sauce. Take your time here—you want every nook and cranny filled with cheese.
Step 7: Assemble the Dish
Pour the mac and cheese into your greased 9×13 baking dish and spread it into an even layer. Don’t press it down; just let it settle naturally.
Step 8: Make the Topping
In a small bowl, combine the panko breadcrumbs, melted butter, grated Parmesan, and smoked paprika if using. Mix with a fork until the breadcrumbs are evenly coated. Sprinkle this mixture evenly over the top of the mac and cheese.
Step 9: Bake to Perfection
Place the baking dish in the preheated oven and bake for 20-25 minutes, until the sauce is bubbly around the edges and the topping is golden brown and crispy. If you want an extra-crunchy top, you can switch the oven to broil for the last 2 minutes, but watch it closely—it can go from golden to burnt in seconds.
Step 10: Rest and Serve
Let the mac and cheese rest for about 5-10 minutes before serving. This is crucial—it allows the sauce to set up slightly so you get that perfect creamy texture instead of a soupy mess. I know it’s hard to wait, but trust me on this one. The anticipation makes that first bite even better.
Cooking Tips & Techniques
Over the years, I’ve made just about every mistake you can make with mac and cheese. Here’s what I’ve learned so you don’t have to make the same mistakes.
Don’t Overcook the Pasta. This is probably the most common mistake. If you cook the pasta to fully tender, it will turn to mush in the oven. Always cook it al dente—firm to the bite—and remember it will continue cooking as it bakes.
Shred Your Own Cheese. I know it’s tempting to buy the pre-shredded bags, especially when you’re in a hurry. But those little bags of shredded cheese are coated with cellulose and other anti-caking agents that prevent the cheese from melting smoothly. You’ll end up with a grainy, clumpy sauce instead of that silky, creamy texture we’re after. Spend the extra 5 minutes shredding your own cheese—it makes a world of difference.
Low and Slow for the Sauce. When you’re melting the cheese into the sauce, keep the heat on low. High heat can cause the cheese to seize up and become stringy or grainy. Patience is your friend here. I’ve ruined more than a few batches by getting impatient and cranking up the heat.
Season in Layers. Don’t rely solely on the cheese for flavor. Salt your pasta water, season your roux, and taste your sauce before you add the pasta. Each layer of seasoning builds on the last, creating a more complex and satisfying final dish.
Let It Rest. I cannot stress this enough. That 5-10 minute rest after baking is not optional. It allows the sauce to thicken and set, so you get a creamy, cohesive dish instead of a runny one. Use this time to set the table, pour drinks, or just take a breath.
Watch the Topping. If you’re broiling the topping at the end, keep a close eye on it. I’ve burned more than a few batches by walking away for “just a second.” The difference between perfectly golden and burnt is about 30 seconds under the broiler.
Variations & Adaptations
One of the best things about this recipe is how adaptable it is. Here are some of my favorite variations, all tested in my own kitchen.
Add Some Protein
This mac and cheese is incredible with added protein. I’ve added cooked, crumbled bacon (about 6 strips) mixed into the pasta before baking. The smoky bacon complements the smoked Gouda beautifully. You can also add diced ham or shredded rotisserie chicken for a heartier meal. Just fold them in with the pasta before pouring into the baking dish.
Vegetable Boost
If you’re trying to sneak some veggies into your kids’ dinner, this is a great recipe for it. Steamed broccoli florets or roasted cauliflower mix in beautifully. I’ve also added sautéed mushrooms and caramelized onions for a more grown-up version. Just make sure any vegetables are cooked and drained well before adding—excess water will make the sauce thin.
Spicy Kick
For those who like a little heat, add diced jalapeños (fresh or pickled) or a few dashes of hot sauce to the cheese sauce. You can also mix in some canned green chiles for a milder warmth. My husband loves this version, and it’s great for game day or potlucks.
Gluten-Free Adaptation
To make this gluten-free, use a 1:1 gluten-free all-purpose flour blend in the roux. I’ve had good luck with Bob’s Red Mill and King Arthur brands. Use gluten-free pasta (cook it about 1 minute less than the package directs) and gluten-free panko breadcrumbs for the topping. The texture is slightly different, but it’s still delicious.
Lighter Version
If you’re watching calories, you can substitute the heavy cream with an additional cup of whole milk. The sauce will be thinner, so you might want to add an extra tablespoon of flour to the roux. You can also use reduced-fat cheddar and Gouda, though the texture won’t be quite as creamy. I’ve also used Greek yogurt in place of some of the cream, but be careful not to let it boil or it will curdle.
Serving & Storage Suggestions
This Smoked Gouda Baked Mac and Cheese is a star on its own, but here’s how I like to serve and store it.
Serving Suggestions
Serve this mac and cheese hot, straight from the oven, with that golden, crispy topping still bubbling. I like to let it rest for 5-10 minutes first, then scoop it onto plates with a large spoon or spatula. It pairs beautifully with a simple green salad dressed with lemon vinaigrette—the acidity cuts through the richness of the cheese. For a heartier meal, serve it alongside grilled chicken, roasted vegetables, or a simple tomato soup. My kids love it with steamed peas mixed in, which adds a pop of color and sweetness.
Storage Instructions
Leftovers can be stored in an airtight container in the refrigerator for up to 5 days. The topping will lose some of its crunch, but the mac and cheese itself will still be delicious. To reheat, I recommend the oven or toaster oven over the microwave. Place individual portions in an oven-safe dish, add a splash of milk, cover with foil, and bake at 350°F (175°C) for about 15-20 minutes, until heated through. If you’re in a hurry, the microwave works too—just add a splash of milk and stir halfway through to redistribute the sauce.
Freezing Instructions
This mac and cheese freezes beautifully, which makes it perfect for meal prep. Assemble the dish completely but don’t bake it. Cover tightly with plastic wrap, then a layer of aluminum foil, and freeze for up to 3 months. When you’re ready to bake, thaw it in the refrigerator overnight, then bake as directed, adding about 10 minutes to the bake time since you’re starting from cold. You can also freeze individual portions in freezer-safe containers for quick lunches.
Flavor Development Note: The flavors in this mac and cheese actually deepen and meld together after a day or two in the fridge. Some people even prefer the leftovers to the fresh version! The smoky flavor becomes more pronounced, and the sauce thickens into something truly luxurious.
Nutritional Information & Benefits
While this isn’t exactly health food, there are some nutritional benefits worth noting. Here’s the estimated nutritional breakdown per serving (based on 8 servings):
- Calories: Approximately 580-620 per serving
- Protein: 22-25g
- Fat: 32-36g
- Carbohydrates: 48-52g
- Fiber: 2-3g
- Calcium: 450-500mg (about 45% of daily value)
- Iron: 2-3mg
Health Benefits: This dish provides a good amount of protein from the cheese and milk, which helps keep you full and satisfied. The calcium content is excellent for bone health, especially for growing kids. Smoked Gouda also contains vitamin B12 and phosphorus, which support energy metabolism and bone health. The sharp cheddar adds vitamin A for eye health and immune function.
Dietary Considerations: This recipe is vegetarian (using rennet-free cheese if needed). It contains gluten and dairy, so it’s not suitable for those with celiac disease or lactose intolerance without modifications. For a gluten-free version, see the variations section above. For a dairy-free version, you can try using plant-based butter, milk, and cheese alternatives, but I’ll be honest—the texture and flavor won’t be the same.
My Personal Take: Look, I’m not going to pretend this is a health food. It’s comfort food, pure and simple. But I believe in balance—serving this alongside a big green salad or some roasted broccoli makes it part of a wholesome meal. And honestly, the joy on my kids’ faces when I pull this out of the oven is worth every calorie.
Conclusion
This Smoked Gouda Baked Mac and Cheese has become a staple in my kitchen for good reason. It’s the kind of recipe that brings people together, that makes weeknight dinners feel special, and that proves you don’t need fancy ingredients or complicated techniques to create something truly memorable.
What I love most about this recipe is how forgiving it is. You can add bacon, throw in some broccoli, swap the cheeses, or double the batch for a crowd—and it always, always works. It’s become my go-to for potlucks, for busy nights, and for those days when everyone just needs a warm, cheesy hug in a bowl.
I’d love to hear how this recipe turns out for you. Did your kids love it? Did you add your own twist? Drop a comment below and let me know—I read every single one, and I’m always inspired by how you all make these recipes your own. And if you’re looking for more family-friendly comfort food, don’t miss my crispy garlic chicken or this easy tomato soup that pairs perfectly with a side of this mac and cheese.
Now go ahead, preheat that oven, and make some memories around the dinner table. You’ve got this.
Frequently Asked Questions
Can I use pre-shredded cheese?
I really don’t recommend it. Pre-shredded cheese is coated with anti-caking agents that prevent it from melting smoothly, which can leave you with a grainy sauce. Taking the extra few minutes to shred your own cheese from a block makes a noticeable difference in the final texture.
Can I make this ahead of time?
Absolutely! You can assemble the entire dish, cover it, and refrigerate it for up to 24 hours before baking. Just add about 10 minutes to the bake time since you’re starting from cold. You can also freeze it unbaked for up to 3 months—just thaw in the refrigerator overnight before baking.
What’s the best pasta shape for this recipe?
Elbow macaroni is the classic choice, but I actually prefer cavatappi or shells because the ridges and curves hold onto the sauce better. Rotini, fusilli, or even penne work great too. Just avoid long, thin pasta like spaghetti or linguine—they don’t hold the sauce as well.
Why did my cheese sauce turn out grainy?
Grainy cheese sauce is usually caused by overheating or using pre-shredded cheese. Keep the heat low when melting the cheese, and add it gradually while stirring constantly. If your sauce does get grainy, you can sometimes rescue it by whisking in a splash of cold milk or cream off the heat.
Can I use regular Gouda instead of smoked?
You can, but you’ll lose that distinctive smoky flavor that makes this recipe special. If you can’t find smoked Gouda, you can add a few drops of liquid smoke to the cheese sauce, or substitute with a combination of regular Gouda and a smoky cheese like smoked cheddar or smoked provolone.
Pin This Recipe!
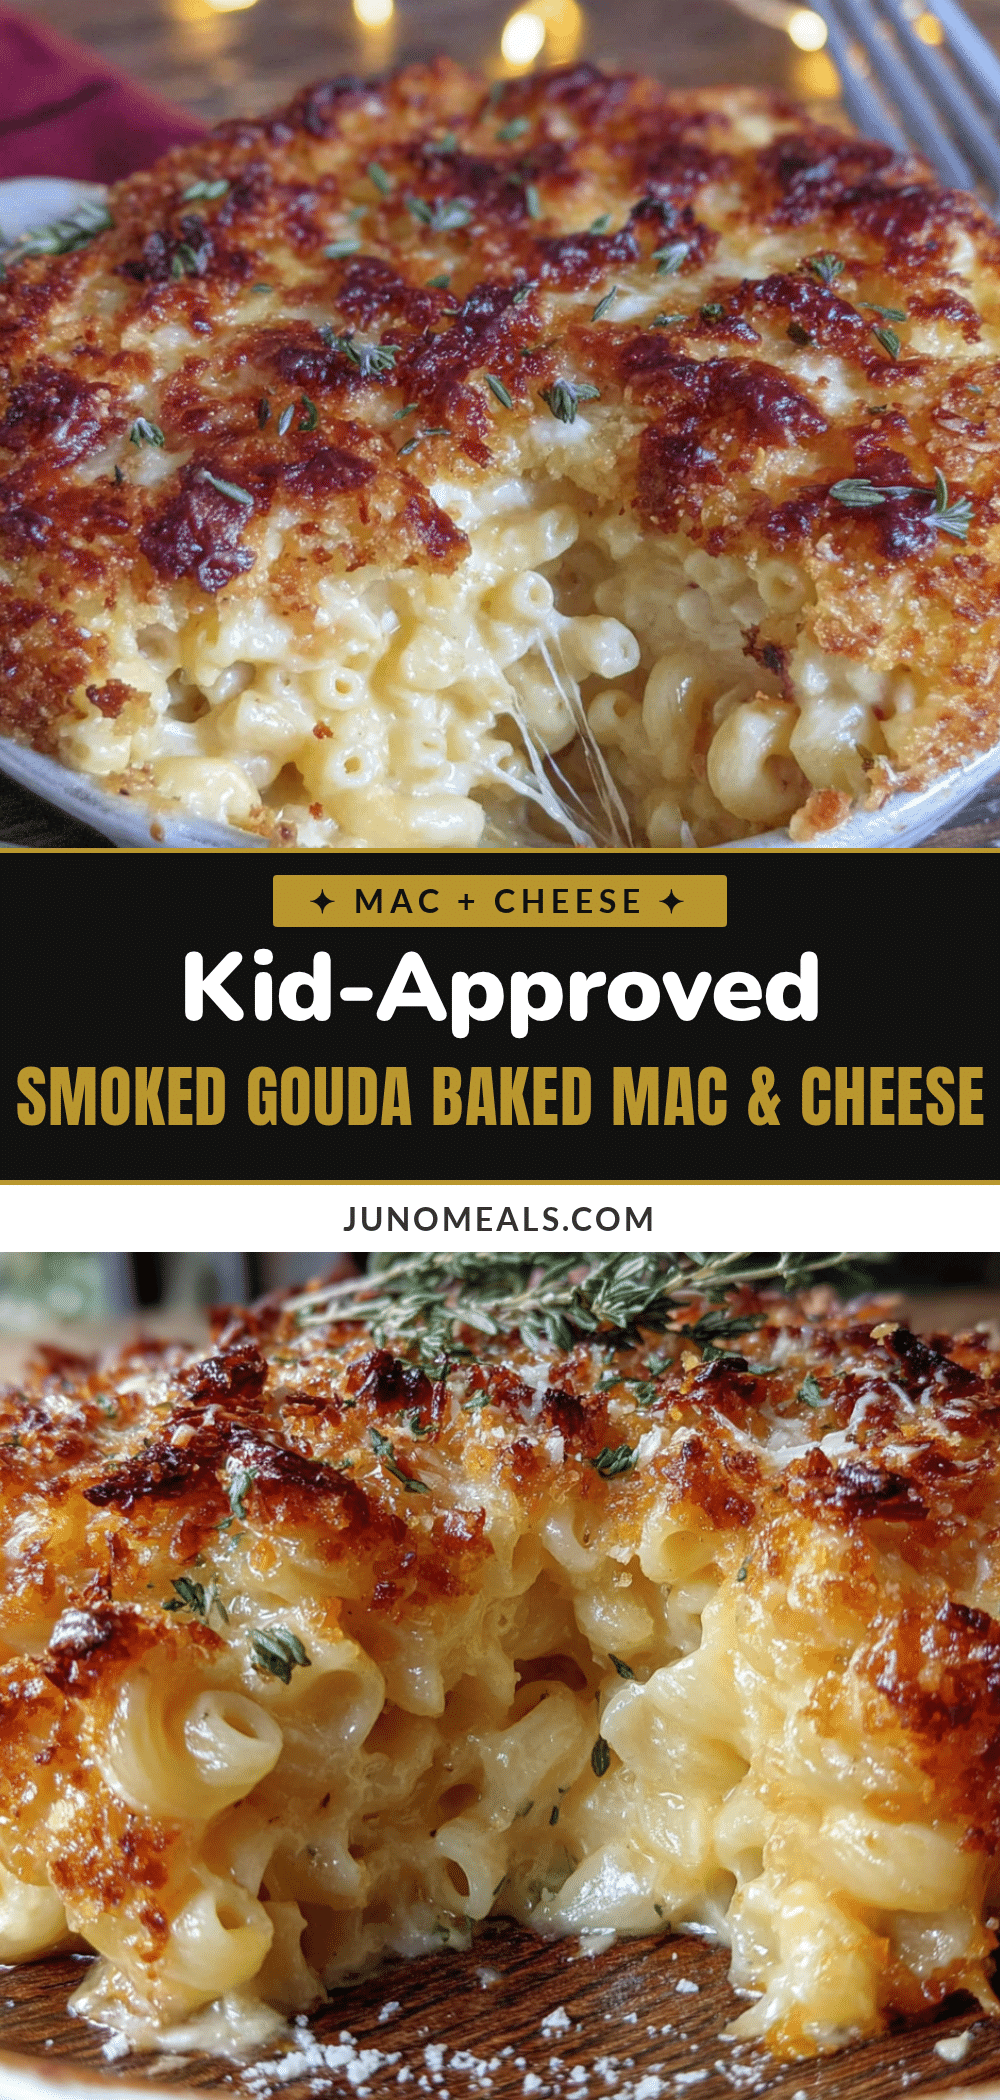
Kid-Approved Smoked Gouda Baked Mac and Cheese
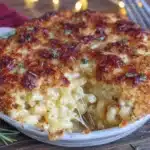
This Smoked Gouda Baked Mac and Cheese is a budget-friendly, kid-approved comfort food that turns a regular weeknight into a celebration. With a creamy smoked Gouda and sharp cheddar sauce, a crispy panko topping, and simple ingredients, it’s perfect for busy families and picky eaters alike.
- Prep Time: 15 minutes
- Cook Time: 30 minutes
- Total Time: 45 minutes
- Yield: 8 servings 1x
- Category: Main Course
- Cuisine: American
Ingredients
- 1 pound (450g) elbow macaroni (or cavatappi, shells, rotini)
- Salt (for pasta water)
- 4 tablespoons (56g) unsalted butter
- 1/4 cup (31g) all-purpose flour
- 3 cups (710ml) whole milk
- 1 cup (240ml) heavy cream
- 2 cups (226g) sharp cheddar cheese, shredded
- 2 cups (226g) smoked Gouda cheese, shredded
- 1/2 teaspoon garlic powder
- 1/2 teaspoon mustard powder
- 1/2 teaspoon salt
- 1/4 teaspoon black pepper
- Pinch of cayenne pepper (optional)
- 1 cup (120g) panko breadcrumbs
- 2 tablespoons (28g) unsalted butter, melted
- 1/4 cup (28g) grated Parmesan cheese
- 1/4 teaspoon smoked paprika (optional)
Instructions
- Preheat oven to 375°F (190°C). Bring a large pot of salted water to a boil.
- Cook pasta according to package directions until al dente, undercooking by about 1 minute. Drain (do not rinse) and toss with a drizzle of olive oil to prevent sticking.
- In a medium saucepan over medium heat, melt 4 tablespoons butter. Whisk in flour and cook for 1-2 minutes until smooth and golden (roux).
- Slowly whisk in milk and heavy cream. Continue whisking until mixture thickens and coats the back of a spoon, about 3-5 minutes.
- Reduce heat to low. Gradually add shredded cheddar and smoked Gouda, stirring until each addition is fully melted. Stir in garlic powder, mustard powder, salt, black pepper, and cayenne (if using). Taste and adjust seasoning.
- Add drained pasta to the cheese sauce and fold gently until every piece is coated.
- Pour mac and cheese into a greased 9×13-inch baking dish and spread evenly.
- In a small bowl, combine panko breadcrumbs, melted butter, Parmesan, and smoked paprika (if using). Sprinkle evenly over the top.
- Bake for 20-25 minutes until bubbly and golden. For extra crunch, broil for the last 2 minutes, watching closely.
- Let rest for 5-10 minutes before serving to allow the sauce to set.
Notes
Shred your own cheese for the smoothest sauce. Undercook pasta by 1 minute to avoid mushiness. Let the dish rest after baking for the best texture. For a gluten-free version, use a 1:1 gluten-free flour blend and gluten-free pasta and panko. Leftovers keep in the fridge for up to 5 days and reheat well with a splash of milk.
Nutrition
- Serving Size: 1 serving (about 1/8
- Calories: 600
- Sugar: 6
- Sodium: 680
- Fat: 34
- Saturated Fat: 20
- Carbohydrates: 50
- Fiber: 2
- Protein: 23
Keywords: smoked gouda mac and cheese, baked mac and cheese, kid-friendly mac and cheese, comfort food, easy mac and cheese, smoked gouda recipe