Introduction
“Did you pack the granola bars?” my friend asked as we hit the trail, half-laughing but mostly serious. Honestly, store-bought bars never quite did it for me — too sweet, too artificial, or falling apart mid-hike. One weekend, between scrambling to get ready for a spontaneous day outdoors and realizing the pantry was bare, I threw together a batch of these Wholesome Trail Mix Granola Bars with Nuts and Dried Fruits. It was a bit of a last-minute save, honestly.
The earthy aroma of toasted nuts mixed with the fruity chewiness filled the kitchen while the bars baked quietly. Later, as I munched on one during a rest stop, I remember thinking, “Okay, this is actually pretty good.” The balance of crunchy and tender, sweet but not cloying, felt like the perfect companion for any adventure — or just a busy afternoon.
Since then, these bars have become my reliable go-to, whether I’m packing lunch for a hectic day or need a quick pick-me-up. The recipe stuck because it’s simple, adaptable, and actually tastes like something you made with care, not something grabbed on impulse. There’s a quiet satisfaction in having a homemade snack that doesn’t crumble under pressure — literally and figuratively.
Why You’ll Love This Recipe
After testing countless versions, tweaking ratios, and swapping ingredients, I landed on this recipe for Wholesome Trail Mix Granola Bars with Nuts and Dried Fruits that honestly checks all the boxes.
- Quick & Easy: Ready in under 30 minutes, perfect for last-minute snack cravings or prepping ahead for busy weeks.
- Simple Ingredients: No obscure items here—just pantry staples like oats, mixed nuts, and dried fruits you probably already have.
- Perfect for On-The-Go: Whether hiking, school, or work, these bars hold up well and provide lasting energy.
- Crowd-Pleaser: The combo of salty nuts and sweet dried fruit appeals to kids and adults alike — never fails to get a thumbs up.
- Unbelievably Delicious: Toasting the nuts and lightly sweetening with honey creates a texture and flavor profile that feels indulgent yet wholesome.
This isn’t just another granola bar recipe. The secret lies in toasting the nuts separately for that deep, nutty aroma and folding in a thoughtfully balanced mix of dried fruits — I personally love a mix of tart cranberries and sweet apricots. Plus, the bars hold together perfectly without feeling dense or gummy, which was a game changer after a few trial runs.
If you’re looking for a snack that gives you a little boost without the crash, these bars deliver. They’re like the snack version of a hug — comforting, satisfying, and just what you need when life’s rushing by.
What Ingredients You Will Need
This recipe uses simple, wholesome ingredients to deliver bold flavor and satisfying texture without the fuss. Most are pantry staples, and you can swap in alternatives depending on your preferences or what’s available.
- Old-Fashioned Rolled Oats (2 cups / 180g) – the base for that hearty, chewy texture.
- Mixed Nuts (1 cup / 120g) – I recommend a combination of almonds, walnuts, and pecans, roughly chopped and toasted for extra crunch.
- Dried Fruits (1 cup / 150g) – cranberries, raisins, chopped apricots, or cherries work beautifully; choose unsweetened for less sugar.
- Natural Nut Butter (1/2 cup / 125g) – creamy almond or peanut butter binds everything together and adds richness.
- Honey (1/3 cup / 113g) – acts as a natural sweetener and sticky binder; substitute with maple syrup for vegan option.
- Vanilla Extract (1 teaspoon) – adds subtle warmth and depth.
- Ground Cinnamon (1/2 teaspoon) – optional, but it gives a nice hint of spice that complements the fruit.
- Salt (a pinch) – balances the sweetness and enhances flavor.
For best results, I suggest toasting the nuts separately on a baking sheet at 350°F (175°C) for 8-10 minutes until fragrant. It makes a major difference in taste and crunch. Also, if you want to try a gluten-free version, just make sure to pick certified gluten-free oats.
Feel free to experiment with your favorite trail mix ingredients—pumpkin seeds or shredded coconut can add extra texture and flavor. And if you’re curious about more sweet treats, you might want to check out my mini lemon blueberry cheesecakes, which are perfect for when you need a dessert but want something a little different.
Equipment Needed
- Baking Sheet – for toasting nuts and baking the bars; a rimmed sheet helps prevent spills.
- Mixing Bowl – a large one to combine all ingredients evenly.
- Spatula or Wooden Spoon – for mixing and pressing the mixture into the pan.
- 8×8-inch (20×20 cm) Baking Pan – lined with parchment paper to easily lift the bars out.
- Measuring Cups and Spoons – for precise ingredient amounts.
- Optional: Food Processor – if you prefer smaller nut pieces, a few quick pulses can help.
I’ve tried baking these bars in glass and metal pans; both work fine, but metal heats more evenly, so your bars may brown better on the edges. Parchment paper is a lifesaver for cleanup and keeping the bars intact.
If you’re on a budget, a simple rimmed baking sheet and a sturdy bowl are enough to get started. Keeping your equipment clean and dry helps the bars set properly and prevents sogginess.
Preparation Method
- Preheat your oven to 350°F (175°C). Line an 8×8-inch (20×20 cm) baking pan with parchment paper, leaving a bit hanging over the sides for easy removal later.
- Toast the nuts: Spread 1 cup (120g) of mixed nuts evenly on a baking sheet. Bake for 8-10 minutes until golden and fragrant, stirring halfway through. Let cool slightly.
- Mix dry ingredients: In a large bowl, combine 2 cups (180g) old-fashioned rolled oats, toasted nuts, 1 cup (150g) dried fruits, 1/2 teaspoon ground cinnamon (if using), and a pinch of salt. Stir well to distribute everything evenly.
- Warm wet ingredients: In a small saucepan over low heat, gently warm 1/2 cup (125g) natural nut butter and 1/3 cup (113g) honey until melted and smooth, about 2-3 minutes. Remove from heat and stir in 1 teaspoon vanilla extract.
- Combine wet and dry: Pour the warm nut butter and honey mixture over the dry ingredients. Use a spatula to mix thoroughly, making sure everything is coated and sticky. The mixture should hold together when pressed.
- Press into pan: Transfer the mixture to the lined baking pan. Using the spatula or your hands (lightly sprayed with cooking oil), press the mixture firmly and evenly into the pan. This step is key to bars that don’t crumble.
- Bake: Place the pan in the oven and bake for 15-18 minutes until the edges are golden brown and the center is set but still slightly soft. Avoid overbaking or bars may become dry.
- Cool completely: Let the bars cool in the pan on a wire rack for at least 30 minutes. Once cooled, use the parchment paper to lift the slab out and cut into 10-12 bars.
- Store: Store bars in an airtight container at room temperature for up to a week, or freeze for longer storage.
If you find the mixture too crumbly when mixing, add a bit more honey or nut butter (a tablespoon at a time) to help bind. Conversely, if too sticky, a bit more oats or nuts can balance it out. The bars should hold together when pressed but not be overly wet.
Pressing firmly into the pan is a trick I learned the hard way. Lightly oiling your hands or spatula helps get an even, compact layer. You’ll notice how the aroma of toasted nuts and honey fills the kitchen—that’s when you know these bars are on the right track.
Cooking Tips & Techniques
Perfecting these granola bars is all about balance and attention to detail. Here are some things I’ve learned:
- Toasting nuts separately is worth the extra step. It brings out a deep nuttiness that just can’t be beat.
- Don’t skip lining the pan with parchment paper. This makes removing the bars easy and prevents sticking.
- Press firmly. If you don’t, the bars will crumble when you cut them. I usually use the bottom of a glass to get a nice even press.
- Watch the oven closely. Bars can go from golden to burnt quickly. Pull them when edges are golden but center is still soft.
- Use natural sweeteners. Honey or maple syrup work best for flavor and texture. Artificial syrups tend to make the bars too sticky or overly sweet.
- Cut bars after cooling. If cut too early, they’ll fall apart. Patient cooling is key.
One time, I forgot to toast the nuts and honestly, it made the bars taste a little flat. Lesson learned! Also, if you’re multitasking while baking, set timers and check your bars — they can be quite forgiving but better safe than sorry.
Variations & Adaptations
This recipe is flexible enough to accommodate different tastes and dietary needs:
- Gluten-Free: Use certified gluten-free rolled oats to keep it safe.
- Vegan: Swap honey for pure maple syrup and use a plant-based nut butter.
- Flavor Twists: Try adding shredded coconut, pumpkin seeds, or a pinch of sea salt flakes on top for extra texture and flavor.
- Seasonal Fruits: In fall, dried apple pieces or chopped dried figs add warmth. Summer calls for dried mango or pineapple for a tropical vibe.
- Chocolate Lover’s Edition: Stir in mini dark chocolate chips after mixing, just before pressing into the pan.
Personally, I once made a batch with chopped dried cherries and a splash of orange zest — it was a hit! You can bake the mixture in muffin tins for portable single servings, too.
Serving & Storage Suggestions
These bars are best served at room temperature, making them ideal for packing in lunchboxes or taking on hikes. They pair nicely with a warm cup of tea or a cold glass of milk for a quick snack break.
For storage, keep bars in an airtight container. They last about a week at room temperature, but I like to freeze extras for up to 3 months. To thaw, just leave them out for 30 minutes or warm slightly in the microwave for 10-15 seconds.
Over time, the flavors meld and the bars soften a bit, which some find even better than fresh. Just be sure to keep them sealed to prevent moisture absorption.
If you’re looking for more homemade snack ideas that balance convenience and flavor, the recipe collection on the site has a handful of options worth trying, from savory bites to sweet treats.
Nutritional Information & Benefits
Each bar packs a nutritional punch, combining healthy fats, fiber, and natural sugars for steady energy.
- Approximately 180-200 calories per bar (depending on size).
- Good source of protein and healthy fats from nuts and nut butter.
- Fiber-rich oats and dried fruits aid digestion and satiety.
- Natural sweeteners keep sugar content moderate compared to store-bought bars.
- Gluten-free and vegan options make it accessible for various dietary needs.
These bars are a wholesome choice for anyone wanting to snack smarter without sacrificing taste or convenience. Personally, I appreciate how they satisfy my sweet tooth while keeping me fueled for hours.
Conclusion
Making your own Wholesome Trail Mix Granola Bars with Nuts and Dried Fruits is one of those small kitchen wins that pay off big time. They’re easy to whip up, adaptable to your pantry, and deliver a satisfying mix of textures and flavors that store-bought just can’t quite match.
Feel free to tweak the nuts, fruits, and spices to suit your taste or occasion. Honestly, that’s part of the fun — discovering your signature bar that fits your lifestyle.
I love how these bars have become a steady companion during busy days, weekend adventures, and everything in between. If you try them out, I’d love to hear how you customized them or what moments you enjoyed them in. Sharing food stories always makes recipes feel more alive!
Here’s to snacks that feel like a little homemade kindness in every bite.
FAQs
Can I use quick oats instead of rolled oats?
Quick oats aren’t recommended because they don’t provide the same chewy texture and may result in bars that are too soft or crumbly.
How long do the granola bars stay fresh?
Stored in an airtight container, these bars last about a week at room temperature or up to 3 months in the freezer.
Can I add chocolate chips to the recipe?
Yes! Stir in mini dark or semi-sweet chocolate chips after mixing the wet and dry ingredients, just before pressing into the pan.
Are these granola bars suitable for kids?
Absolutely. The natural sweetness and wholesome ingredients make them a great snack for kids and adults alike.
What if my bars don’t hold together well?
Try adding a bit more nut butter or honey to bind the mixture better. Also, pressing firmly into the pan before baking helps the bars set properly.
Pin This Recipe!
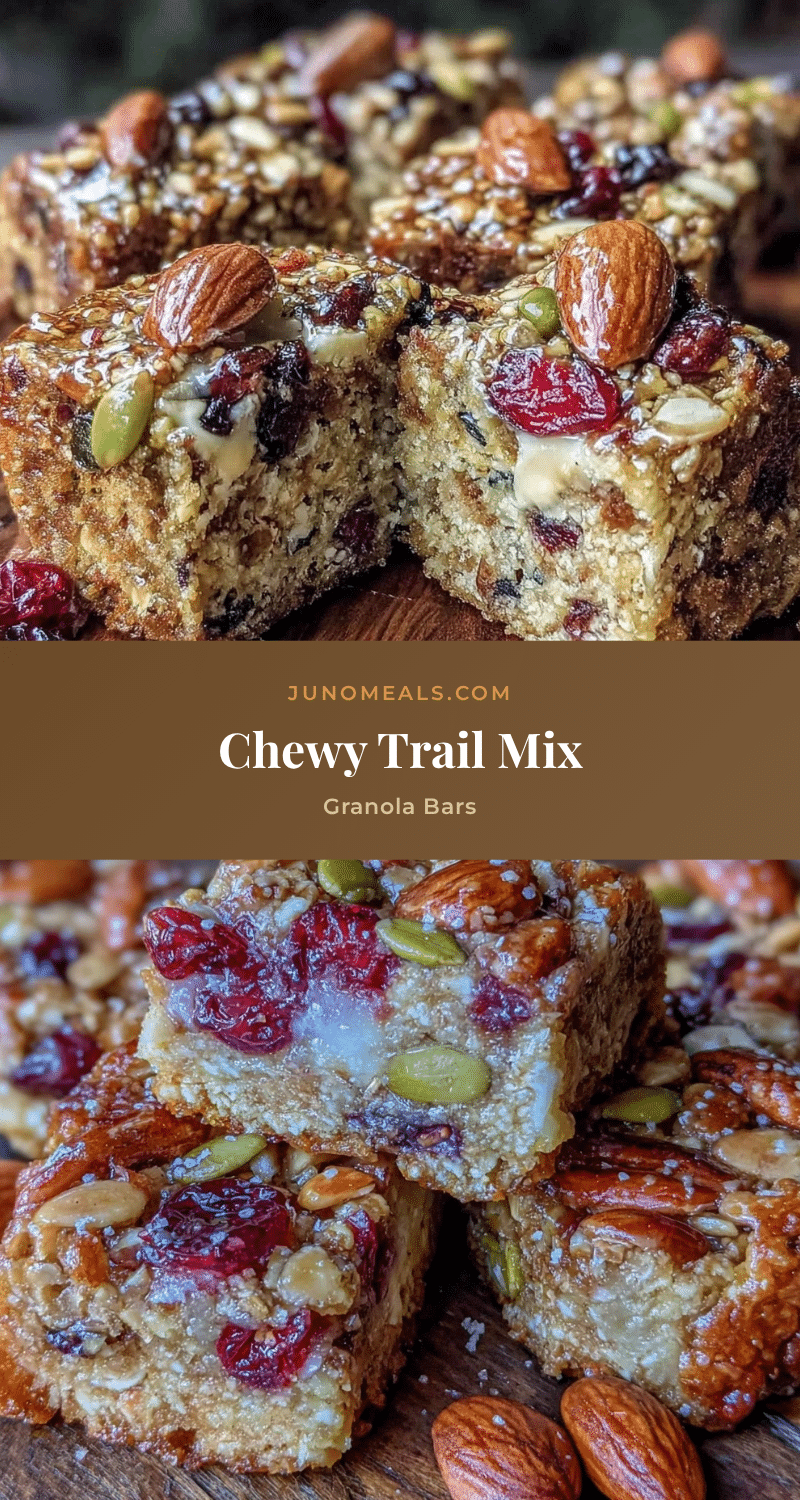
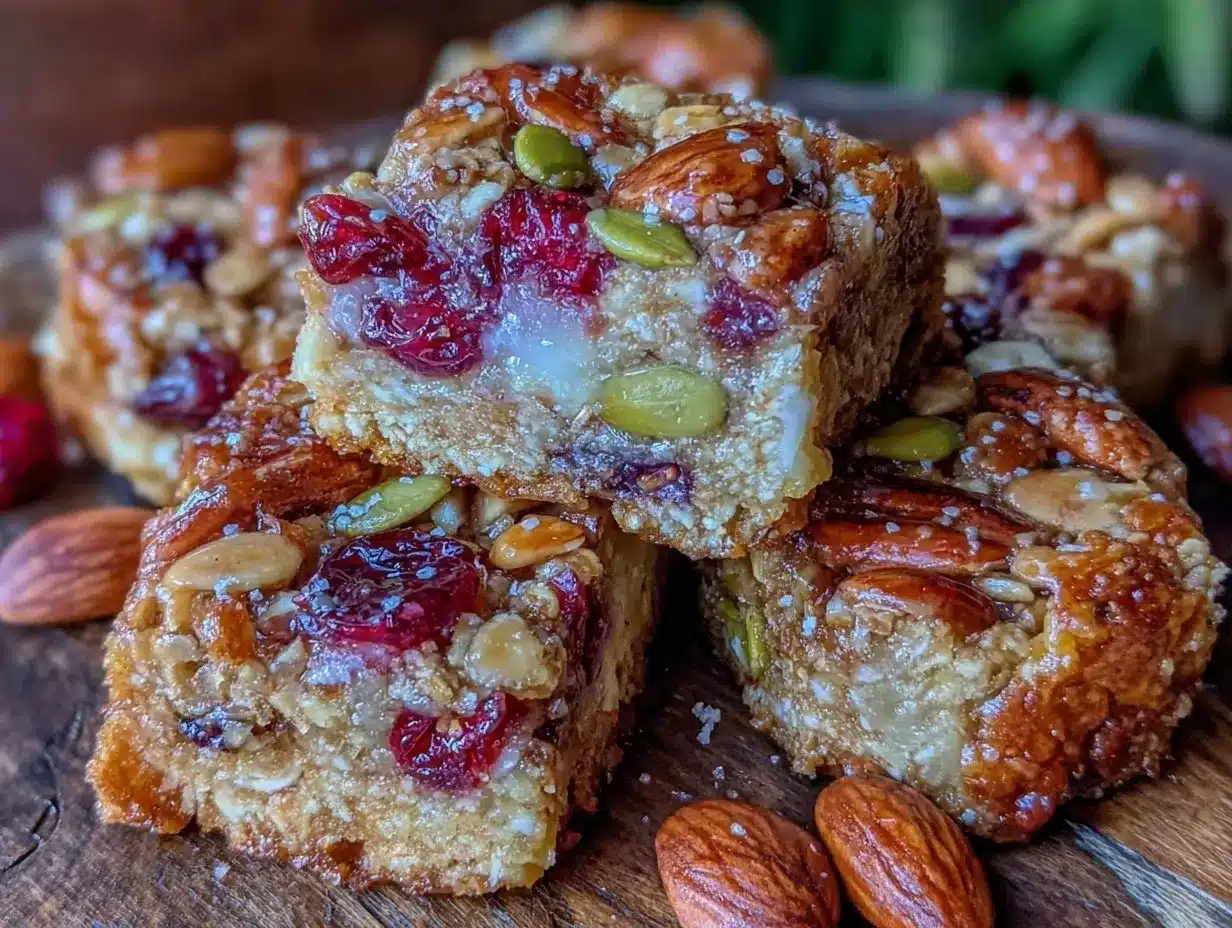
Wholesome Trail Mix Granola Bars Recipe Easy Homemade with Nuts and Dried Fruits

These homemade granola bars combine toasted nuts and dried fruits for a wholesome, chewy snack perfect for on-the-go energy. They are easy to make, adaptable, and hold together well without being dense or gummy.
- Prep Time: 10 minutes
- Cook Time: 25 minutes
- Total Time: 35 minutes
- Yield: 10-12 bars 1x
- Category: Snack
- Cuisine: American
Ingredients
- 2 cups (180g) old-fashioned rolled oats
- 1 cup (120g) mixed nuts (almonds, walnuts, pecans), roughly chopped and toasted
- 1 cup (150g) dried fruits (cranberries, raisins, chopped apricots, or cherries), unsweetened
- 1/2 cup (125g) natural nut butter (almond or peanut butter)
- 1/3 cup (113g) honey (or maple syrup for vegan option)
- 1 teaspoon vanilla extract
- 1/2 teaspoon ground cinnamon (optional)
- Pinch of salt
Instructions
- Preheat your oven to 350°F (175°C). Line an 8×8-inch (20×20 cm) baking pan with parchment paper, leaving a bit hanging over the sides for easy removal later.
- Toast the nuts: Spread 1 cup (120g) of mixed nuts evenly on a baking sheet. Bake for 8-10 minutes until golden and fragrant, stirring halfway through. Let cool slightly.
- Mix dry ingredients: In a large bowl, combine 2 cups (180g) old-fashioned rolled oats, toasted nuts, 1 cup (150g) dried fruits, 1/2 teaspoon ground cinnamon (if using), and a pinch of salt. Stir well to distribute everything evenly.
- Warm wet ingredients: In a small saucepan over low heat, gently warm 1/2 cup (125g) natural nut butter and 1/3 cup (113g) honey until melted and smooth, about 2-3 minutes. Remove from heat and stir in 1 teaspoon vanilla extract.
- Combine wet and dry: Pour the warm nut butter and honey mixture over the dry ingredients. Use a spatula to mix thoroughly, making sure everything is coated and sticky. The mixture should hold together when pressed.
- Press into pan: Transfer the mixture to the lined baking pan. Using the spatula or your hands (lightly sprayed with cooking oil), press the mixture firmly and evenly into the pan.
- Bake: Place the pan in the oven and bake for 15-18 minutes until the edges are golden brown and the center is set but still slightly soft.
- Cool completely: Let the bars cool in the pan on a wire rack for at least 30 minutes. Once cooled, use the parchment paper to lift the slab out and cut into 10-12 bars.
- Store: Store bars in an airtight container at room temperature for up to a week, or freeze for longer storage.
Notes
Toast nuts separately for best flavor and crunch. Press mixture firmly into pan to prevent crumbling. Use parchment paper to easily remove bars. Adjust honey or nut butter if mixture is too crumbly or sticky. Cool bars completely before cutting. Store in airtight container for up to a week or freeze for up to 3 months.
Nutrition
- Serving Size: 1 bar
- Calories: 180200
- Sugar: 10
- Sodium: 50
- Fat: 10
- Saturated Fat: 1.5
- Carbohydrates: 22
- Fiber: 3
- Protein: 5
Keywords: granola bars, trail mix, homemade snack, nuts, dried fruits, healthy snack, easy recipe, gluten-free, vegan option