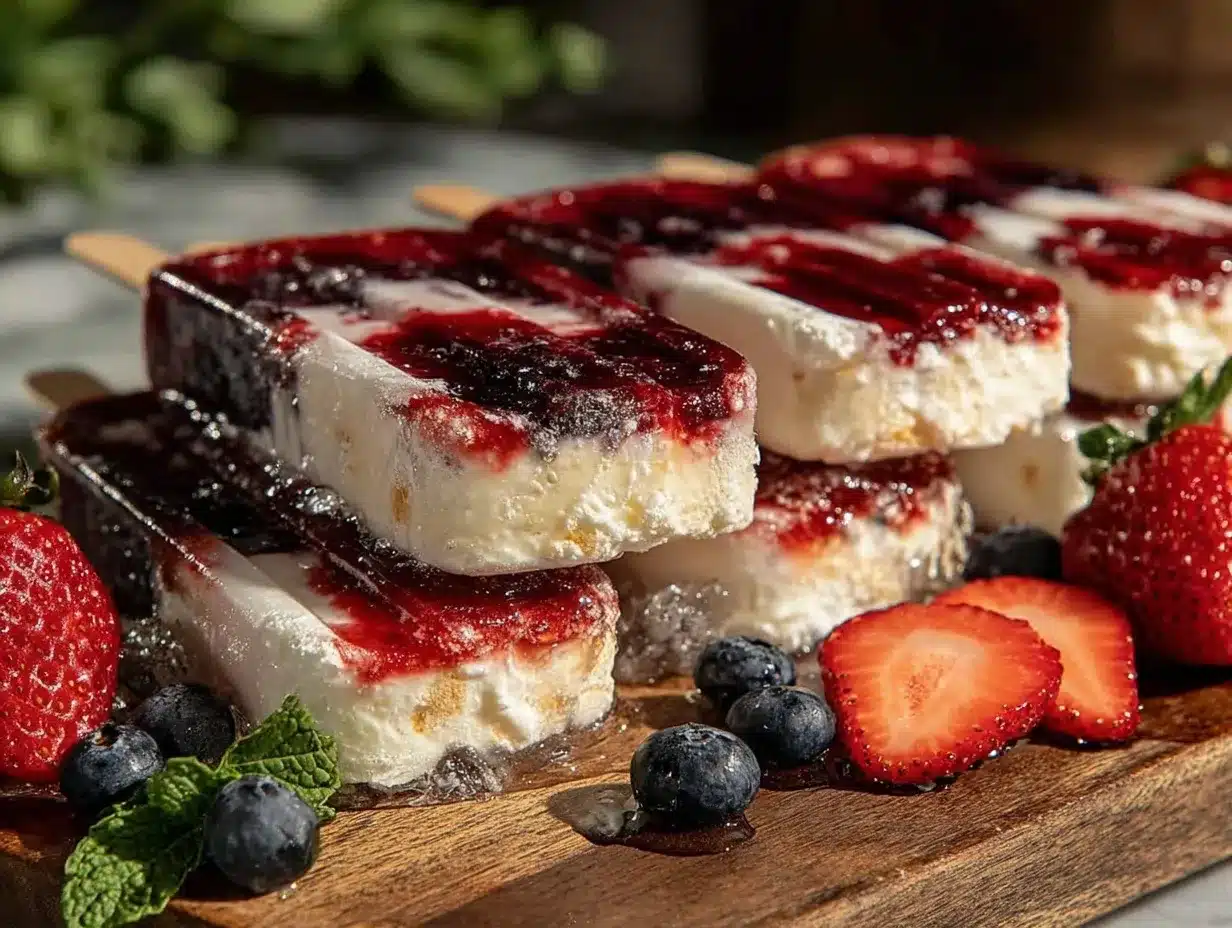
Let me tell you, the sight of those vibrant red, white, and blue popsicles melting slowly on a hot summer day instantly takes me back to childhood. The sweet scent of strawberries mingling with creamy yogurt is enough to make anyone’s mouth water. The first time I made these refreshing red, white, and blue popsicles with creamy yogurt layers, it was a spontaneous idea born out of a leftover container of Greek yogurt and a handful of fresh berries. I was instantly hooked – the kind of moment where you pause, take a deep breath, and just smile because you know you’re onto something truly special.
Years ago, when I was knee-high to a grasshopper, my grandma used to make simple fruit popsicles that were more icy than creamy. This recipe feels like a grown-up, fancier version of that nostalgia—pure, nostalgic comfort with a modern twist. Honestly, my family couldn’t stop sneaking them off the cooling rack (and I can’t really blame them). These popsicles have become a staple for our summer gatherings and a sweet treat to brighten up any picnic or backyard barbecue. Whether you’re looking for a fun Fourth of July dessert or just want a cool, fruity snack, these popsicles with creamy yogurt layers are dangerously easy to make and impossible to resist.
Why You’ll Love This Recipe
After testing this refreshing red, white, and blue popsicles recipe multiple times (in the name of research, of course), I can confidently say it ticks all the boxes for a summer favorite. Here’s why you’ll want to keep this recipe handy:
- Quick & Easy: Comes together in under 30 minutes, perfect for busy afternoons or last-minute celebrations.
- Simple Ingredients: Uses pantry staples and fresh fruits—you probably already have everything you need.
- Perfect for Summer Occasions: Great for Fourth of July, Memorial Day, or any sunny day that calls for a cool treat.
- Crowd-Pleaser: Kids and adults alike rave about the creamy texture paired with fruity freshness.
- Unbelievably Delicious: The combination of tart berries and smooth yogurt makes every bite feel like a mini celebration.
What sets this recipe apart? The layering technique creates a stunning visual effect and a delightful contrast in textures. Using Greek yogurt instead of heavy cream keeps it light but still luxuriously creamy. Plus, blending the berries just right to keep that vibrant color without overpowering the delicate yogurt layers makes this recipe uniquely special. It’s not just another popsicle recipe—it’s one that makes you close your eyes after the first bite and savor the moment. Perfect for impressing guests without breaking a sweat or indulging in a guilt-free snack that tastes like a party in your mouth.
What Ingredients You Will Need
This recipe uses simple, wholesome ingredients to deliver bold flavor and satisfying texture without the fuss. Most of these you’ll find in your fridge or local market, and they come together beautifully to create those iconic red, white, and blue layers.
- For the Red Layer:
- 1 cup fresh strawberries, hulled and chopped (or frozen, thawed)
- 2 tablespoons honey or maple syrup (adjust to sweetness)
- 1 teaspoon lemon juice (brightens flavor)
- For the White Layer:
- 1 cup plain Greek yogurt (I prefer Fage for its creamy texture)
- 2 tablespoons honey or agave syrup (optional, for sweetness)
- 1 teaspoon vanilla extract (adds warmth)
- For the Blue Layer:
- 1 cup fresh blueberries (or frozen and thawed)
- 2 tablespoons honey or maple syrup
- 1 teaspoon lemon juice
- Additional:
- Popsicle molds with sticks
- Water or coconut water (optional, to thin fruit layers if needed)
If you’re feeling adventurous, you can swap honey for agave or use coconut yogurt for a dairy-free option. For the fruit, fresh is best in season, but frozen works just fine (just thaw and drain excess liquid). When picking berries, look for ripe, firm fruit to get the best natural sweetness and color. The yogurt layer’s sweetness is totally customizable — I like mine lightly sweetened so it balances the tart berries perfectly.
Equipment Needed
- Popsicle molds – essential for shaping those stunning red, white, and blue layers. If you don’t have molds, small paper cups with wooden sticks work in a pinch.
- Blender or food processor – to puree the berries smoothly for the red and blue layers. A hand blender can work if you’re careful.
- Mixing bowls – a few small bowls to prepare and mix each layer separately.
- Measuring cups and spoons – for accurate ingredient amounts.
- Freezer – obviously important! A freezer with good temperature control will freeze the popsicles evenly.
I’ve tried popsicle molds from budget-friendly brands and high-end silicone sets—both work well, but silicone molds make it easier to pop out the frozen treats without breaking. If you’re using wooden sticks, soak them in water for 10 minutes before inserting to prevent cracking. Nothing worse than a stick snapping at the last minute, you know?
Preparation Method
- Prepare the Red Layer: In a blender, combine 1 cup strawberries, 2 tablespoons honey, and 1 teaspoon lemon juice. Blend until smooth but still slightly textured. Taste and adjust sweetness if needed. Pour about 1/3 cup of this mixture into each popsicle mold, filling just enough for the red layer.
Freeze for about 30-40 minutes until firm but not rock solid. - Make the White Yogurt Layer: While the red layer chills, mix 1 cup Greek yogurt, 2 tablespoons honey, and 1 teaspoon vanilla extract in a bowl. Stir until smooth and creamy. Once the red layer is set, spoon approximately 1/4 cup of this yogurt mixture over it in each mold. Use the back of a spoon to smooth the layer gently.
Freeze again for 30 minutes. - Prepare the Blue Layer: Blend 1 cup blueberries, 2 tablespoons honey, and 1 teaspoon lemon juice until smooth. If too thick, add a splash of water or coconut water for easier pouring. Pour about 1/3 cup of this blueberry mixture on top of the yogurt layer.
Insert popsicle sticks now—make sure they stand upright through the layers. - Final Freeze: Freeze the assembled popsicles for at least 4 hours or overnight until completely solid. This ensures the layers hold their shape and the popsicles are perfectly chilled.
- Unmold and Serve: To release, run warm water briefly over the outside of the molds (be careful not to soak the popsicles). Gently pull on the sticks and enjoy!
Pro tip: Don’t rush the freezing between layers! If the red or white layer isn’t firm enough before pouring the next, the colors will bleed together and lose that classic Americana look. Patience here really pays off.
Cooking Tips & Techniques
Mastering the layering is the key to getting those perfect red, white, and blue popsicles. Here’s what I’ve learned from trial and error:
- Puree consistency: The fruit layers should be smooth but thick enough not to run into the yogurt. If too watery, add a bit of chia seeds or reduce the liquid to thicken.
- Freezing time: Let each layer set properly before adding the next to avoid color mixing. Usually, 30-40 minutes per layer in a standard freezer does the trick.
- Sweetness balance: Depending on your fruit’s sweetness, adjust the honey or syrup. Too much sugar can overpower the fresh flavor, too little makes it tangy.
- Yogurt choice: Full-fat Greek yogurt gives the creamiest texture. If you choose low-fat or dairy-free, expect a slightly different mouthfeel but still delicious.
- Stick placement: Insert sticks only after the white layer is partially frozen so they stand upright without tipping.
One time, I got impatient and poured all layers at once—let’s just say those popsicles became a patriotic swirl rather than distinct layers! It was tasty, but not quite the look I wanted. Timing and layering are your best friends here. Also, if your freezer is on the colder side, keep an eye on the layers so they don’t freeze too hard too fast, which can make them difficult to unmold.
Variations & Adaptations
This recipe is wonderfully flexible. Here are a few ways to make it your own:
- Dairy-Free Version: Swap Greek yogurt with coconut or almond milk yogurt. The creamy layers will still shine, though with a slight coconut or nutty flavor.
- Different Berries: Use raspberries or blackberries instead of strawberries or blueberries for a twist on the red and blue layers. Just blend and sweeten as usual.
- Adult Version: Add a splash of lemon vodka or limoncello in the fruit layers for a boozy, festive treat (freeze a bit longer to offset alcohol’s effect on freezing).
- Low-Sugar Option: Use stevia or erythritol in place of honey. Keep in mind this might slightly alter texture but still keeps it refreshing.
- Layer Swap: Try layering in a different order—blue, white, red—for a fun surprise.
Personally, I once swapped the white yogurt layer for a light cream cheese mixture—less tangy, more decadent. It was a hit at my niece’s birthday party and made the popsicles feel like a mini cheesecake on a stick. You can get creative with texture and flavor while keeping that iconic red, white, and blue theme.
Serving & Storage Suggestions
These popsicles are best served straight from the freezer, ideally on a hot day when you need a cool refresher. Present them on a platter lined with fresh berries for an extra pop of color and appeal. They pair wonderfully with picnic favorites like lemonade, iced tea, or even a light sparkling wine for grown-ups.
Store leftover popsicles in an airtight container or keep them in their molds tightly covered with plastic wrap to prevent freezer burn. They’ll keep well for up to 2 weeks without losing flavor or texture. When reheating (if you can call it that), just let them sit at room temperature for 5 minutes before enjoying to soften slightly for the perfect bite.
Fun fact: the flavors mellow and blend a bit if you leave them overnight, making the creamy yogurt layer even more luscious and the fruit layers a touch sweeter. So, feel free to make pops ahead of time for the perfect chilled treat ready when you are.
Nutritional Information & Benefits
Each refreshing red, white, and blue popsicle contains roughly:
| Calories | 90-110 per popsicle |
|---|---|
| Protein | 5-7 grams (from Greek yogurt) |
| Fat | 2-3 grams (mostly from yogurt) |
| Carbohydrates | 15-18 grams (natural sugars from fruit and honey) |
Using Greek yogurt adds a good dose of protein and probiotics, which supports digestion and gut health. The berries are loaded with antioxidants and vitamin C, boosting your immune system. This treat is naturally gluten-free and can be dairy-free with simple swaps, making it accessible for many dietary needs.
From a personal wellness viewpoint, I love that these popsicles satisfy my sweet tooth without the guilt or artificial ingredients. It feels like treating yourself while still caring for your body—a rare win in the world of desserts.
Conclusion
If you’re craving a sweet, cooling treat that’s as fun to look at as it is to eat, this refreshing red, white, and blue popsicles recipe with creamy yogurt layers is your new go-to. It’s simple, colorful, and totally customizable based on what’s in your fridge and your taste buds. Honestly, I love how it brings a little nostalgia and a lot of smiles to every summer day.
So go ahead, give the recipe a try, tweak it to your liking, and make it your own. I’m betting you’ll be making these for every picnic, party, and sunny afternoon to come. Don’t forget to drop a comment below sharing your favorite variation or any tips you discover along the way. Happy popping!
Frequently Asked Questions
Can I use frozen berries instead of fresh?
Absolutely! Just thaw them first and drain any excess liquid for best results. Frozen berries work just as well and are great year-round.
How long do these popsicles take to freeze completely?
After layering, they need at least 4 hours or preferably overnight to freeze solid and hold their shape.
Can I make these popsicles without honey or sugar?
Yes, you can omit sweeteners or replace them with alternatives like stevia, but keep in mind it might affect the flavor balance and texture slightly.
What if I don’t have popsicle molds?
Use small paper cups or silicone muffin liners and insert wooden sticks. Just be sure to freeze them upright so the layers stay separated.
How do I prevent the popsicles from sticking to the molds?
Run warm water quickly over the outside of the molds before removing the popsicles. Silicone molds also help make removal easier.
Pin This Recipe!
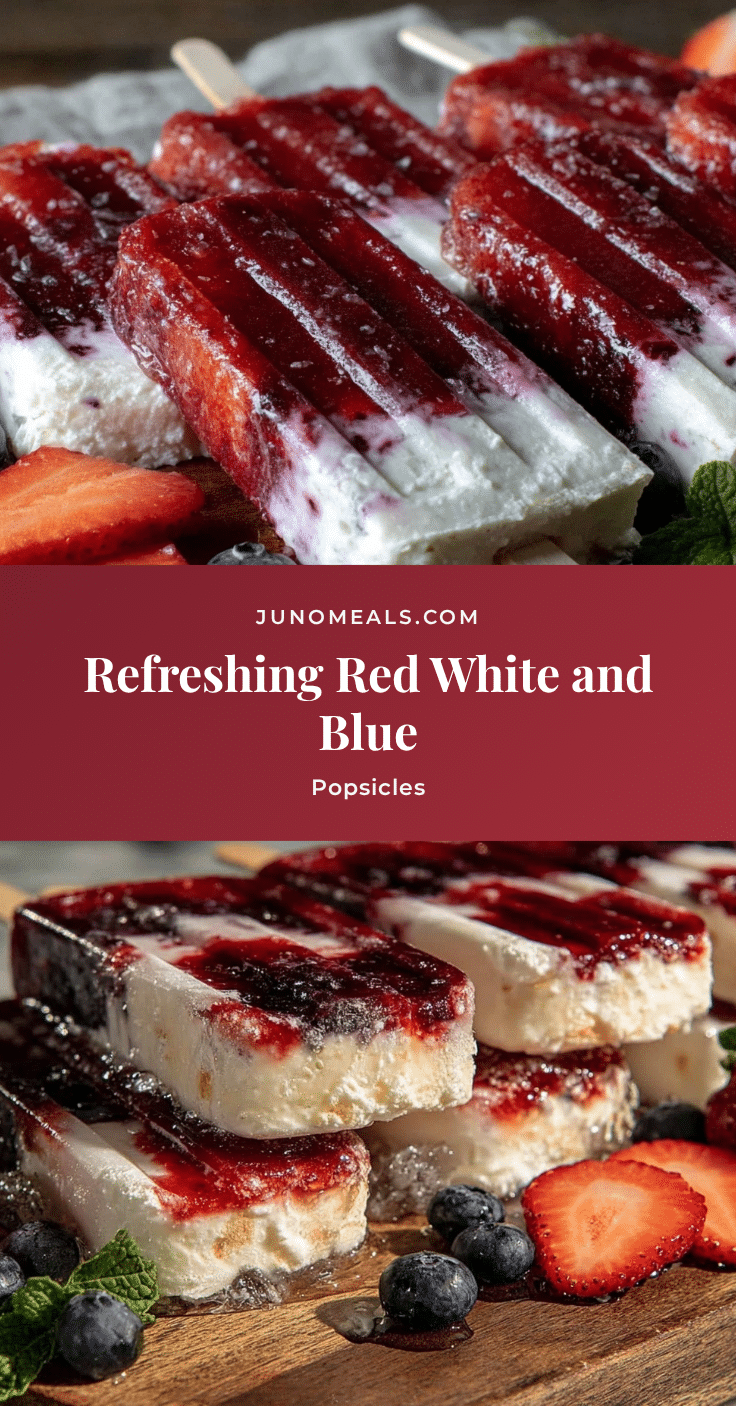
Refreshing Red White and Blue Popsicles Recipe Easy Homemade Yogurt Layers
A vibrant and creamy layered popsicle recipe featuring fresh strawberries, Greek yogurt, and blueberries, perfect for summer celebrations and nostalgic treats.
- Prep Time: 15 minutes
- Cook Time: 4 hours 40 minutes
- Total Time: 4 hours 55 minutes
- Yield: 6 popsicles 1x
- Category: Dessert
- Cuisine: American
Ingredients
- 1 cup fresh strawberries, hulled and chopped (or frozen, thawed)
- 2 tablespoons honey or maple syrup (adjust to sweetness)
- 1 teaspoon lemon juice
- 1 cup plain Greek yogurt
- 2 tablespoons honey or agave syrup (optional, for sweetness)
- 1 teaspoon vanilla extract
- 1 cup fresh blueberries (or frozen and thawed)
- 2 tablespoons honey or maple syrup
- 1 teaspoon lemon juice
- Water or coconut water (optional, to thin fruit layers if needed)
- Popsicle molds with sticks
Instructions
- Prepare the Red Layer: In a blender, combine 1 cup strawberries, 2 tablespoons honey, and 1 teaspoon lemon juice. Blend until smooth but still slightly textured. Taste and adjust sweetness if needed. Pour about 1/3 cup of this mixture into each popsicle mold, filling just enough for the red layer. Freeze for about 30-40 minutes until firm but not rock solid.
- Make the White Yogurt Layer: While the red layer chills, mix 1 cup Greek yogurt, 2 tablespoons honey, and 1 teaspoon vanilla extract in a bowl. Stir until smooth and creamy. Once the red layer is set, spoon approximately 1/4 cup of this yogurt mixture over it in each mold. Use the back of a spoon to smooth the layer gently. Freeze again for 30 minutes.
- Prepare the Blue Layer: Blend 1 cup blueberries, 2 tablespoons honey, and 1 teaspoon lemon juice until smooth. If too thick, add a splash of water or coconut water for easier pouring. Pour about 1/3 cup of this blueberry mixture on top of the yogurt layer. Insert popsicle sticks now—make sure they stand upright through the layers.
- Final Freeze: Freeze the assembled popsicles for at least 4 hours or overnight until completely solid. This ensures the layers hold their shape and the popsicles are perfectly chilled.
- Unmold and Serve: To release, run warm water briefly over the outside of the molds (be careful not to soak the popsicles). Gently pull on the sticks and enjoy!
Notes
Do not rush freezing between layers to prevent color bleeding. Use full-fat Greek yogurt for creamiest texture. Soak wooden sticks in water for 10 minutes before inserting to prevent cracking. Frozen berries can be used if thawed and drained. For dairy-free, swap Greek yogurt with coconut or almond milk yogurt.
Nutrition
- Serving Size: 1 popsicle
- Calories: 90110
- Fat: 23
- Carbohydrates: 1518
- Protein: 57
Keywords: red white and blue popsicles, yogurt popsicles, summer treats, patriotic dessert, homemade popsicles, Greek yogurt popsicles, berry popsicles