“You’re telling me these are just Oreo cookies?” my niece asked, wide-eyed as she bit into one of the witch hat Oreo cookie pops. Honestly, I wasn’t expecting much the first time I tried making these. It was one of those last-minute Halloween afternoons—kids bouncing off the walls, and me scrambling for a fun treat that wouldn’t take forever. I grabbed a few pantry staples and some candy hats leftover from last year’s party, thinking, “Well, this might be a cute snack, but probably nothing fancy.”
Turns out, these Perfect Witch Hat Oreo Cookie Pops became an instant hit, not just for the kids but for the grown-ups too. The crisp chocolate cookie, smooth creamy filling, and a little candy cone perched on top come together to create a playful, festive bite. And the best part? They’re ridiculously easy to make, even when you’re juggling a million things (or just feeling like you don’t want to spend hours baking).
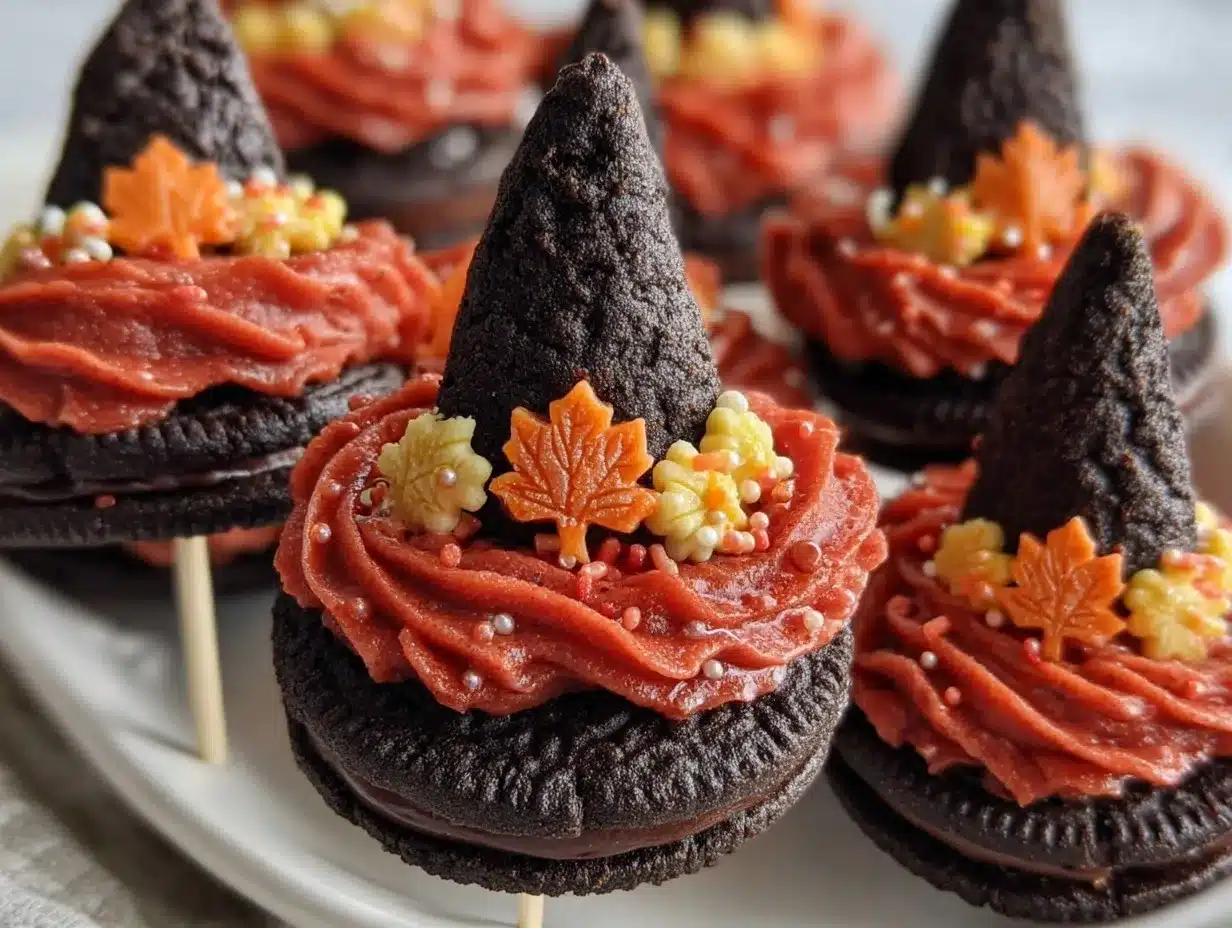
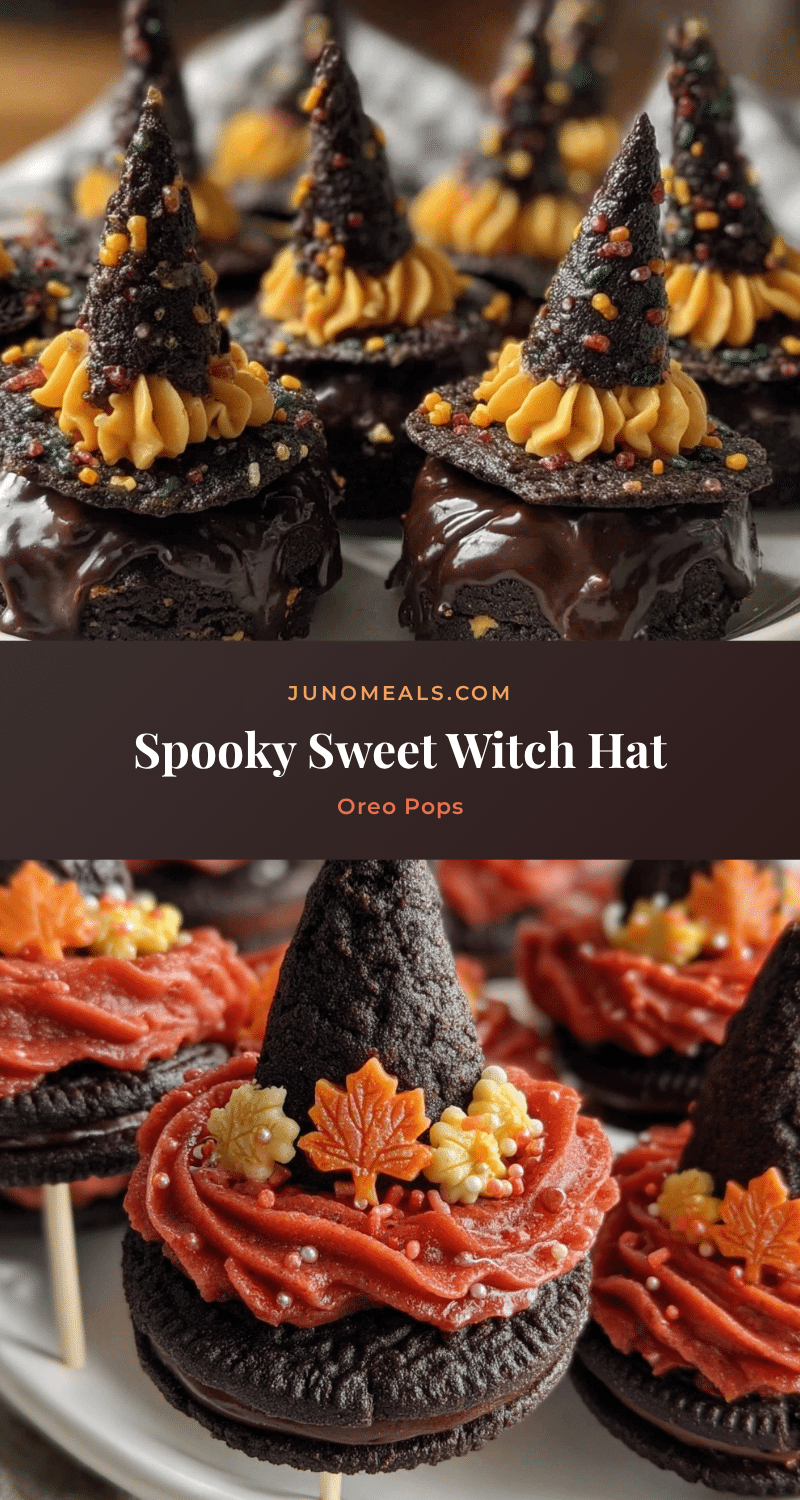
The way the melted chocolate coats the Oreo, locking the candy hat in place, with just a sprinkle of festive sugar confetti, makes these cookie pops feel like a Halloween treat you’d find at a boutique bakery. But nope, it’s just me in my kitchen, with a bit of patience and a few simple ingredients. After making them a handful of times this season, I realized these cookie pops don’t just belong at Halloween parties—they’re perfect for any spooky, sweet occasion. And honestly, seeing those little witch hats lined up on a platter just makes me smile every single time.
Why You’ll Love This Recipe
After several rounds of testing these witch hat Oreo cookie pops, I’m convinced they’re one of the easiest yet most impressive Halloween treats you can whip up. Here’s why they stand out:
- Quick & Easy: These come together in about 30 minutes, making them perfect for last-minute Halloween fun or unexpected guests.
- Simple Ingredients: You probably already have Oreos and chocolate in your pantry, plus a few candy cones from the store.
- Perfect for Halloween Parties: They’re festive and fun, ideal for school parties, family gatherings, or even spooky-themed office treats.
- Crowd-Pleaser: Kids love the fun shape and adults appreciate the classic Oreo taste with a creative twist.
- Unbelievably Delicious: The rich chocolate coating contrasts perfectly with the creamy Oreo filling, while the candy hat adds a crunchy surprise.
This recipe isn’t just another cookie pop idea—it’s the one I trust when I want something that looks special but won’t stress me out. The trick to making the perfect witch hat Oreo cookie pops is in melting the chocolate just right, so it’s smooth and glossy for that flawless finish. And adding a little edible glitter or Halloween sprinkles? Game changer. It’s comfort food with a costume, really.
Plus, if you’re into other party treats, you might enjoy the mini lemon blueberry cheesecakes that are also crowd favorites around here. But for quick, spooky charm, these cookie pops are my go-to.
What Ingredients You Will Need
This recipe uses straightforward pantry ingredients that come together to deliver a fun, festive treat without fuss. You can easily find or substitute most items, making it a no-brainer for busy cooks.
- Oreos: Classic sandwich cookies work best for that iconic crunch and creamy filling.
- Chocolate Chips or Melting Chocolate: Semi-sweet or milk chocolate chips—pick your favorite brand like Ghirardelli for smooth melting.
- Candy Cones: Sugar cones or mini waffle cones trimmed to size serve as the witch hats.
- Lollipop Sticks or Cake Pop Sticks: For holding the cookie pops; food-safe wooden sticks work well.
- Sprinkles or Edible Glitter: Orange, black, or green Halloween-themed sprinkles add extra festive flair.
- Optional – Colored Candy Melts: If you want to get fancy, adding colored melts for decorative drizzles is a nice touch.
Ingredient Tips: Look for firm, fresh Oreos to avoid crumbling. If you want a gluten-free version, there are gluten-free sandwich cookies that work well. For a dairy-free option, swap the chocolate with vegan-friendly melting wafers. And if you can’t find candy cones, mini sugar cones cut down to size can do the trick just as nicely.
Equipment Needed
- Microwave-safe bowl or double boiler: For melting chocolate smoothly without burning.
- Baking sheet lined with parchment paper or a silicone mat: To place the cookie pops for setting.
- Small spoon or fork: To help coat the Oreos evenly in chocolate.
- Styrofoam block or upright stand (optional): For holding pops upright while drying, which helps keep the candy hat in place.
I personally like using a silicone mat rather than parchment — it’s sturdier and reusable. And if you don’t have a Styrofoam block, setting the pops in a cardboard box filled with rice works surprisingly well to keep them upright. For melting chocolate, a microwave is super convenient, but a double boiler gives you more control if you’re not in a hurry.
Preparation Method
- Prepare your workspace: Line a baking sheet with parchment paper or a silicone baking mat. Trim the candy cones if needed so they fit nicely on top of the Oreos.
- Insert the sticks: Carefully push a lollipop stick into the cream filling of each Oreo cookie. Go gently to avoid breaking the cookie—about halfway in works best. If you want extra stability, dip the end of the stick in melted chocolate before inserting.
- Melt the chocolate: In a microwave-safe bowl, heat your chocolate chips in 30-second intervals, stirring in between until smooth and glossy. Alternatively, melt over a double boiler, stirring constantly to keep it from seizing.
- Coat the Oreo pops: Hold each Oreo pop by the stick and dip it into the melted chocolate until fully coated. Use a spoon or fork to help cover any spots you miss. Gently tap off the excess chocolate to avoid drips.
- Add the witch hat: Immediately place a candy cone on top of the chocolate-coated Oreo. The melted chocolate acts as glue—press gently to secure.
- Decorate: Before the chocolate hardens, sprinkle on your Halloween-themed sprinkles or edible glitter for a magical finish.
- Set the pops: Stand the pops upright in a Styrofoam block or lay them flat on the lined baking sheet. Let them sit at room temperature or pop them in the fridge for about 15-20 minutes until fully set.
- Serve or store: Once hardened, carefully remove the pops from the Styrofoam and arrange them on a festive platter for your Halloween fun.
Pro Tip: If the chocolate starts to thicken before you finish dipping all your Oreos, reheat gently in the microwave for 10-15 seconds. Also, if you notice any cracking in the Oreo, swap it out—freshness matters here!
Cooking Tips & Techniques
From trial and plenty of error, I’ve learned a few things that make these witch hat Oreo cookie pops turn out perfectly every time.
- Chocolate temperature is key: If the chocolate is too hot, it’ll be runny and mess up your decorations. Too cool, and it won’t coat smoothly. Aim for a warm, glossy finish—stir often to keep it even.
- Stick placement matters: Inserting the stick in the cream center keeps the pop stable. Pushing too far risks breaking the cookie, so halfway is ideal.
- Work quickly: Once dipped, add the candy hat before the chocolate sets. It’s easier to secure and looks cleaner.
- Try different sprinkles: I once mixed black sanding sugar with tiny orange nonpareils for a textured look that really popped.
- Use a stand: If you want a polished presentation, drying pops upright is a game changer—no smudges or flat spots.
Once, I left a batch drying flat and the hats slid right off—lesson learned! Also, if you want to speed up the process, chilling the coated Oreos in the fridge works well, but be mindful of condensation which can dull the shine.
Variations & Adaptations
These cookie pops are a fun canvas for creativity. Here are some ways to switch things up:
- Flavor twists: Use flavored Oreos like mint or birthday cake for a surprising spin.
- Dairy-free option: Swap regular chocolate for dairy-free melting wafers and use vegan sandwich cookies.
- Seasonal colors: Instead of traditional chocolate, use colored candy melts in green or purple for a spooky vibe.
- Alternative hats: Use mini ice cream cones dipped in chocolate and rolled in crushed candy corn for a different texture.
- Personal touch: I once added tiny edible eyes under the candy hats for a silly monster effect—the kids loved it.
If you’re curious about other sweet projects, the broader collection of recipes offers plenty of inspiration for your next gathering or cozy night in.
Serving & Storage Suggestions
Serve these witch hat Oreo cookie pops at room temperature for the best texture and flavor. They look amazing standing upright in a glass jar or laid out on a black or orange platter to really bring out the Halloween spirit.
Pair them with a warm spiced cider or a fun Halloween punch to complete the party vibe. They’re a hit with kids who love the novelty and adults who appreciate the classic Oreo taste.
For storage, keep them in an airtight container at room temperature for up to 3 days. If your house is warm, refrigeration helps prevent the chocolate from melting, but bring them back to room temp before serving for optimal taste.
You can freeze these pops for up to a month—just wrap them individually in plastic wrap and place in a freezer-safe container. Thaw in the fridge overnight to avoid moisture buildup. Interestingly, the chocolate shine holds up well, making frozen pops a smart option for prepping ahead.
Nutritional Information & Benefits
Each witch hat Oreo cookie pop is an indulgent treat, roughly containing around 150-180 calories depending on the size of the Oreo and amount of chocolate used. The classic Oreo provides a comforting combination of chocolate and creamy filling, while the candy cone adds a bit of crunch.
While not a health food, these pops can fit into a balanced diet when enjoyed in moderation. For a slightly lighter version, you might try using reduced-fat chocolate or smaller Oreos.
These treats are gluten-containing and include dairy, so if allergies are a concern, opt for gluten-free and dairy-free alternatives. The recipe’s flexibility makes it easy to accommodate various dietary needs without losing the fun factor.
Conclusion
So, if you’re looking for a Halloween treat that’s quick, fun, and brings smiles all around, these Perfect Witch Hat Oreo Cookie Pops are a no-brainer. They combine classic flavors with a festive twist that feels thoughtful but doesn’t require a ton of fuss.
Feel free to make them your own by trying different Oreos, colors, or decorations—you might find a new family favorite or party staple. Personally, these pops remind me of that chaotic afternoon when I needed a little magic in the kitchen, and they delivered exactly that.
If you give them a try, I’d love to hear how your witch hat Oreo cookie pops turned out or what creative spins you added. Sharing those moments keeps the fun going. Happy haunting in the kitchen!
FAQs
- Can I make these without lollipop sticks?
Yes, you can serve them as decorated Oreo cookies with candy hats glued on using melted chocolate, but the stick makes them easier to handle and more festive. - What’s the best chocolate to use for coating?
Semi-sweet chocolate chips melt well and taste great, but candy melts are also popular for colored options and smoother finishes. - How do I prevent the candy hats from sliding off?
Make sure to coat the Oreo fully in melted chocolate and place the candy hat immediately while the chocolate is still wet; then let it set upright if possible. - Can I prepare these ahead of time?
Absolutely! You can make them a day or two ahead and store in an airtight container at room temperature or refrigerated if your home is warm. - Are there gluten-free or vegan versions?
Yes, use gluten-free sandwich cookies and dairy-free chocolate or candy melts to adapt the recipe for dietary preferences.
Pin This Recipe!
Perfect Witch Hat Oreo Cookie Pops Recipe for Easy Halloween Fun

These witch hat Oreo cookie pops are a quick, festive Halloween treat combining classic Oreos with a chocolate coating and candy cone hats, perfect for parties and last-minute fun.
- Prep Time: 10 minutes
- Cook Time: 20 minutes
- Total Time: 30 minutes
- Yield: 12 servings
- Category: Dessert
- Cuisine: American
Ingredients
- Oreos (classic sandwich cookies)
- Semi-sweet or milk chocolate chips or melting chocolate
- Candy cones (sugar cones or mini waffle cones, trimmed to size)
- Lollipop sticks or cake pop sticks (food-safe wooden sticks)
- Halloween-themed sprinkles or edible glitter (orange, black, or green)
- Optional: Colored candy melts for decorative drizzles
Instructions
- Line a baking sheet with parchment paper or a silicone baking mat. Trim the candy cones if needed to fit on top of the Oreos.
- Carefully push a lollipop stick halfway into the cream filling of each Oreo cookie. For extra stability, dip the end of the stick in melted chocolate before inserting.
- Melt the chocolate chips in a microwave-safe bowl in 30-second intervals, stirring until smooth and glossy, or melt over a double boiler.
- Hold each Oreo pop by the stick and dip it into the melted chocolate until fully coated. Use a spoon or fork to cover any missed spots and gently tap off excess chocolate.
- Immediately place a candy cone on top of the chocolate-coated Oreo, pressing gently to secure with the melted chocolate.
- Sprinkle Halloween-themed sprinkles or edible glitter on the chocolate before it hardens.
- Stand the pops upright in a Styrofoam block or lay flat on the lined baking sheet. Let set at room temperature or refrigerate for 15-20 minutes until fully hardened.
- Once set, carefully remove the pops from the Styrofoam and arrange on a festive platter for serving.
Notes
Use firm, fresh Oreos to avoid crumbling. If chocolate thickens during dipping, reheat gently in the microwave for 10-15 seconds. Insert sticks halfway to prevent breaking. Drying pops upright prevents hats from sliding off. Store in airtight container at room temperature up to 3 days or refrigerate if warm. Pops can be frozen for up to a month wrapped individually.
Nutrition
- Serving Size: 1 witch hat Oreo coo
- Calories: 165
- Sugar: 15
- Sodium: 120
- Fat: 9
- Saturated Fat: 5
- Carbohydrates: 20
- Fiber: 1
- Protein: 2
Keywords: Halloween, Oreo cookie pops, witch hat cookies, easy Halloween treats, chocolate coated Oreos, party snacks, kid-friendly desserts