“You seriously think this cheesecake can look like a flag?” my niece asked, eyeing the messy kitchen counter where I was juggling bowls of cream cheese, whipped cream, and a mountain of fresh berries. Honestly, I was skeptical too at first. I’d always admired those patriotic cheesecakes that pop up every Fourth of July, but the idea of assembling one with fresh strawberries, blueberries, and whipped cream felt fussy and complicated. Yet, here I was, on a late June afternoon, determined to make this perfect flag cheesecake with fresh berries for patriotic celebrations happen.
The smell of sweet cream and tart berries filled the air, while the hum of summer cicadas buzzed outside the open window. It wasn’t a planned baking day — more of a spontaneous attempt sparked by a last-minute invite to a neighborhood barbecue. I didn’t want to show up empty-handed or with something boring. I figured, why not try this visually stunning cheesecake? What started as a bit of skepticism quickly turned into a quiet obsession over the next few days as I tweaked the layers and got the texture just right.
What stuck with me wasn’t just how striking the finished cheesecake looked — it was that moment when I took the first bite and realized this wasn’t just about looks. The balance of creamy, tangy cheesecake paired with the freshness of berries was so comforting and familiar. It felt like summer on a plate, a perfect way to celebrate with friends and family. This recipe has since become my go-to for patriotic gatherings — a sweet tradition that makes the holiday feel a little more special every year.
Why You’ll Love This Recipe
This perfect flag cheesecake with fresh berries isn’t just eye candy — it’s a recipe I’ve tested over several seasons to get just right. From texture to flavor, here’s why it’s become a favorite:
- Quick & Easy: You can pull this together in about 45 minutes of prep, making it ideal for busy summer days or last-minute celebrations.
- Simple Ingredients: No fancy or hard-to-find items here — just classic cheesecake staples and fresh, seasonal berries.
- Perfect for Patriotic Celebrations: Whether it’s Fourth of July, Memorial Day, or any red-white-and-blue occasion, this cheesecake fits right in.
- Crowd-Pleaser: Friends, kids, and neighbors have all given rave reviews — the kind of dessert that disappears fast at parties.
- Unbelievably Delicious: The creamy, smooth cheesecake base pairs perfectly with the natural sweetness and slight tartness of the fresh berries for a balanced bite every time.
What sets this cheesecake apart? The layering technique — I use a no-bake cheesecake base that stays firm but creamy, topped with a homemade whipped cream layer for lightness. Then, arranging the berries in a flag pattern isn’t just a fun visual; it also distributes flavors evenly so you get a little bit of everything in each slice. This isn’t your average berry cheesecake — it’s a little piece of summer pride on a plate.
Honestly, after making this a handful of times, I realized it’s the kind of recipe that brings people together. It’s festive, approachable, and just plain fun to make, which is why it always finds its way back to my summer table.
What Ingredients You Will Need
This recipe uses simple, wholesome ingredients to deliver bold flavor and satisfying texture without the fuss. Most are pantry staples, with fresh berries bringing the seasonal pop of color and taste.
- For the Crust:
- 1 ½ cups (150g) graham cracker crumbs (I like using Honey Maid for that classic flavor)
- 6 tablespoons (85g) unsalted butter, melted (adds richness and helps bind the crust)
- 2 tablespoons granulated sugar (balances the buttery crust)
- For the Cheesecake Filling:
- 16 ounces (450g) cream cheese, softened (full-fat for best texture)
- ⅔ cup (135g) granulated sugar
- 1 teaspoon pure vanilla extract
- 1 cup (240ml) heavy whipping cream, cold (whipped to soft peaks for lightness)
- 2 large eggs, room temperature
- For the Topping:
- 1 cup (240ml) heavy whipping cream, cold (for fresh whipped cream topping)
- 2 tablespoons powdered sugar (to sweeten the whipped cream)
- 1 cup fresh strawberries, sliced (for the red stripes)
- 1 cup fresh blueberries (for the blue field)
For best results, I recommend using berries that are firm and ripe but not overly soft — fresh local berries in season work wonders here. If strawberries aren’t your thing, raspberries can be a great substitute for the red stripes. For a dairy-free alternative, swap cream cheese with a plant-based version and use coconut cream for whipping, though the texture will be a bit different.
Equipment Needed
- 9-inch (23cm) springform pan – makes removing the cheesecake easier without damaging the sides.
- Mixing bowls – at least two, one for the crust and one for the filling.
- Electric mixer or stand mixer – essential for whipping cream and achieving a smooth cheesecake filling.
- Rubber spatula – for folding ingredients gently and scraping the bowl clean.
- Measuring cups and spoons – for precise ingredient amounts.
- Knife and cutting board – for slicing berries.
If you don’t have a springform pan, a regular 9-inch cake pan lined with parchment paper can work, but removing the cheesecake will be trickier. For whipping cream without an electric mixer, a handheld whisk works but will take some muscle – I’ve been there, and it’s worth the effort for fresh topping!
Preparation Method
- Make the crust: Preheat your oven to 350°F (175°C). In a bowl, combine the graham cracker crumbs, melted butter, and sugar. Stir until the mixture resembles wet sand. Press this mixture evenly into the bottom of the springform pan, using the back of a spoon or your fingers (about 1-inch thick). Bake for 8-10 minutes until golden and set. Remove from oven and let cool completely (about 15 minutes).
- Prepare the cheesecake filling: In a large bowl, beat the softened cream cheese with sugar until smooth (about 2-3 minutes on medium speed). Add vanilla extract and eggs, one at a time, mixing just until combined after each addition. Avoid overmixing to prevent cracks. In a separate bowl, whip 1 cup of heavy cream to soft peaks. Gently fold the whipped cream into the cream cheese mixture using a spatula — this keeps the filling light and creamy.
- Assemble the cheesecake: Pour the filling over the cooled crust and smooth the top with a spatula. Tap the pan gently on the counter to release any air bubbles. Bake at 325°F (160°C) for 45-50 minutes, or until the edges are set but the center still jiggles slightly. Turn off the oven, leave the door ajar, and let the cheesecake cool inside for 1 hour to prevent cracking.
- Chill the cheesecake: Remove from the oven and cool completely at room temperature. Then refrigerate for at least 4 hours or overnight — this step is crucial for the perfect texture.
- Prepare the whipped cream topping: Using an electric mixer, whip the remaining 1 cup of heavy cream with powdered sugar until stiff peaks form. Spread evenly over the chilled cheesecake.
- Arrange the berries: Create the flag pattern by placing blueberries in the upper left corner of the cheesecake to form the blue field. Then, alternate rows of sliced strawberries and whipped cream stripes across the rest of the cake to mimic the red and white stripes. Take your time — this is where the magic happens visually. A small offset spatula helps smooth the edges between layers.
- Final chill and serve: Refrigerate the assembled cheesecake for another 30 minutes to set the topping. Serve chilled and slice carefully with a warm, dry knife for clean cuts.
Pro tip: If you find the berries releasing too much juice while slicing, pat them dry gently with paper towels before arranging. This keeps your cheesecake from getting soggy. Also, I like to keep a small bowl of warm water nearby to dip my knife between slices — it makes cutting through the creamy layers much neater.
Cooking Tips & Techniques
Cheesecake can be a little intimidating, but a few tricks make a world of difference. First, remember that room temperature cream cheese blends smoother, so don’t rush it straight from the fridge. When mixing eggs into the batter, fold gently to avoid excess air that causes cracks during baking.
Baking in a water bath is a classic method to prevent cracks, but for this recipe, I skip it since the no-bake topping and gentle oven cooling help maintain a smooth surface. If you prefer, you can wrap the springform pan in foil and place it in a hot water bath during baking — just be sure to place the pan on a baking sheet to catch any leaks.
Whipping cream to just the right consistency is key — soft peaks hold the batter and topping light, but overwhipping can turn it grainy. I learned this the hard way after whipping cream straight to stiff peaks and ending up with butter by accident!
Finally, the berry arrangement requires a steady hand and a bit of patience. I like to start with the blueberries since they form the corner of the flag. Using small, uniform slices of strawberries helps keep the stripes neat and balanced. If you want to get fancy, a little mint leaf garnish can add a fresh green contrast, but honestly, the berries do all the talking.
Variations & Adaptations
This flag cheesecake recipe is flexible enough to suit different tastes and dietary needs. Here are a few ideas I’ve tried or thought about:
- Gluten-Free: Swap the graham cracker crust for a gluten-free cookie crust or use almond flour mixed with butter. It holds up well and tastes great.
- Lower Sugar: Use a natural sweetener like maple syrup or honey in the crust and filling, adjusting amounts to taste. I tried honey once and loved the subtle depth it added.
- Seasonal Berry Mix: In late summer, swap blueberries and strawberries for fresh raspberries and blackberries for a deeper color palette and richer flavor.
- Mini Flag Cheesecakes: For smaller gatherings, make individual-sized cheesecakes in a muffin tin or mini springform pans. This approach is perfect for parties and lets everyone have their own flag. I keep a batch of these mini lemon-blueberry cheesecakes handy for potlucks, and they’re always a hit.
For a dairy-free version, I’ve had success using vegan cream cheese and coconut cream. The texture isn’t exactly the same, but it’s creamy and festive enough to still impress.
Serving & Storage Suggestions
This cheesecake shines best served chilled, right out of the fridge. The fresh berries add a cool, juicy contrast to the rich filling. For presentation, I like to place the whole cheesecake on a simple white platter to let the flag colors pop. It pairs beautifully with a glass of sparkling lemonade or an iced tea for summer celebrations.
Leftovers keep well refrigerated, covered tightly with plastic wrap or in an airtight container for up to 4 days. The crust stays crisp, and the whipped cream topping holds up surprisingly well. I wouldn’t recommend freezing this cheesecake because the fresh berries can get mushy after thawing.
If you want to re-serve chilled cheesecake that’s been refrigerated for a while, let it sit at room temperature for 10-15 minutes before slicing — this softens it just enough for a smooth cut. And hey, if you ever want to shake things up, a drizzle of balsamic glaze over the berry topping adds a tangy twist that’s unexpectedly delicious.
Nutritional Information & Benefits
A typical slice (1/12 of the cheesecake) contains approximately 350 calories, 28 grams of fat, 20 grams of carbohydrates, and 5 grams of protein. The fresh berries provide antioxidants and vitamins, especially vitamin C, while the cream cheese offers a rich source of calcium.
While this dessert is indulgent, I appreciate that it uses natural fruit rather than sugary jams or artificial toppings. For gluten-free eaters, adjusting the crust makes it accessible too. Plus, the protein and fat from the cream cheese and cream can help keep you satisfied with smaller portions. Just be mindful of portion size, especially if you’re watching sugar intake.
Conclusion
This perfect flag cheesecake with fresh berries has become more than just a dessert in my kitchen — it’s a way to bring a little festive joy and fresh flavor to patriotic celebrations. Its balance of creamy richness and bright berries makes it a standout, while the berry flag design adds that special touch without being fussy.
Feel free to make it your own, whether that means switching up the berries, trying a mini version, or adapting the crust. I love how this cheesecake manages to feel both classic and fresh, a real conversation starter that almost always gets requests for the recipe.
If you try it out, I’d genuinely love to hear how it turned out — what variations you made or what memories it helped create. Sharing those moments is what makes cooking so special. Here’s to many more sweet celebrations ahead!
Frequently Asked Questions
Can I make this cheesecake ahead of time?
Yes! It’s actually best made a day in advance to allow the flavors to meld and the texture to set perfectly. Just keep it refrigerated and covered.
What if I don’t have a springform pan?
You can use a regular 9-inch cake pan lined with parchment paper, but be careful removing the cheesecake as it will be more fragile without the removable sides.
Can I use frozen berries for the topping?
Fresh berries are best for this recipe to keep the flag design neat and prevent excess moisture. If using frozen, thaw and drain them thoroughly, then pat dry before arranging.
How do I prevent cheesecake cracks?
Use room temperature ingredients, mix gently, avoid overbaking, and cool the cheesecake slowly by leaving the oven door ajar after baking. Also, a water bath can help if you want an extra safety net.
Is this recipe suitable for kids?
Absolutely! The fresh berries add natural sweetness, and the creamy texture is usually a hit with kids. Just be mindful of the serving size due to the richness.
For more ideas on berry-based desserts and festive treats, you might enjoy my mini lemon blueberry cheesecakes recipe perfect for parties or browse through other delicious recipes that bring fresh flavors to your table.
Pin This Recipe!
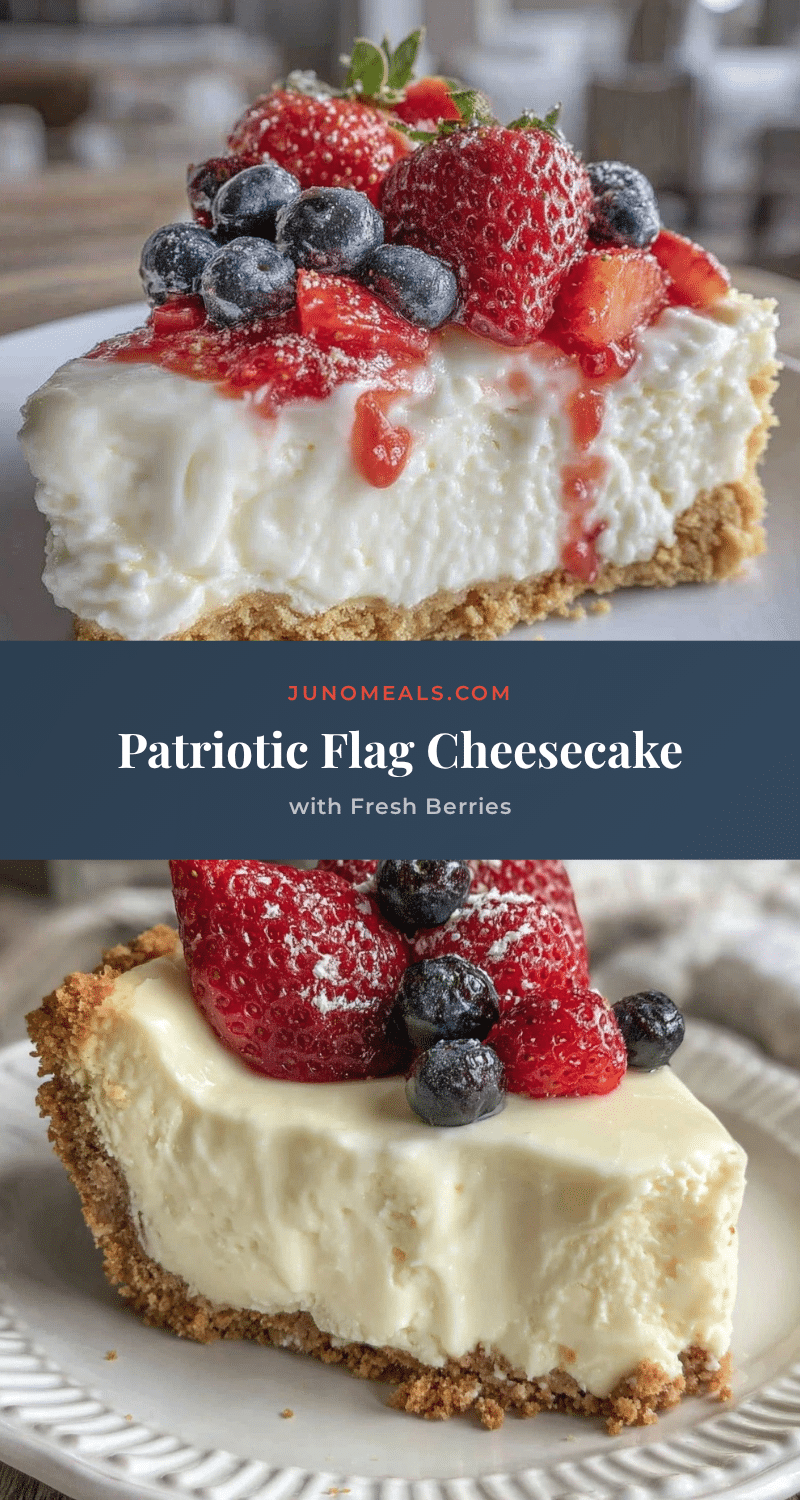
Perfect Flag Cheesecake Recipe with Fresh Berries for Patriotic Celebrations

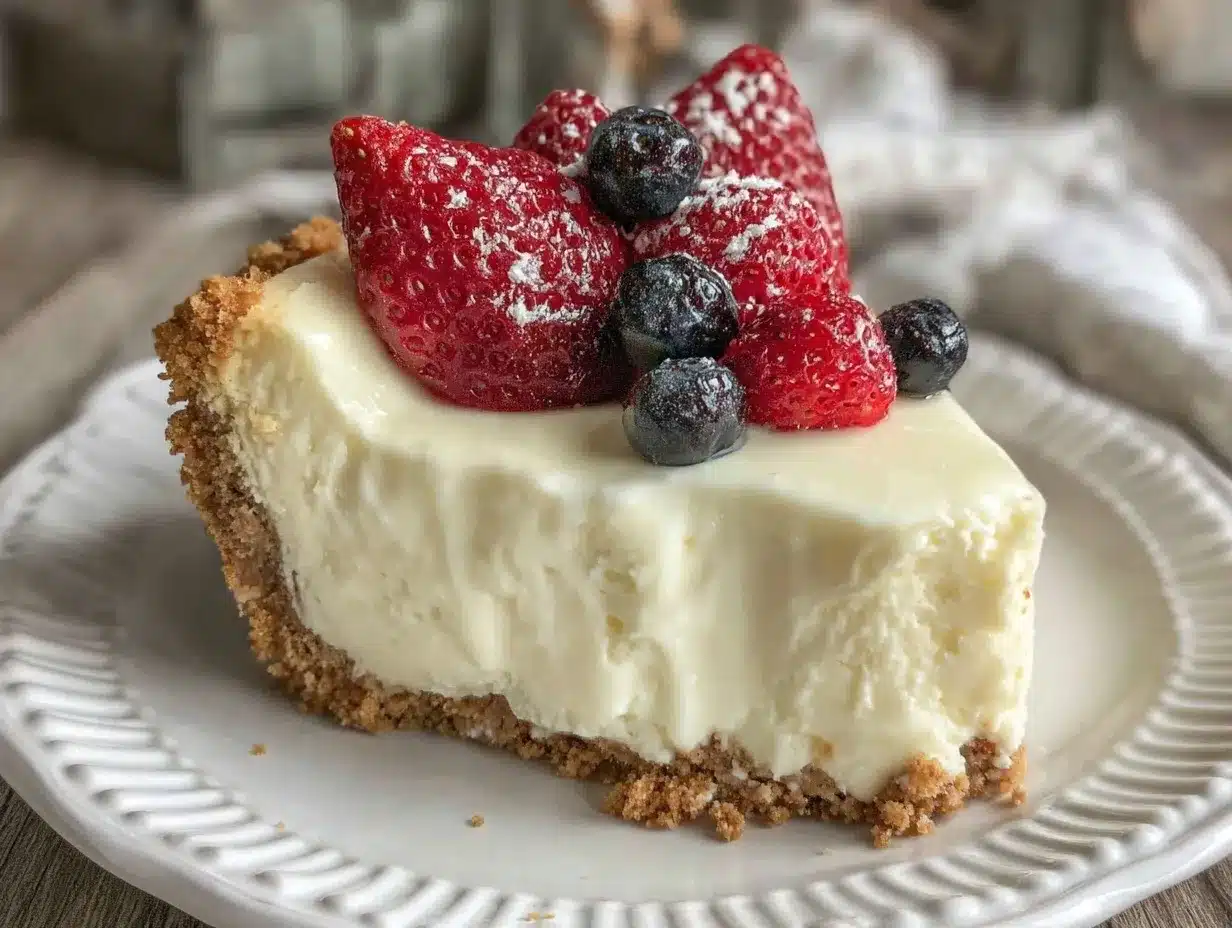
A visually stunning and delicious no-bake cheesecake topped with fresh strawberries and blueberries arranged in a patriotic flag pattern, perfect for Fourth of July and other red-white-and-blue celebrations.
- Prep Time: 45 minutes
- Cook Time: 55 minutes
- Total Time: 5 hours 40 minutes
- Yield: 12 servings 1x
- Category: Dessert
- Cuisine: American
Ingredients
- 1 ½ cups (150g) graham cracker crumbs
- 6 tablespoons (85g) unsalted butter, melted
- 2 tablespoons granulated sugar
- 16 ounces (450g) cream cheese, softened
- ⅔ cup (135g) granulated sugar
- 1 teaspoon pure vanilla extract
- 1 cup (240ml) heavy whipping cream, cold (for filling)
- 2 large eggs, room temperature
- 1 cup (240ml) heavy whipping cream, cold (for topping)
- 2 tablespoons powdered sugar
- 1 cup fresh strawberries, sliced
- 1 cup fresh blueberries
Instructions
- Make the crust: Preheat oven to 350°F (175°C). Combine graham cracker crumbs, melted butter, and sugar until mixture resembles wet sand. Press evenly into bottom of 9-inch springform pan about 1-inch thick. Bake 8-10 minutes until golden. Cool completely (about 15 minutes).
- Prepare cheesecake filling: Beat softened cream cheese with sugar until smooth (2-3 minutes). Add vanilla and eggs one at a time, mixing just until combined. Whip 1 cup heavy cream to soft peaks and gently fold into cream cheese mixture.
- Assemble cheesecake: Pour filling over cooled crust and smooth top. Tap pan to release air bubbles. Bake at 325°F (160°C) for 45-50 minutes until edges are set but center jiggles slightly. Turn off oven, leave door ajar, cool inside 1 hour.
- Chill cheesecake: Cool completely at room temperature, then refrigerate at least 4 hours or overnight.
- Prepare whipped cream topping: Whip remaining 1 cup heavy cream with powdered sugar until stiff peaks form. Spread evenly over chilled cheesecake.
- Arrange berries: Place blueberries in upper left corner to form blue field. Alternate rows of sliced strawberries and whipped cream stripes across rest of cake to mimic flag stripes.
- Final chill and serve: Refrigerate assembled cheesecake 30 minutes to set topping. Serve chilled, slicing with warm dry knife for clean cuts.
Notes
Use room temperature cream cheese for smooth blending. Avoid overmixing eggs to prevent cracks. Pat berries dry before arranging to avoid sogginess. Dip knife in warm water between slices for clean cuts. For gluten-free, substitute crust with gluten-free cookie or almond flour crust. Dairy-free options include plant-based cream cheese and coconut cream.
Nutrition
- Serving Size: 1 slice (1/12 of che
- Calories: 350
- Fat: 28
- Carbohydrates: 20
- Protein: 5
Keywords: cheesecake, flag cheesecake, patriotic dessert, Fourth of July, fresh berries, no-bake topping, summer dessert