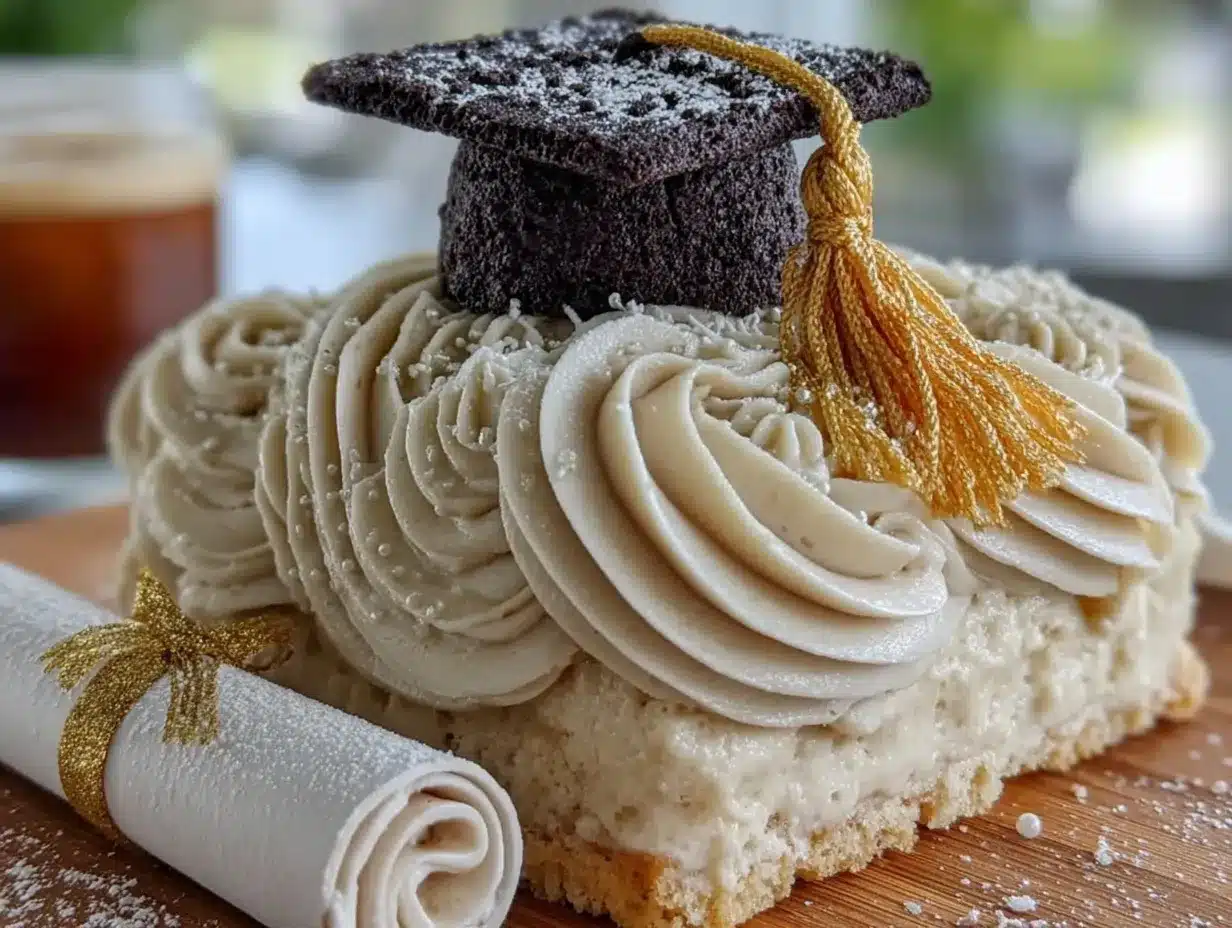
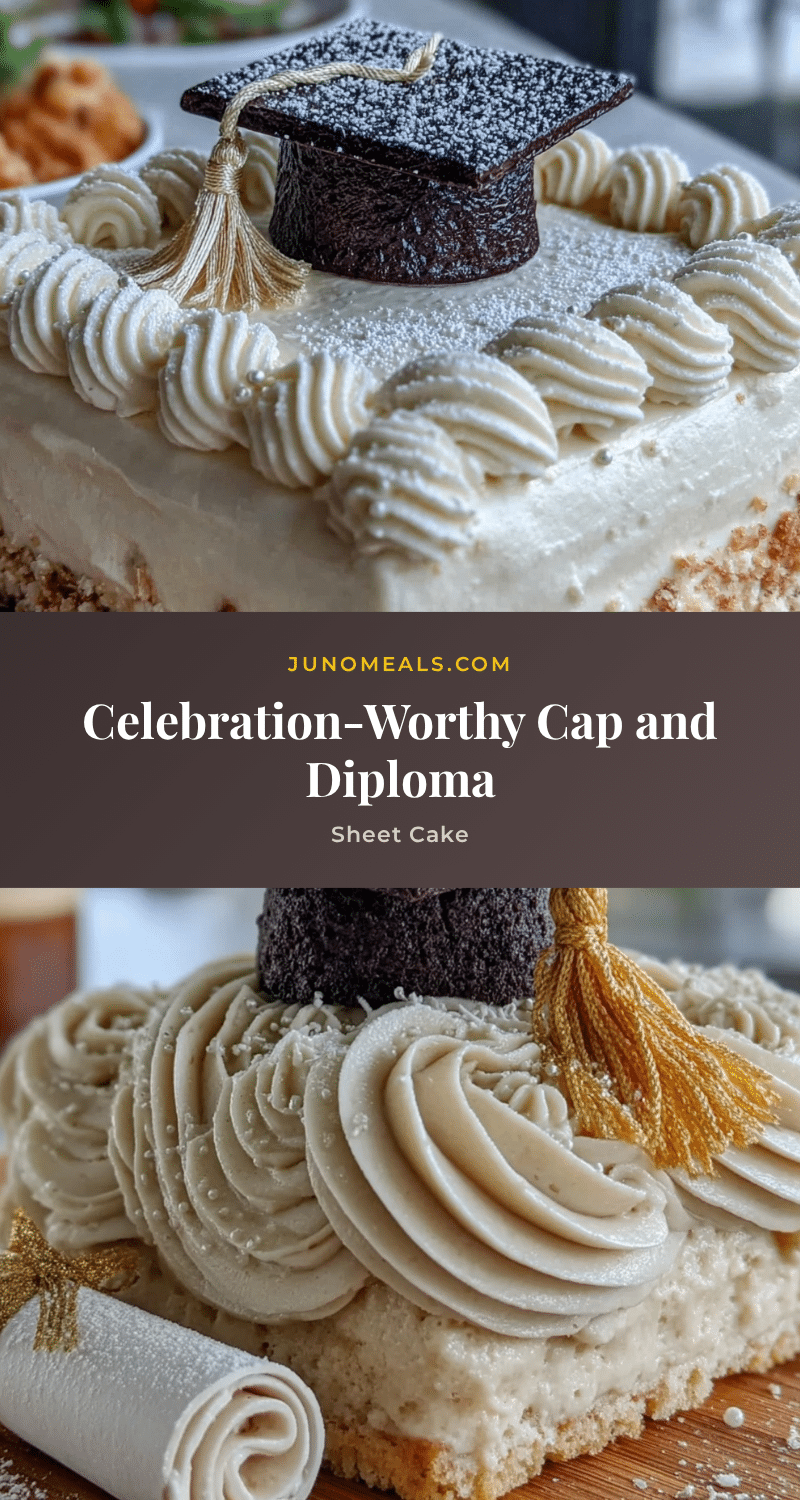
“You better bring the cake—it’s not a graduation without one,” my sister texted me just two days before the big day. Honestly, my heart sank a little; I’m not really the type to bake fancy cakes, let alone decorate them. But this time, I wanted to make something that felt personal, something that said, “Congratulations!” without being over the top. That’s how the idea of the Perfect Cap and Diploma Decorated Sheet Cake with Buttercream was born in my kitchen, fueled by a mix of last-minute panic and a stubborn “I can do this” attitude.
I started with a simple sheet cake recipe—nothing too complicated—because, let’s face it, I needed something reliable. The homemade buttercream was my secret weapon, whipped up with just the right balance of sweetness and smoothness, perfect for piping those little graduation caps and diplomas. At first, I was skeptical about how those decorations would turn out; I’d never really practiced piping before. But with a bit of patience (and a couple of failed attempts), the cake turned out to be a hit.
There was something quietly satisfying watching that smooth buttercream hold its shape, those little caps sitting proudly on the cake’s surface, and the diplomas curling just right. It wasn’t just a cake; it was a small celebration in itself. This cake stuck with me because it proved that even last-minute efforts can bring genuine joy. It’s the kind of recipe you can trust to make a moment special, without stress or fancy equipment—just the joy of homemade goodness.
Why You’ll Love This Recipe
Having made this Perfect Cap and Diploma Decorated Sheet Cake multiple times now, I can share a few reasons why it’s become a go-to for celebrations, especially graduations:
- Quick & Easy: The whole cake, including the buttercream and decorations, comes together in under two hours—ideal for last-minute party plans.
- Simple Ingredients: You probably have everything in your pantry already—flour, sugar, butter, eggs, and a few basics for the buttercream.
- Perfect for Graduation Parties and More: While it’s designed for graduation, the classic look and flavor suit birthdays, promotions, or any milestone.
- Crowd-Pleaser: Kids and adults both go crazy for this cake—the buttercream is silky, not too sweet, and the cake stays moist for days.
- Unbelievably Delicious: The buttercream’s creamy texture pairs perfectly with the tender crumb of the cake, making each bite a little celebration.
What sets this cake apart is the straightforward piping technique that anyone can try—even if you’re not a pro. I use a simple star tip and a round tip to create charming little caps and diplomas. The buttercream recipe is tested to hold up well in warmer rooms without melting into a sugary mess, which I’ve learned the hard way before.
This cake isn’t just dessert; it’s a heartfelt nod to the hard work behind every diploma. It’s the kind of treat that makes you pause and smile while you’re frosting, knowing it’s more than just sugar—it’s a little ceremony in every slice.
What Ingredients You Will Need
This recipe uses simple, wholesome ingredients to deliver bold flavor and satisfying texture without the fuss. Most are pantry staples, which makes it a practical choice for spontaneous celebrations.
- For the Cake:
- All-purpose flour, 2 ½ cups (300 g) – I prefer King Arthur for consistent results
- Granulated sugar, 2 cups (400 g)
- Baking powder, 2 ½ teaspoons
- Baking soda, ½ teaspoon
- Salt, ½ teaspoon
- Unsalted butter, ½ cup (115 g), softened (adds richness and tenderness)
- Buttermilk, 1 cup (240 ml), room temperature (for moistness and tang)
- Large eggs, 3, room temperature
- Vanilla extract, 2 teaspoons (pure vanilla makes a big difference here)
- For the Buttercream:
- Unsalted butter, 1 cup (230 g), softened (use high-quality for best flavor)
- Powdered sugar, 4 cups (480 g), sifted
- Heavy cream, 2-4 tablespoons (30-60 ml), to adjust consistency
- Vanilla extract, 1 ½ teaspoons
- Salt, a pinch (balances sweetness)
- Food coloring (black and gold gel colors recommended for graduation caps and diplomas)
- Decorative Extras:
- Mini fondant pieces or edible gold dust (optional, for diploma shine)
- Thin licorice or black piping gel (for diploma ribbons)
If you want to keep it dairy-free, you can swap the butter and heavy cream for coconut oil and a plant-based milk with a splash of vinegar to mimic buttermilk. For a gluten-free version, almond or oat flour blends work, but expect a slightly different crumb.
Equipment Needed
To craft this Perfect Cap and Diploma Decorated Sheet Cake, you’ll need a few basics and a couple of handy tools that make the decorating part a breeze:
- 9×13-inch (23×33 cm) baking sheet or pan – standard size for sheet cakes
- Electric mixer – stand or handheld, crucial for smooth buttercream
- Mixing bowls – at least two, for batter and frosting
- Offset spatula – ideal for spreading buttercream evenly
- Piping bags and tips – I use a #21 star tip for caps and a round tip for diploma ribbons
- Cooling rack – helps the cake cool evenly and prevents sogginess
No fancy airbrush or fondant sculpting tools needed here. If you don’t have piping bags, ziplock bags with a small corner cut also work great. My offset spatula is one of my best kitchen friends—it makes frosting look neat even when I’m rushing.
Preparation Method
- Preheat your oven to 350°F (175°C). Grease and flour your 9×13-inch pan or line with parchment paper for easy removal. This step helps the cake release cleanly, saving you frustration later.
- Mix dry ingredients: In a large bowl, whisk together 2 ½ cups (300 g) all-purpose flour, 2 cups (400 g) sugar, 2 ½ teaspoons baking powder, ½ teaspoon baking soda, and ½ teaspoon salt. Getting these evenly distributed ensures your cake rises well and tastes balanced.
- Cream butter and eggs: In a separate bowl, beat ½ cup (115 g) softened unsalted butter until creamy. Add 3 large eggs, one at a time, beating well after each addition. This step traps air, giving your cake a tender crumb.
- Combine wet and dry: Gradually add the dry ingredients to the butter and eggs, alternating with 1 cup (240 ml) buttermilk and 2 teaspoons vanilla extract. Start and end with dry ingredients. Mix just until combined—overmixing can make the cake dense.
- Pour batter into the prepared pan and smooth the top with a spatula. Tap the pan gently on the counter to release air bubbles. Bake for 35–40 minutes or until a toothpick inserted near the center comes out clean.
- Cool completely: Let the cake cool in the pan for about 15 minutes, then transfer to a wire rack to cool fully. Frosting a warm cake leads to melting buttercream, which is no fun.
- Prepare the buttercream: Beat 1 cup (230 g) softened butter on medium speed until creamy (about 2 minutes). Gradually add 4 cups (480 g) powdered sugar, 1 ½ teaspoons vanilla, and a pinch of salt. Add 2-4 tablespoons (30-60 ml) heavy cream to reach your desired spreading consistency.
- Divide and color: Separate a small portion of buttercream for your black and gold piping colors. Use gel food coloring to avoid thinning the frosting. This is key for sharp, vibrant graduation cap and diploma details.
- Frost the cake: Using an offset spatula, spread a smooth, even layer of plain buttercream over the cooled cake.
- Pipe the decorations: With a star tip, pipe small graduation caps spaced evenly across the cake. Use the round tip to create diploma shapes—thin rectangles with licorice or piping gel ribbons. Don’t rush; the best decorations come with a steady hand and patience.
Cooking Tips & Techniques
Getting buttercream right can feel tricky, but a few tricks make all the difference:
- Use room temperature butter: This helps the buttercream whip up light and fluffy. If your butter is cold, it won’t blend properly and you’ll get lumps.
- Sift your powdered sugar: It prevents gritty frosting and helps achieve that silky smooth texture that’s perfect for piping.
- Don’t overmix the cake batter: Once you combine wet and dry, mix just until no flour streaks remain. Overmixing can make the cake tough.
- Practice piping on parchment: Before decorating the cake, test your piping skills on a piece of parchment paper. This helps you get comfortable with pressure and shapes.
- Keep your workspace cool: Buttercream softens quickly, so if your kitchen is warm, refrigerate the frosting briefly to firm it up before piping.
- Multitask smartly: While the cake bakes, prepare the buttercream. This saves time and ensures you’re ready to decorate once the cake is cooled.
I’ve learned the hard way that rushing the frosting phase leads to smudged decorations. Take a deep breath and enjoy the process—it’s part of the fun!
Variations & Adaptations
This cake is versatile enough for tweaks that fit your style or dietary needs:
- Flavor swaps: Add a teaspoon of almond or lemon extract to the batter for a subtle twist. I once added fresh lemon zest alongside a batch of mini lemon blueberry cheesecakes for a refreshing combo.
- Gluten-free option: Use a gluten-free flour blend in place of all-purpose flour. Be sure to check the blend’s baking properties; you might want to add a teaspoon of xanthan gum for structure.
- Dairy-free adaptation: Swap butter for vegan margarine and heavy cream for coconut cream. The texture will be slightly different but still delicious.
- Decorating shortcuts: Instead of piping, use edible printed graduation-themed toppers for a fuss-free option. Or try using premade fondant shapes if you want a cleaner look.
- Personal touch: I decorated one cake with a hand-piped inspirational quote alongside the caps and diplomas using a fine tip—added a heartfelt layer to the celebration.
Serving & Storage Suggestions
Serve this Perfect Cap and Diploma Decorated Sheet Cake at room temperature for the best flavor and texture. The buttercream softens beautifully when left out for 20-30 minutes, making each bite melt in your mouth.
This cake pairs wonderfully with a fresh fruit salad or a cup of strong coffee, balancing sweetness with brightness. For a refreshing twist, serve alongside a chilled sparkling lemonade or iced tea.
Store leftover cake tightly covered in the refrigerator for up to 4 days. Bring to room temperature before serving to soften the buttercream. You can also freeze the cake (without decorations) for up to 2 months; thaw overnight in the fridge.
Interestingly, the flavors tend to deepen after a day, making it even better the next day. Just keep it well wrapped to avoid drying out.
Nutritional Information & Benefits
Each serving (about 1/12th of the cake) contains roughly:
| Calories | 350-400 kcal |
|---|---|
| Fat | 18-22 g (mostly from butter) |
| Carbohydrates | 45-50 g |
| Protein | 4-5 g |
The cake’s main ingredients like eggs and butter provide essential fats and protein, while the buttermilk adds a gentle tang and some calcium. This isn’t a low-calorie dessert, but it’s perfect for special occasions where a little indulgence feels right.
For those concerned about allergens, this recipe contains gluten, dairy, and eggs, but with substitutions mentioned earlier, you can accommodate different dietary restrictions.
Conclusion
The Perfect Cap and Diploma Decorated Sheet Cake with Buttercream is more than just dessert—it’s a celebration you can make yourself, even under pressure. Its simple ingredients and straightforward techniques mean you don’t need to be a pro baker to create something memorable.
I’ve found this recipe to be a sweet reminder that the best celebrations are often about the effort and care you put in, not perfection. Whether you’re decorating for a graduation, a milestone, or simply a joyful moment, this cake brings a touch of homemade charm and happiness to the table.
Feel free to tweak the flavors or decorations to make it your own. And if you try it, I’d love to hear how it turned out—comments and stories always make my day. Here’s to sweet endings and new beginnings!
FAQs
- Can I make the cake and decorate it the day before? Yes! Bake and frost the cake a day ahead, cover tightly, and keep refrigerated. Bring to room temperature before serving.
- What if I don’t have buttermilk? Mix 1 tablespoon of white vinegar or lemon juice with 1 cup (240 ml) milk and let sit for 5 minutes as a buttermilk substitute.
- How do I prevent buttercream from melting while decorating? Keep your kitchen cool, refrigerate the buttercream if needed, and work in small sections.
- Can I use store-bought frosting for this cake? You can, but homemade buttercream offers better texture and flavor, especially for piping detailed decorations.
- Are there any tips for piping neat graduation caps? Yes—practice on parchment paper first, use consistent pressure, and start with small amounts of frosting in the bag to maintain control.
Pin This Recipe!
Perfect Cap and Diploma Decorated Sheet Cake Easy Homemade Buttercream Recipe
A simple and reliable sheet cake decorated with homemade buttercream piping in the shape of graduation caps and diplomas, perfect for celebrations and especially graduations.
- Prep Time: 30 minutes
- Cook Time: 40 minutes
- Total Time: 1 hour 10 minutes
- Yield: 12 servings 1x
- Category: Dessert
- Cuisine: American
Ingredients
- 2 ½ cups (300 g) all-purpose flour
- 2 cups (400 g) granulated sugar
- 2 ½ teaspoons baking powder
- ½ teaspoon baking soda
- ½ teaspoon salt
- ½ cup (115 g) unsalted butter, softened
- 1 cup (240 ml) buttermilk, room temperature
- 3 large eggs, room temperature
- 2 teaspoons vanilla extract
- 1 cup (230 g) unsalted butter, softened (for buttercream)
- 4 cups (480 g) powdered sugar, sifted
- 2–4 tablespoons (30–60 ml) heavy cream
- 1 ½ teaspoons vanilla extract (for buttercream)
- Pinch of salt (for buttercream)
- Food coloring (black and gold gel colors recommended)
- Mini fondant pieces or edible gold dust (optional)
- Thin licorice or black piping gel (for diploma ribbons)
Instructions
- Preheat your oven to 350°F (175°C). Grease and flour a 9×13-inch pan or line with parchment paper.
- In a large bowl, whisk together flour, sugar, baking powder, baking soda, and salt.
- In a separate bowl, beat softened butter until creamy. Add eggs one at a time, beating well after each addition.
- Gradually add dry ingredients to the butter and eggs, alternating with buttermilk and vanilla extract. Start and end with dry ingredients. Mix just until combined.
- Pour batter into prepared pan and smooth the top. Tap pan gently to release air bubbles.
- Bake for 35-40 minutes or until a toothpick inserted near the center comes out clean.
- Cool cake in pan for 15 minutes, then transfer to a wire rack to cool completely.
- Beat softened butter for buttercream on medium speed until creamy (about 2 minutes). Gradually add powdered sugar, vanilla, and salt. Add heavy cream to reach desired consistency.
- Divide buttercream and color portions with black and gold gel food coloring.
- Spread a smooth, even layer of plain buttercream over cooled cake using an offset spatula.
- Pipe small graduation caps with a star tip evenly across the cake.
- Use a round tip to pipe diploma shapes and add ribbons with licorice or piping gel.
Notes
[‘Use room temperature butter for smooth buttercream.’, ‘Sift powdered sugar to avoid gritty frosting.’, ‘Do not overmix cake batter to keep cake tender.’, ‘Practice piping on parchment paper before decorating.’, ‘Keep workspace cool to prevent buttercream from melting.’, ‘Prepare buttercream while cake bakes to save time.’, ‘Bring refrigerated cake to room temperature before serving for best texture.’]
Nutrition
- Serving Size: 1 slice (1/12th of c
- Calories: 350400
- Fat: 1822
- Carbohydrates: 4550
- Protein: 45
Keywords: graduation cake, sheet cake, buttercream, homemade cake, easy cake recipe, celebration cake, decorated cake, piping decorations