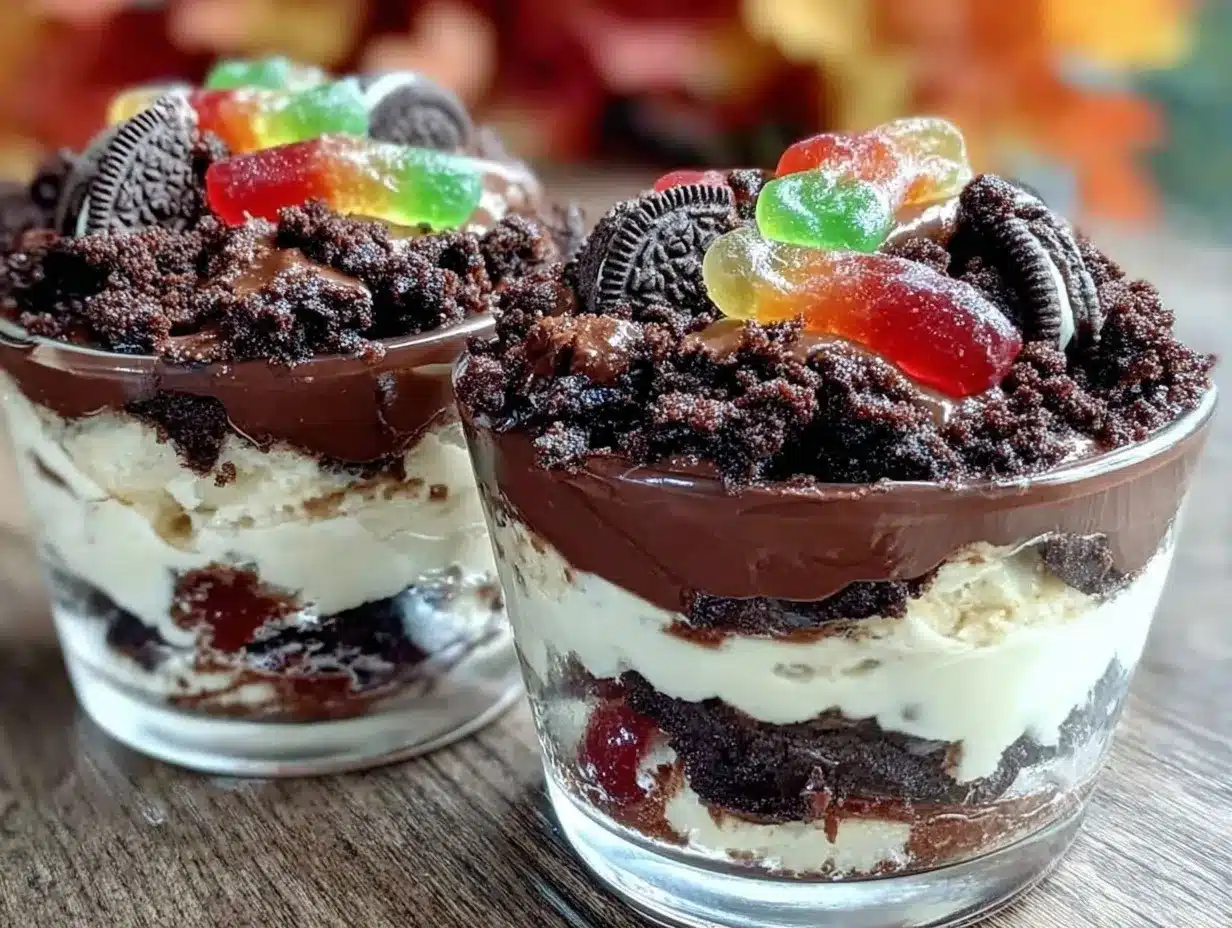
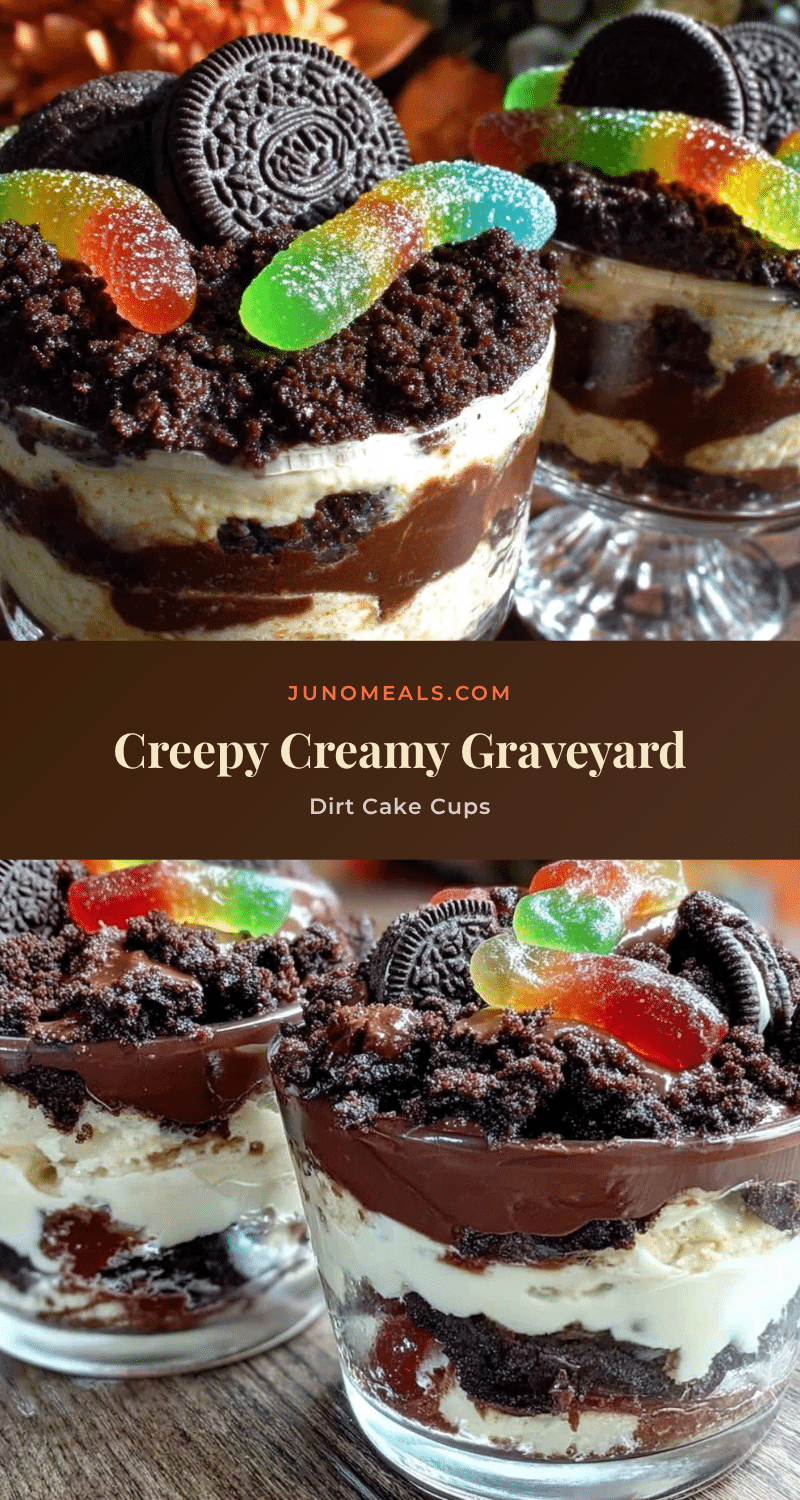
“Are you sure these are supposed to look like dirt?” my niece asked, eyeing the Fun Graveyard Dirt Cake Cups with Gummy Worms for Halloween suspiciously as I placed the spooky treats on the table. Honestly, I wasn’t entirely certain either the first time I whipped these up. It all started last October, when I was scrambling to find a quick, kid-friendly dessert that could pull off the Halloween vibe without requiring me to carve pumpkins or bake elaborate pies. I grabbed a box of chocolate pudding, some crushed Oreo cookies, and a handful of gummy worms just to see if it’d pass muster.
The idea of dirt cake isn’t new, but turning it into individual graveyard cups with candy tombstones and wiggly worms was a total accident—a happy mistake born out of last-minute Halloween party panic. What surprised me most was how much everyone loved them: the kids squealed over the gummy worms, and even the adults couldn’t resist sneaking bites. The crunchy cookie “soil” combined with creamy pudding created a texture that felt both indulgent and playful. And I swear, the smell of the chocolate mixed with the sweet gummy scent still takes me back to that chilly October evening.
Now, I make these little dirt cake cups every year. They’re my go-to when I need a mess-free, no-fuss dessert that still manages to wow. It’s funny how something so simple—layering pudding and crushed cookies—became a Halloween tradition. I think what stuck with me is how these cups invite a bit of fun and imagination. Kids get to poke around with their spoons as if they’re digging up a tiny graveyard, and adults get a nostalgic kick from the gummy worms that remind us of childhood treats.
So, if you’re looking for an easy Halloween dessert that’s as fun to make as it is to eat, these Fun Graveyard Dirt Cake Cups might just become your new favorite. Plus, they’re the kind of recipe you can tweak up or down depending on your mood—more chocolate, extra worms, or even a splash of spooky decoration. No stress, just sweet, creepy deliciousness.
Why You’ll Love This Recipe
After making the Fun Graveyard Dirt Cake Cups with Gummy Worms for Halloween several times, I’m convinced they tick all the boxes for a fuss-free party dessert. Here’s why you’ll want to keep this recipe in your back pocket:
- Quick & Easy: Ready in about 20 minutes, making it perfect for last-minute Halloween gatherings or busy evenings when you still want to impress.
- Simple Ingredients: No hunting for obscure items here—pretty much everything is pantry or grocery store staple, like chocolate pudding, Oreos, and gummy worms.
- Perfect for Halloween Parties: The creepy graveyard theme gets everyone talking, and the individual cups mean no messy slicing or plating.
- Crowd-Pleaser: Kids adore the gummy worms, and adults love the creamy, chocolatey layers—everyone ends up with a smile (and a little dirt under their nails, metaphorically speaking).
- Unbelievably Delicious: The contrast of crunchy cookie crumbs with smooth pudding is just right—plus, you can customize the sweetness and textures as you like.
This isn’t just a dirt cake slapped into cups. What sets this version apart is the playful presentation and the balance of textures. I like to use crushed Oreos with the filling whipped just enough to stay creamy but still hold up. The gummy worms add a fun, tactile element that makes it feel like a mini Halloween adventure in every bite. Honestly, it’s the kind of recipe that makes you close your eyes and smile after the first spoonful.
What Ingredients You Will Need
This recipe uses simple, wholesome ingredients to deliver bold flavor and satisfying texture without the fuss. Most are pantry staples, so you probably have everything on hand.
- Chocolate pudding mix: Instant pudding powder works best for quick prep. I prefer Jell-O for its smooth texture.
- Milk (2 cups / 475 ml): Whole milk gives the pudding a richer taste, but 2% or even a plant-based milk can work.
- Oreos (about 20 cookies): Crushed to mimic dirt. You can use regular or double-stuff depending on how sweet you want it.
- Whipped topping (8 oz / 225 g): Cool Whip or homemade whipped cream adds lightness.
- Gummy worms (1 cup / 150 g): The star of the show, pick your favorite brand. I like the chewy, slightly tart ones for contrast.
- Chocolate sandwich cookies or Milano cookies: To use as tombstones, optional but adds a cute touch.
- Optional decorations: Mini candy pumpkins, edible eyes, or sprinkles to add variety and Halloween flair.
For substitutions, you can swap the pudding mix with a homemade chocolate pudding if preferred, or use gluten-free cookies for dietary needs. If you want to cut back on sugar, try light pudding mix and sugar-free gummies. In the summer months, fresh berries can be added on top for a fun twist—though that’s a little less spooky!
Equipment Needed
- Mixing bowls (large and medium size) – I usually use glass bowls for easy cleanup.
- Electric mixer or whisk – The electric mixer makes pudding fluffier, but a sturdy whisk works fine.
- Measuring cups and spoons – Essential for accurate ingredient amounts.
- Spatula – For folding whipped topping into the pudding.
- Plastic or glass cups (8-12 small servings) – Clear cups help show off the layers nicely.
- Food processor or resealable bag and rolling pin – For crushing the Oreos into “dirt.”
- Optional: piping bag with a round tip – For a neater whipped topping layer, but spooning works just as well.
If you don’t have a food processor, no worries! Placing the cookies in a sealed plastic bag and gently crushing with a rolling pin or even a heavy pan works just as well. For budget-friendly options, buying pudding mix in bulk or using store-brand whipped topping can save a few bucks without sacrificing taste. I’ve found that investing in a good electric mixer really speeds things up when whipping cream or pudding.
Preparation Method
- Prepare the chocolate pudding: In a large bowl, whisk together the instant pudding mix and 2 cups (475 ml) of cold milk according to the package instructions. Let it set for 5 minutes until it thickens. This usually takes about 5 minutes.
- Crush the Oreos: While the pudding sets, place the Oreos in a food processor and pulse until crumbs form. If you don’t have a processor, put cookies in a freezer bag and crush with a rolling pin until you get a sandy dirt-like texture.
- Fold in whipped topping: Gently fold 8 oz (225 g) of whipped topping into the pudding. Use a spatula to keep it light and airy, blending until smooth but don’t overmix or it’ll deflate.
- Layer the cups: Start by spooning a layer of crushed Oreos into the bottom of each cup (about 2 tablespoons). Then add a layer of pudding mixture (about 3 tablespoons). Repeat once more, finishing with a dirt layer on top.
- Add gummy worms and tombstones: Place 1 or 2 gummy worms on top, letting them peek out like they’re crawling through the dirt. Insert a cookie or Milano cookie as a tombstone, standing upright or lying flat.
- Chill before serving: Refrigerate the cups for at least 30 minutes to let flavors meld and the pudding set firmly. This also makes the dirt top firm up nicely.
- Optional finishing touches: Add mini candy pumpkins, edible eyes, or sprinkles for extra Halloween vibes just before serving.
Watch out for overmixing the pudding and whipped topping; it’s tempting to stir vigorously but keeping it light keeps the texture perfect. The crushed Oreos should resemble fine dirt—not too chunky—and the gummy worms should look like they’re sneaking out of the graveyard. If your pudding seems too runny, a quick 10-minute chill in the fridge before layering helps it firm up.
Cooking Tips & Techniques
Creating the perfect Fun Graveyard Dirt Cake Cups is mostly about layering and texture balance. Here are some tips I’ve picked up along the way:
- Crushing Oreos: Aim for a fine crumb that’s not powdery. Bigger chunks look less like dirt and can create uneven texture.
- Whipped topping: Using store-bought whipped topping saves time, but if you whip fresh cream, stop when soft peaks form for best fluffiness.
- Layering: Be gentle when layering pudding and dirt. Too much pressure can crush the bottom layers and mix everything together.
- Gummy worm placement: Insert them just before serving to keep them from drying out or sticking too hard.
- Multitasking: While pudding sets, crush the cookies and prep decorations to save time.
- Make ahead: These cups keep well in the fridge for 2 days, but add gummy worms fresh each day for the best texture.
I once forgot to chill the pudding before layering and ended up with a muddy mess instead of cute cups—lesson learned! Also, if you’re prepping for a crowd, scaling this recipe up is easy and still turns out great. For a smoother pudding layer, try whipping the pudding briefly before folding in the whipped topping.
Variations & Adaptations
Want to mix things up? These Fun Graveyard Dirt Cake Cups are quite forgiving and fun to customize.
- Dietary variation: Use gluten-free Oreos or substitute dairy-free pudding and whipped topping for allergy-friendly versions.
- Seasonal twist: Swap gummy worms for candy spiders or edible eyes for a scarier look, or add orange and black sprinkles for Halloween color.
- Flavor swap: Try vanilla or butterscotch pudding instead of chocolate for a different taste profile, or add a teaspoon of instant coffee powder to the chocolate pudding for a mocha twist.
- Cooking method: For a no-pudding version, use a chocolate mousse base or even a chocolate cheesecake filling for a richer treat.
- Personal variation: One year, I added a drizzle of caramel sauce between layers for a gooey surprise that got rave reviews.
Serving & Storage Suggestions
These dirt cake cups are best served chilled, straight from the fridge. The cold pudding and crunchy cookie crumbs create the perfect contrast.
Presentation-wise, clear plastic or glass cups work great to show off the layers. You can garnish with extra gummy worms or candy decorations right before serving to keep things fresh and fun.
To store, cover the cups tightly with plastic wrap or lids and refrigerate for up to 2 days. Avoid freezing as the texture of pudding and whipped topping can suffer. When reheating (if you must), let them come to room temperature naturally; microwaving is not recommended.
Flavors tend to meld over time, making the dirt taste richer, but gummy worms can dry out if left too long on top—so add those last!
If you want to pair this dessert with something lighter, try a simple fruit salad or a citrusy drink to balance the sweetness. These cups would also fit right in alongside other festive treats like mini lemon blueberry cheesecakes for a colorful party spread.
Nutritional Information & Benefits
Each Fun Graveyard Dirt Cake Cup contains roughly 250-300 calories, depending on portion size and specific ingredients. They offer a comforting dose of indulgent chocolate and sweetness, but also come with some nutritional perks.
- Calcium: Milk and pudding powder contribute to daily calcium intake.
- Antioxidants: Cocoa powder in the pudding contains antioxidants that have health benefits when consumed in moderation.
- Portion controlled: Individual cups help with managing serving size, which is great for mindful eating.
For those watching carbs or sugar, you can adjust by using sugar-free pudding mixes or low-sugar gummy worms. Gluten-free versions are easy to make by swapping cookies. While this recipe isn’t exactly health food, it fits well as an occasional treat in a balanced diet.
Conclusion
These Fun Graveyard Dirt Cake Cups with Gummy Worms for Halloween have become my go-to treat when I want something that’s playful, easy, and absolutely delicious. Whether you’re feeding a crowd or just craving a spooky snack, they hit the sweet spot between fun and fuss-free. I love how customizable they are—you can easily adjust flavors, decorations, and portion sizes to fit your mood.
Plus, making them feels like a tiny celebration, even on a hectic day. The best part? Watching faces light up when they spot the gummy worms poking out of the “dirt.” It’s a simple recipe that brings a little magic to the table, and I hope you find the same joy in it that I do.
Give these a try, and don’t hesitate to make them your own—add your favorite Halloween candy, swap in different puddings, or even pair with other treats from my recipe collection. I’d love to hear how you customize these cups, so please drop a comment below and share your spooky dessert stories!
Frequently Asked Questions
Can I make the dirt cake cups ahead of time?
Yes! You can prepare the cups up to 2 days in advance. Just add the gummy worms and any delicate decorations right before serving to keep them fresh.
What can I use instead of gummy worms?
Try candy spiders, chocolate chips, or even small marshmallows for a different look. Edible eyes or candy pumpkins also work great for Halloween.
Is it possible to make this recipe dairy-free?
Absolutely. Use dairy-free pudding mixes and substitute whipped topping with coconut whipped cream or another vegan alternative.
Can I use homemade pudding instead of instant mix?
Yes, homemade pudding works well, but it might take longer to set. Be sure it’s fully chilled before layering to keep the dirt cake cups firm.
What’s the best way to crush Oreos without a food processor?
Place the cookies in a sealed plastic bag and crush them with a rolling pin or the bottom of a heavy pan until you get fine crumbs resembling dirt.
Pin This Recipe!
Fun Graveyard Dirt Cake Cups Easy Halloween Dessert with Gummy Worms
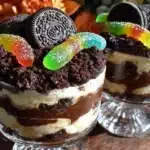
A quick and easy Halloween dessert featuring layers of chocolate pudding, crushed Oreos, and gummy worms served in individual cups for a fun graveyard theme.
- Prep Time: 10 minutes
- Cook Time: 5 minutes
- Total Time: 20 minutes
- Yield: 8-12 servings 1x
- Category: Dessert
- Cuisine: American
Ingredients
- 1 box chocolate pudding mix (instant)
- 2 cups (475 ml) milk (whole milk preferred, 2% or plant-based milk can be used)
- About 20 Oreos, crushed
- 8 oz (225 g) whipped topping (Cool Whip or homemade whipped cream)
- 1 cup (150 g) gummy worms
- Chocolate sandwich cookies or Milano cookies (optional, for tombstones)
- Optional decorations: mini candy pumpkins, edible eyes, sprinkles
Instructions
- Prepare the chocolate pudding: In a large bowl, whisk together the instant pudding mix and 2 cups (475 ml) of cold milk according to the package instructions. Let it set for 5 minutes until it thickens.
- Crush the Oreos: While the pudding sets, place the Oreos in a food processor and pulse until crumbs form. If you don’t have a processor, put cookies in a freezer bag and crush with a rolling pin until you get a sandy dirt-like texture.
- Fold in whipped topping: Gently fold 8 oz (225 g) of whipped topping into the pudding. Use a spatula to keep it light and airy, blending until smooth but don’t overmix or it’ll deflate.
- Layer the cups: Start by spooning a layer of crushed Oreos into the bottom of each cup (about 2 tablespoons). Then add a layer of pudding mixture (about 3 tablespoons). Repeat once more, finishing with a dirt layer on top.
- Add gummy worms and tombstones: Place 1 or 2 gummy worms on top, letting them peek out like they’re crawling through the dirt. Insert a cookie or Milano cookie as a tombstone, standing upright or lying flat.
- Chill before serving: Refrigerate the cups for at least 30 minutes to let flavors meld and the pudding set firmly.
- Optional finishing touches: Add mini candy pumpkins, edible eyes, or sprinkles for extra Halloween vibes just before serving.
Notes
Do not overmix pudding and whipped topping to keep texture light and airy. Crush Oreos to a fine crumb for best dirt effect. Add gummy worms just before serving to prevent drying. Can be made ahead and stored in fridge up to 2 days, add gummy worms fresh each time.
Nutrition
- Serving Size: 1 cup serving
- Calories: 275
- Sugar: 28
- Sodium: 150
- Fat: 12
- Saturated Fat: 6
- Carbohydrates: 38
- Fiber: 2
- Protein: 3
Keywords: Halloween dessert, dirt cake, pudding cups, gummy worms, Oreo dessert, easy Halloween recipe, kid-friendly dessert