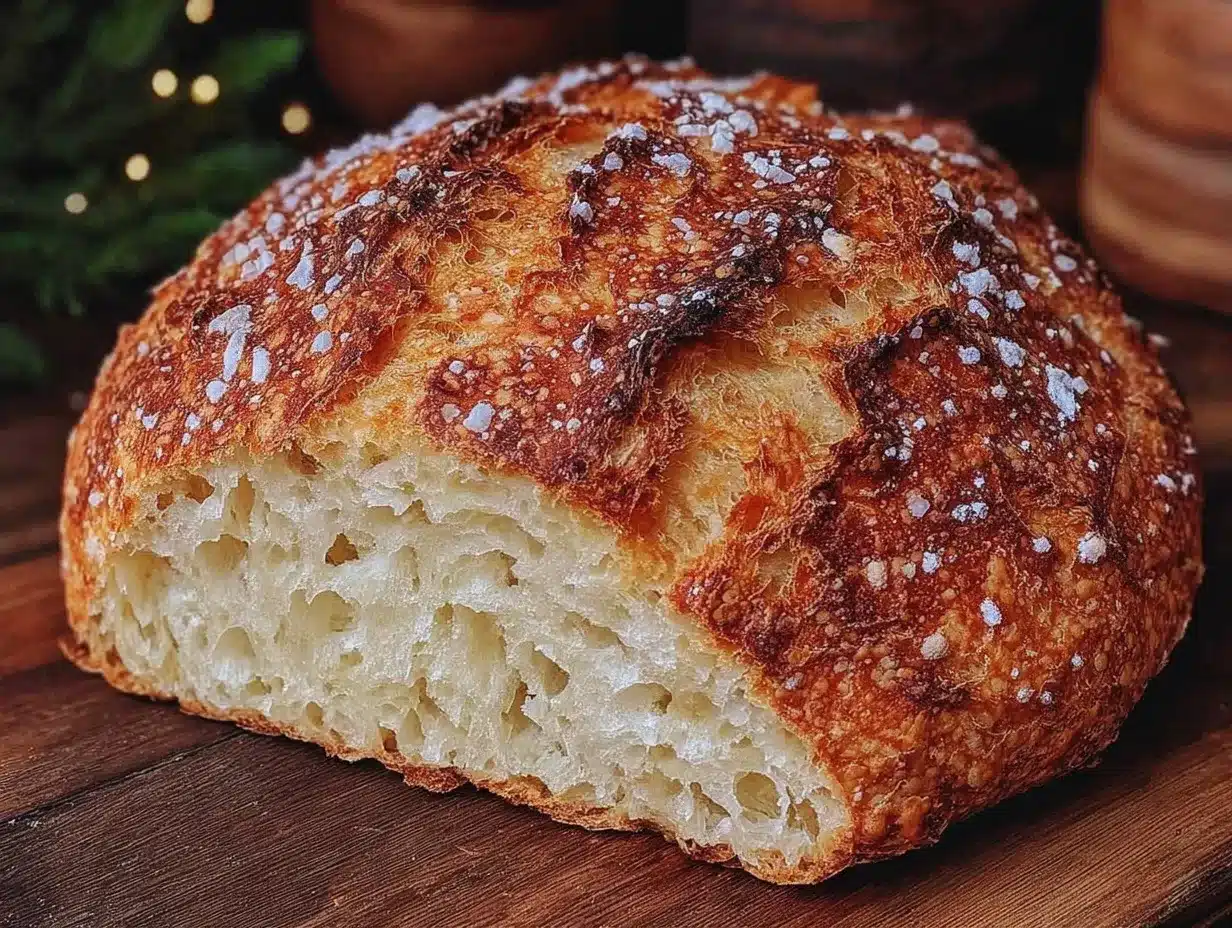
Let me tell you, the smell of freshly baked artisan bread wafting through my kitchen is enough to make anyone’s mouth water. The crackling crust, the tender crumb inside, and that warm, yeasty aroma—honestly, it’s like magic happening right before your eyes. The first time I baked this crispy no-knead artisan bread recipe, I was instantly hooked. It was one of those rare moments where you pause, take a deep breath, and just smile because you know you’re onto something truly special. Years ago, when I was knee-high to a grasshopper, our family didn’t have the luxury of fancy bread machines or artisan bakeries on every corner. So discovering a homemade loaf that required barely any effort felt like uncovering a treasure chest.
My family couldn’t stop sneaking slices off the cooling rack (and I can’t really blame them). This recipe is dangerously easy and delivers pure, nostalgic comfort—perfect for breakfast spreads, cozy dinners, or brightening up your Pinterest cookie board with something savory and satisfying. You know what? It’s also perfect for those rainy weekends when you want to feel productive but not overwhelmed. After testing this recipe multiple times in the name of research, of course, it’s become a staple for family gatherings and gifting. Honestly, it feels like a warm hug baked into a loaf, and you’re going to want to bookmark this one.
Why You’ll Love This Recipe
After countless trials and tasting sessions, this crispy no-knead artisan bread recipe has earned a special spot in my kitchen. Here’s why you’ll fall for it too:
- Quick & Easy: Comes together in under 15 minutes of active prep, perfect for busy weeknights or last-minute cravings.
- Simple Ingredients: No fancy grocery trips needed; you likely already have everything in your pantry.
- Perfect for Any Occasion: Whether it’s a brunch, a comforting dinner, or a gift for friends, this loaf fits right in.
- Crowd-Pleaser: Kids and adults alike rave about that crispy crust and soft interior combo.
- Unbelievably Delicious: The texture and flavor combo is next-level comfort food, with a rustic, bakery-quality feel.
This isn’t just another no-knead bread recipe. The secret lies in the slow fermentation and that cast-iron Dutch oven trick that gives the loaf its signature crispiness and open crumb. Plus, the balance of salt and yeast is spot on, ensuring every bite is packed with flavor without being overpowering. You’ll find yourself closing your eyes after the first bite—trust me on this. It’s comfort food reimagined—simple, satisfying, and soul-soothing. This recipe is your best bet for impressing guests without sweating over complicated techniques or leaving your kitchen a mess.
What Ingredients You Will Need
This crispy no-knead artisan bread recipe uses simple, wholesome ingredients to deliver bold flavor and that satisfying chewy texture without the fuss. Most of these are pantry staples, so you probably have them on hand already.
- All-purpose flour – 3 cups (360g), preferably unbleached for best texture
- Instant yeast – 1/4 teaspoon (use active dry if unavailable, but add a bit more time for rising)
- Salt – 1 1/2 teaspoons (I love fine sea salt for a clean flavor)
- Warm water – 1 1/2 cups (360ml), about 105°F (40°C) to activate the yeast gently
- Olive oil – 1 tablespoon (optional, adds slight richness and helps with browning)
That’s it, honestly! I recommend using King Arthur flour if you can find it—trust me, the texture comes out just right. If you’re feeling adventurous, swapping up to bread flour will give you a chewier bite. For a dairy-free version, this recipe is naturally accommodating since it doesn’t require milk or butter. In summer, feel free to toss in a handful of fresh herbs into the dough for a fragrant twist. If you’re gluten-sensitive, try substituting with a gluten-free flour blend, but be aware the texture will differ.
Equipment Needed
- Large mixing bowl: For combining the ingredients comfortably.
- Wooden spoon or spatula: For mixing the dough—it’s sticky, so a sturdy tool helps.
- Kitchen scale (optional): For measuring flour accurately; I swear by mine for consistent results.
- Cast-iron Dutch oven or heavy oven-safe pot with lid: This is key to getting that unbeatable crispy crust. If you don’t have one, a ceramic baking dish with a lid will work too, though results vary.
- Kitchen towel: To cover the dough during its long rise.
- Cooling rack: For resting the bread after baking, so the crust stays crisp.
If you don’t own a Dutch oven yet, don’t sweat it—any heavy pot that holds heat will help. I’ve tried this recipe with a Le Creuset and a Lodge cast iron, and both gave stellar crusts. Just be sure to preheat the pot thoroughly in the oven before adding the dough. Pro tip: season your cast iron regularly to prevent sticking and keep that crust perfect.
Preparation Method
- Mix the dry ingredients: In your large mixing bowl, whisk together 3 cups (360g) of all-purpose flour, 1/4 teaspoon instant yeast, and 1 1/2 teaspoons salt. This step takes about 2 minutes.
- Add warm water and olive oil: Pour in 1 1/2 cups (360ml) of warm water (around 105°F / 40°C) and 1 tablespoon olive oil (if using). Stir with a wooden spoon or spatula until all the flour is hydrated and the dough forms a shaggy, sticky mass. It should be loose and wet, not stiff. This mixing takes about 3-5 minutes.
- Cover and rest: Lay a clean kitchen towel over the bowl and let the dough rest at room temperature for 12 to 18 hours. You want it to bubble and rise slowly — this long fermentation is what builds flavor and texture. Don’t rush this step; it’s worth the wait.
- Prepare your baking vessel: About 30 minutes before baking, place your Dutch oven with the lid inside the oven and preheat to 450°F (230°C). This ensures the pot is scorching hot and ready to create steam for a crackly crust.
- Shape the dough: Once the dough has doubled in size and is bubbly, lightly flour a work surface and gently scrape the dough out of the bowl. Fold it over onto itself a couple of times, forming a loose ball—no kneading needed, just gentle handling to keep those air pockets intact.
- Transfer to parchment paper: Place the dough seam-side down on a parchment paper square. Let it rest uncovered for 30 minutes to relax and rise a little more.
- Bake: Carefully lift the dough with the parchment paper and place it into your preheated Dutch oven. Cover with the lid and bake for 30 minutes.
- Remove lid and finish baking: After 30 minutes, take off the lid and bake for an additional 15-20 minutes. This step crisps the crust to perfection and deepens the color.
- Cool: Remove the bread from the oven and transfer it to a cooling rack. Let it cool completely before slicing (at least 1 hour) to allow the crumb to set properly.
If you notice your dough is too sticky to handle, dust your hands with flour but avoid over-flouring the dough itself. The dough should feel soft and tacky, not dry. Also, preheating your pot is crucial—don’t skip it! It creates that lovely oven spring and crust everyone raves about. You’ll know it’s ready when the crust is a deep golden brown and the bread sounds hollow when tapped.
Cooking Tips & Techniques
Let’s face it: no-knead bread can seem like magic, but there are some tricks to get it right every time. First, patience is your best friend here. The long fermentation allows gluten to develop naturally—no elbow grease required. Avoid the temptation to rush it; the flavor and texture depend on this slow rise.
Also, don’t skip preheating the Dutch oven. I’ve made the mistake of popping the dough into a cold pot before, and the crust came out pale and soft instead of crispy. A screaming hot vessel traps steam, mimicking a professional bread oven.
When shaping, handle the dough gently. It’s sticky and fragile, so folding instead of kneading keeps those air bubbles intact, resulting in a light, open crumb. Also, use parchment paper for easy transfer—trust me, it saves a big mess.
Another tip: after baking, cool the bread completely on a wire rack. Cutting too soon makes the crumb gummy. I learned that the hard way after slicing a hot loaf and ending up with a doughy mess.
Multitasking during the rising period is a lifesaver. While the dough rests, prep your kitchen, clean up, or even relax with a cup of tea. This recipe is as much about timing as it is about technique—embrace the downtime.
Variations & Adaptations
This crispy no-knead artisan bread recipe is a great base to customize:
- Herb & Garlic: Add 2 tablespoons of finely chopped fresh rosemary or thyme and 2 minced garlic cloves to the dry ingredients for an aromatic twist.
- Whole Wheat: Substitute 1 cup of all-purpose flour with whole-wheat flour for a nuttier, heartier loaf. The dough will be denser but still delicious.
- Gluten-Free: Use a gluten-free flour blend designed for bread baking. Add 1 teaspoon xanthan gum if your blend doesn’t include it. Rise times may vary.
- Seeded: Mix in 1/4 cup mixed seeds (sunflower, flax, sesame) into the dough or sprinkle on top before baking for extra crunch.
For a slightly different method, you can bake the dough on a pizza stone instead of a Dutch oven. Preheat the stone with the oven, then slide the dough on with parchment paper. Cover loosely with a large metal bowl to trap steam for the first 20 minutes. I tried this once when my Dutch oven was in use, and while the crust was good, it wasn’t quite as crisp as with the pot method.
Serving & Storage Suggestions
This crispy no-knead artisan bread shines best served fresh and warm, with a slather of butter or dipped in olive oil. It pairs beautifully with soups, stews, and salads—or simply alongside a cheese board for an impressive, fuss-free treat.
Store leftover bread wrapped loosely in a clean kitchen towel or paper bag at room temperature. Avoid plastic bags, which trap moisture and soften the crust. It stays fresh for about 2 days this way.
For longer storage, slice and freeze the bread in an airtight bag. When ready to enjoy, toast slices directly from the freezer or warm the whole loaf wrapped in foil at 350°F (175°C) for 10-15 minutes. Reheating revives the crust wonderfully.
Over time, the flavors deepen, making leftover slices perfect for toasted sandwiches or croutons. Just remember, fresh is best, but this bread holds up nicely to storing and reviving.
Nutritional Information & Benefits
This crispy no-knead artisan bread recipe is made with simple ingredients, free from preservatives and additives. One slice (about 60g) contains approximately 160 calories, 32g carbohydrates, 5g protein, and 1g fat.
Using unbleached all-purpose flour means you get more of the natural vitamins and minerals from wheat. Plus, the slow fermentation process breaks down some of the gluten and makes the bread easier to digest—something I appreciate personally.
This recipe is naturally dairy-free and can be adapted for gluten-free diets with proper flour substitutions. It provides a wholesome energy source and pairs well with nutrient-dense toppings for balanced meals.
Conclusion
This crispy no-knead artisan bread recipe is a game-changer for anyone who loves homemade bread without the fuss. It’s simple enough for beginners but yields a loaf that feels straight from a bakery. You can customize it to your taste, impress guests, or just enjoy a quiet moment with a warm slice slathered in butter.
Personally, I adore this recipe because it brings out the best of bread-making’s rustic charm with minimal effort. It’s the kind of loaf that makes your kitchen smell amazing and your family smile wide. Give it a try, tweak it to your liking, and don’t forget to share your versions—I’d love to hear how you make it yours!
Now, go ahead and bake that perfect loaf. You’ve got this!
Frequently Asked Questions
1. Can I use active dry yeast instead of instant yeast?
Yes! Just dissolve the active dry yeast in the warm water first and let it sit for 5-10 minutes until bubbly before mixing with the flour. You might need to extend the rising time slightly.
2. Why is the dough so wet and sticky?
This dough is intentionally wet to create an open crumb and crispy crust. Resist the urge to add too much extra flour; a sticky dough will yield better texture.
3. What if I don’t have a Dutch oven?
You can bake the bread on a preheated baking stone or heavy baking sheet, covering it with a large metal bowl or roasting pan for the first half of baking to trap steam.
4. How long can I store the bread?
Store at room temperature for up to 2 days wrapped in a towel. For longer storage, slice and freeze; toast or warm before serving.
5. Can I add flavors like herbs or seeds?
Absolutely! Add chopped herbs, garlic, or seeds to the dough before rising or sprinkle on top before baking for extra taste and texture.
Pin This Recipe!
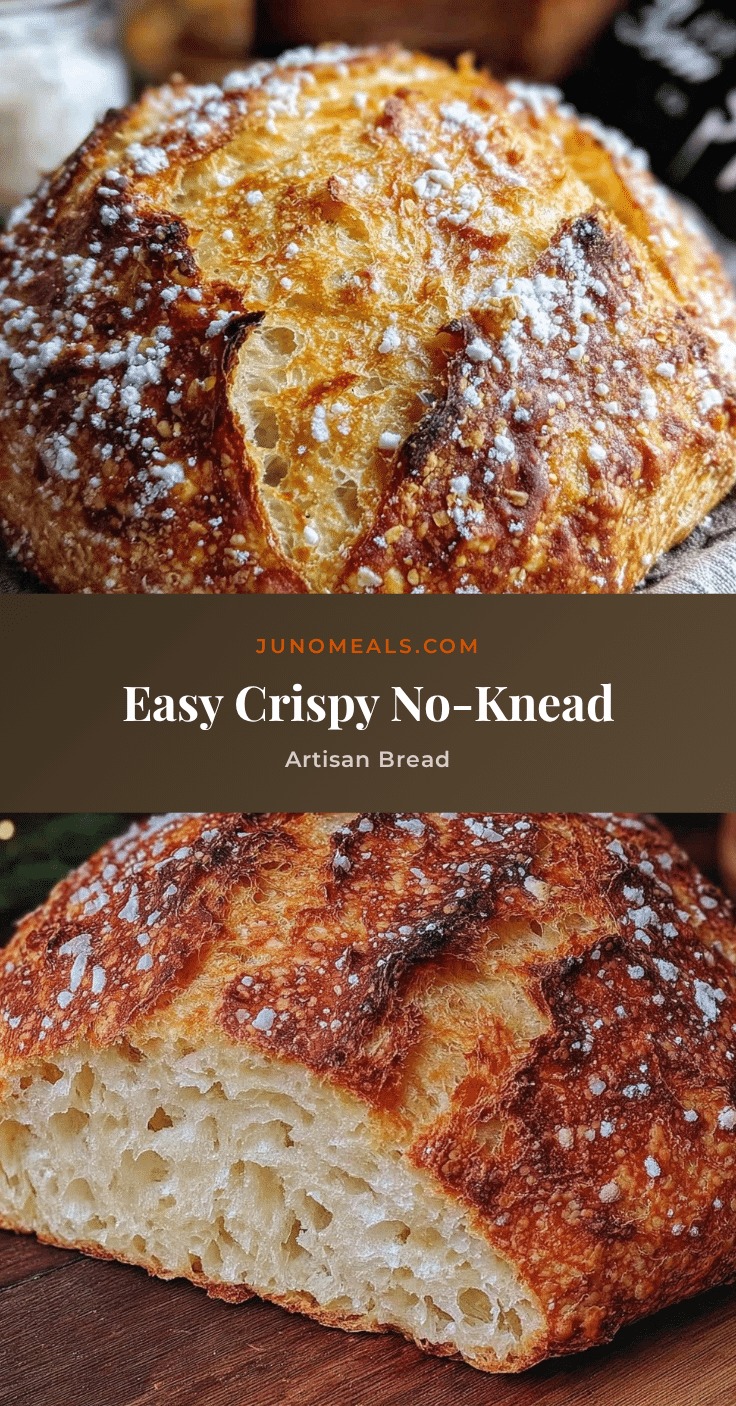
Crispy No-Knead Artisan Bread
A simple and easy no-knead artisan bread recipe that yields a perfect crispy crust and tender crumb with minimal effort, ideal for any occasion.
- Prep Time: 15 minutes
- Cook Time: 45 minutes
- Total Time: 13 hours
- Yield: 1 loaf (about 8 servings) 1x
- Category: Main Course
- Cuisine: American
Ingredients
- 3 cups (360g) all-purpose flour, preferably unbleached
- 1/4 teaspoon instant yeast (or active dry yeast with longer rising time)
- 1 1/2 teaspoons salt
- 1 1/2 cups (360ml) warm water (about 105°F / 40°C)
- 1 tablespoon olive oil (optional)
Instructions
- In a large mixing bowl, whisk together the flour, instant yeast, and salt.
- Add warm water and olive oil (if using) to the dry ingredients and stir with a wooden spoon or spatula until a shaggy, sticky dough forms.
- Cover the bowl with a kitchen towel and let the dough rest at room temperature for 12 to 18 hours until bubbly and doubled in size.
- About 30 minutes before baking, preheat a cast-iron Dutch oven with its lid inside the oven to 450°F (230°C).
- Lightly flour a work surface and gently scrape the dough out of the bowl. Fold it over onto itself a couple of times to form a loose ball.
- Place the dough seam-side down on a parchment paper square and let it rest uncovered for 30 minutes.
- Carefully lift the dough with the parchment paper and place it into the preheated Dutch oven. Cover with the lid and bake for 30 minutes.
- Remove the lid and bake for an additional 15-20 minutes until the crust is deep golden brown and crispy.
- Remove the bread from the oven and transfer it to a cooling rack. Let it cool completely for at least 1 hour before slicing.
Notes
Use unbleached all-purpose flour for best texture. Preheat the Dutch oven thoroughly to ensure a crispy crust. Handle the dough gently to preserve air pockets. Cool bread completely before slicing to avoid gummy crumb. For gluten-free, substitute with a gluten-free flour blend and add xanthan gum if needed. Optional additions include fresh herbs, garlic, or seeds for flavor variations.
Nutrition
- Serving Size: 1 slice (about 60g)
- Calories: 160
- Fat: 1
- Carbohydrates: 32
- Protein: 5
Keywords: no-knead bread, artisan bread, homemade bread, easy bread recipe, crispy crust bread, Dutch oven bread