Introduction
I remember the moment these Refreshing One in a Melon Watermelon Cake Pops first became a hit in my kitchen. It was one of those scorchingly hot afternoons when the air conditioning was struggling, and all I wanted was something cold, sweet, and a little playful. Honestly, I was skeptical at first—cake pops with watermelon? It sounded like a gimmick, maybe even a mess waiting to happen. But I was craving a treat that felt like summer bottled up on a stick, something that would make the kids pause their endless pool games and smile.
So I grabbed a ripe watermelon from the market, feeling its weight and imagining how juicy and fresh it would be inside. After a bit of tinkering (a few sticky fingers later), I realized this wasn’t just a quirky idea—it was a crowd-pleaser. The juicy burst of watermelon paired with the sweet cake crumb created a texture and flavor that was surprisingly harmonious. And you know what? Even my “not really a baker” self found the process easy enough to enjoy—no complicated equipment, no fuss.
Now, these watermelon cake pops have become my go-to summer refreshment, perfect for those days when you want a sweet chill without the usual heavy dessert. They’re bright, fun, and honestly, just a little bit magical. The best part? They’re as fun to make as they are to eat, and they bring a little unexpected joy to any warm day. That’s why this recipe stuck around—it’s pure summer on a stick, and it feels like a simple celebration every time.
Why You’ll Love This Recipe
- Quick & Easy: Comes together in about 30 minutes, perfect for last-minute summer gatherings or an afternoon treat.
- Simple Ingredients: Uses everyday pantry staples plus fresh watermelon—you probably have most of these on hand already.
- Perfect for Summer: Ideal for pool parties, picnics, or just cooling off on a hot day.
- Crowd-Pleaser: Kids and adults alike rave about the juicy surprise in every bite.
- Unbelievably Delicious: The combo of moist cake crumbs and refreshing watermelon makes this unlike any other cake pop you’ve tried.
This isn’t your average cake pop recipe. The secret is in gently folding the fresh watermelon juice into the cake crumbs, creating a moist, slightly tangy pop that melts in your mouth. The watermelon’s natural sweetness balances the rich cake, and the hint of citrus zest I add gives it a subtle zing. It’s a bit like a mini summer party on a stick, minus the fuss and sticky mess.
Honestly, I’ve tried other fruity cake pops before, but this one stands out because it captures summer’s essence so perfectly. Plus, you get to skip the oven if you use store-bought cake or opt for a no-bake base, making it even easier on busy days. If you love bright, refreshing desserts like the mini lemon blueberry cheesecakes, you’re going to appreciate this playful twist on cake pops that truly feel like a treat for the whole family.
What Ingredients You Will Need
This recipe uses simple, wholesome ingredients to deliver bold flavors and a satisfying texture without any fuss. Most are pantry staples, and the fresh watermelon is the star that makes these cake pops shine.
- Fresh Watermelon: About 3 cups, diced and pureed (choose a seedless, ripe watermelon for sweetness and ease)
- Boxed White or Yellow Cake Mix: 1 box (about 15.25 oz/432 g) for convenience and consistent results (I prefer Betty Crocker for texture)
- Eggs: 2 large, room temperature (helps bind the cake)
- Vegetable Oil: 1/2 cup (120 ml) for moisture
- Watermelon Juice: 1/4 cup (60 ml) freshly squeezed from your watermelon puree (adds fresh melon flavor and moisture)
- Powdered Sugar: 1/2 cup (60 g) to sweeten the watermelon glaze
- White Chocolate or Candy Melts: 12 oz (340 g) for coating the pops (use pink or red candy melts for a fun look)
- Sprinkles or Crushed Pistachios: Optional, for decoration
- Wooden Popsicle Sticks: 12-15, to hold your cake pops
Pro tip: If you want a gluten-free version, swap the cake mix for an almond flour-based mix or your favorite gluten-free blend. Also, if dairy is a concern, candy melts offer many dairy-free options that still taste great. For a seasonal twist, try adding fresh mint or basil finely chopped right into the cake batter, which adds a subtle herbaceous note that pairs beautifully with watermelon.
Equipment Needed
- Food Processor or Blender: To puree the watermelon smoothly
- Mixing Bowls: At least two, for batter and glaze preparation
- Electric Mixer or Whisk: For mixing cake batter evenly (a hand mixer works fine)
- Baking Pan: 9×13 inches (23×33 cm) for baking the cake
- Baking Sheet: For cooling cake before crumbling
- Wooden Popsicle Sticks: To assemble the cake pops
- Microwave-Safe Bowl: For melting white chocolate or candy melts
- Styrofoam Block or Cake Pop Stand: To hold pops upright while drying
If you don’t have a food processor, a blender or even a fine mesh strainer to juice your watermelon will work just fine. I find a stand mixer makes mixing easier but a sturdy whisk and a bit of elbow grease do the trick too. For melting chocolate, the microwave method is easiest, but a double boiler works well if you want more control. For drying, a simple glass with holes poked in foil can substitute for a cake pop stand.
Preparation Method
- Preheat the Oven and Prepare Pan: Set your oven to 350°F (175°C). Lightly grease a 9×13 inch (23×33 cm) baking pan and line it with parchment paper for easy removal. This should take about 10 minutes.
- Puree the Watermelon: Cut your watermelon into chunks and puree in a food processor or blender until smooth. Strain through a fine sieve to remove pulp if you want a smoother texture—this takes about 5 minutes.
- Mix the Cake Batter: In a large bowl, combine the cake mix, eggs, vegetable oil, and 1/4 cup (60 ml) of the watermelon juice. Mix on medium speed for 2-3 minutes until smooth and well-combined. The batter will have a slightly pink tint from the watermelon.
- Bake the Cake: Pour the batter into your prepared pan and bake for 28-32 minutes. Insert a toothpick in the center; it should come out clean. Ovens vary, so check around 28 minutes to avoid overbaking.
- Cool and Crumble: Let the cake cool completely on a wire rack. Once cooled, crumble the cake into fine crumbs in a large mixing bowl. This step is key for smooth cake pops.
- Prepare the Watermelon Glaze: Mix the powdered sugar with a couple tablespoons of the remaining watermelon juice to form a thick glaze. Adjust the consistency—you want it thick enough to bind the crumbs but still spreadable.
- Combine Cake and Glaze: Add the glaze gradually to the cake crumbs, mixing gently with a spoon or your hands. When the mixture holds together without crumbling, it’s ready to shape.
- Form Cake Pops: Roll the mixture into 1 1/2-inch (4 cm) balls, place them on a parchment-lined tray, and chill in the fridge for at least 30 minutes. This makes dipping easier and less messy.
- Melt the Candy Coating: In a microwave-safe bowl, melt the white chocolate or candy melts in 30-second bursts, stirring between each until smooth.
- Assemble the Cake Pops: Dip the tip of each wooden stick into the melted coating, then insert halfway into each cake ball. This helps the pop stay secured.
- Dip and Decorate: Dip each cake pop into the coating, letting the excess drip off. Decorate immediately with sprinkles or crushed pistachios before the coating sets.
- Set and Serve: Place pops upright in a styrofoam block or stand and let the coating harden completely, about 15 minutes at room temperature.
Quick tip: If your coating thickens too much while dipping, warm it again in short bursts. And if the cake pops feel too crumbly, add a little more glaze before shaping—this is a common fix I’ve learned through trial and error.
Cooking Tips & Techniques
One of the trickiest parts of making watermelon cake pops is balancing moisture. Too much watermelon juice and the cake mixture gets soggy; too little and the pops fall apart. I like to start with less glaze and slowly add until the texture feels just right. Trust your hands to tell you when the mixture is ready to roll.
When melting candy coating, patience is key. Overheating can cause it to seize or become grainy. I always melt mine in short bursts, stirring well between, and keep it covered with a damp cloth to avoid drying out.
Another tip: chill the cake balls thoroughly before dipping. This prevents them from falling apart or melting the coating. If you’re short on time, a quick 15-minute blast in the freezer helps but avoid leaving them too long or they get icy.
Lastly, if you want your cake pops to have that perfect round shape, use gentle rolling motions with your palms, not too tight or too loose. It’s a balance I’ve learned only after many sticky attempts, but once you get the rhythm, it’s pretty satisfying.
Variations & Adaptations
- Dietary Swaps: For a gluten-free version, use gluten-free cake mix or a homemade almond flour cake. Swap candy melts for dairy-free or vegan coatings if needed.
- Flavor Twists: Add finely chopped fresh mint or basil into the cake batter or glaze for an herbal lift. A splash of lime juice in the glaze can brighten the flavor even more.
- Seasonal Adaptations: In late summer, try swapping watermelon for cantaloupe or honeydew for a mellow variation. You might also mix in fresh berries for added texture and color.
- Cooking Method: If you prefer not to bake, use crumbled store-bought pound cake as a base, mixing with the watermelon glaze for a no-bake alternative.
Personally, I once tried adding a dash of chili powder to the glaze for a subtle spicy kick—unexpected but surprisingly good! Feel free to experiment and adjust according to your taste buds.
Serving & Storage Suggestions
These cake pops are best served chilled or at room temperature, especially on warm summer days. Present them upright in a colorful vase or stand for a festive touch that makes them hard to resist.
Pair with light beverages like iced tea, lemonade, or even a sparkling rosé for adults. They’re also a fun complement to fresh fruit platters or alongside other summer treats like light sorbets and gelatos.
Store leftover pops in an airtight container in the refrigerator for up to 3 days. For longer storage, freeze them individually wrapped in plastic wrap and placed in a sealed container for up to 2 weeks. When ready to eat, thaw in the fridge for a couple of hours to avoid condensation ruining the coating.
Flavors tend to mellow and meld over time, so sometimes the next day’s pops taste even better—like a little gift from your past self.
Nutritional Information & Benefits
Each watermelon cake pop is approximately 150-170 calories, depending on size and coating used. The fresh watermelon adds hydration and natural sweetness with minimal calories, plus a boost of vitamin C and antioxidants.
The cake base provides energy from carbohydrates, and using a white or yellow cake mix keeps it light. White chocolate coating adds some fat and sweetness but can be moderated by portion size.
This treat fits well into a balanced diet as an occasional indulgence, especially when paired with fresh fruit or a light meal. For those watching gluten or dairy, easy swaps make it accessible without losing the fun.
From a wellness perspective, I appreciate how this recipe brings a bit of fresh fruit into a dessert format, making it feel less heavy and more in tune with summer’s vibrant, light vibes.
Conclusion
These Refreshing One in a Melon Watermelon Cake Pops are a delightful way to enjoy summer’s sweetness without the usual heaviness of traditional desserts. They’re playful, fresh, and surprisingly simple to make, even if you don’t consider yourself a baker. What I love most is how they invite you to slow down for a moment—stick in hand, enjoying a little burst of juicy, cakey joy.
Feel free to tweak the flavors, decorations, or even the base cake to suit your mood or occasion. This recipe’s flexibility and ease make it a summer staple in my kitchen. If you try it out, I’d love to hear how you made it your own—drop a comment or share your creative twists!
Here’s to sweet, sunny days and simple treats that bring a smile every time.
FAQs
- Can I make these cake pops without baking from scratch?
Yes! You can use crumbled store-bought pound cake or cake crumbs mixed with the watermelon glaze for a quick no-bake version. - How do I prevent the cake pops from falling apart?
Make sure to chill the cake balls thoroughly before dipping and use enough glaze to bind the crumbs without making them too wet. - Can I prepare these cake pops ahead of time?
Absolutely. They can be made a day in advance and stored in the fridge. For longer storage, freeze them wrapped individually. - What’s the best way to melt candy coating?
Use a microwave in short 30-second bursts, stirring in between to avoid overheating. Alternatively, a double boiler works well for controlled melting. - Are these cake pops kid-friendly?
Definitely. They’re fun to make and eat, and the fresh watermelon flavor usually wins over kids easily.
Pin This Recipe!
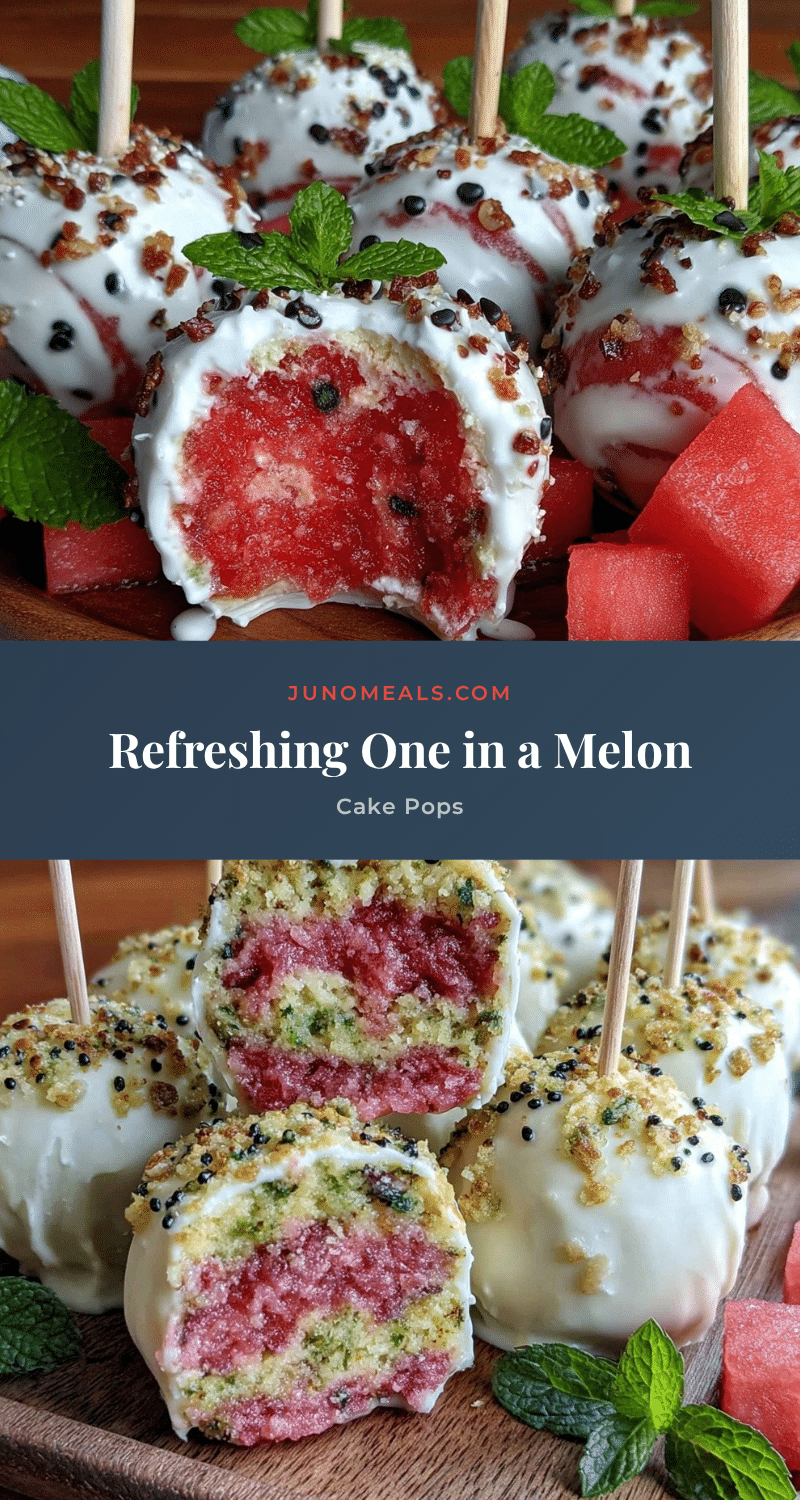
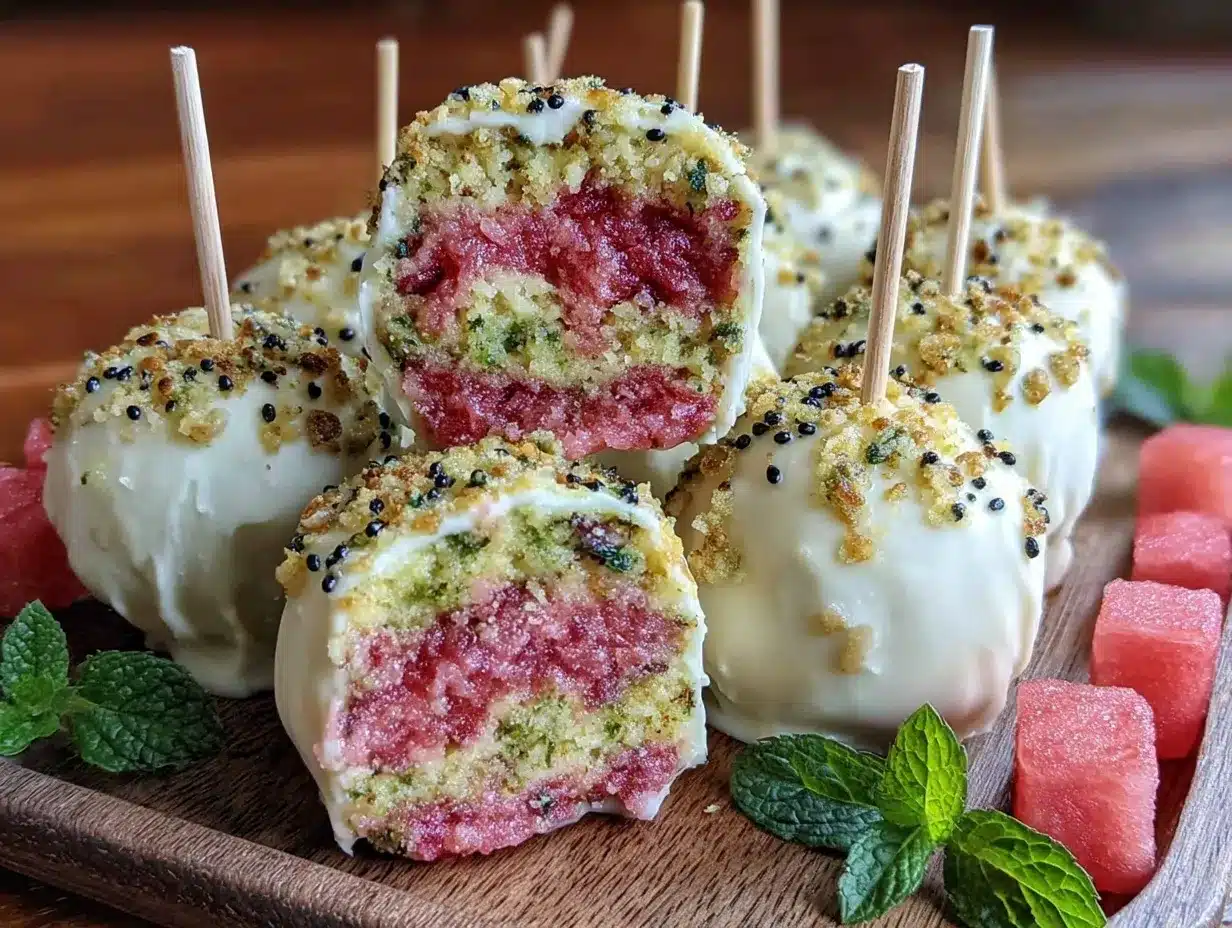
Refreshing One in a Melon Watermelon Cake Pops
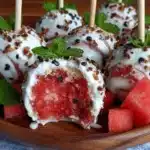
These watermelon cake pops are a playful, refreshing summer treat combining juicy watermelon with moist cake crumbs, coated in white chocolate or candy melts for a fun and easy dessert.
- Prep Time: 15 minutes
- Cook Time: 30 minutes
- Total Time: 45 minutes
- Yield: 12-15 servings 1x
- Category: Dessert
- Cuisine: American
Ingredients
- 3 cups fresh watermelon, diced and pureed
- 1 box (15.25 oz / 432 g) white or yellow cake mix
- 2 large eggs, room temperature
- 1/2 cup (120 ml) vegetable oil
- 1/4 cup (60 ml) watermelon juice, freshly squeezed from puree
- 1/2 cup (60 g) powdered sugar
- 12 oz (340 g) white chocolate or candy melts (pink or red for decoration)
- Sprinkles or crushed pistachios (optional)
- 12–15 wooden popsicle sticks
Instructions
- Preheat the oven to 350°F (175°C). Lightly grease a 9×13 inch baking pan and line with parchment paper.
- Cut watermelon into chunks and puree in a food processor or blender until smooth. Strain through a fine sieve if desired for smoother texture.
- In a large bowl, combine cake mix, eggs, vegetable oil, and 1/4 cup watermelon juice. Mix on medium speed for 2-3 minutes until smooth and slightly pink.
- Pour batter into prepared pan and bake for 28-32 minutes. Check doneness with a toothpick; it should come out clean.
- Cool cake completely on a wire rack. Crumble cooled cake into fine crumbs in a large bowl.
- Mix powdered sugar with a couple tablespoons of remaining watermelon juice to form a thick glaze.
- Gradually add glaze to cake crumbs, mixing gently until mixture holds together without crumbling.
- Roll mixture into 1 1/2-inch balls, place on parchment-lined tray, and chill in fridge for at least 30 minutes.
- Melt white chocolate or candy melts in microwave-safe bowl in 30-second bursts, stirring until smooth.
- Dip tip of each wooden stick into melted coating, then insert halfway into each cake ball.
- Dip each cake pop into coating, letting excess drip off. Decorate immediately with sprinkles or crushed pistachios.
- Place pops upright in styrofoam block or stand and let coating harden completely, about 15 minutes at room temperature.
Notes
If coating thickens while dipping, warm it again in short bursts. Chill cake balls thoroughly before dipping to prevent falling apart. Adjust glaze amount to get the right moisture balance. For gluten-free, use gluten-free cake mix; for dairy-free, use dairy-free candy melts. Variations include adding fresh mint or basil, or swapping watermelon with cantaloupe or honeydew.
Nutrition
- Serving Size: 1 cake pop
- Calories: 150170
- Sugar: 15
- Sodium: 150
- Fat: 7
- Saturated Fat: 4
- Carbohydrates: 22
- Fiber: 0.5
- Protein: 2
Keywords: watermelon cake pops, summer treats, easy cake pops, refreshing dessert, no bake cake pops, white chocolate coating, kid-friendly dessert