The first time I tried my hand at making the Perfect Baby in Bloom Flower Decorated Sugar Cookies, it was actually a last-minute save. I had promised to bring something sweet to a baby shower, but time was slipping away faster than I expected. Honestly, I wasn’t sure if I could pull off those delicate floral designs that looked so dreamy on Pinterest. My kitchen was a mess, and I had just enough dough to work with—nothing fancy, just basic pantry staples.
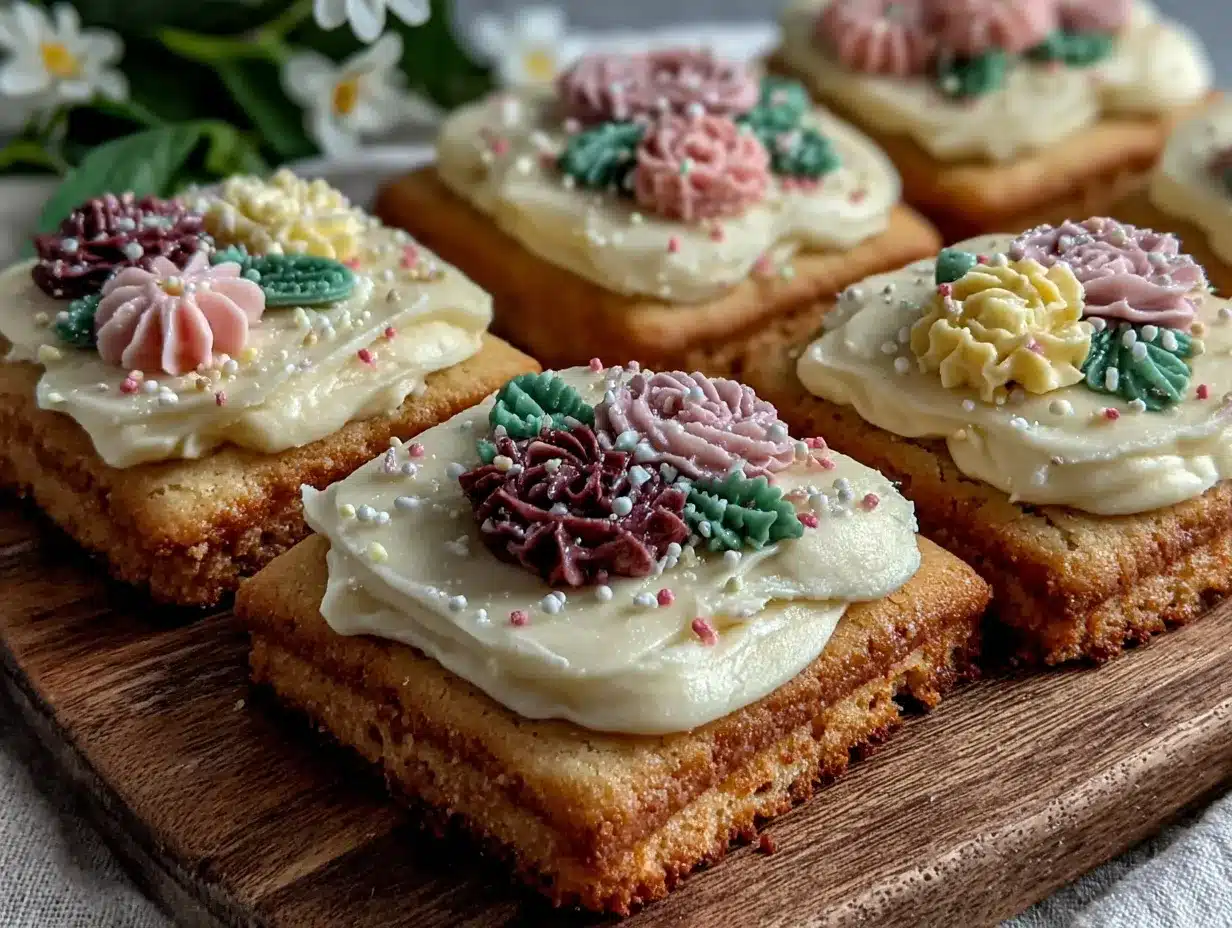
As I rolled out the dough and carefully cut each cookie, I found myself calming down. The soft pastel icing and tiny edible flowers seemed to transform the whole experience into something almost meditative. By the time the cookies cooled and I decorated them with royal icing, I realized these weren’t just any sugar cookies. They had a quiet elegance, like the perfect little bloom that fits right into a celebration of new life.
Each cookie felt like a tiny gift, and I noticed that the simple ingredients and straightforward method made the whole process less intimidating than I thought. The baby shower guests actually asked for the recipe, which was a surprise to me—and that’s when I knew this recipe had earned its place in my baking rotation. If you’re looking for a sweet treat that’s as charming as it is delicious, these flower-decorated sugar cookies might just be your new favorite. After all, nothing says “welcome baby” quite like a cookie that looks almost too pretty to eat.
Why You’ll Love This Recipe
These Perfect Baby in Bloom Flower Decorated Sugar Cookies have a few special things going on that make them stand out from your everyday sugar cookie recipe. From my experience baking and sharing them over several gatherings, here’s why this recipe has stayed a favorite:
- Quick & Easy: The dough comes together in about 15 minutes, and the icing sets nicely within a couple of hours, making it doable even if you start later in the day.
- Simple Ingredients: No need for fancy or hard-to-find items. You probably have most of the ingredients, like unsalted butter and powdered sugar, right in your pantry.
- Perfect for Baby Showers & Celebrations: The delicate flower decorations feel tailored for welcoming new life or marking a special moment with elegance.
- Crowd-Pleaser: Kids and adults alike love these – the texture is tender but sturdy enough for decorating, and the flavor is sweet without being overwhelming.
- Unbelievably Delicious: The subtle vanilla and buttery notes pair beautifully with the light sweetness of the icing, making each cookie feel like a little indulgence.
What sets this recipe apart is the floral design approach that feels both approachable and charming. Instead of complex piping, I share a simple way to create those soft blooms using basic icing techniques and edible flower accents. It’s not just another sugar cookie with frosting slapped on—it’s a thoughtfully decorated treat that invites compliments and second helpings. Honestly, it’s the kind of recipe that makes you want to bake a batch just to keep on hand for whenever a last-minute party invitation pops up.
What Ingredients You Will Need
This recipe uses simple, wholesome ingredients to deliver bold flavor and a tender texture without the fuss. The ingredients are mostly pantry staples, with a few special touches for decorating that you can easily swap or skip depending on your preferences.
- For the Cookie Dough:
- 2 ¾ cups (345g) all-purpose flour, sifted (I recommend King Arthur for consistent results)
- 1 teaspoon baking powder
- ½ teaspoon salt
- 1 cup (226g) unsalted butter, softened (room temperature for easy creaming)
- 1 ½ cups (300g) granulated sugar
- 1 large egg, room temperature
- 1 teaspoon pure vanilla extract (freshly bottled makes a difference)
- For the Royal Icing:
- 3 cups (360g) powdered sugar, sifted
- 2 large egg whites or 4 tablespoons meringue powder + 6 tablespoons water (for a safer, no-raw-egg option)
- 1 teaspoon lemon juice (helps with drying and adds a subtle brightness)
- Food coloring gels in pastel shades (pink, lavender, mint green, soft yellow)
- Decorations:
- Edible sugar flowers or small fondant blossoms (optional but adds that perfect “in bloom” look)
- Fine sanding sugar for a little sparkle (optional)
For substitutions, you can swap all-purpose flour with a gluten-free blend if needed, but the texture will vary slightly. The royal icing can be made vegan by using aquafaba instead of egg whites, though drying times might be longer. If fresh edible flowers are in season where you are, they can be a beautiful, natural alternative to sugar flowers.
Equipment Needed
- Mixing bowls (one large for dough, one medium for icing)
- Electric hand mixer or stand mixer with paddle attachment (makes creaming butter and sugar easier)
- Rolling pin (a non-stick or lightly floured surface works best)
- Cookie cutters, preferably flower shapes or baby-themed shapes (I use a set from Wilton that’s lasted years)
- Baking sheets lined with parchment paper or silicone mats
- Squeeze bottles or piping bags with small round tips for icing application
- Small offset spatula or butter knife for smoothing icing
- Cooling racks
If you don’t have piping bags, resealable plastic bags with a tiny corner snipped off work fine for the icing. For cleaning, I’ve found that soaking mixing bowls and tips immediately after use saves a lot of scrubbing later. And if you’re on a budget, silicone baking mats are a great investment—they’re reusable and help cookies bake evenly without sticking.
Preparation Method
- Make the Dough: In a medium bowl, whisk together 2 ¾ cups (345g) flour, 1 teaspoon baking powder, and ½ teaspoon salt. Set aside.
- Cream Butter & Sugar: In a large bowl, beat 1 cup (226g) softened unsalted butter with 1 ½ cups (300g) granulated sugar using a mixer on medium speed until light and fluffy—about 3-4 minutes. This step is key for tender cookies.
- Add Egg & Vanilla: Beat in 1 large egg and 1 teaspoon vanilla extract until just combined. The mixture might look a bit curdled, but that’s normal.
- Combine Wet & Dry: Gradually mix in the flour mixture on low speed until dough forms. Don’t overmix—it should be soft but not sticky.
- Chill the Dough: Flatten dough into a disk, wrap in plastic, and chill for at least 1 hour (or overnight). This helps with rolling and prevents spreading in the oven.
- Preheat Oven & Prepare Surface: Preheat oven to 350°F (175°C). Lightly flour your work surface and rolling pin.
- Roll & Cut: Roll dough to about ¼-inch (0.6 cm) thickness. Use flower-shaped cookie cutters to cut out shapes, placing them 1 inch (2.5 cm) apart on the baking sheets.
- Bake: Bake cookies for 8-10 minutes, until edges are just starting to turn golden. Keep a close eye to avoid overbaking—cookies should be pale with firm edges.
- Cool: Let cookies rest on the baking sheet for 5 minutes, then transfer to cooling racks to cool completely before decorating.
- Prepare Royal Icing: Beat together 3 cups (360g) powdered sugar, 2 egg whites or meringue powder mixture, and 1 teaspoon lemon juice until smooth and glossy. Separate into small bowls and tint with desired food coloring gels.
- Decorate: Using piping bags or squeeze bottles, outline each cookie with a thicker consistency icing, then flood the center with a thinner consistency. While still wet, add edible sugar flowers or use a small brush to paint delicate floral details. Let icing dry thoroughly—ideally overnight—to avoid smudging.
Pro tip: If your dough gets too soft while rolling, pop it back in the fridge for 15 minutes. Also, cleaning your cookie cutters between batches helps keep edges sharp and precise. When flooding with icing, think of it like painting a canvas—patience here really pays off!
Cooking Tips & Techniques
Getting those sugar cookies just right can be a little tricky, but here’s what I’ve learned over multiple batches:
- Butter Temperature Matters: Too soft, and your dough will be sticky; too cold, and it won’t mix well. Room temperature butter should feel like a firm ball that gives slightly under pressure.
- Don’t Skip Chilling: Chilling the dough prevents cookies from spreading too much and helps maintain the crisp flower shapes during baking.
- Use Parchment or Silicone Mats: They promote even baking and stop cookies from sticking—trust me, it saves a lot of frustrated scraping.
- Royal Icing Consistency: For outlining, use icing that holds its shape when you lift the spoon; for flooding, thin it slightly so it spreads smoothly but doesn’t run off edges.
- Practice Flower Piping: Start with simple petals and build layers. It’s easier than it looks once you get the hang of the pressure and angle of your piping bag.
- Work in Small Batches: Keep icing covered with a damp cloth when not in use to prevent drying out. If it thickens, add a drop of water and stir gently.
- Timing: Bake cookies in batches so your oven stays consistent. Multitasking with icing while cookies cool keeps things moving.
One time, I accidentally added too much lemon juice to my icing, and it took forever to dry—but I learned to add it in small increments next time. Don’t be afraid to experiment a little with the flower designs—sometimes the best looks come from happy accidents!
Variations & Adaptations
If you want to adapt the Perfect Baby in Bloom Flower Decorated Sugar Cookies to fit different needs or occasions, here are some ideas I’ve tried and loved:
- Dietary Adjustments: Use almond flour instead of all-purpose for a gluten-free option (expect a slightly nuttier flavor). Swap butter with coconut oil for a dairy-free version, though the texture will be a little different.
- Seasonal Flavors: Add lemon zest or lavender extract to the dough for a spring twist. Around holidays, swap pastel colors for festive reds and greens or autumnal oranges and browns.
- Alternative Decorating: Instead of royal icing, try a simple glaze made with powdered sugar and milk for a softer finish. Top with crushed freeze-dried berries for a natural pop of color.
- Different Shapes: While flowers are perfect for baby showers, these cookies also work with butterflies, stars, or even alphabet cutters for personalized celebrations.
- Personal Variation: Once, I used edible gold dust on the petals, which gave the cookies a subtle shimmer—perfect for a more upscale event without feeling over the top.
Plus, if you want to try some other party-perfect sweets, the mini lemon blueberry cheesecakes from this site make a lovely pairing with these cookies for variety and color contrast.
Serving & Storage Suggestions
These cookies are best served at room temperature to enjoy the full flavor and tender crumb. They make a charming centerpiece on a dessert table or a sweet handout in decorative bags for guests to take home.
Pair them with a light, floral tea like chamomile or a refreshing lemonade for a delightful afternoon treat. They also complement soft drinks or coffee well, especially when you want a sweet snack to balance bitterness.
For storage, keep the cookies in an airtight container at room temperature for up to 5 days. If you need to store them longer, layering them between parchment paper and freezing works well—just thaw completely before serving to avoid moisture buildup.
Reheating isn’t recommended as it can soften the icing, but letting frozen cookies sit out for about 30 minutes brings back their fresh-baked texture. Over time, the flavors meld even deeper, especially if you make them a day ahead for a party.
Nutritional Information & Benefits
Estimated per cookie (based on 24 cookies): approximately 120 calories, 5g fat, 18g carbohydrates, 1g protein.
The key ingredients like butter and sugar provide energy, while the flour offers carbohydrates for quick fuel. Using fresh vanilla extract adds natural aroma without artificial additives.
While these cookies aren’t a health food, they fit well into a balanced diet as an occasional treat. They are naturally gluten-free adaptable and can be made dairy-free with simple swaps.
From my wellness perspective, baking these cookies is also a great way to slow down and enjoy a mindful activity—sometimes that’s just as nourishing as the ingredients themselves.
Conclusion
If you’re after a recipe that combines simplicity, charm, and a touch of artistry, the Perfect Baby in Bloom Flower Decorated Sugar Cookies definitely deliver. They are easy enough for a beginner but offer enough detail to feel special and thoughtful. Whether you’re baking for a baby shower, a spring gathering, or just because you want a sweet floral treat, these cookies have a way of making moments feel a little brighter.
Feel free to make them your own with different colors, flavors, or decorations. I love how versatile this recipe is—it’s become one of those dependable favorites I keep returning to. If you give it a try, I’d love to hear how your cookies bloom and what personal touches you add. Sharing recipes is part of the fun, after all!
Happy baking, and may your cookies bring just the right sweetness to your special celebrations.
FAQs
How long do decorated sugar cookies last?
Stored in an airtight container at room temperature, these cookies stay fresh for about 5 days. For longer storage, freeze them with parchment between layers and thaw before serving.
Can I use butter substitutes in this recipe?
Yes, you can use coconut oil or vegan butter alternatives, but the texture and flavor will vary slightly. Coconut oil tends to make cookies a bit softer and adds a mild coconut taste.
What is the best way to store royal icing decorations?
Keep decorated cookies in a single layer in an airtight container. Avoid stacking until the icing is fully set, ideally overnight, to prevent smudging.
Can I prepare the dough ahead of time?
Absolutely. The dough can be refrigerated for up to 48 hours or frozen for up to 3 months. Just thaw in the fridge before rolling and cutting.
How do I fix royal icing if it’s too thick or too thin?
If the icing is too thick, add a few drops of water and mix gently. If it’s too thin, add more powdered sugar a tablespoon at a time until you reach the desired consistency.
Pin This Recipe!
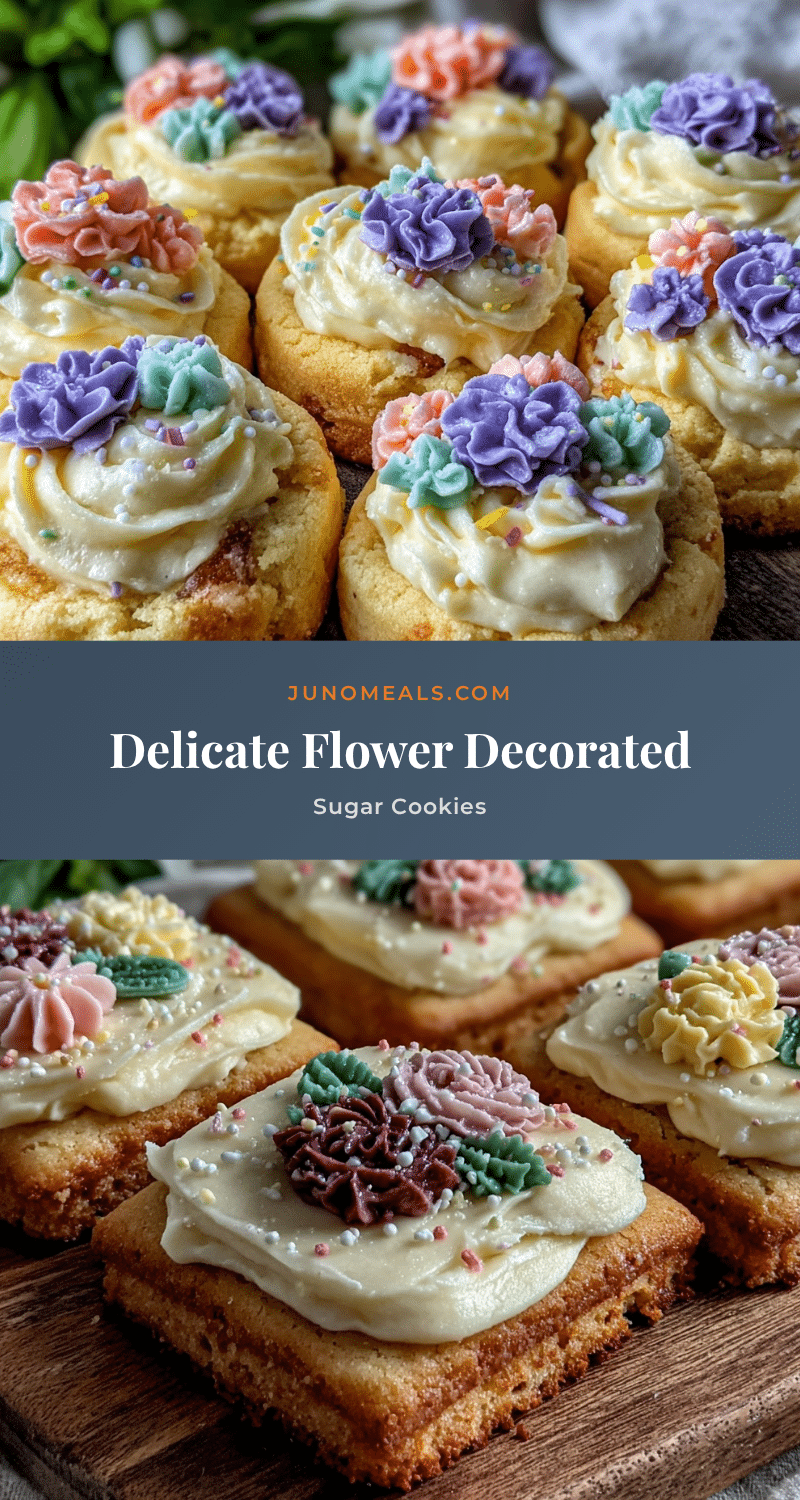
Perfect Baby in Bloom Flower Decorated Sugar Cookies
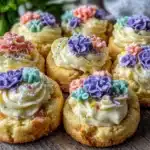
Delicate flower-decorated sugar cookies perfect for baby showers and celebrations, featuring a tender texture and simple ingredients with charming floral designs.
- Prep Time: 15 minutes
- Cook Time: 10 minutes
- Total Time: 1 hour 25 minutes
- Yield: 24 cookies 1x
- Category: Dessert
- Cuisine: American
Ingredients
- 2 ¾ cups (345g) all-purpose flour, sifted
- 1 teaspoon baking powder
- ½ teaspoon salt
- 1 cup (226g) unsalted butter, softened (room temperature)
- 1 ½ cups (300g) granulated sugar
- 1 large egg, room temperature
- 1 teaspoon pure vanilla extract
- 3 cups (360g) powdered sugar, sifted
- 2 large egg whites or 4 tablespoons meringue powder + 6 tablespoons water
- 1 teaspoon lemon juice
- Food coloring gels in pastel shades (pink, lavender, mint green, soft yellow)
- Edible sugar flowers or small fondant blossoms (optional)
- Fine sanding sugar for sparkle (optional)
Instructions
- In a medium bowl, whisk together 2 ¾ cups (345g) flour, 1 teaspoon baking powder, and ½ teaspoon salt. Set aside.
- In a large bowl, beat 1 cup (226g) softened unsalted butter with 1 ½ cups (300g) granulated sugar using a mixer on medium speed until light and fluffy—about 3-4 minutes.
- Beat in 1 large egg and 1 teaspoon vanilla extract until just combined.
- Gradually mix in the flour mixture on low speed until dough forms. Do not overmix.
- Flatten dough into a disk, wrap in plastic, and chill for at least 1 hour or overnight.
- Preheat oven to 350°F (175°C). Lightly flour your work surface and rolling pin.
- Roll dough to about ¼-inch (0.6 cm) thickness. Use flower-shaped cookie cutters to cut out shapes, placing them 1 inch (2.5 cm) apart on baking sheets.
- Bake cookies for 8-10 minutes, until edges just start to turn golden.
- Let cookies rest on the baking sheet for 5 minutes, then transfer to cooling racks to cool completely.
- Beat together 3 cups (360g) powdered sugar, 2 egg whites or meringue powder mixture, and 1 teaspoon lemon juice until smooth and glossy.
- Separate icing into small bowls and tint with desired food coloring gels.
- Outline each cookie with thicker consistency icing, then flood the center with thinner consistency icing.
- While icing is still wet, add edible sugar flowers or paint delicate floral details.
- Let icing dry thoroughly, ideally overnight, before serving.
Notes
If dough gets too soft while rolling, chill for 15 minutes. Clean cookie cutters between batches for sharp edges. Use parchment or silicone mats to prevent sticking. For royal icing, use thicker consistency for outlining and thinner for flooding. Let icing dry overnight to avoid smudging. Dough can be refrigerated up to 48 hours or frozen up to 3 months. Use aquafaba for vegan icing option. Butter should be room temperature but not too soft.
Nutrition
- Serving Size: 1 cookie
- Calories: 120
- Fat: 5
- Carbohydrates: 18
- Protein: 1
Keywords: sugar cookies, baby shower cookies, flower decorated cookies, royal icing, homemade sugar cookies, easy sugar cookies, baby shower dessert